
Do you like to read books at night, but don’t want to disturb the surrounding bright light? Then this wireless book clip is just what you need! In this article I will tell you how to create a compact and lightweight lamp with your own hands that can be easily attached to a book or diary. Ready? Let’s start!
What you need to create a lamp
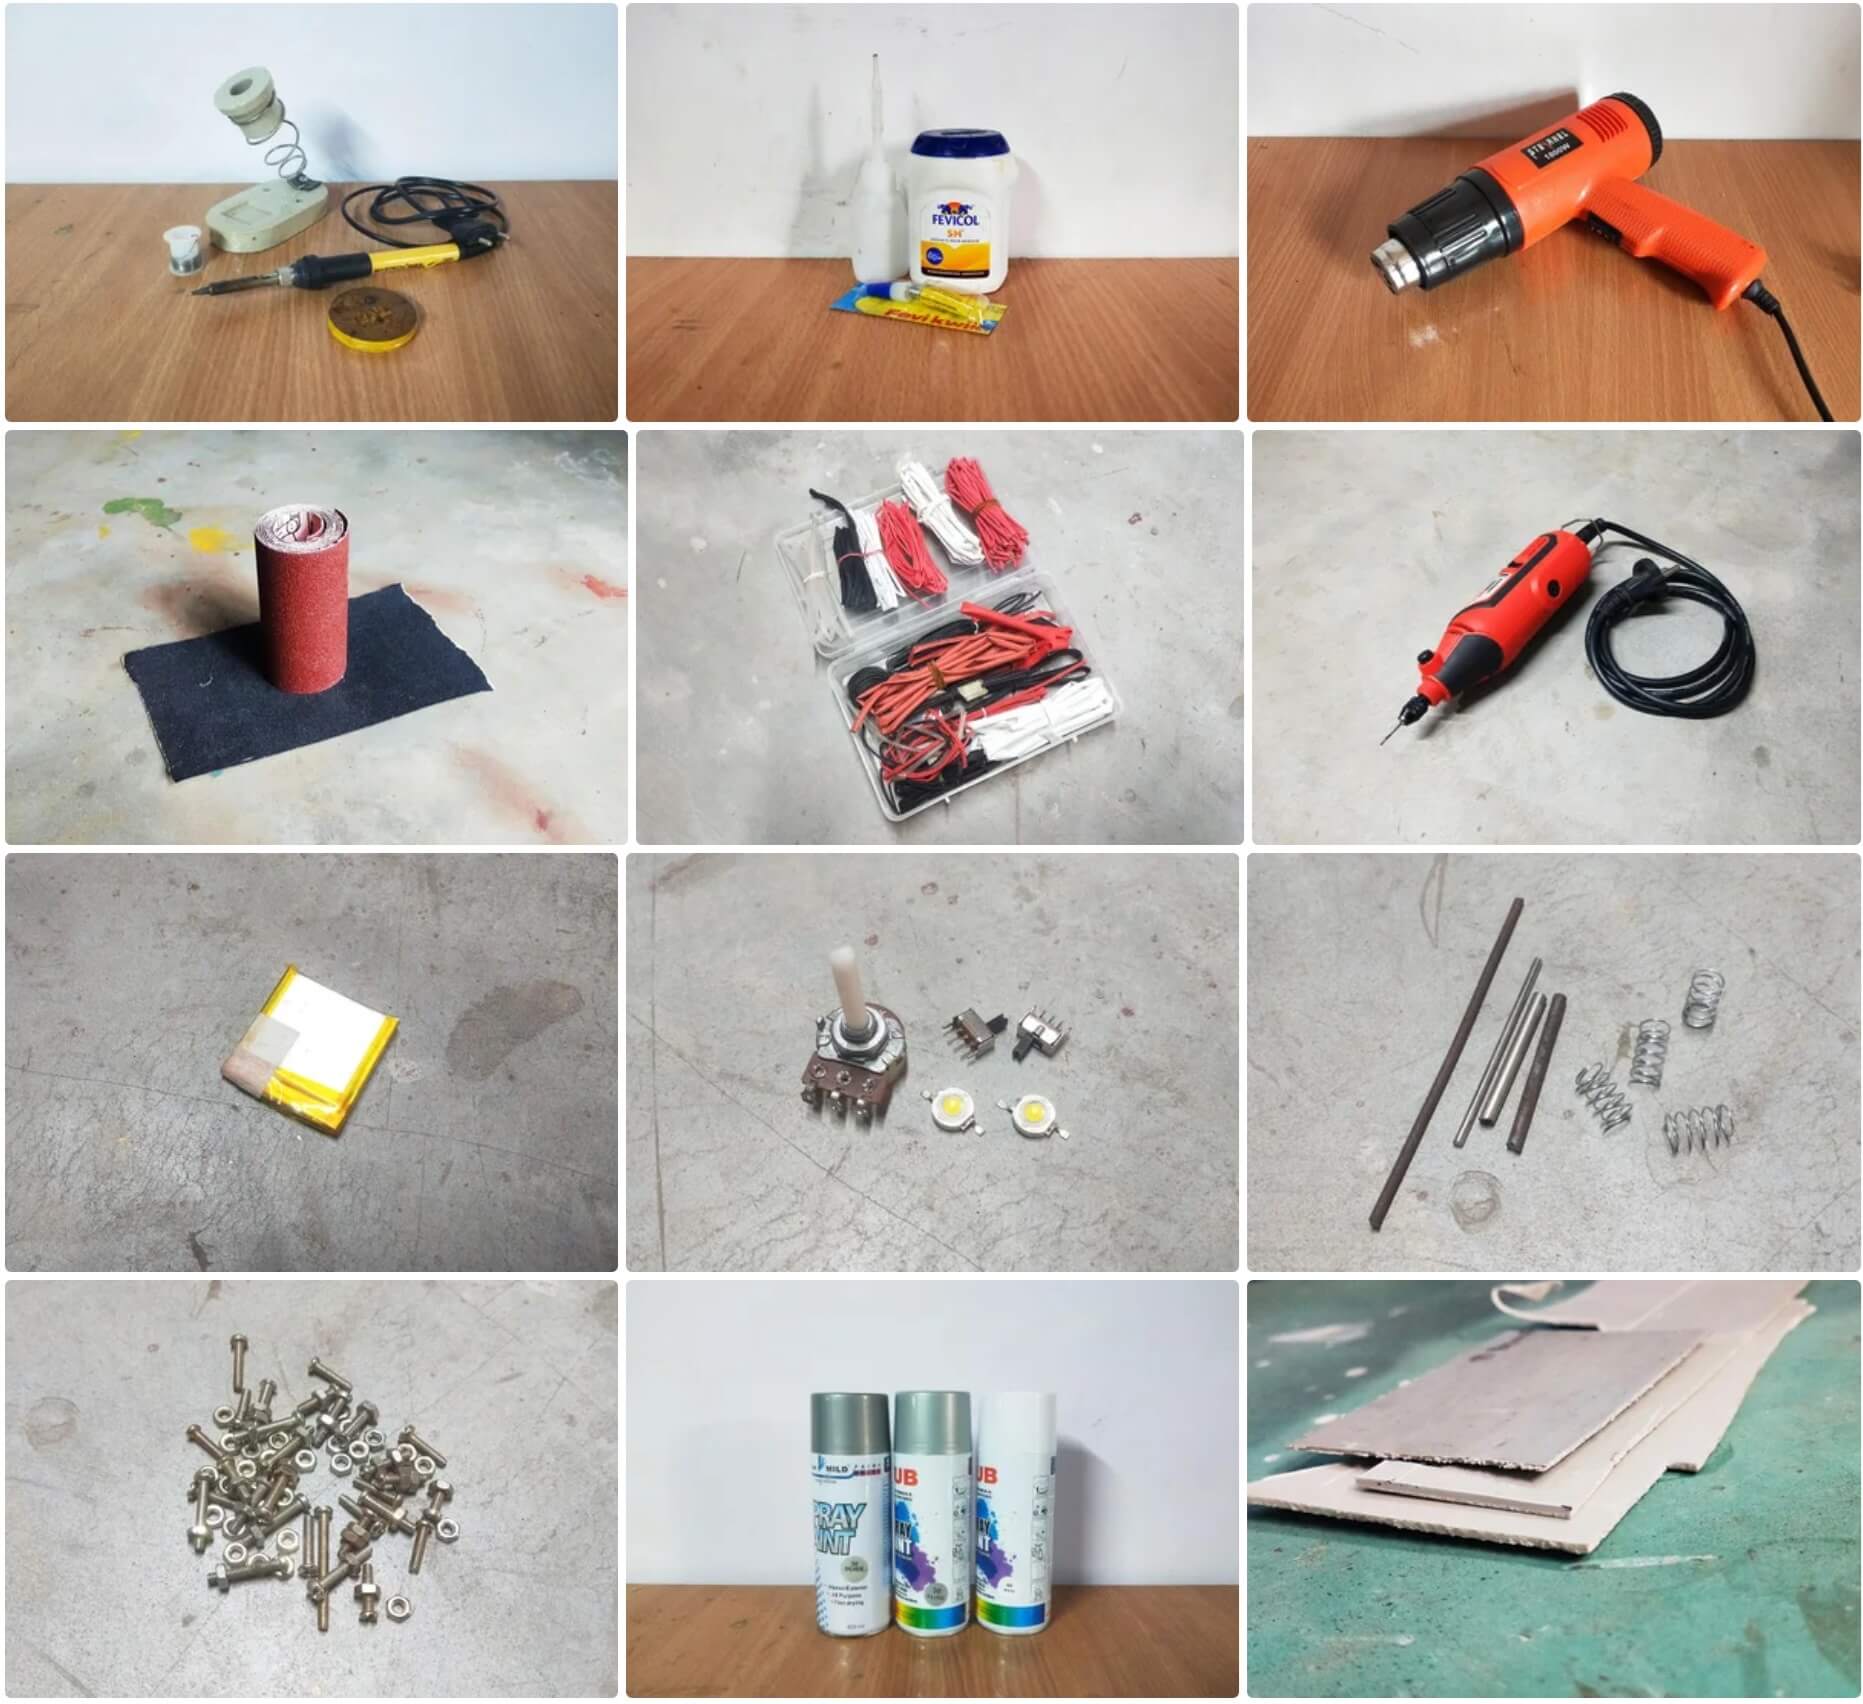
Materials
- PVC pipes or sheets (different thicknesses: 0.5mm, 1mm, 2mm)
- 2 springs
- Metal rod (3mm)
- Super glue
- Nuts and bolts (M2x10)
- Microscrews (for watches or glasses)
- Spray paint (silver white)
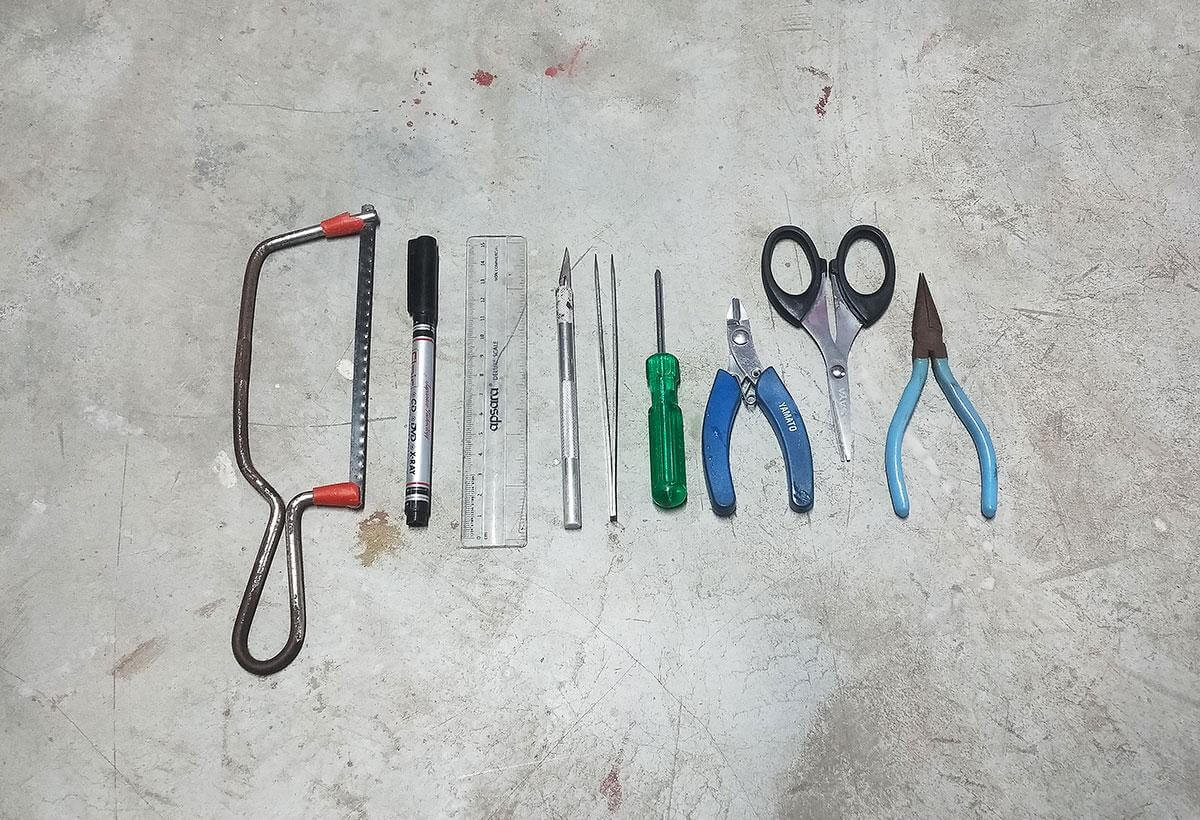
Tools
- Heat gun
- Wire cutters/pliers
- Knife
- Hacksaw
- Sandpaper/files
- Drill and drill bits
- Soldering iron
- Screwdriver
Electronics
- Battery LiPo 550mAh
- Charging module
- Microswitch
- Potentiometer (1k – 10k)
- LED (1w – 3w)
- Wires
- Heat shrink tubing
Steps to create a lamp
Step 1: Preparation of PVC materials
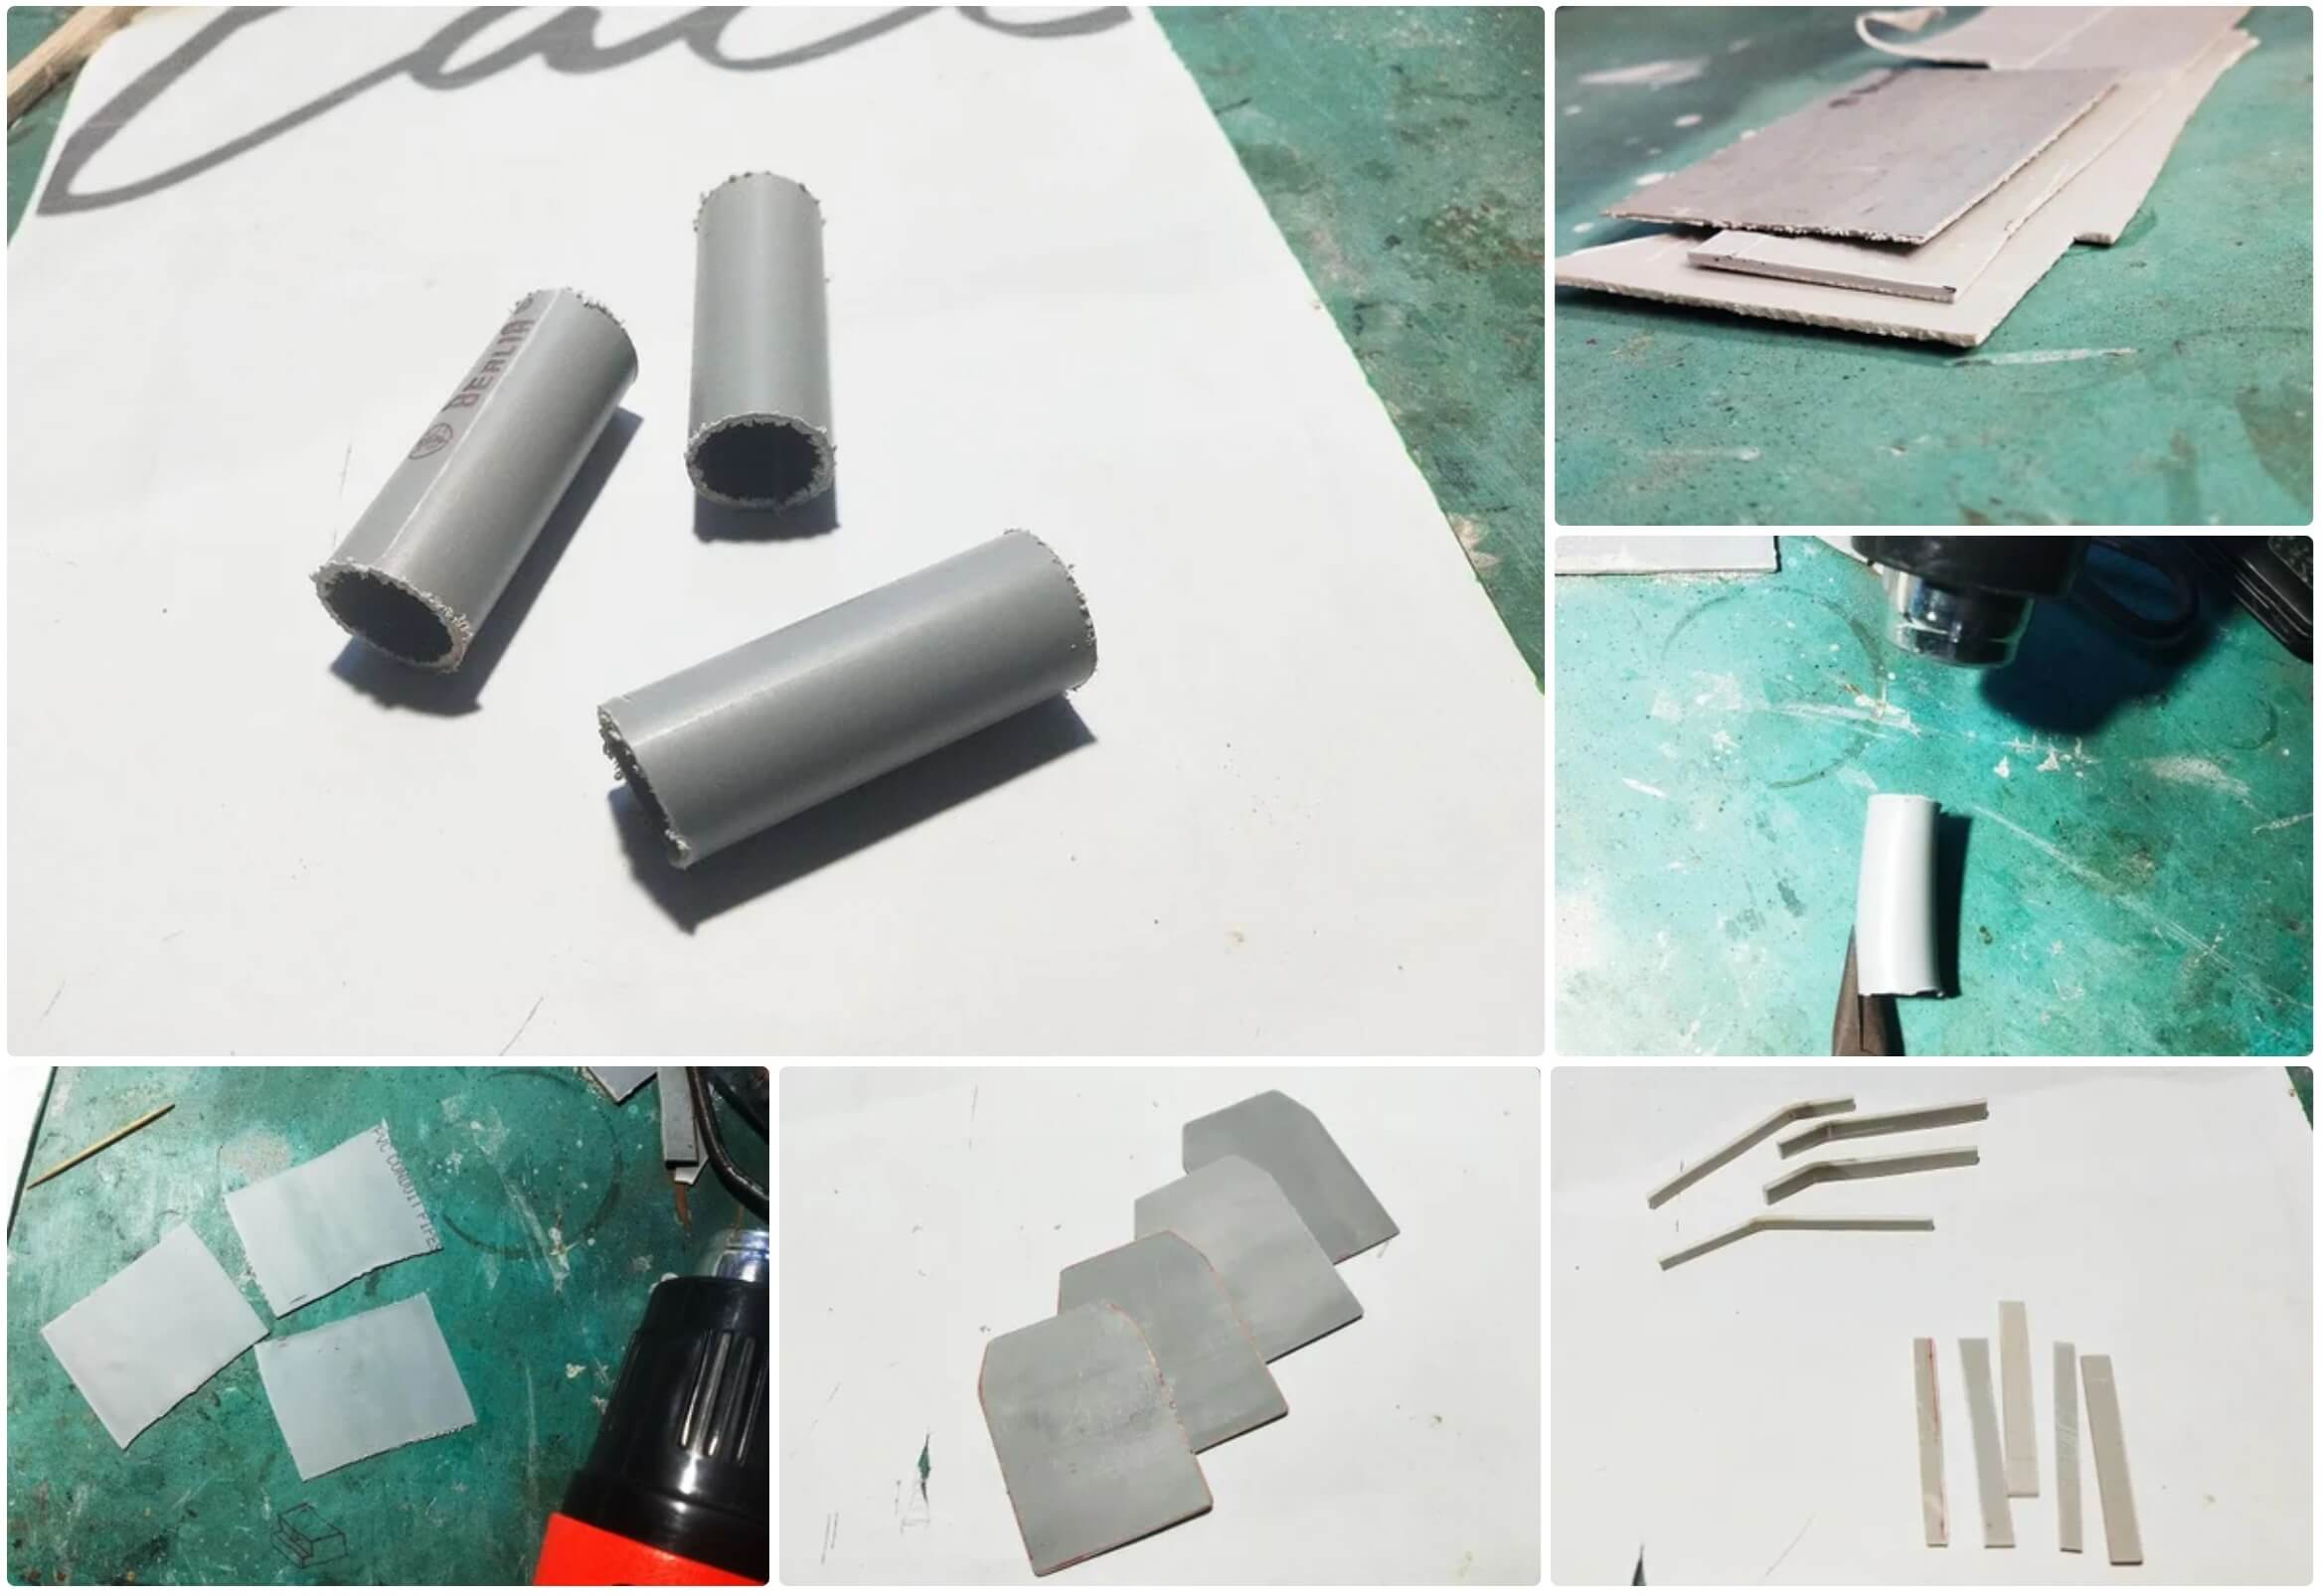
Let’s start with preparing PVC pipes. To do this, we heat them with a heat gun to flatten them, and then cut them into the sizes we need. We use different pipe thicknesses to obtain the most suitable parts for our lamp.
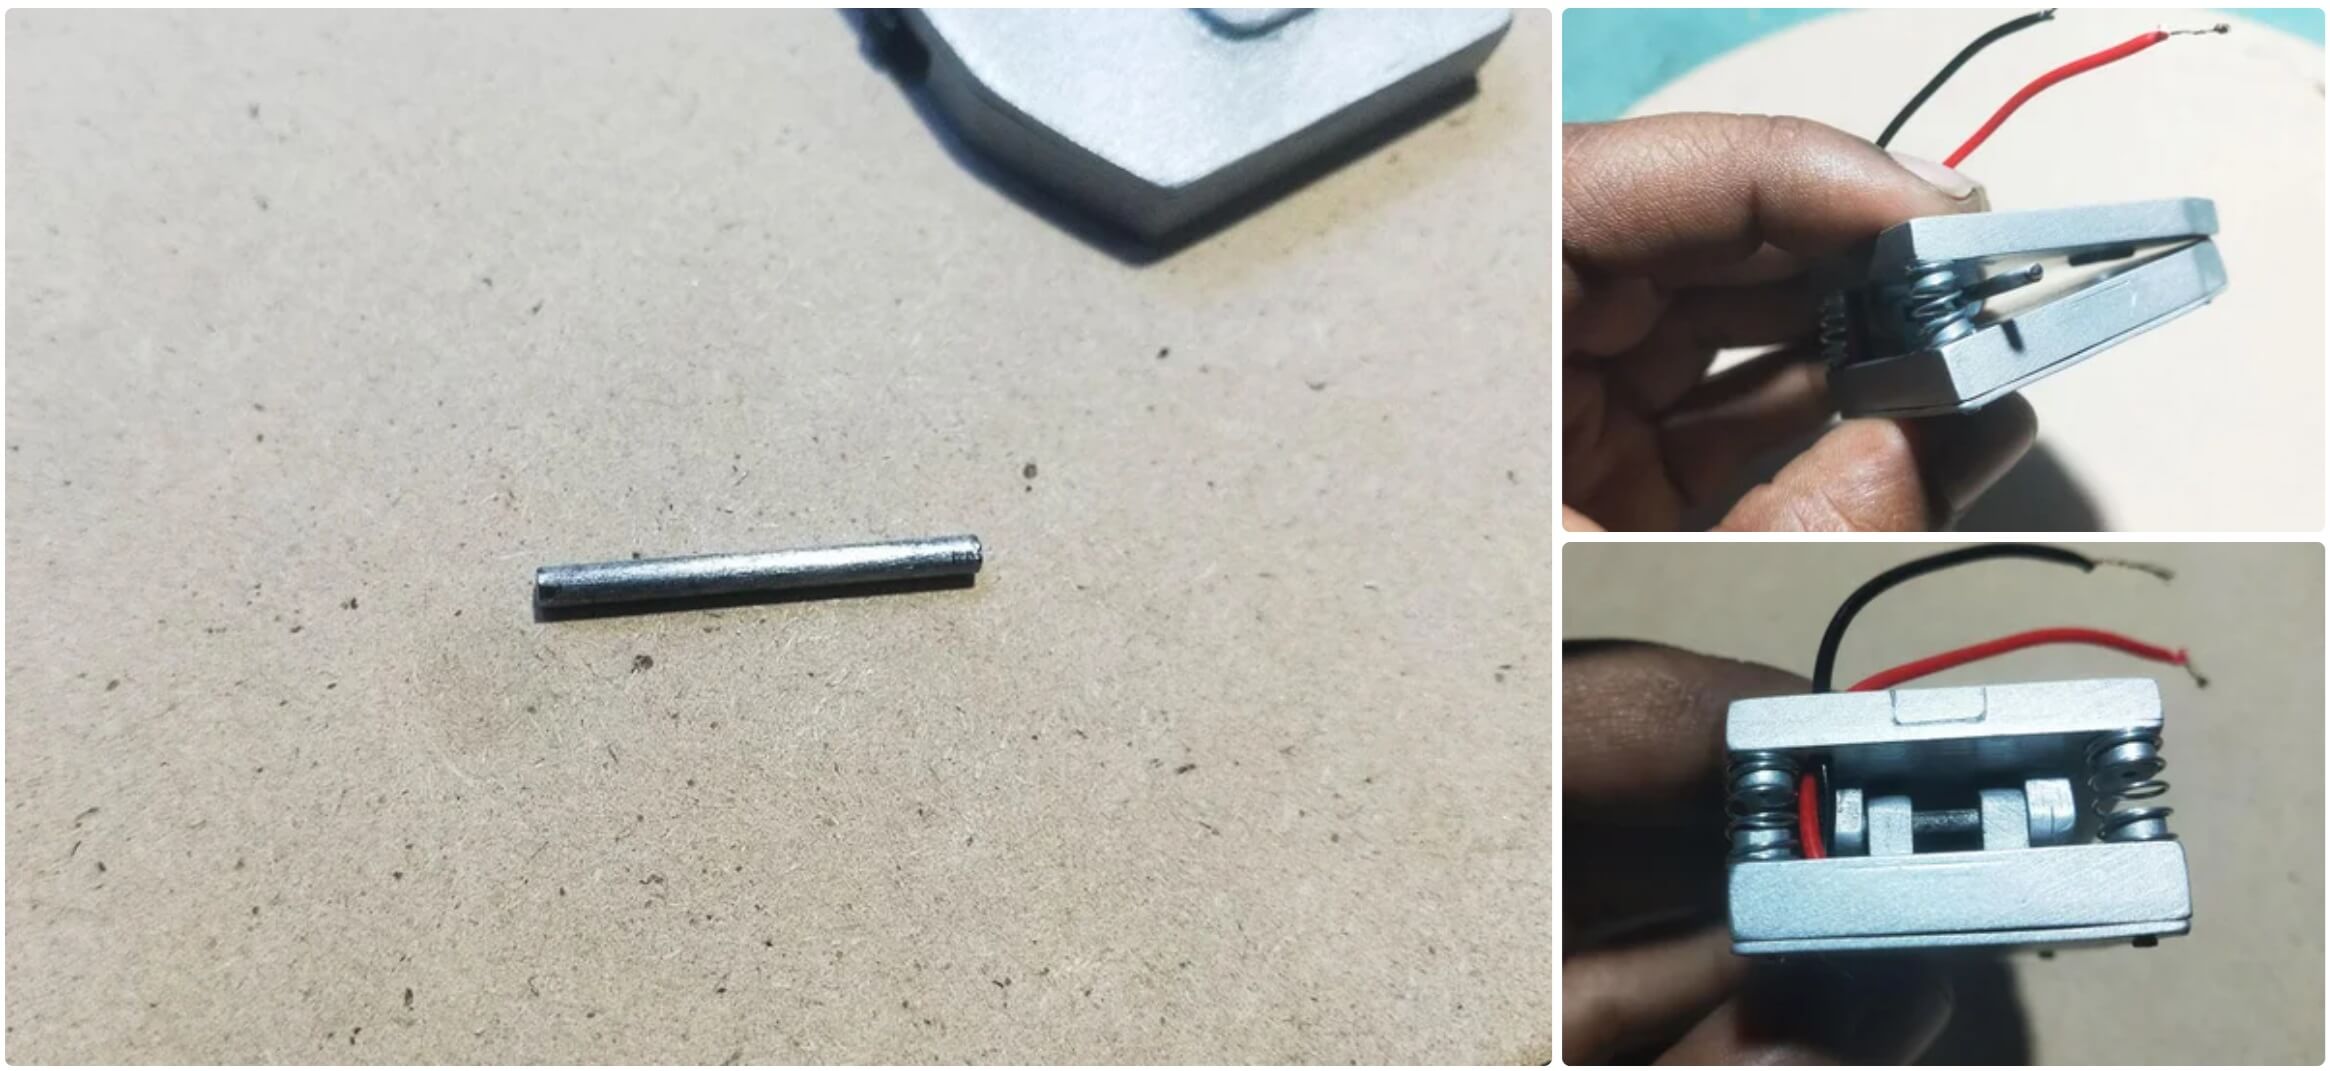
Step 2: Making the battery compartment
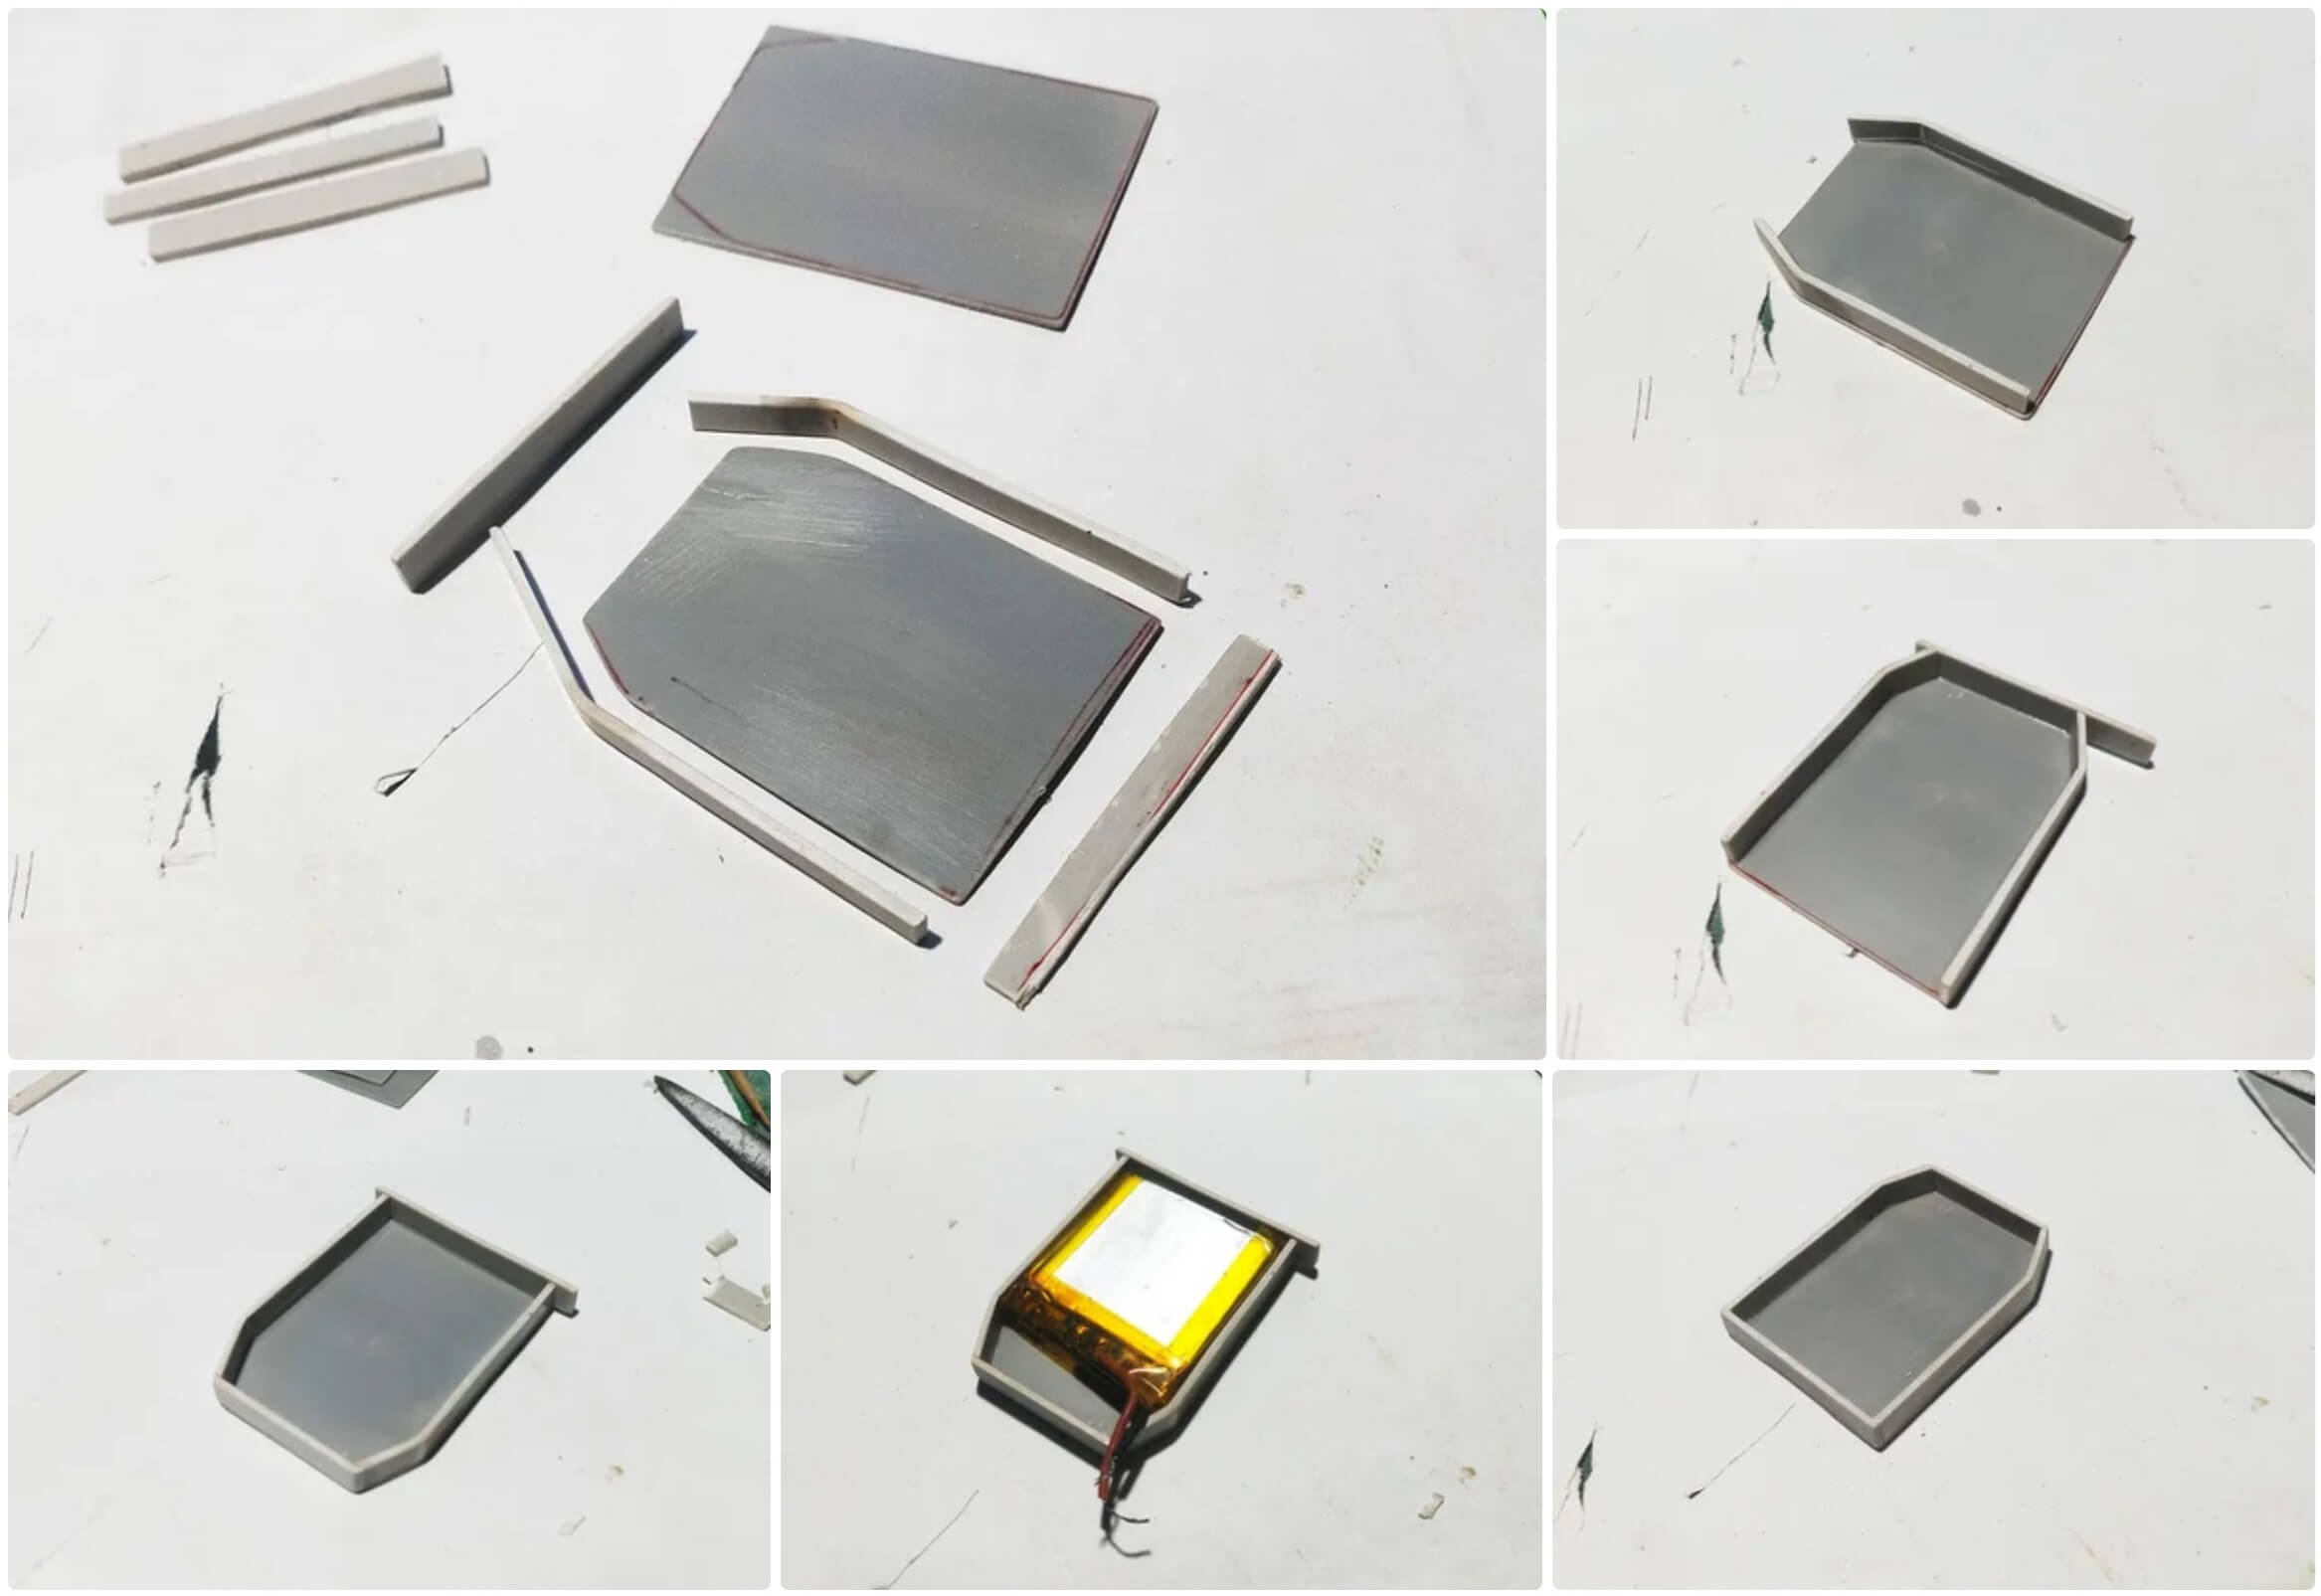
We measure the dimensions of the battery and cut out a PVC sheet to create a compartment in which it will fit. This compartment will be located at the bottom of the lamp.
Step 3: Create Electronics Bays
We make a second compartment to accommodate all electronic components. To do this, we use small pieces of PVC to secure the cover with screws. We place the battery in the lower compartment, and the switch, charging module, potentiometer and wires in the upper compartment.
Step 4: Making the Lamp Head
For the lamp head, we use electrical pipes of different diameters to create the shape of the lamp. We insert the LED into the plastic cover, which we then glue to all parts.
Step 5: LED Installation
We use a 1W LED to save battery power. Solder two wires to the LED and fix it inside the lamp head.
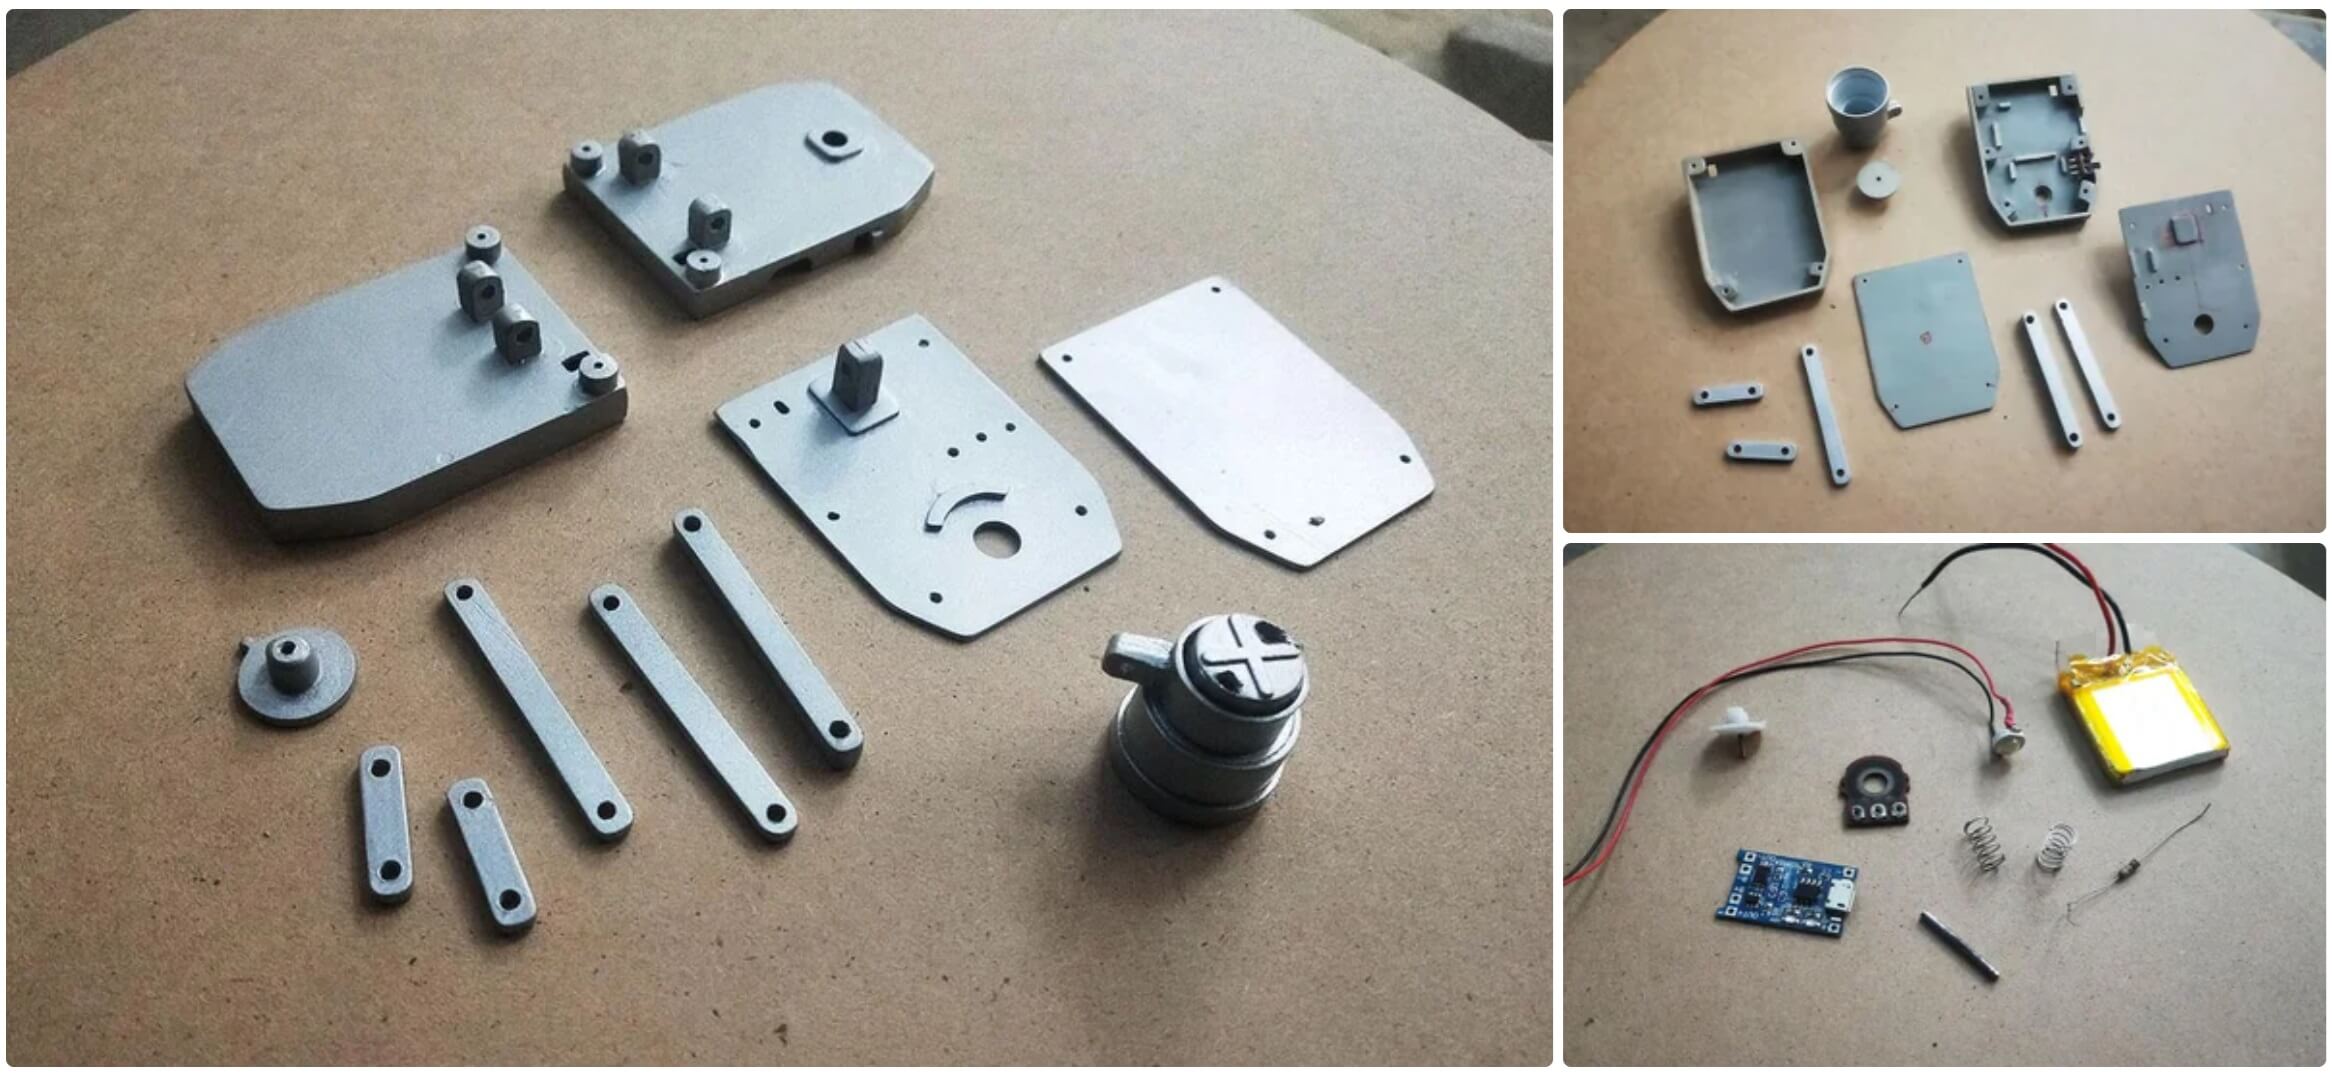
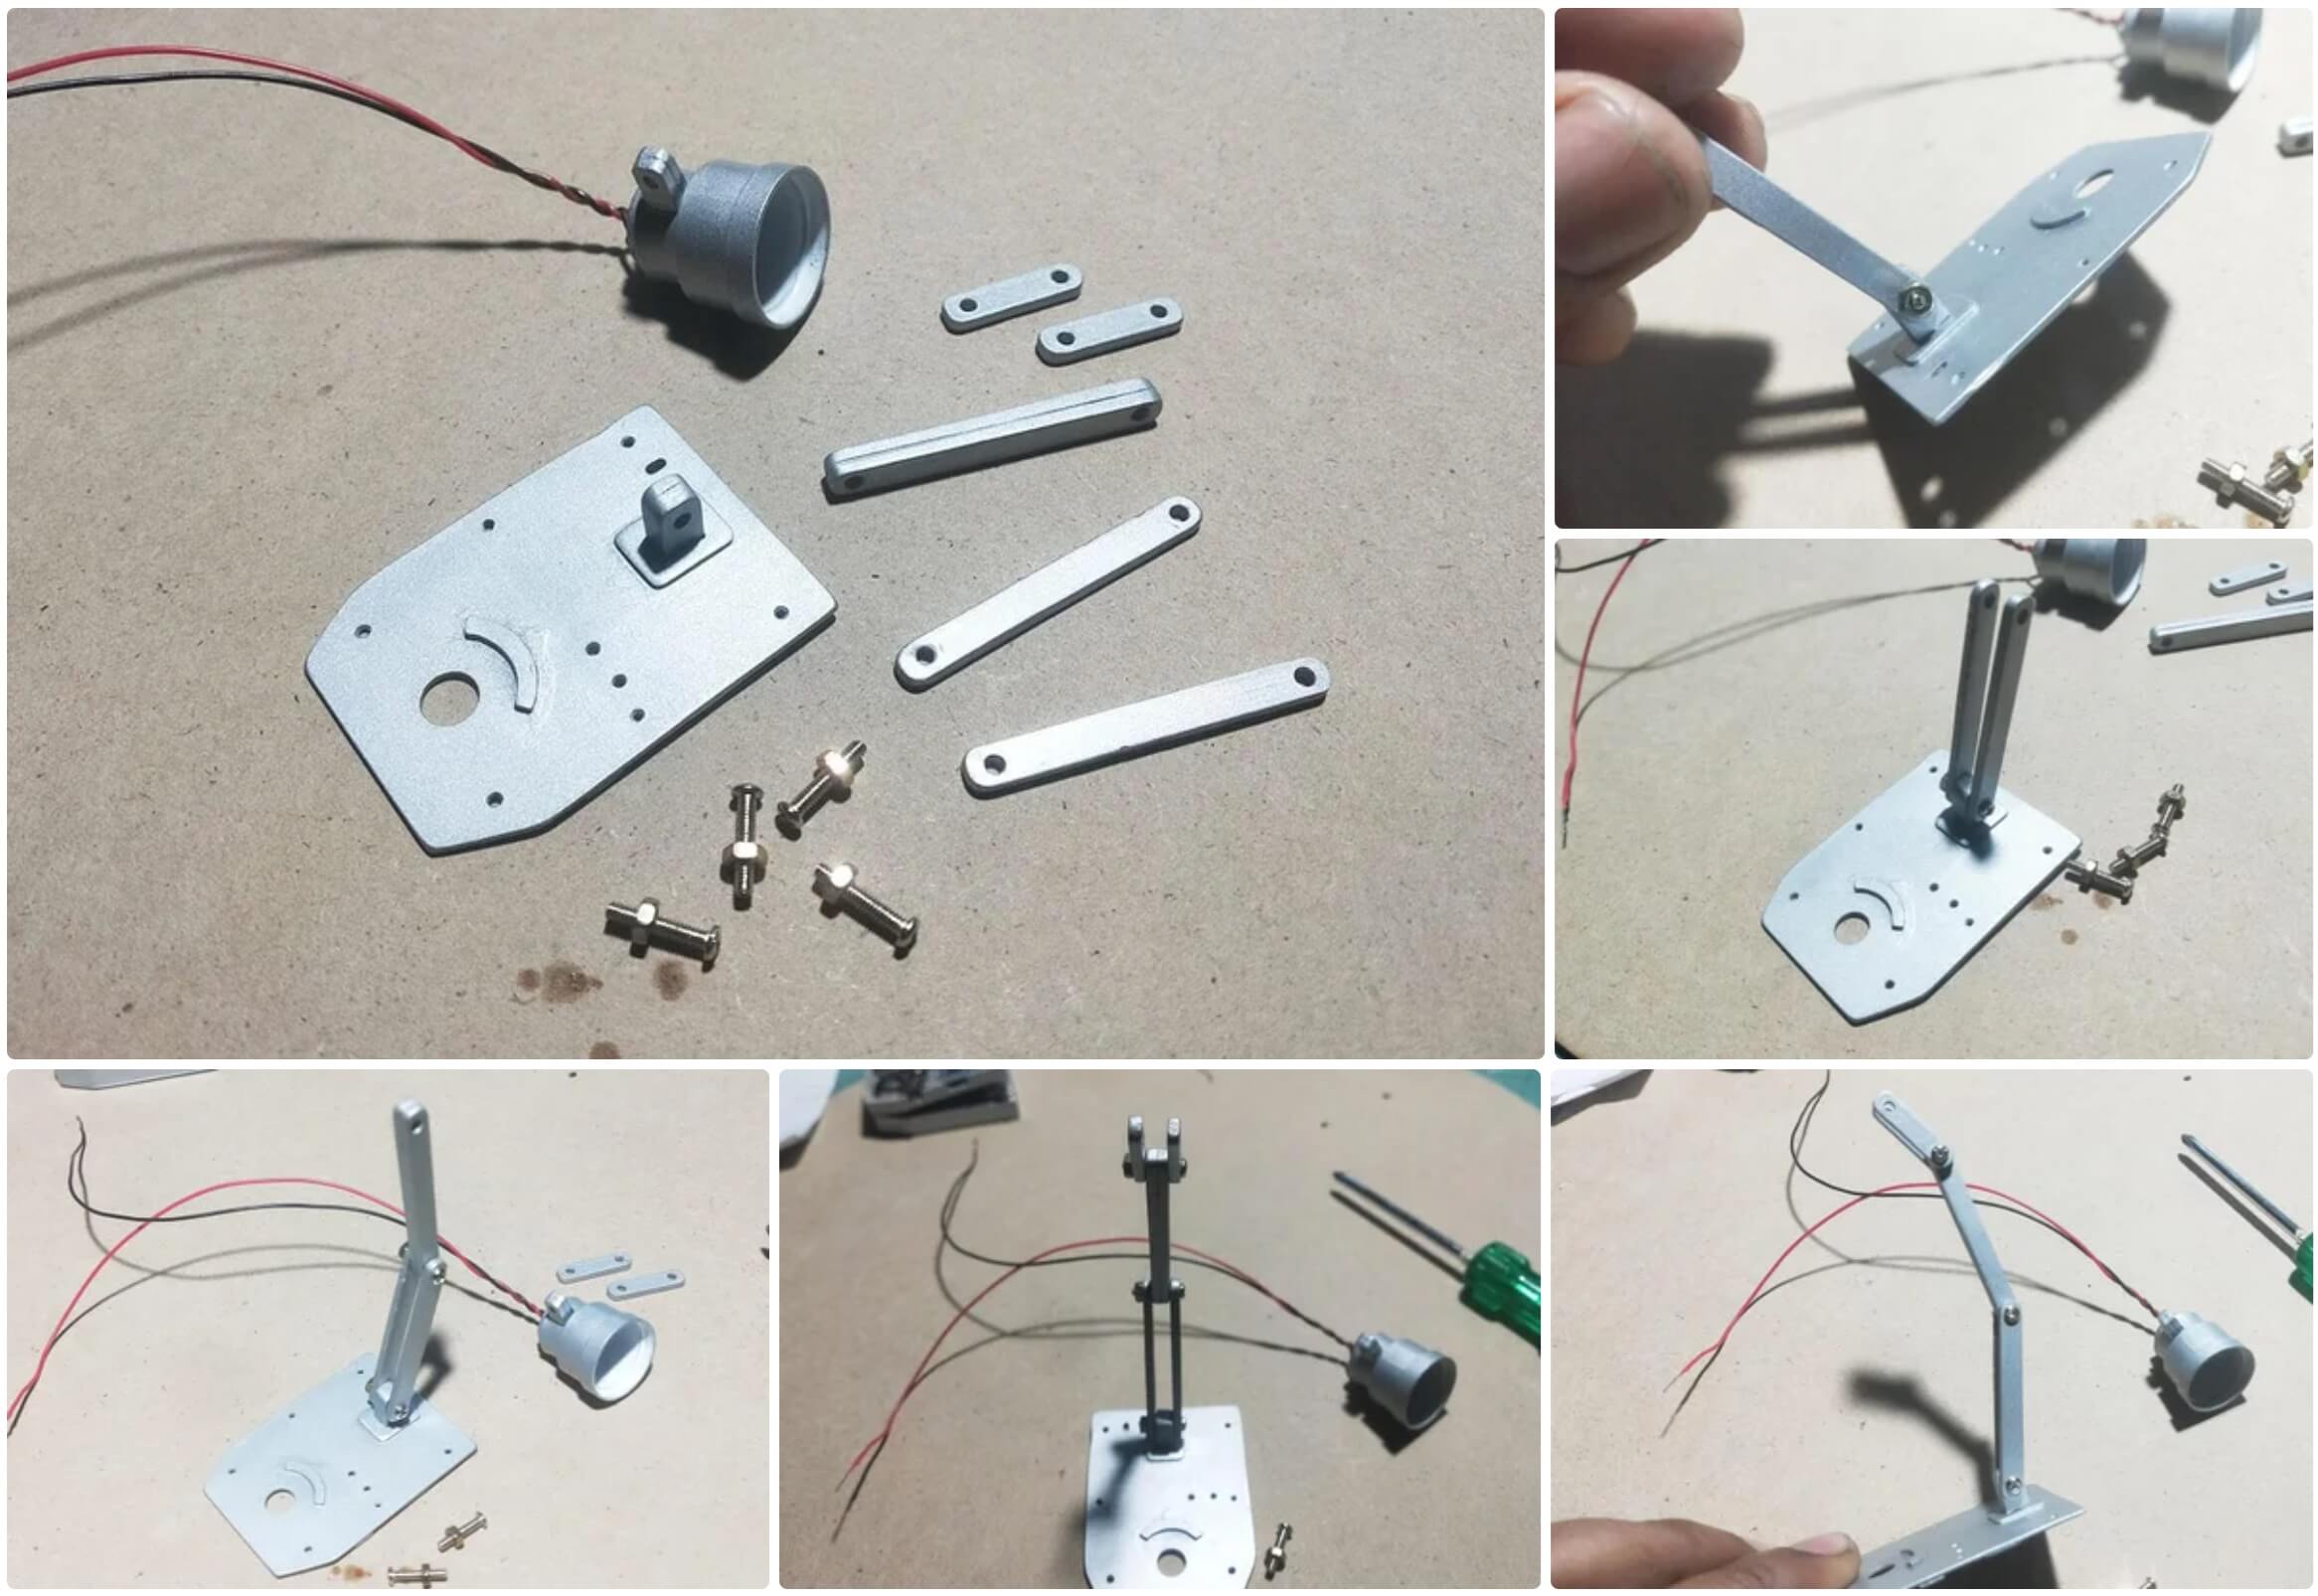
Step 6: Making the Lamp Stand
From a thicker PVC plate we cut out several stands for the lamp and drill holes in them for attaching bolts.
Step 7: Preparing the Top Compartment Cover
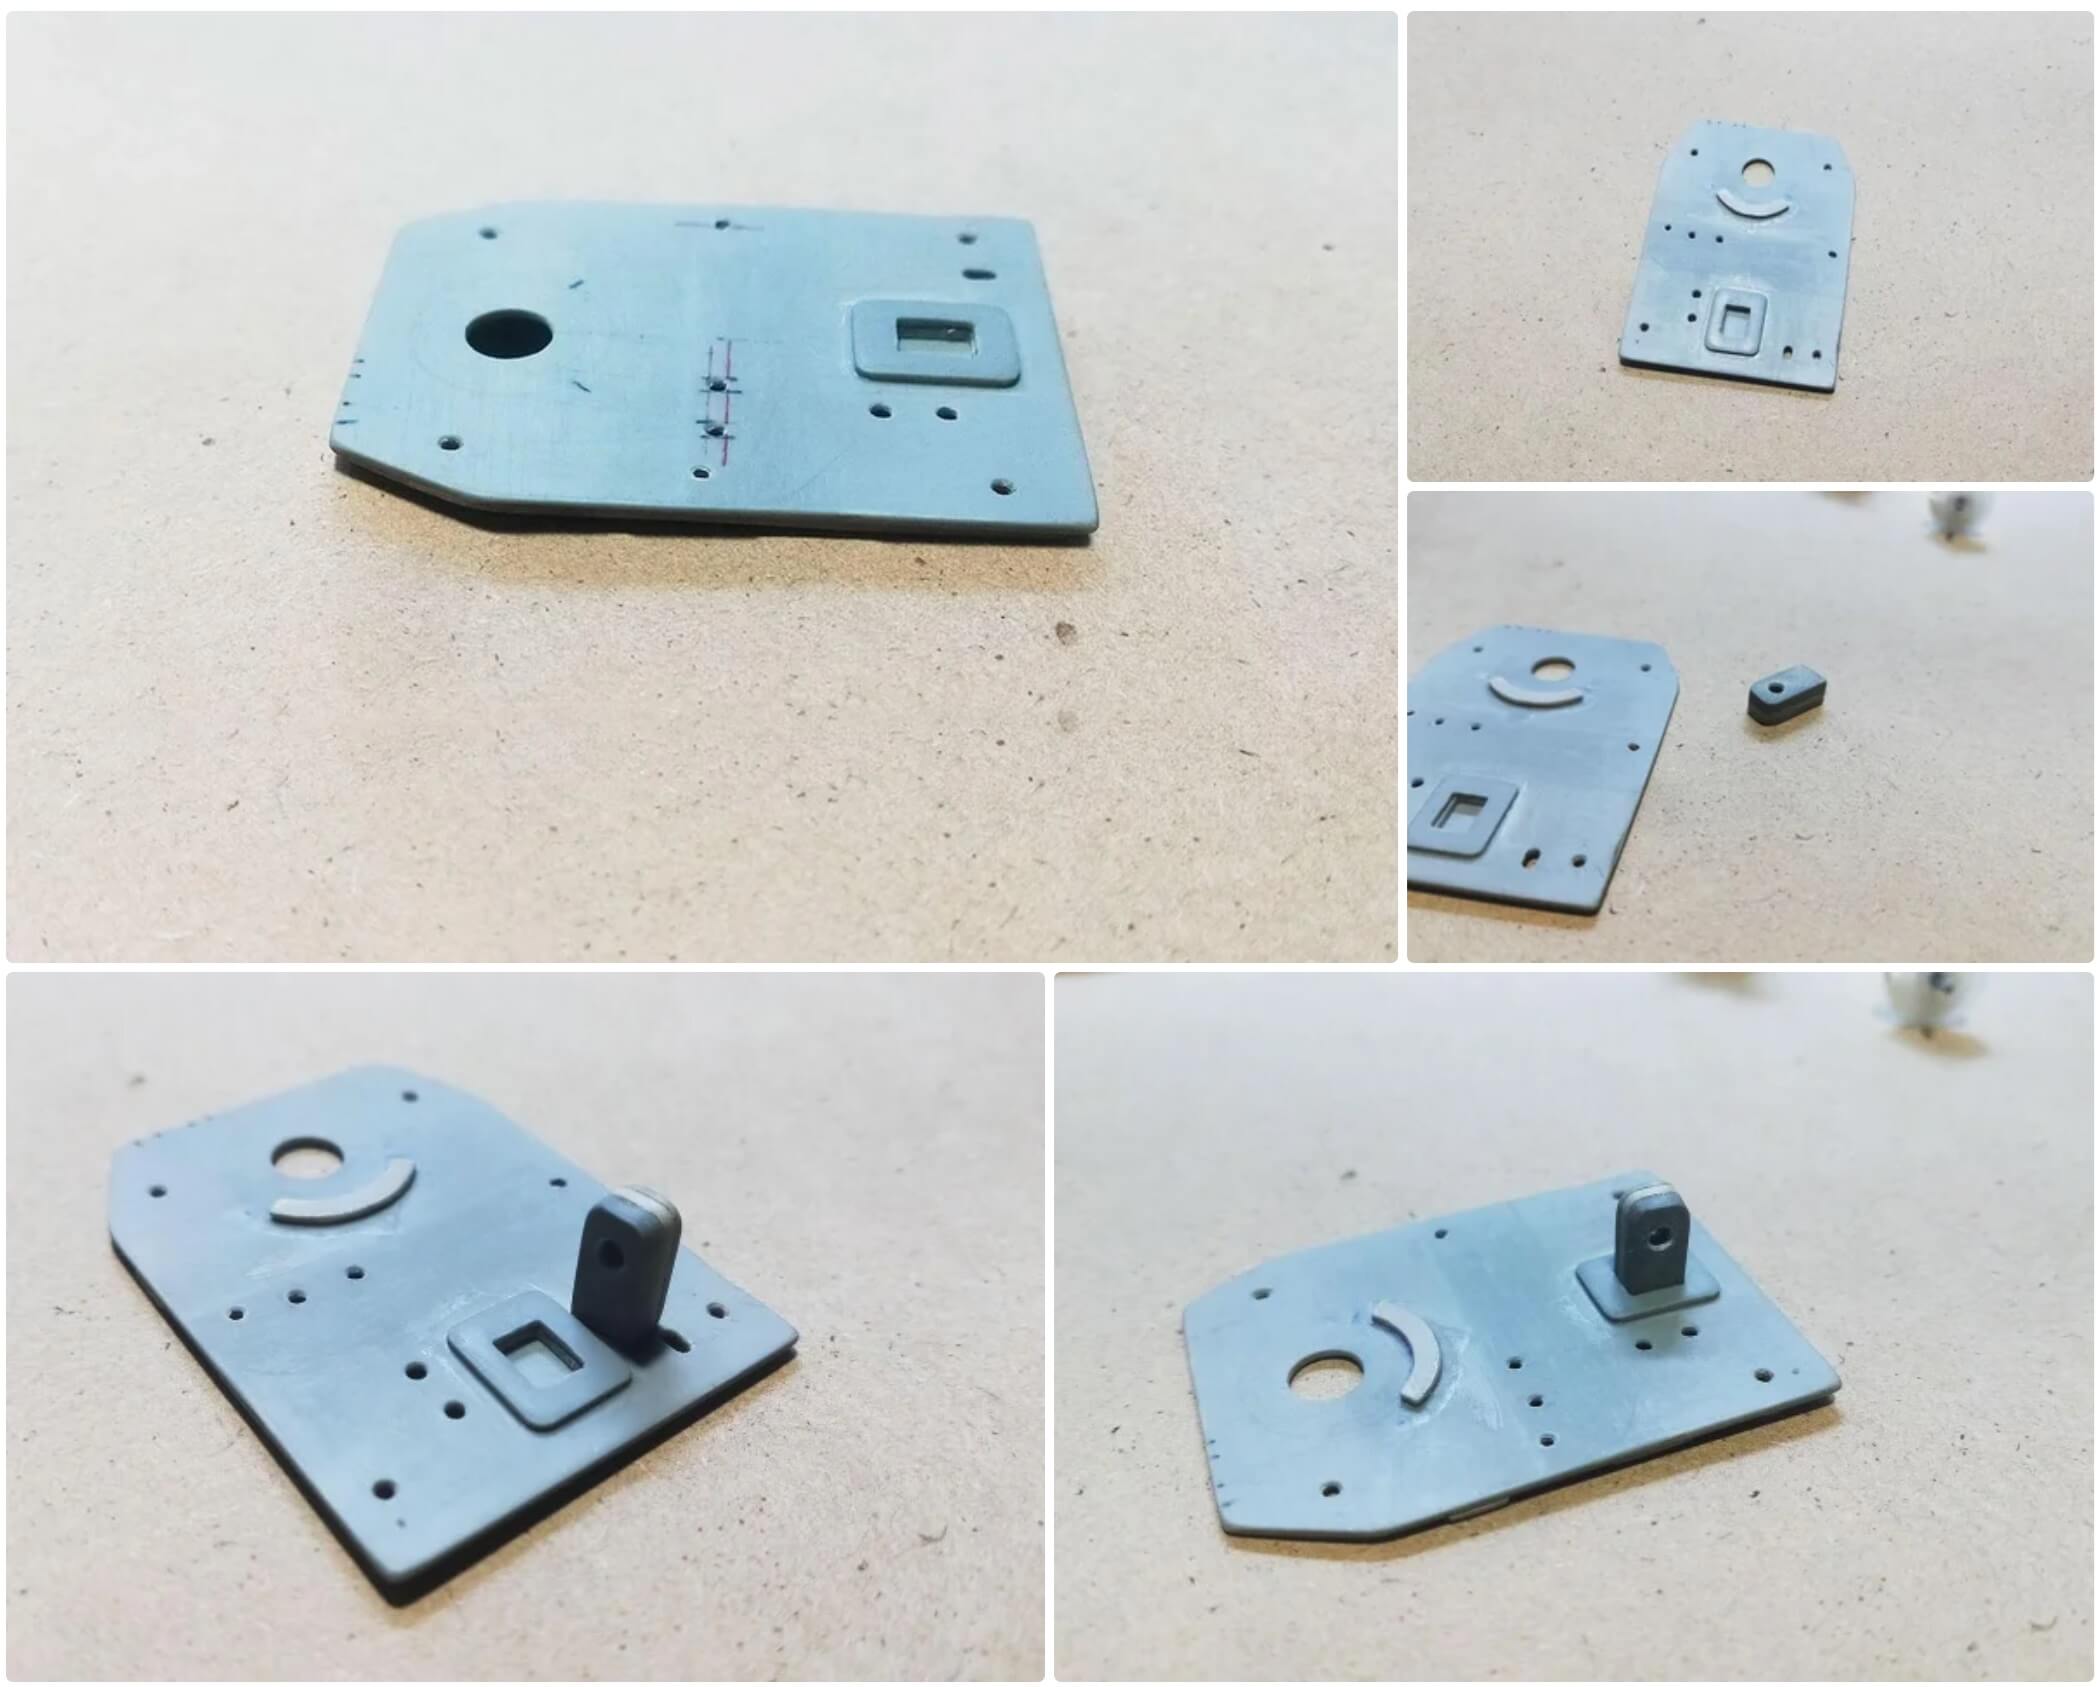
We make a hole for the potentiometer handle and for attaching the lamp stands.
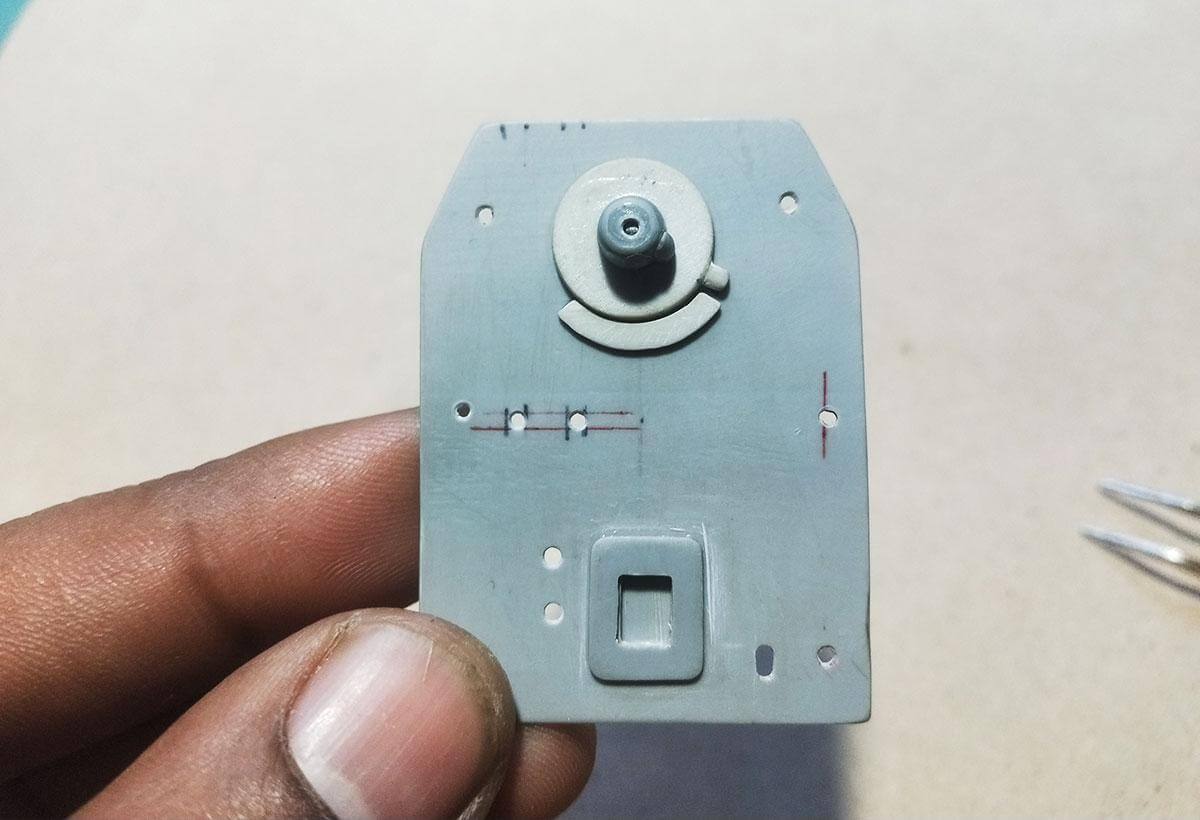
Step 8: Create a knob to adjust the brightness
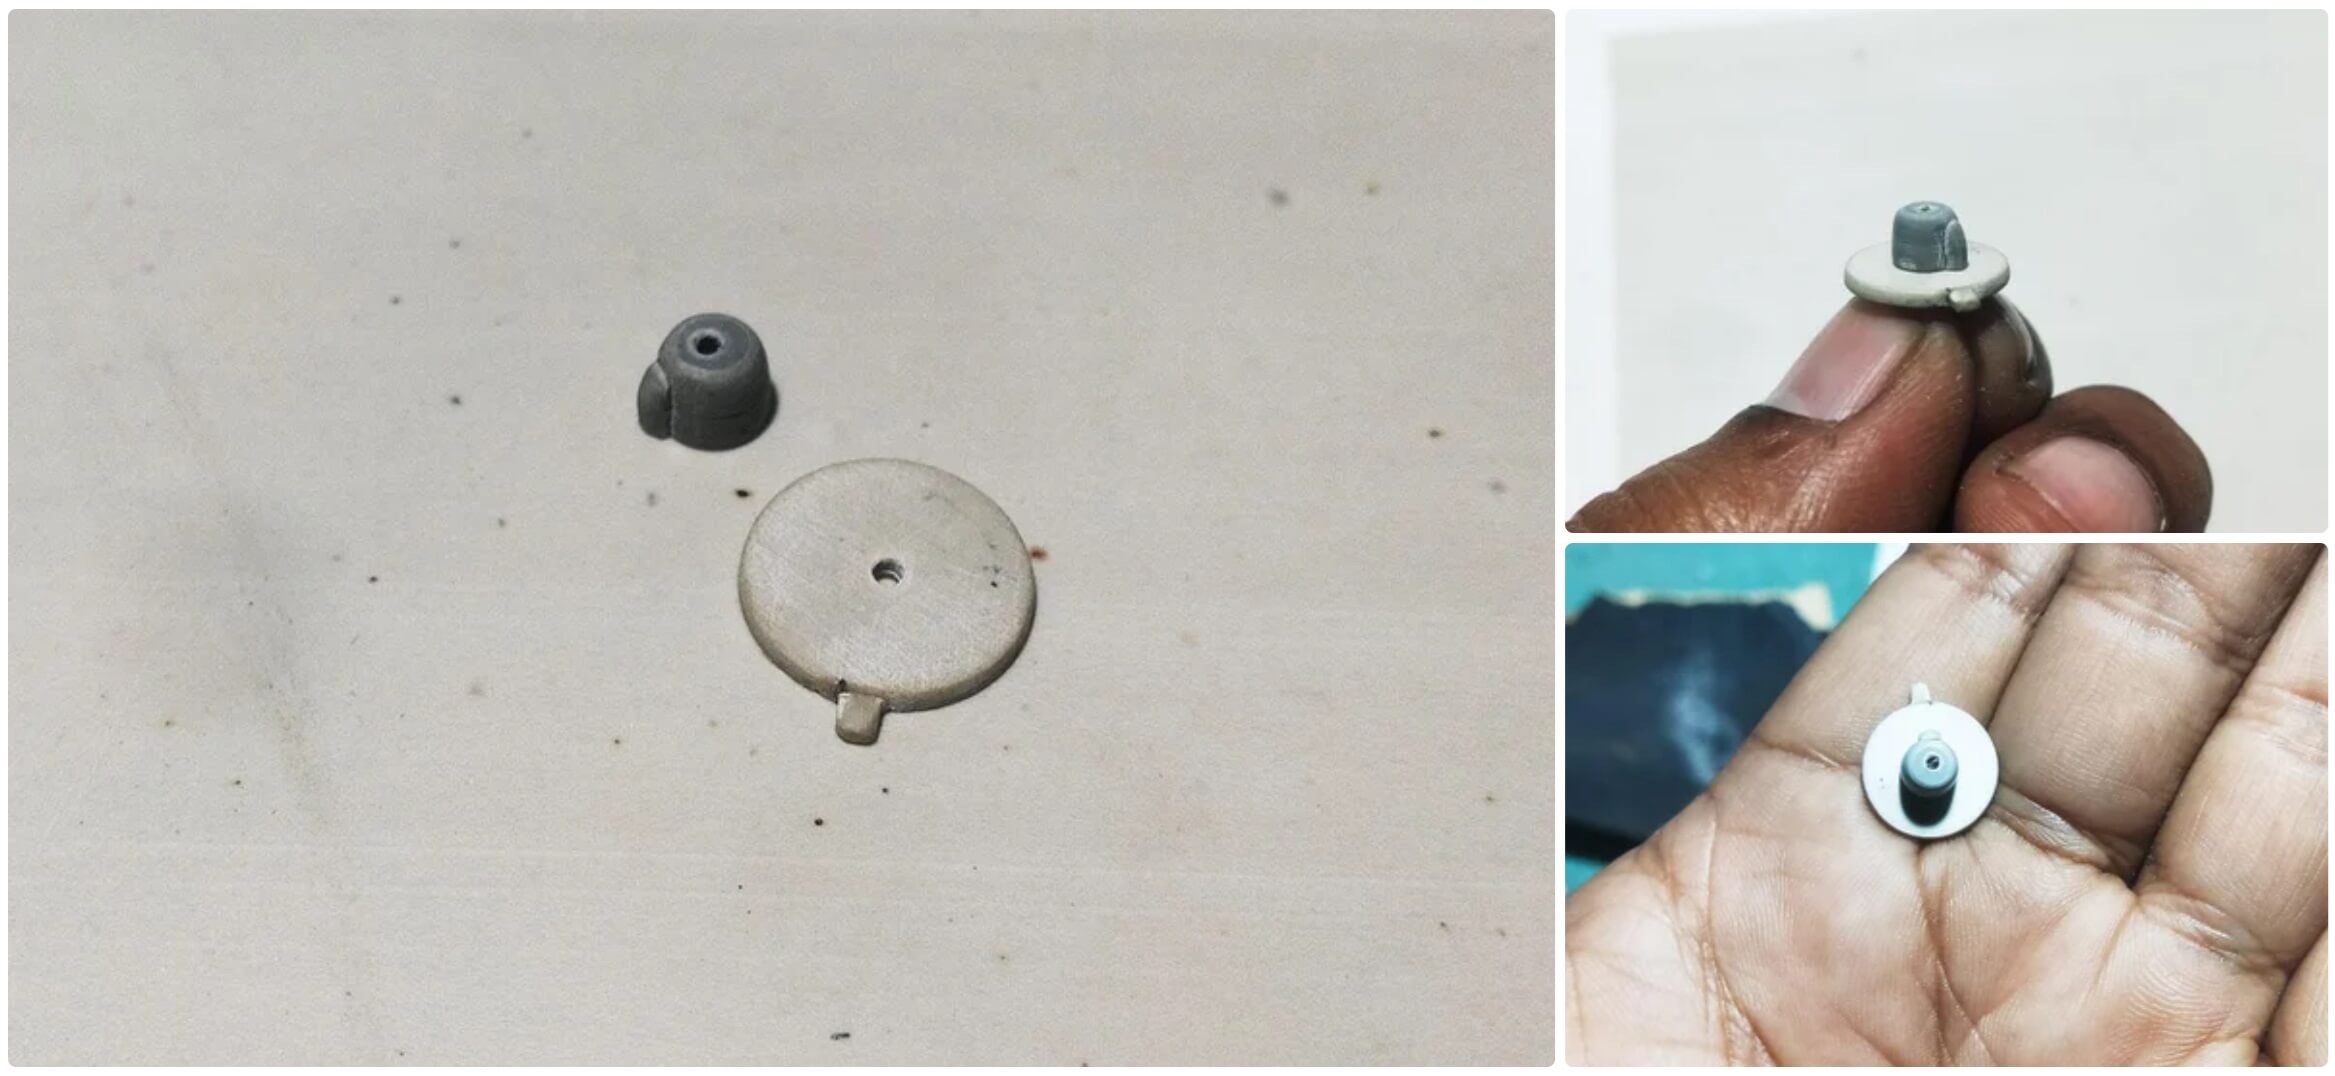
We make a small handle that will adjust the brightness of the LED through a potentiometer. We insert it into the cover of the upper compartment.
Step 9: Preparing the Potentiometer
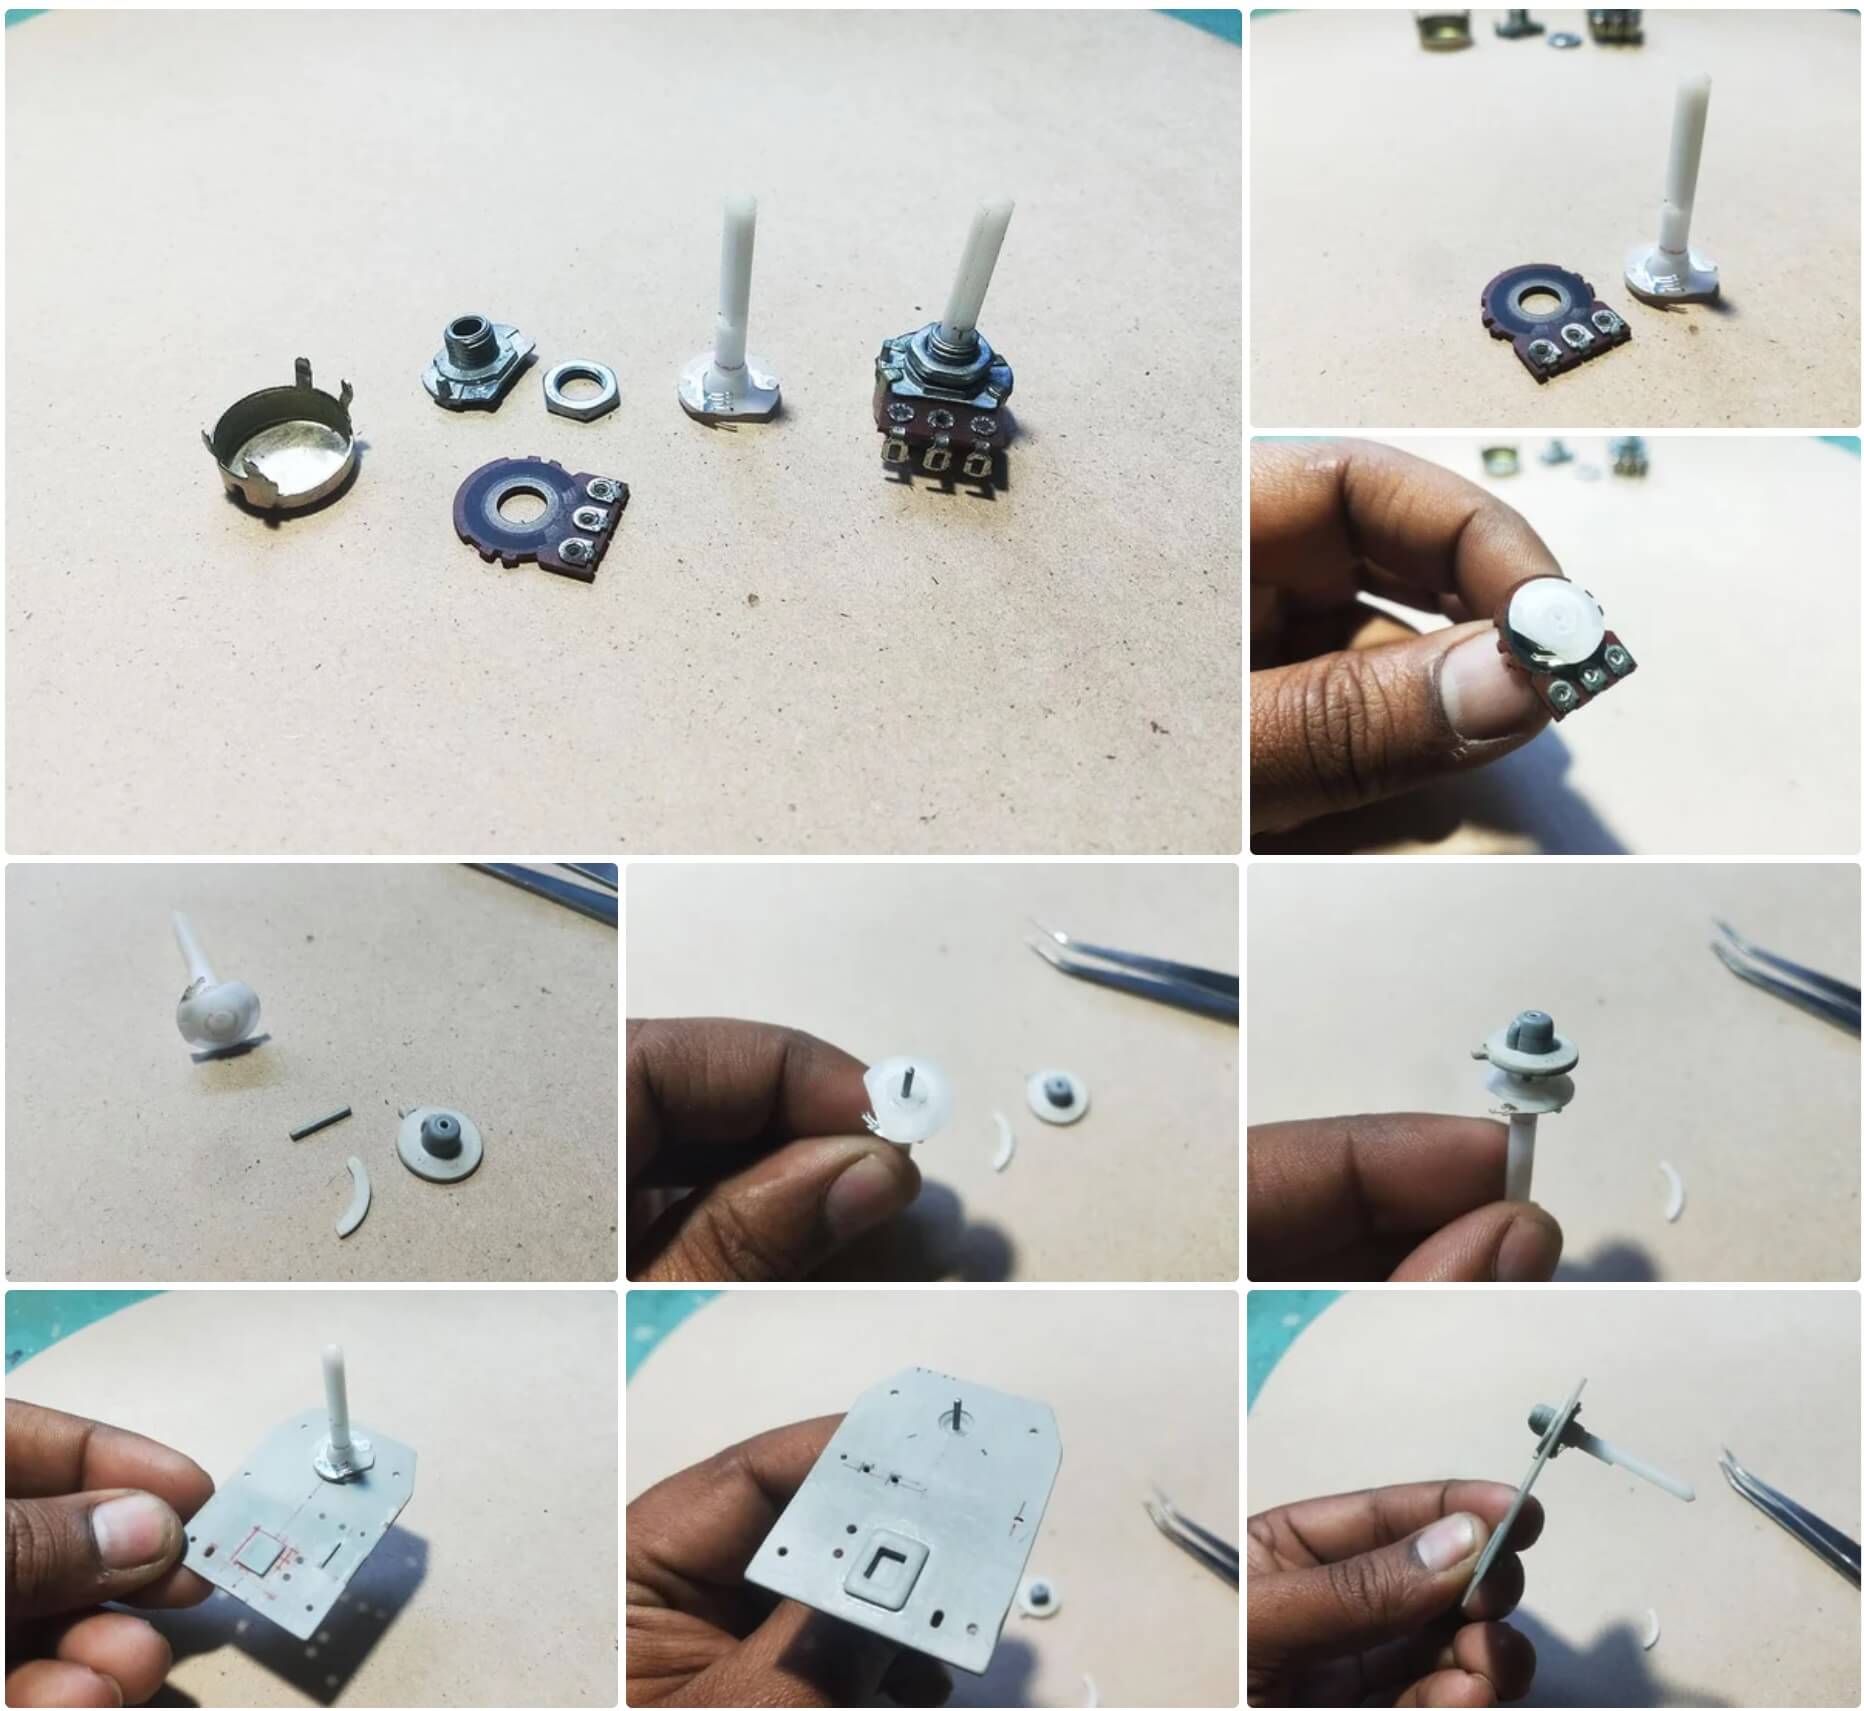
We disassemble the standard potentiometer and reduce its height so that it fits into the compartment. Install the handle and fix it.
Step 10: Preparing the Power Switch
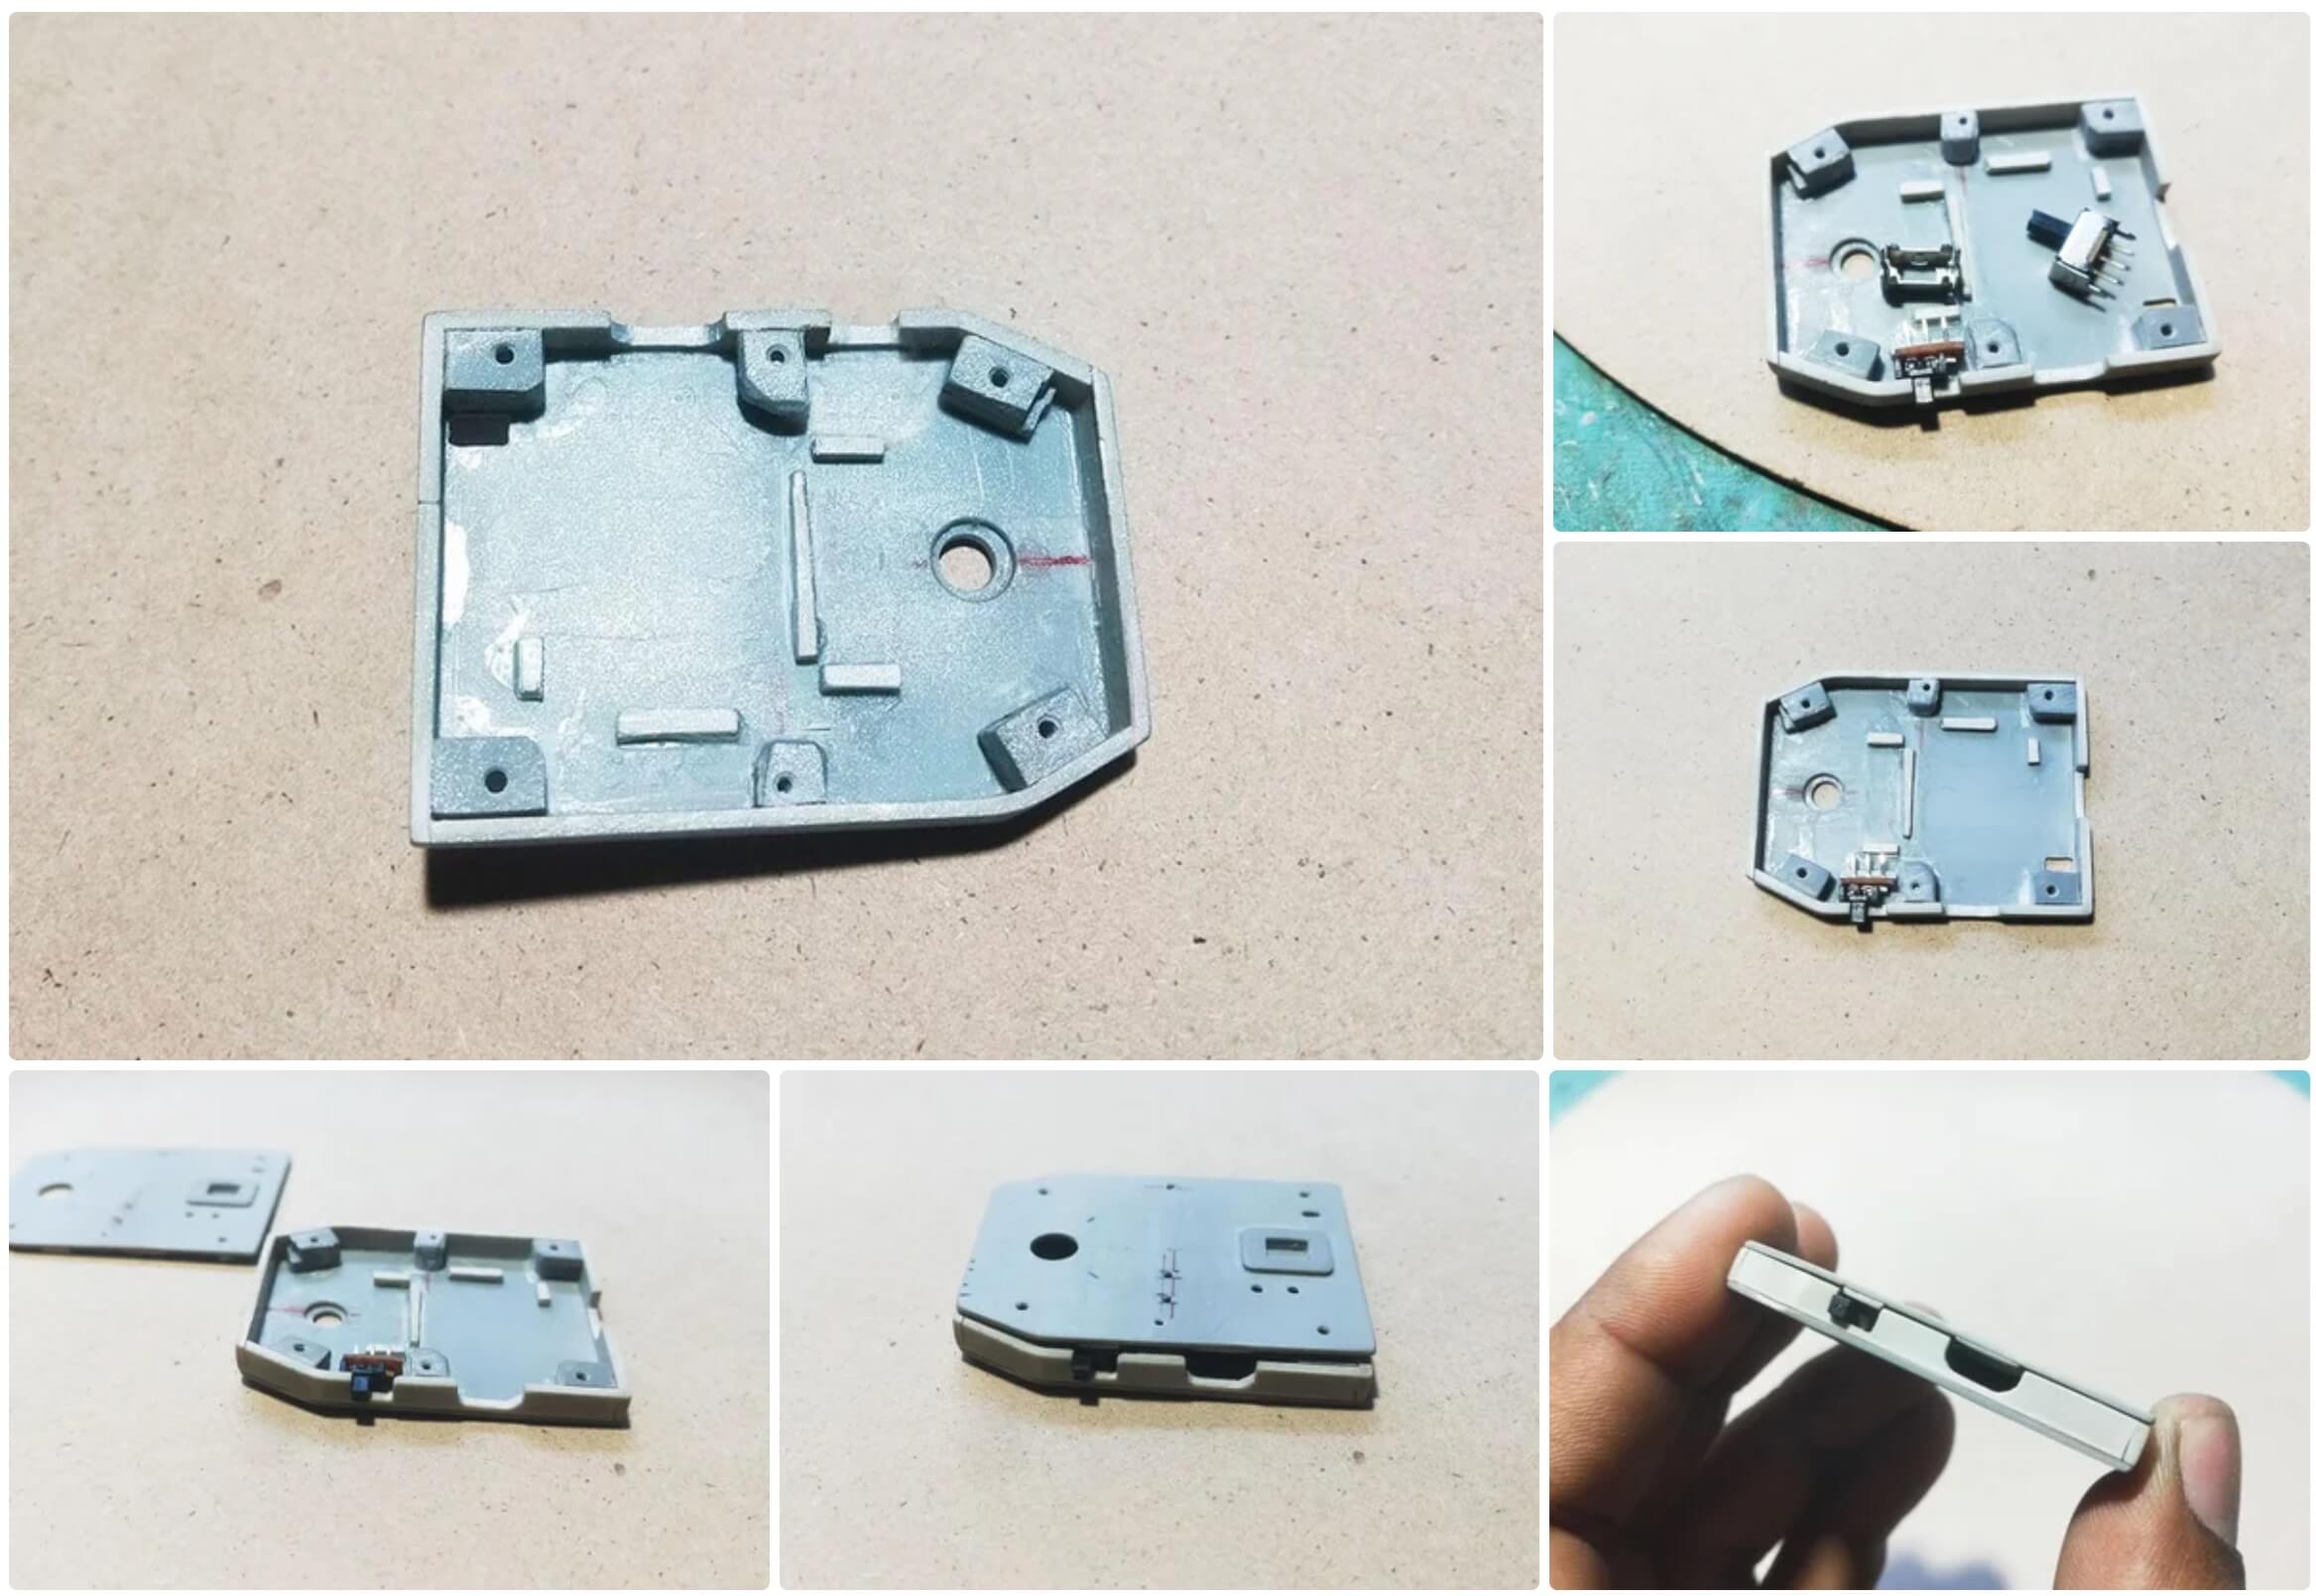
We measure the dimensions of the components and make marks in the PVC for their installation. We install the microswitch, reducing its height so that it fits into the compartment.
Step 11: Checking All Parts
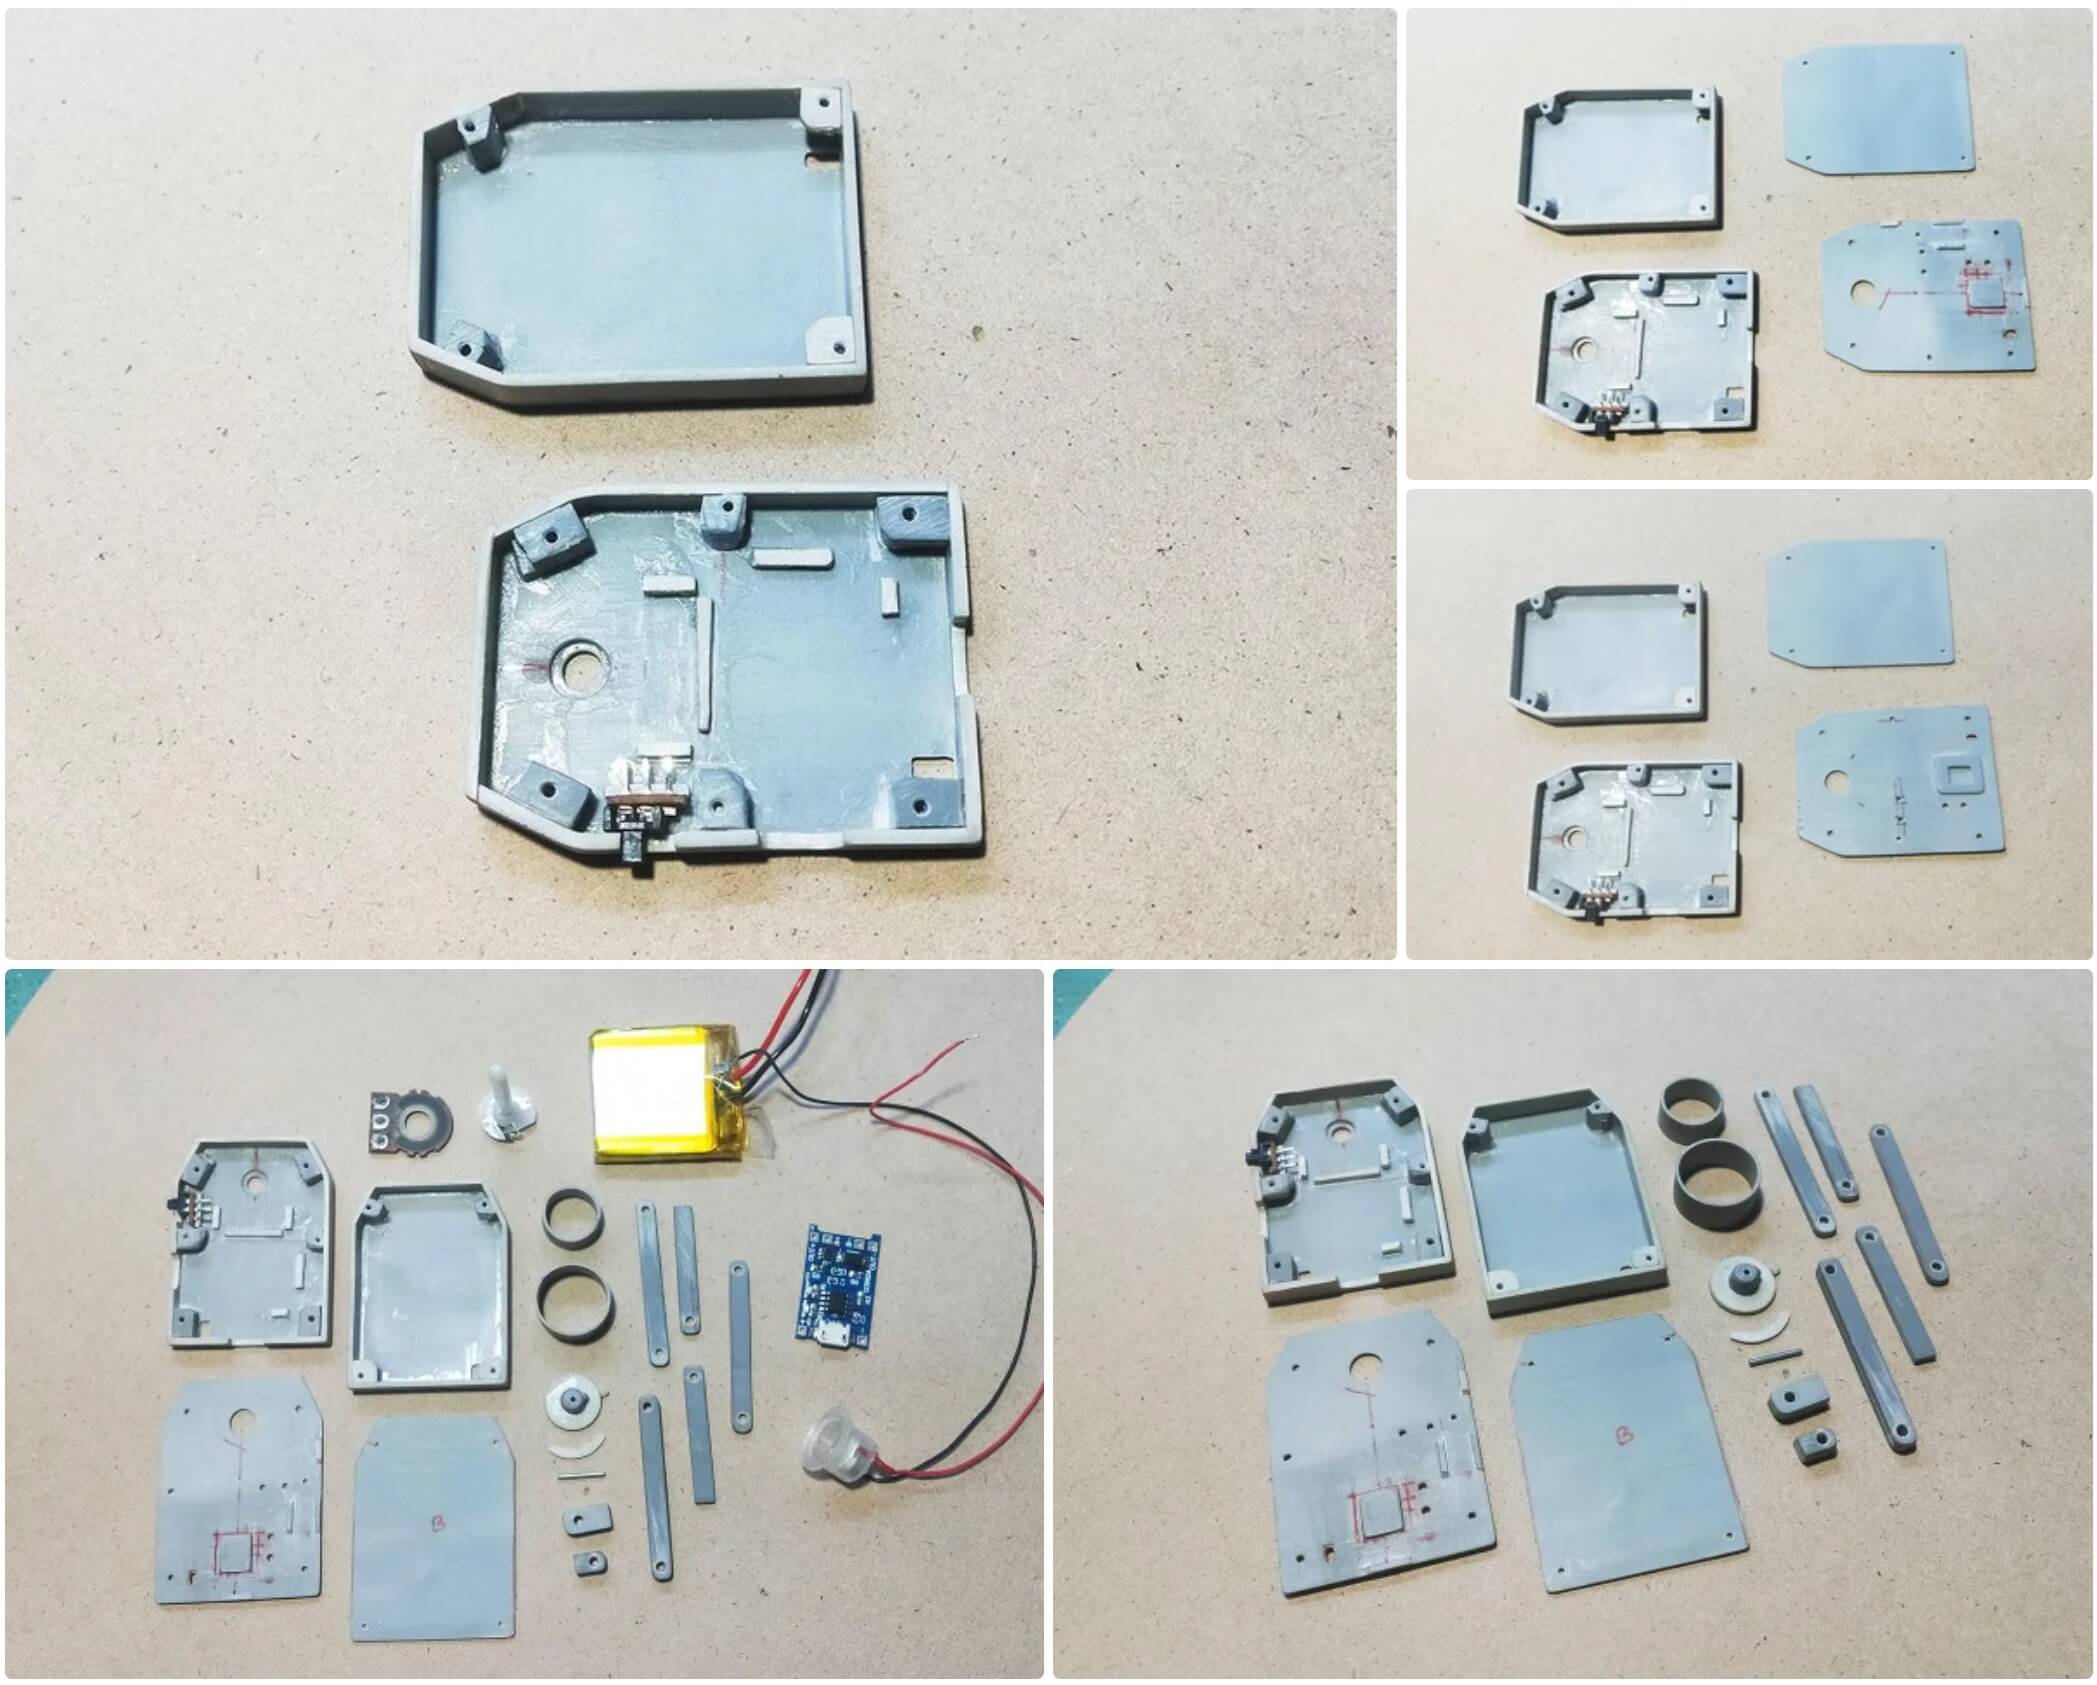
We check all prepared parts before final assembly.
Step 12: Creating the Mounting System

We make several additional PVC parts and drill holes for the metal rod that will connect the two compartments. In the corners we attach round PVC parts for installing springs.
Step 13: Painting the Components
Apply silver paint to all parts and begin assembly.
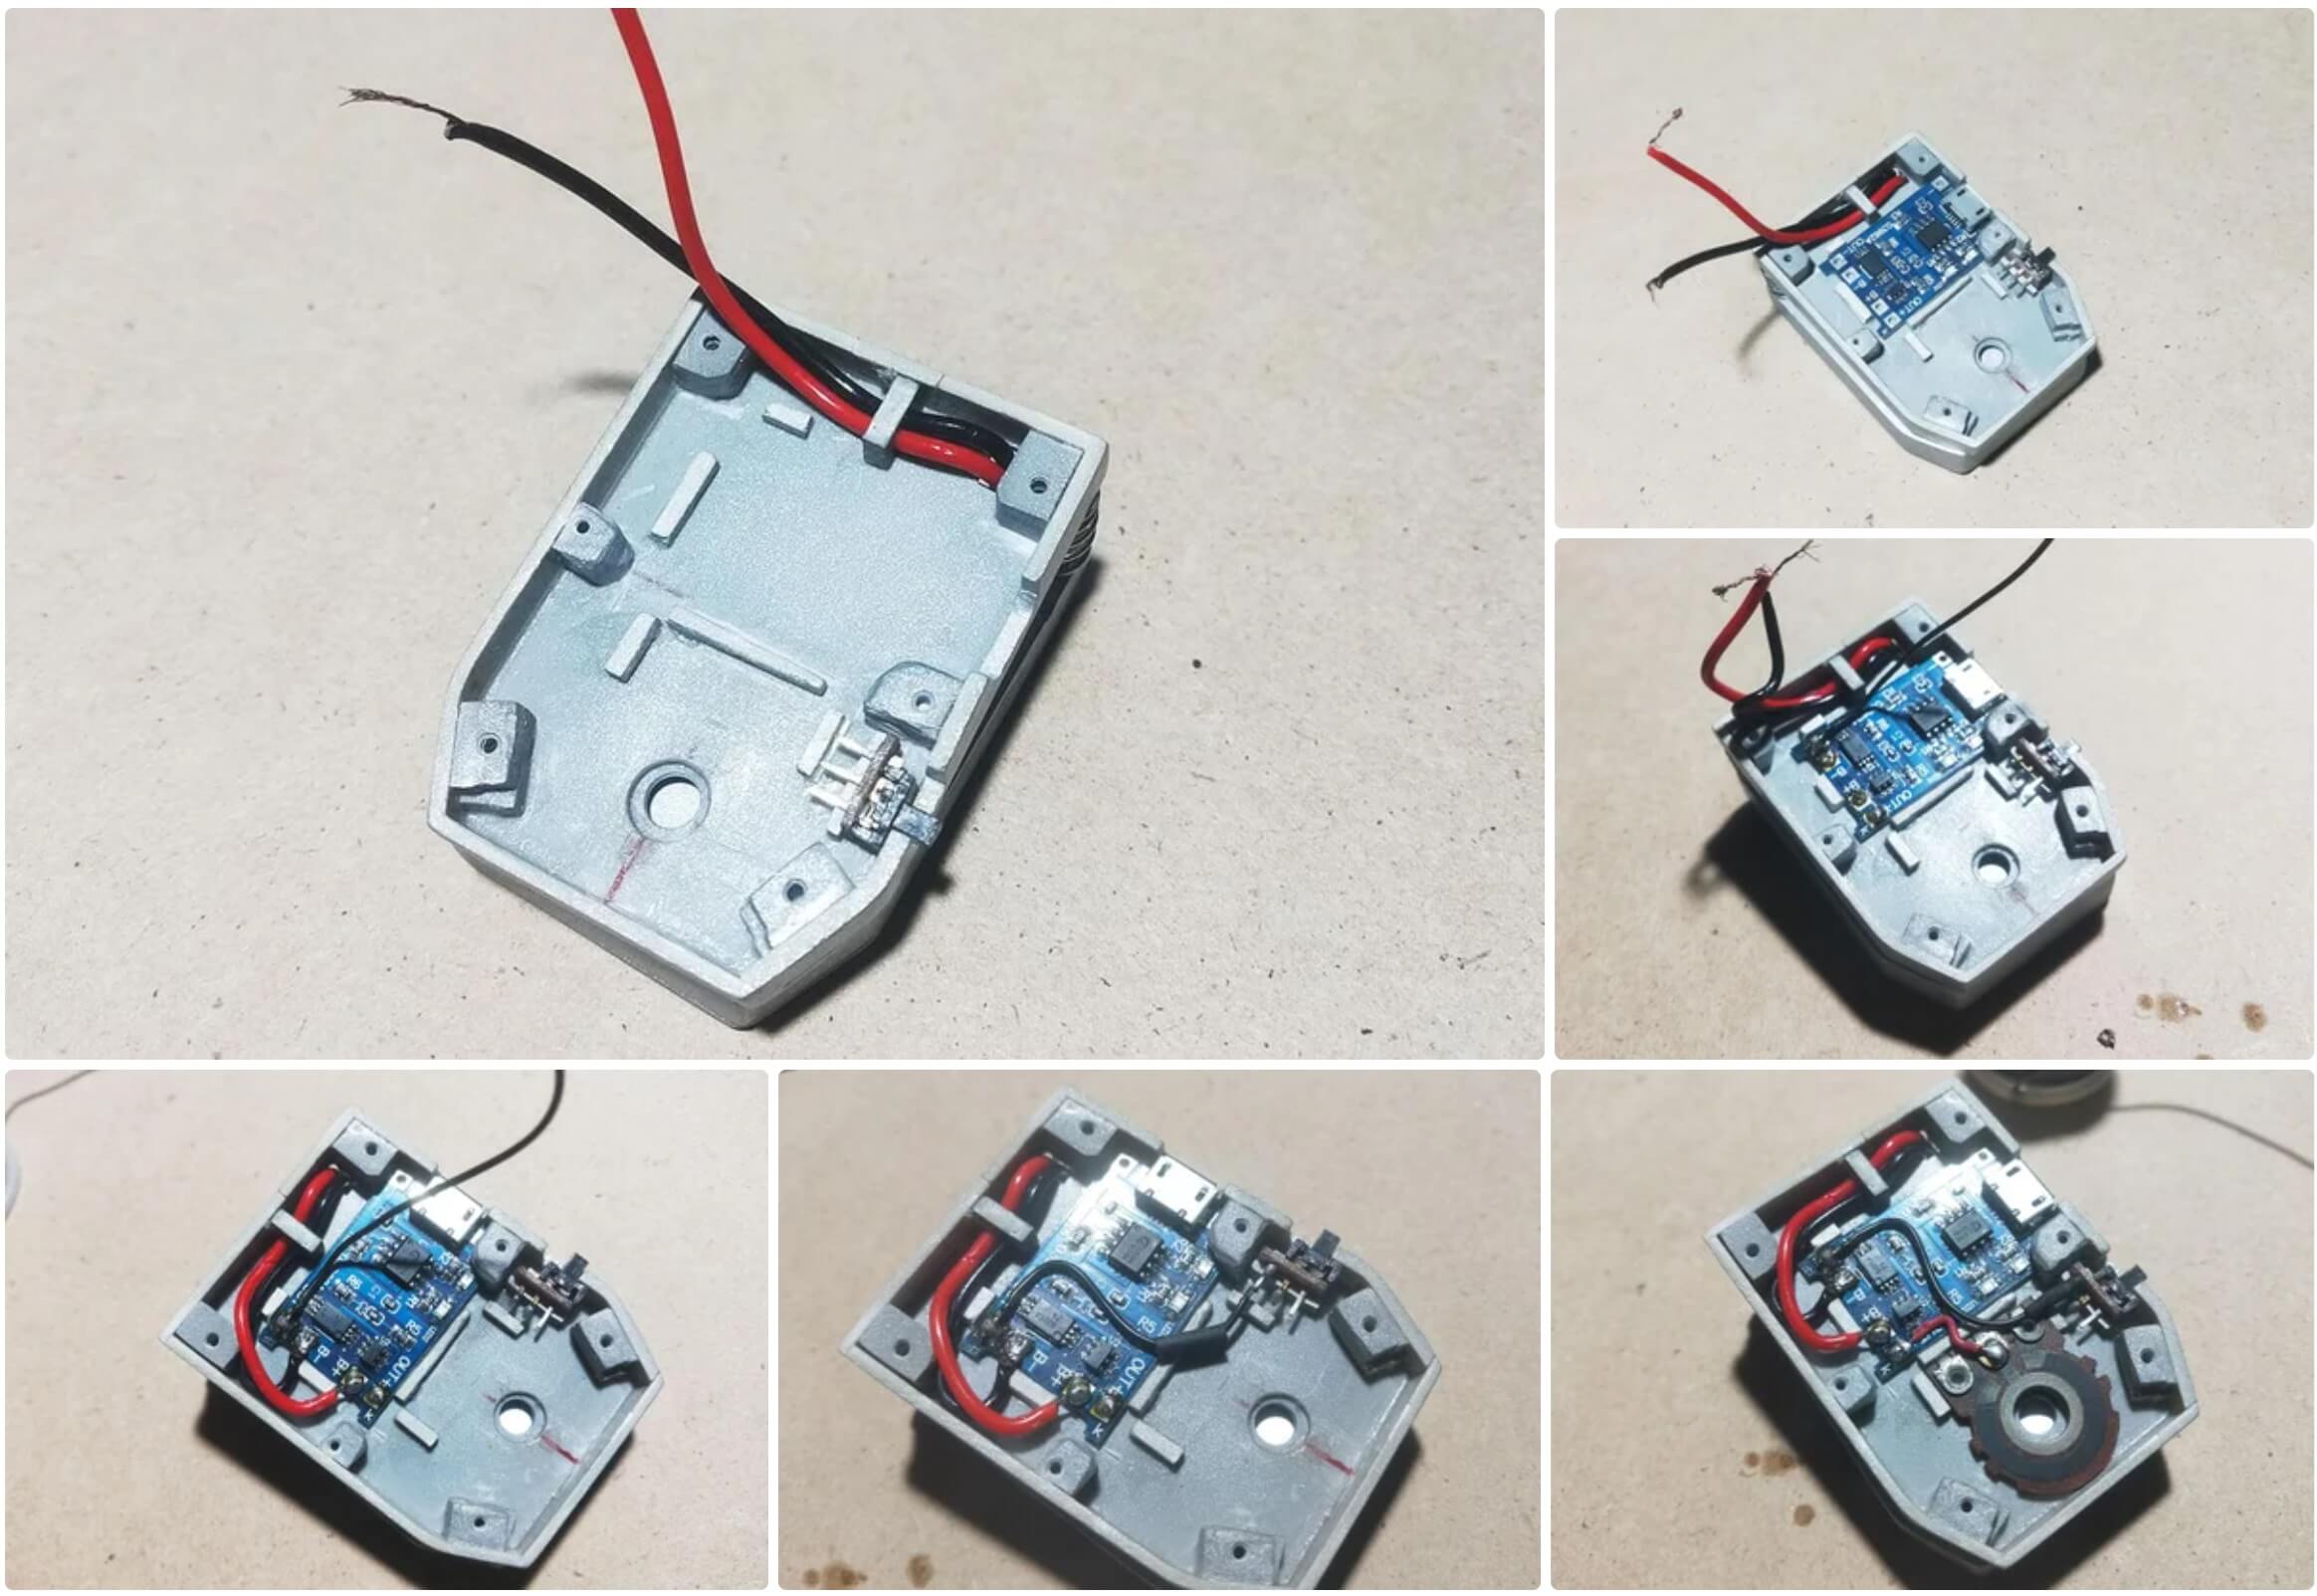
Step 14: Completing the Battery Compartment
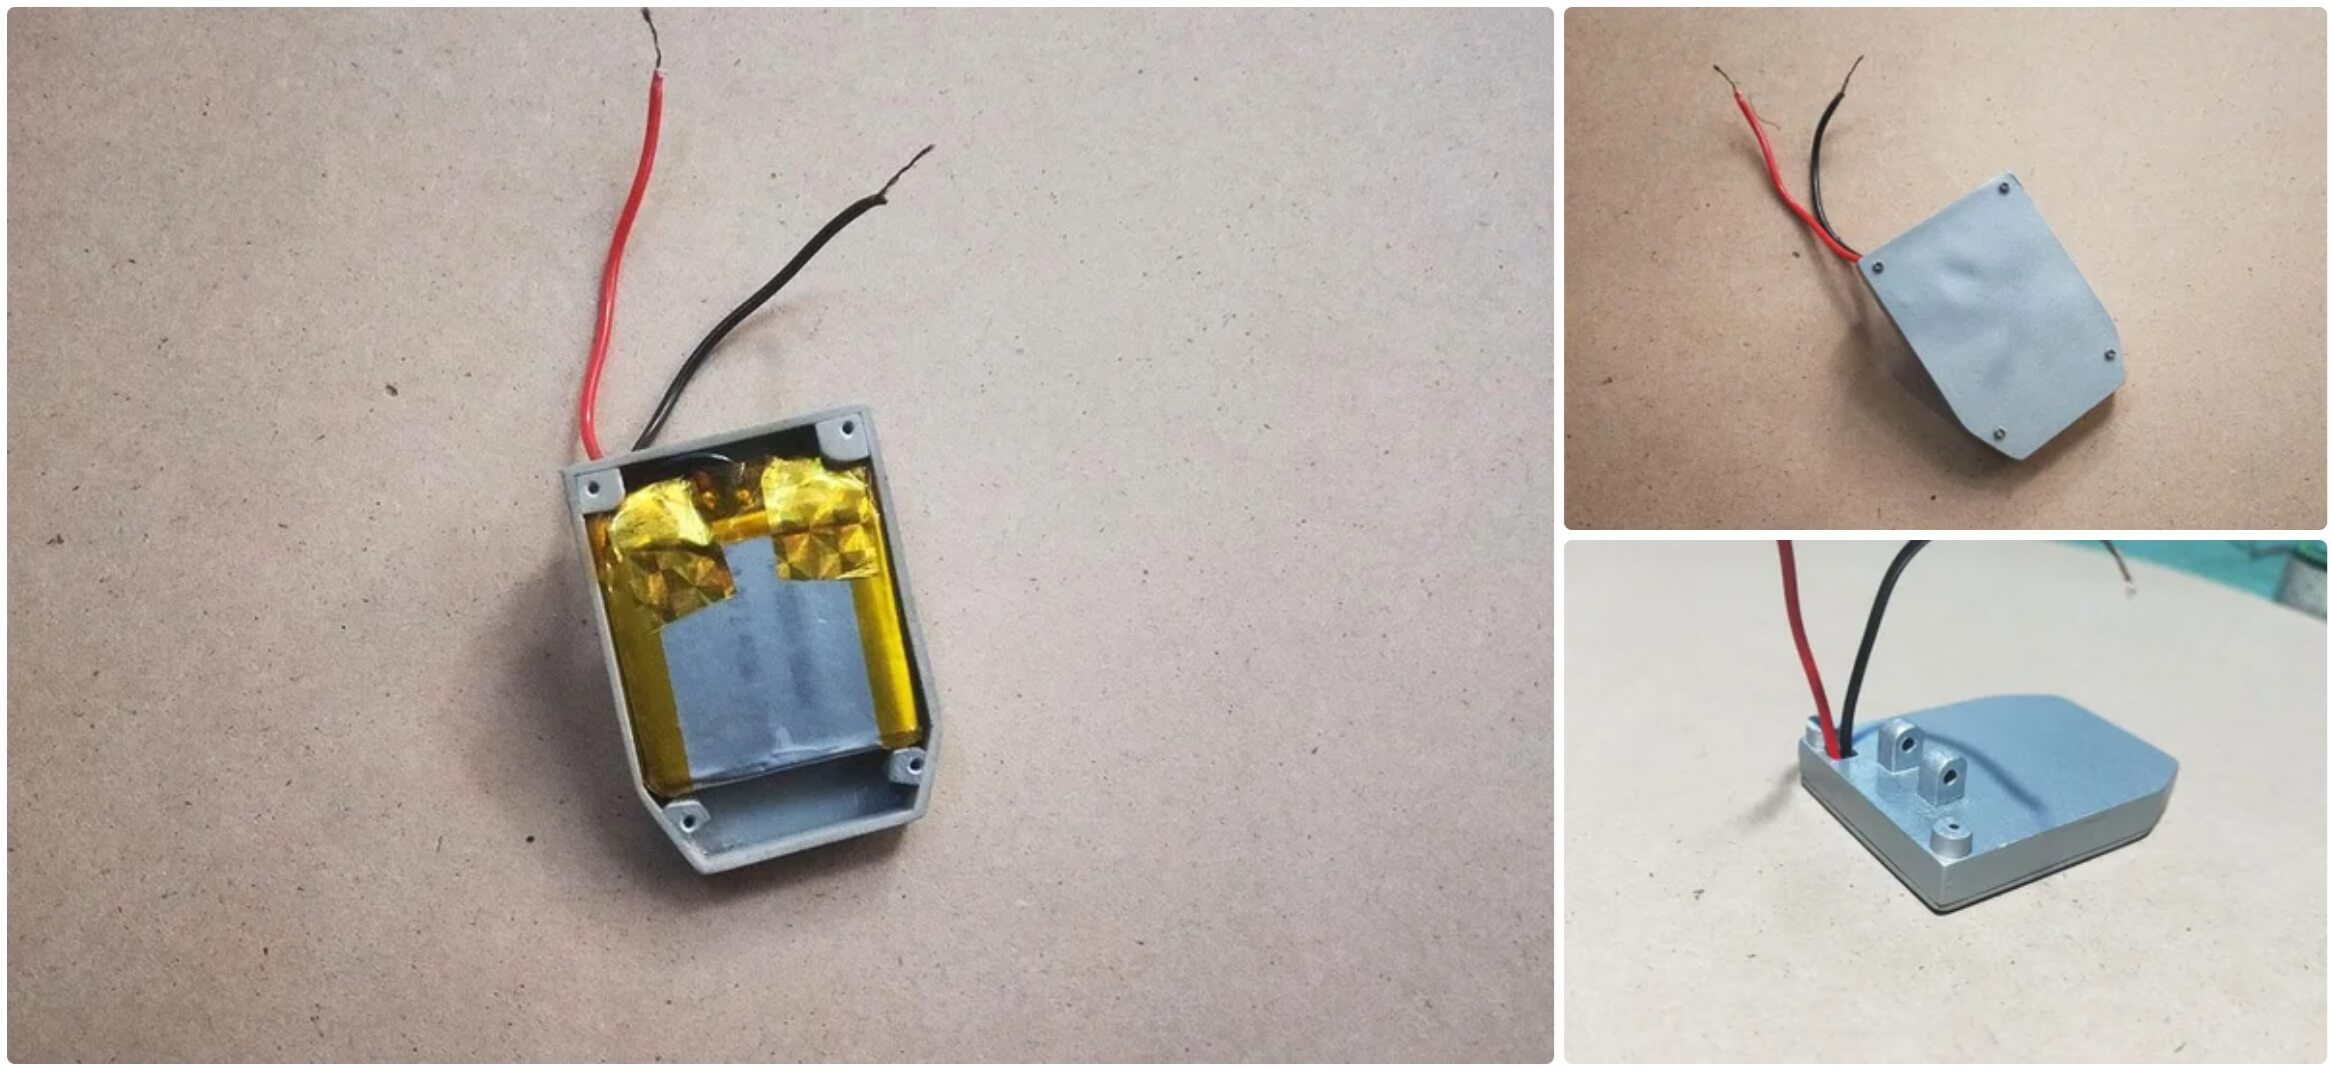
We insert the battery into the bottom compartment and take the wires out through the side hole, then secure the cover with screws.
Step 15: Connecting the Compartments

We use a metal rod to connect the two compartments and install the springs.
Step 16: Installing Electronics
We install all the electronic components in the upper compartment and solder the wires.
Step 17: Installing the Lamp Stand
We attach all the previously prepared stands with nuts and bolts so that they can be adjusted as needed.
Step 18: Installing the Lamp Head
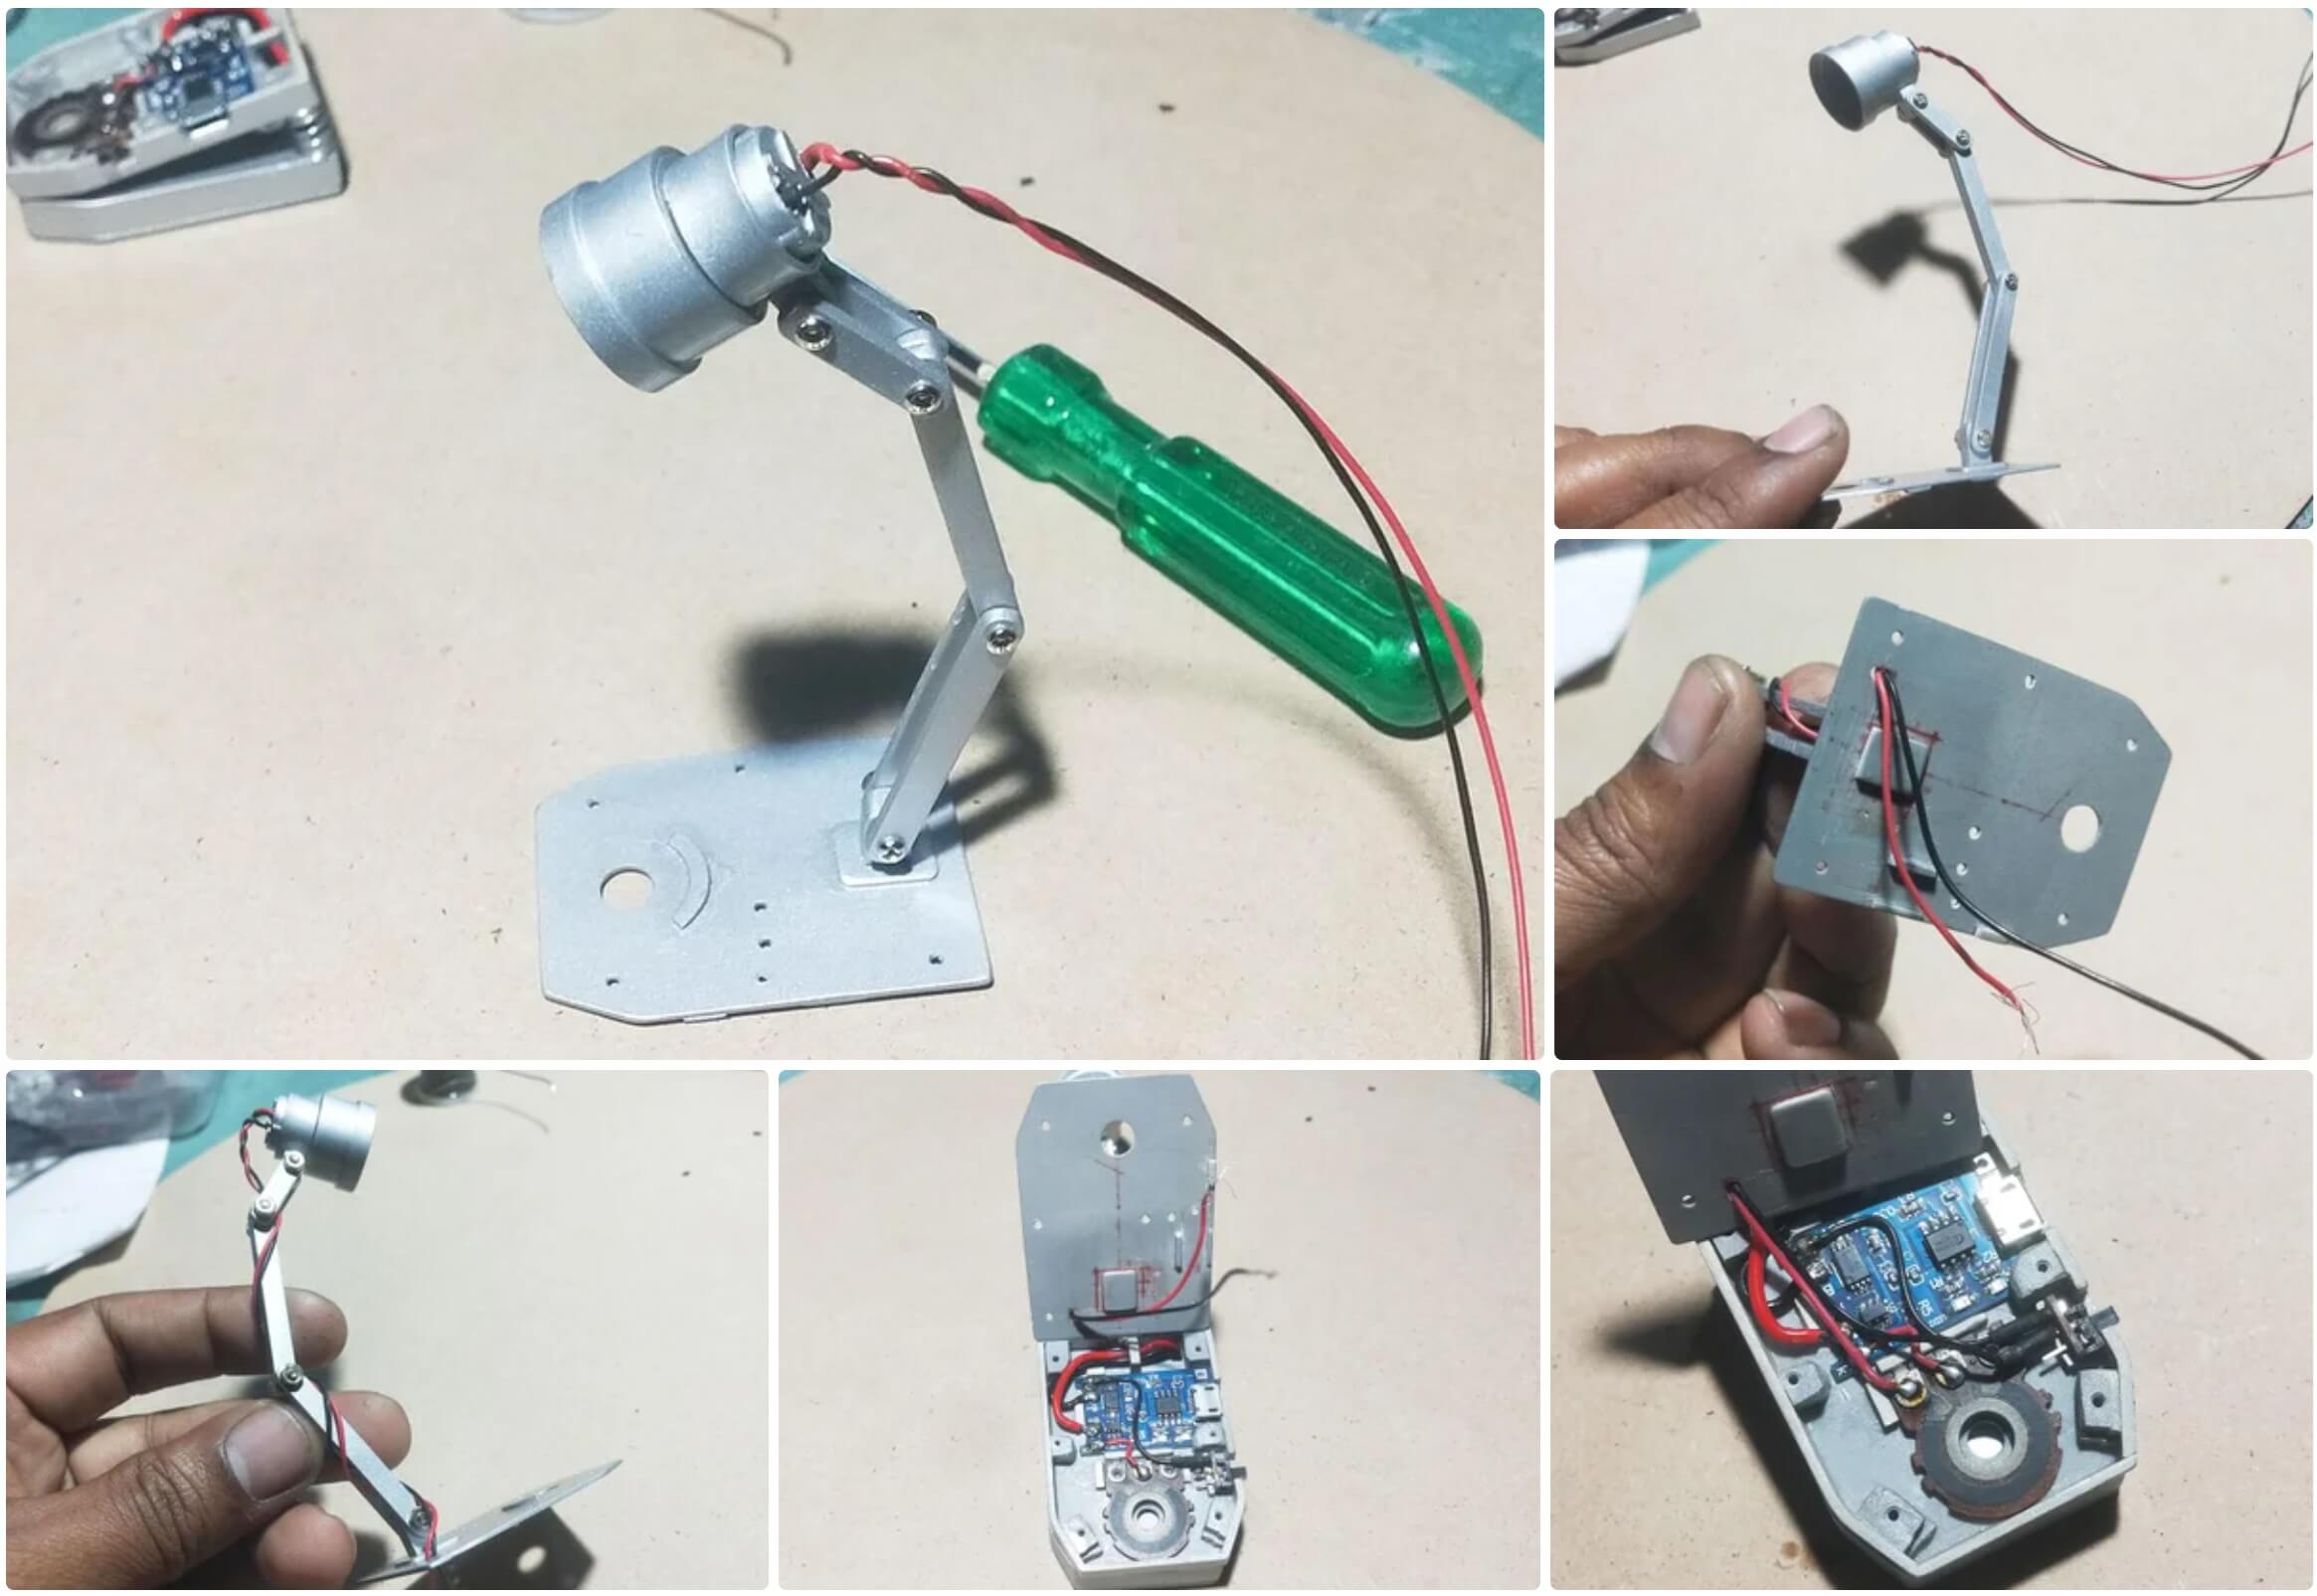
We insert the lamp head and connect the wires to the electronics.
Step 19: Final Result
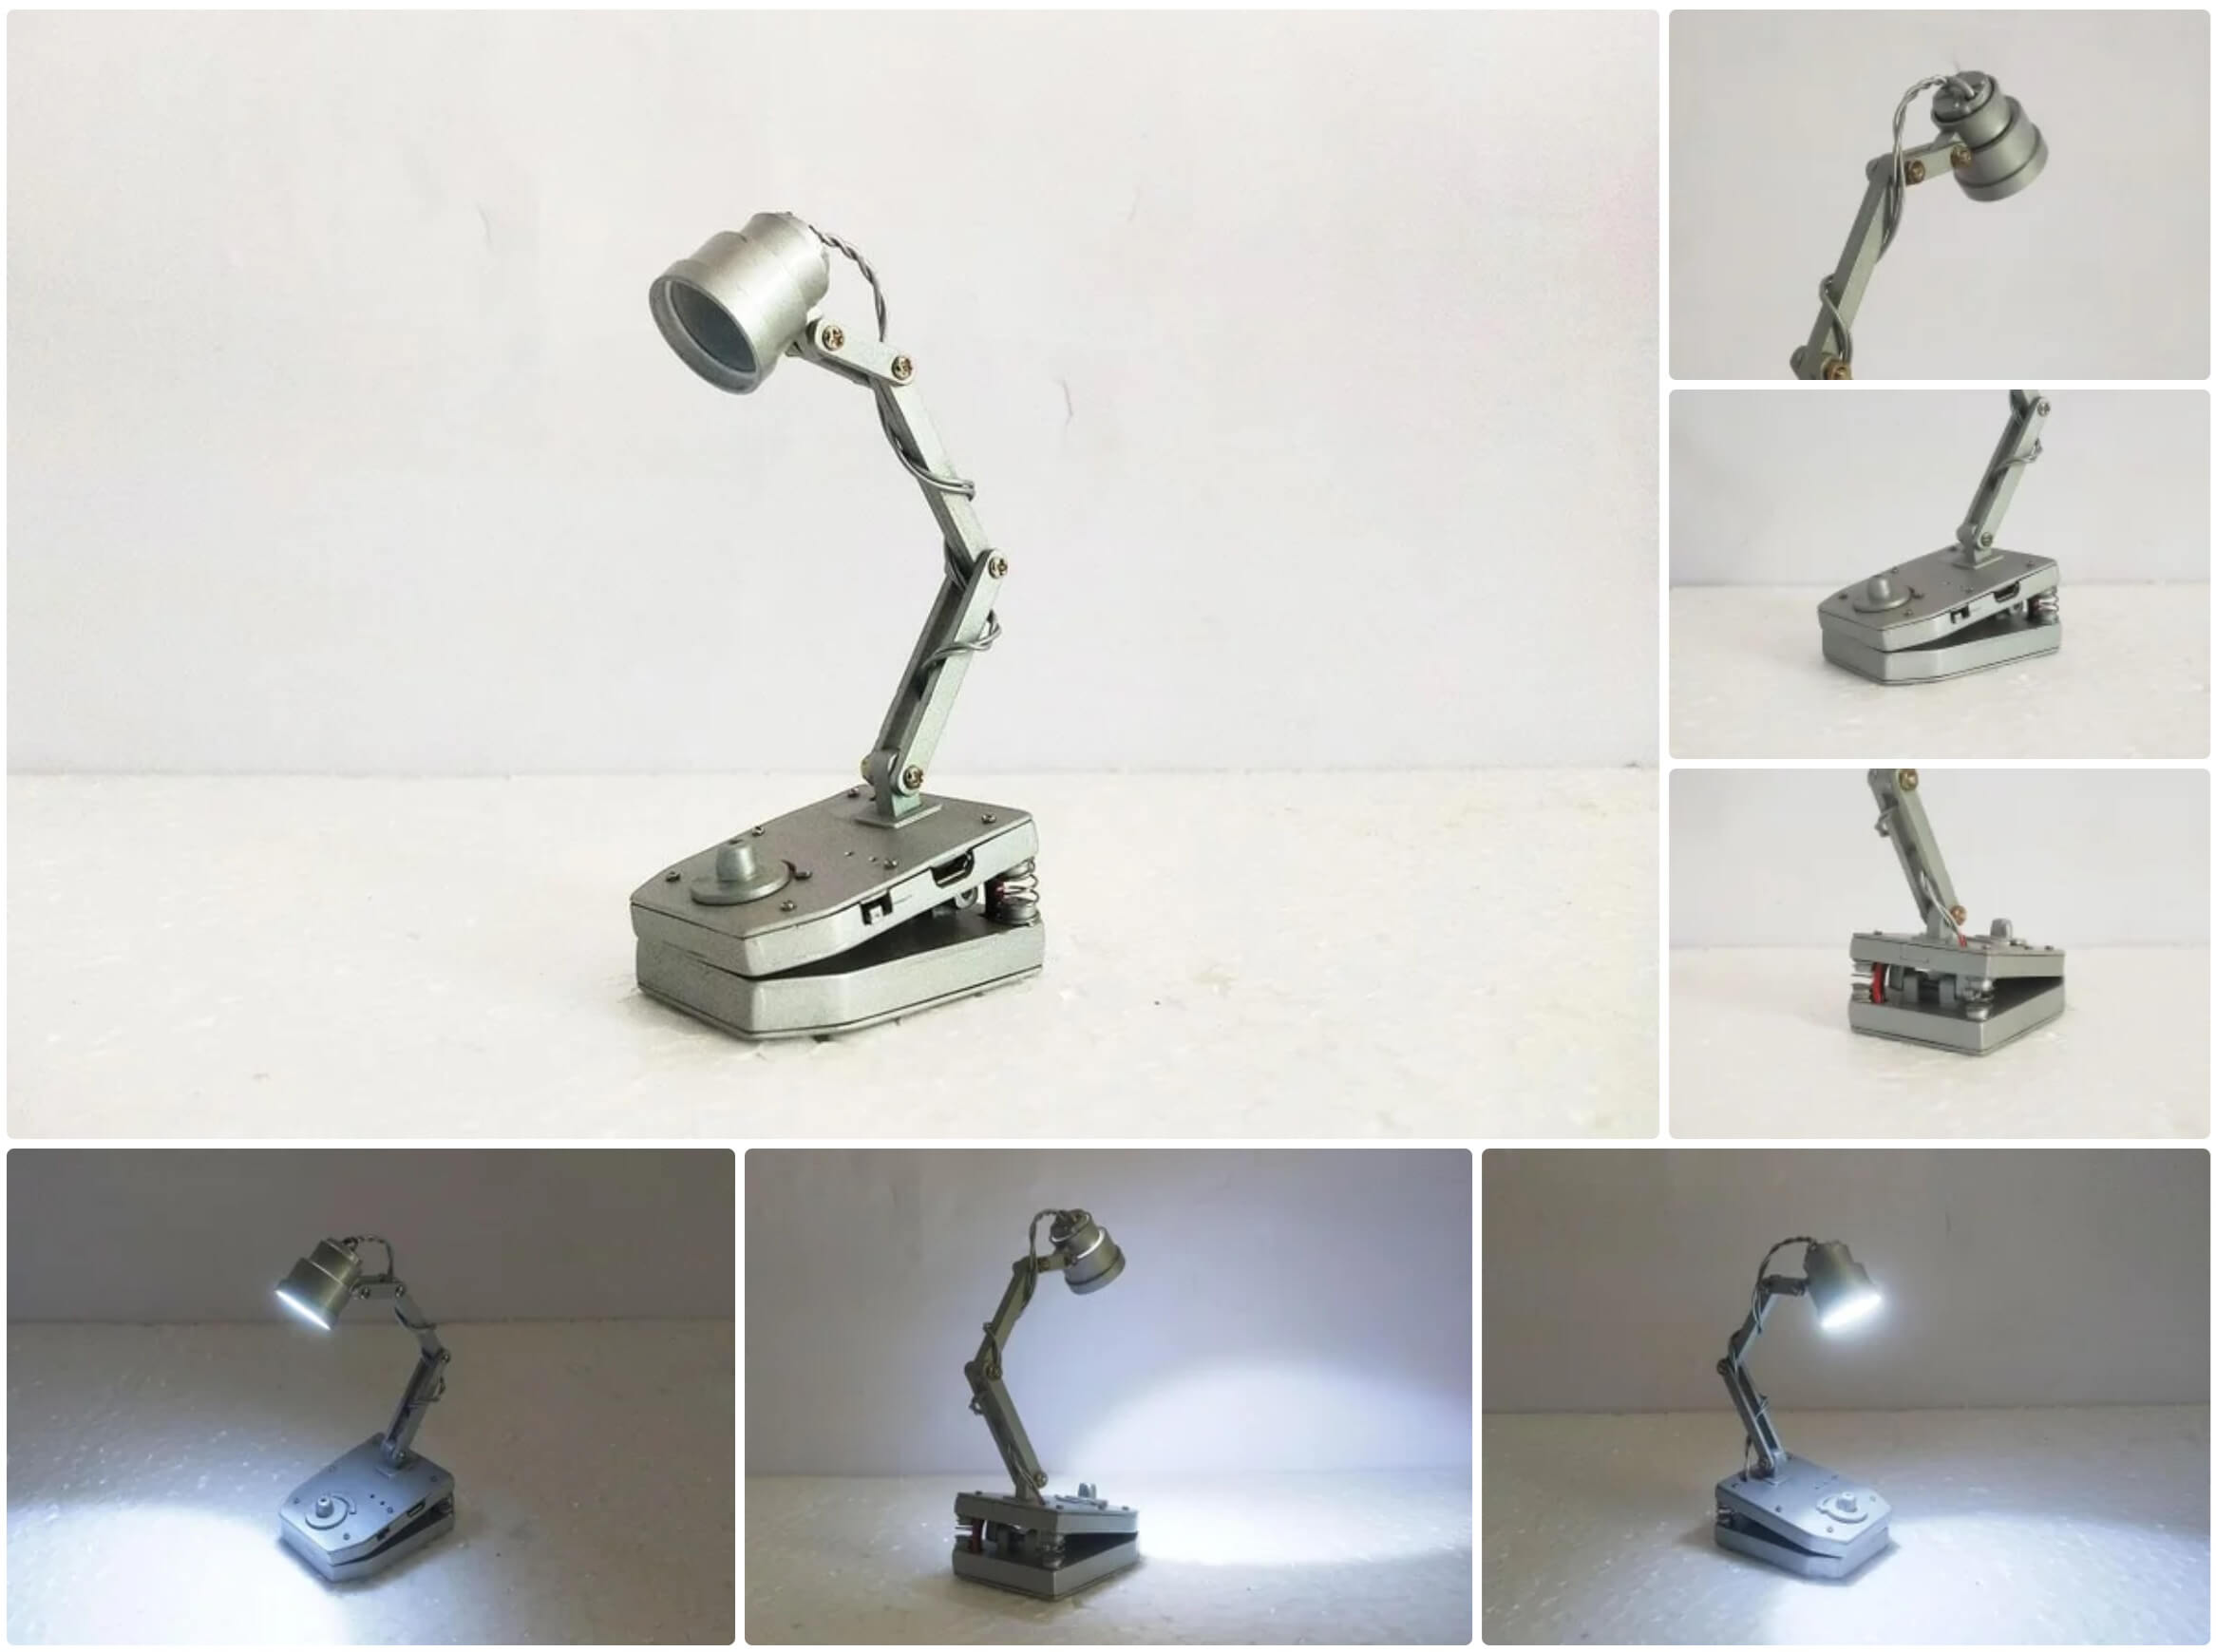
That’s all! Your wireless book clip is ready. Now you can enjoy reading books at night without disturbing others.
Conclusion
Making this lamp is a fun process that allows you to be creative and learn how to work with different materials and tools. It will be a great addition for all night reading lovers.
FAQ
How long does it take to make a lamp? This usually takes between 2 and 4 hours, depending on your experience and availability of materials.
How long does this lamp last? With careful handling and proper use, the lamp will serve you for several years.
Can other materials be used instead of PVC? Yes, you can experiment with other materials such as acrylic or wood, but PVC is easy to work with and quite durable.
How to charge the battery? To charge, use a charging module that connects via a Micro USB port.
Can the brightness of the light be adjusted? Yes, the lamp has a potentiometer that allows you to adjust the brightness of the LED at your discretion.
Technocraft STUDIO, Guwahati, India
Recommend to read
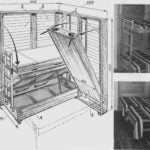 TECHNOLOGY ONE DESIGN DIFFERENT
Getting to self-designing furniture, I set a goal to achieve maximum adaptability to design was designed, manufactured, and operated with the lowest cost. I designed a set of furniture...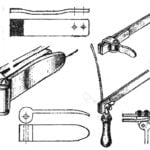 CLIP IN ONE MOVEMENT
Jigsaw is perhaps the most popular tool in the home workshop craftsmen, and in the laboratory modeller. Meanwhile, its design has remained unchanged for decades, but this does not mean...
