This wheelbarrow was designed (if you can call it that—the process of thinking through the design and estimating dimensions) and built in a few hours after my brother and I received a message from our father in the village asking us to help him build an access road to the house. It was clear that we couldn’t manage with just carrying things by hand—the volume of work was significant, and no mechanized freight vehicles were available.
As often happens with DIY enthusiasts, the wheelbarrow’s design was determined by the materials and mechanisms available in the shed. Two wheels from an M-103 “Minsk” motorcycle, which had been lying idle for a long time, came in very handy—the engine had already been used on the “Mysl” snowmobile (An article about this snowmobile was published in issue No. 11 of 1991 of the “Modelist-Konstruktor” magazine). Other parts used in the construction included arches and legs from old metal bed frames; scraps of sheet metal 1.0 mm thick also came in handy.
The manufacturing process is simple, just like the wheelbarrow’s design itself.
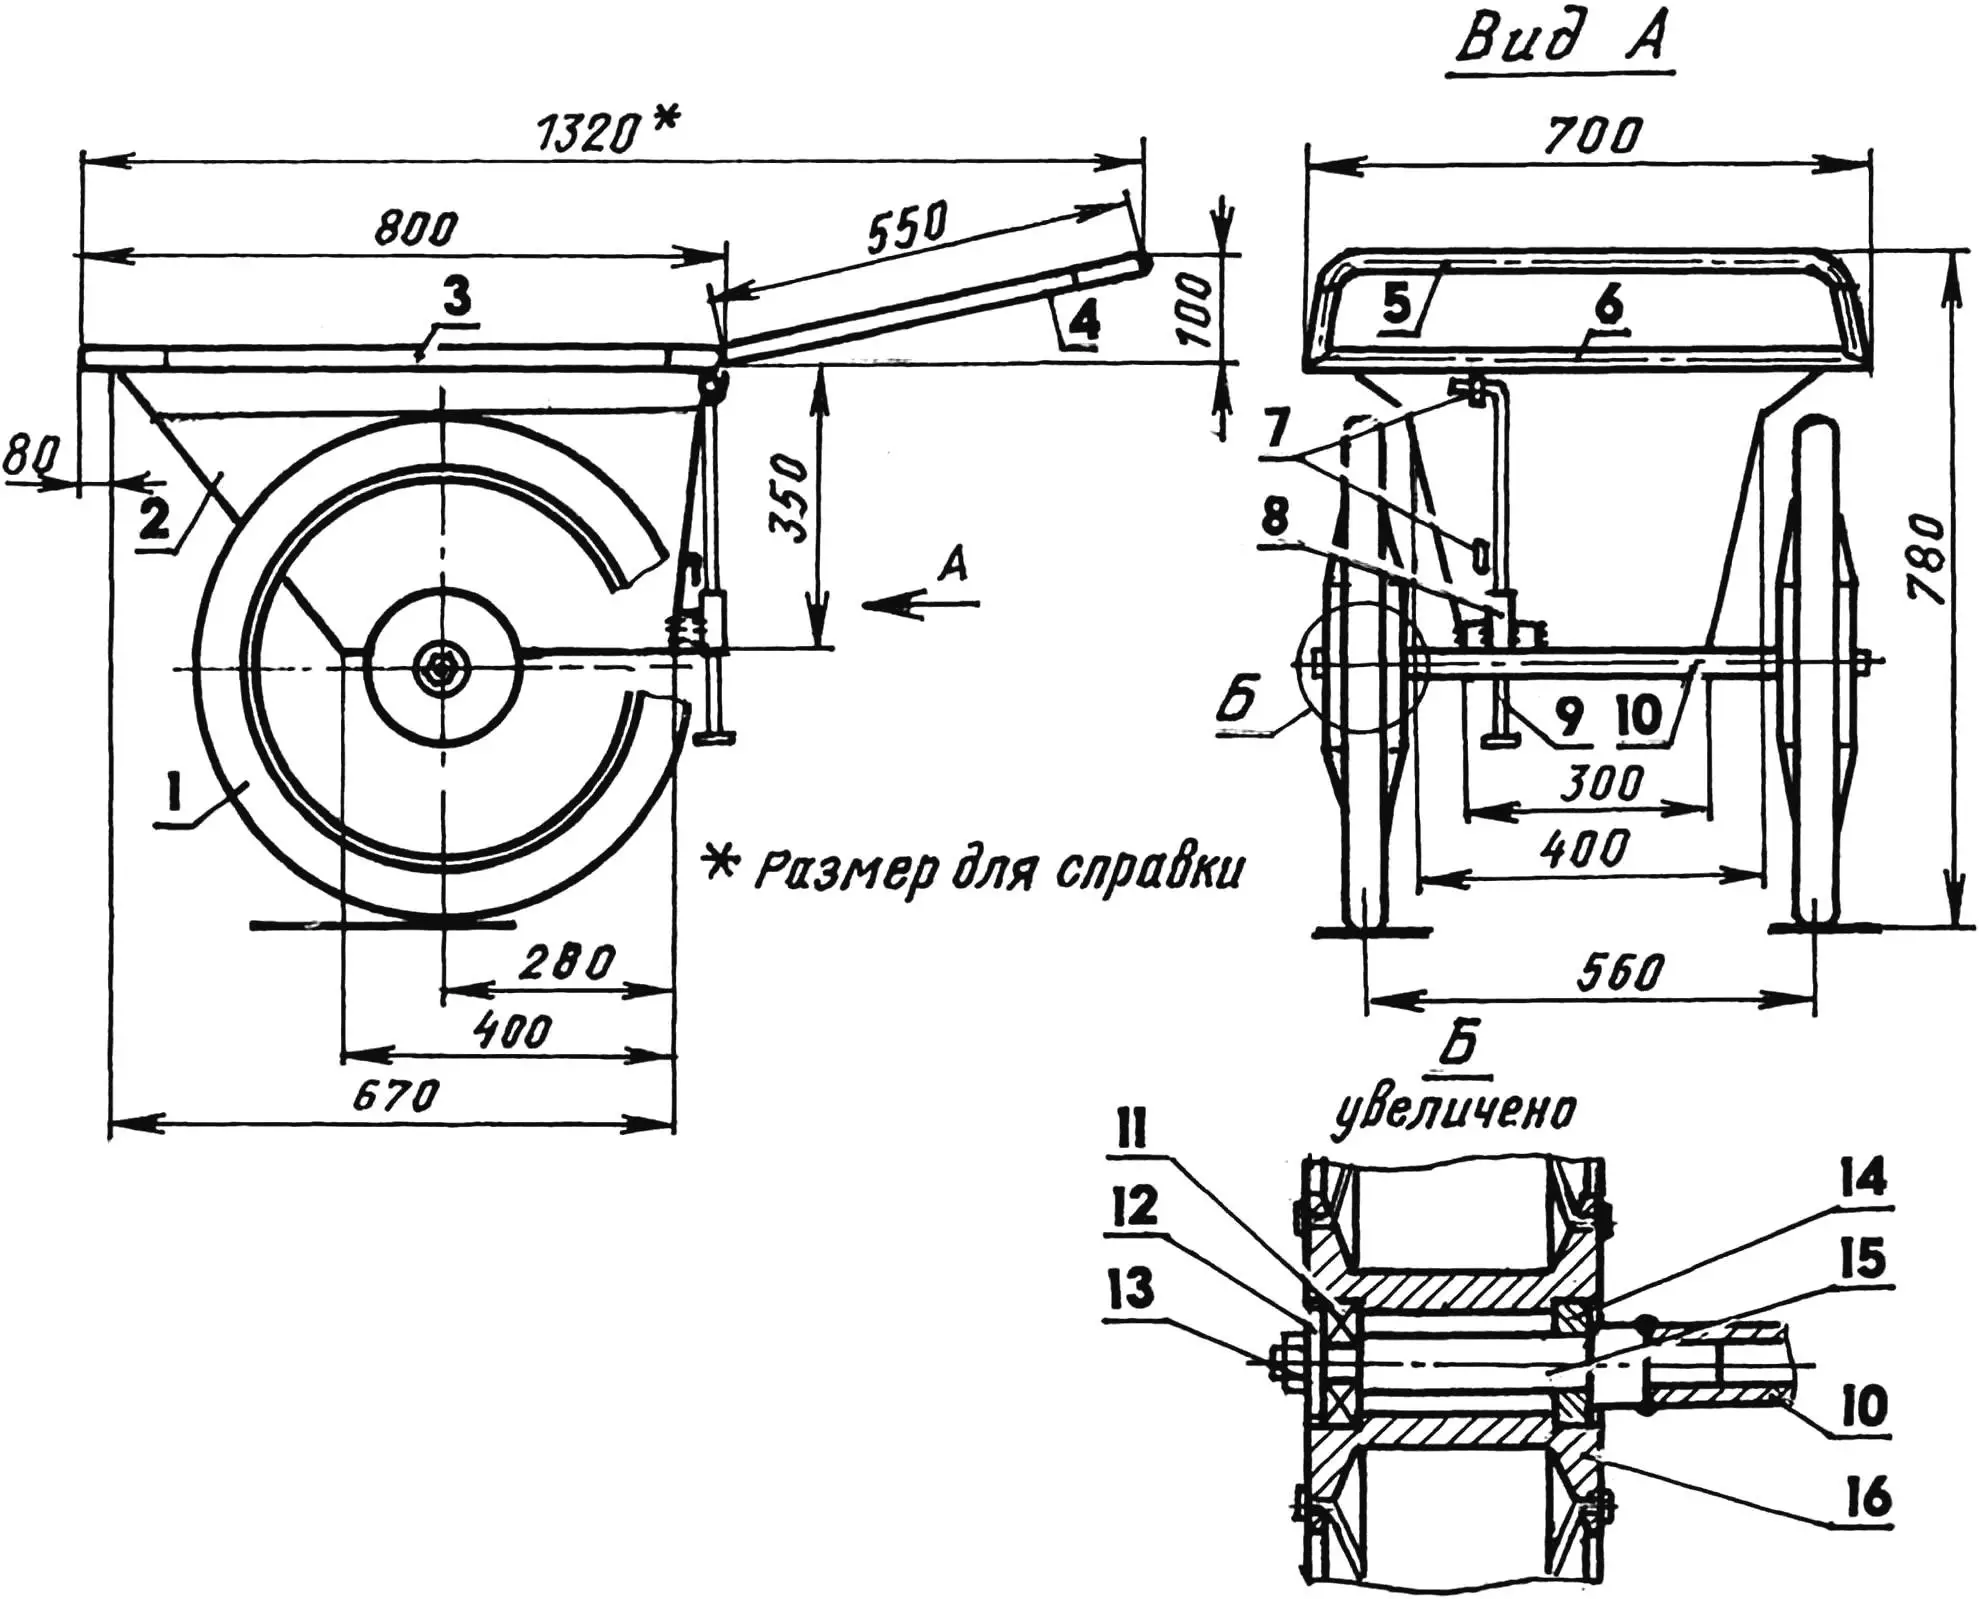
1 — wheel (from M-103 “Minsk” motorcycle, 2 pcs.); 2 — body (steel sheet s1.0); 3 — side body trim (bed leg, 2 pcs.); 4 — handle arms (bed leg, 2 pcs.); 5 — handle (bed frame arch); 6 — end trim (bed frame arch, 2 pcs.); 7 — hooks for transport and static position of support leg (St3, sheet s2); 8 — distance plate and guide bushing of support leg (steel sheet s2 and 1″ pipe); 9 — support leg (1/2″ steel pipe); 10 — axle (1″ pipe); 11 — standard bearing (2 pcs.); 12 — thrust washer (2 pcs.); 13 — wheel mounting nut (2 pcs.); 14 — plain bearing (bronze, 2 pcs.); 15 — axle; 16 — wheel hub
First, I welded the trim for the bucket-shaped body from two arches and a pair of bed legs shortened to the required size. Then I cut out the bottom and walls with small allowances, tack-welded all joints, and inserted the “bucket” into the trim. After aligning the parts relative to each other and fitting the body edges in place, I marked the allowances and cut off the excess.
Then, bending the “bucket” edge to the trim pipes, I welded with an intermittent seam (gas welding) around the perimeter, and all edges and face joints—with a continuous seam.
Next, I sawed off a section from the bed leg pipe—for the wheel pair axle. According to the pipe dimensions (its internal and external diameters) and the wheel hub (its length and the seating diameter of the inner bearing ring), I turned two axles and, inserting them from both ends of the pipe, welded them. Turning the body upside down, I installed the axle strictly across it and welded it, then reinforced the fastening with welded brackets. Thus, the wheelbarrow ended up with a load-bearing body.
Now I secured the wheels on the axles and turned the body back to its original position. I also made the handle from an arch and legs of an old bed frame. I selected the installation angle according to my height and welded the ends to the rear arch of the body trim.
I made the support leg retractable so it wouldn’t catch when moving. After all, the wheelbarrow’s track and ground clearance allow it to ride over fairly large obstacles.
And finally, I painted the wheelbarrow with quick-drying primer so it would have a proper appearance.
In the morning, we hitched the finished wheelbarrow to a two-seat four-wheeled velomobile and set off to our father in the village…
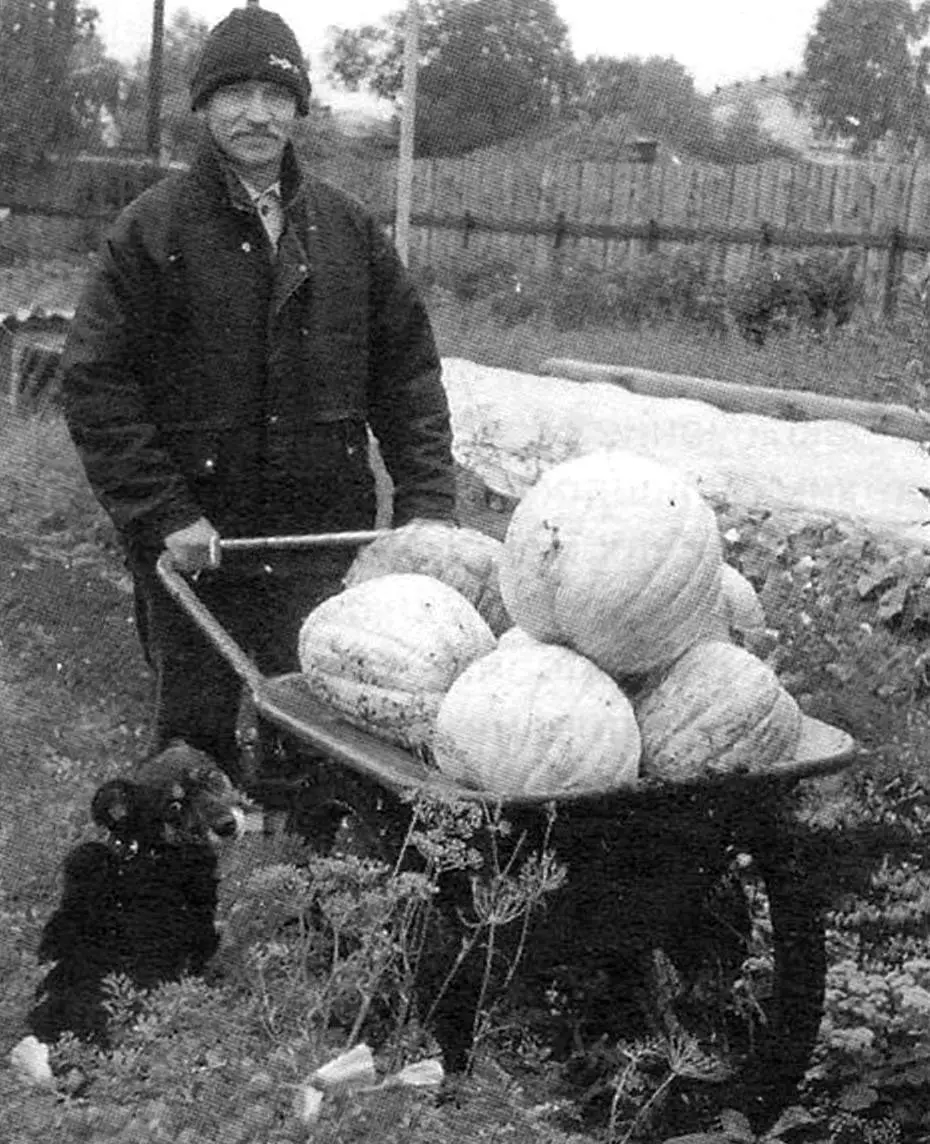
About 15 years have passed since then, much has changed (the velomobile fell into disrepair, our father passed away), but the wheelbarrow still serves as a helper and is always in use. During this time, it has transported tens of tons of various cargoes (piece, bulk, and even liquid): soil, gravel, manure, firewood, bricks, mortar, and more.
Large-diameter wheels allow the wheelbarrow to be transported on uneven roads, on unstable ground, and through mud. The cart can be unloaded (if the cargo allows) using a “dump” method by tipping the body forward.
The wheelbarrow has fully demonstrated its positive qualities: simplicity of design, reliability in operation, versatility in use, and environmental friendliness. The latter quality manifested itself not only in its operation but also in its creation. After all, it was made practically from scrap metal that would have rusted for many years in the open air. And so the motto “Use useful iron from scrap metal” has long become a life principle for me.
«Modelist-Konstruktor» No. 9’2005, A. MATVEYCHUK
Recommend to read
 DOUBLE PENCIL
If a wooden bar and drill two holes the diameter of pencils or flomasterom — get a new handy tool for drawing or sketching: one motion will be two parallel lines. Instead of a single bar... WITHOUT ALTERATION OF THE POWER SUPPLY
In Amateur radio practice, there are situations when 9-volt DC source you need to obtain 12, and then a higher output voltage. Bail in such cases can I designed a compact transformerless...
