In “M-K” No. 8, 1984, we wrote about an arched cold frame built by schoolchildren. Its main load-bearing elements — the half-arches — were made from gymnastic hoops. That circumstance strictly determined the size of the cold frame. Yet it is very tempting to build, on the same principle, a more spacious and easier-to-maintain structure — a greenhouse. The trouble is that finding material for the frame’s half-arches is not easy.
But Muscovite Mikhail Nikolayevich Simakov managed to find a solution to this problem. Using his proposed design, you can build a greenhouse that has practically no metal parts at all! We hope this structure, quite accessible for independent replication, will interest our readers.
The idea of making such a greenhouse was suggested by two things that, at first glance, have nothing in common: industrial arched storage warehouses and, strangely enough… fishing. The first suggested the idea of an arched structure; the second — using flexible willow or young tree shoots (birch, walnut, bird cherry, etc.) as load-bearing half-arches — rods often used by anglers as fishing poles. The result was a cheap and simple structure that required neither scarce materials nor a specially equipped workshop. A hatchet, hammer, saw, brace or drill, knife, scissors, pliers, plus a soldering iron and a file — that is the entire set of tools for the job.
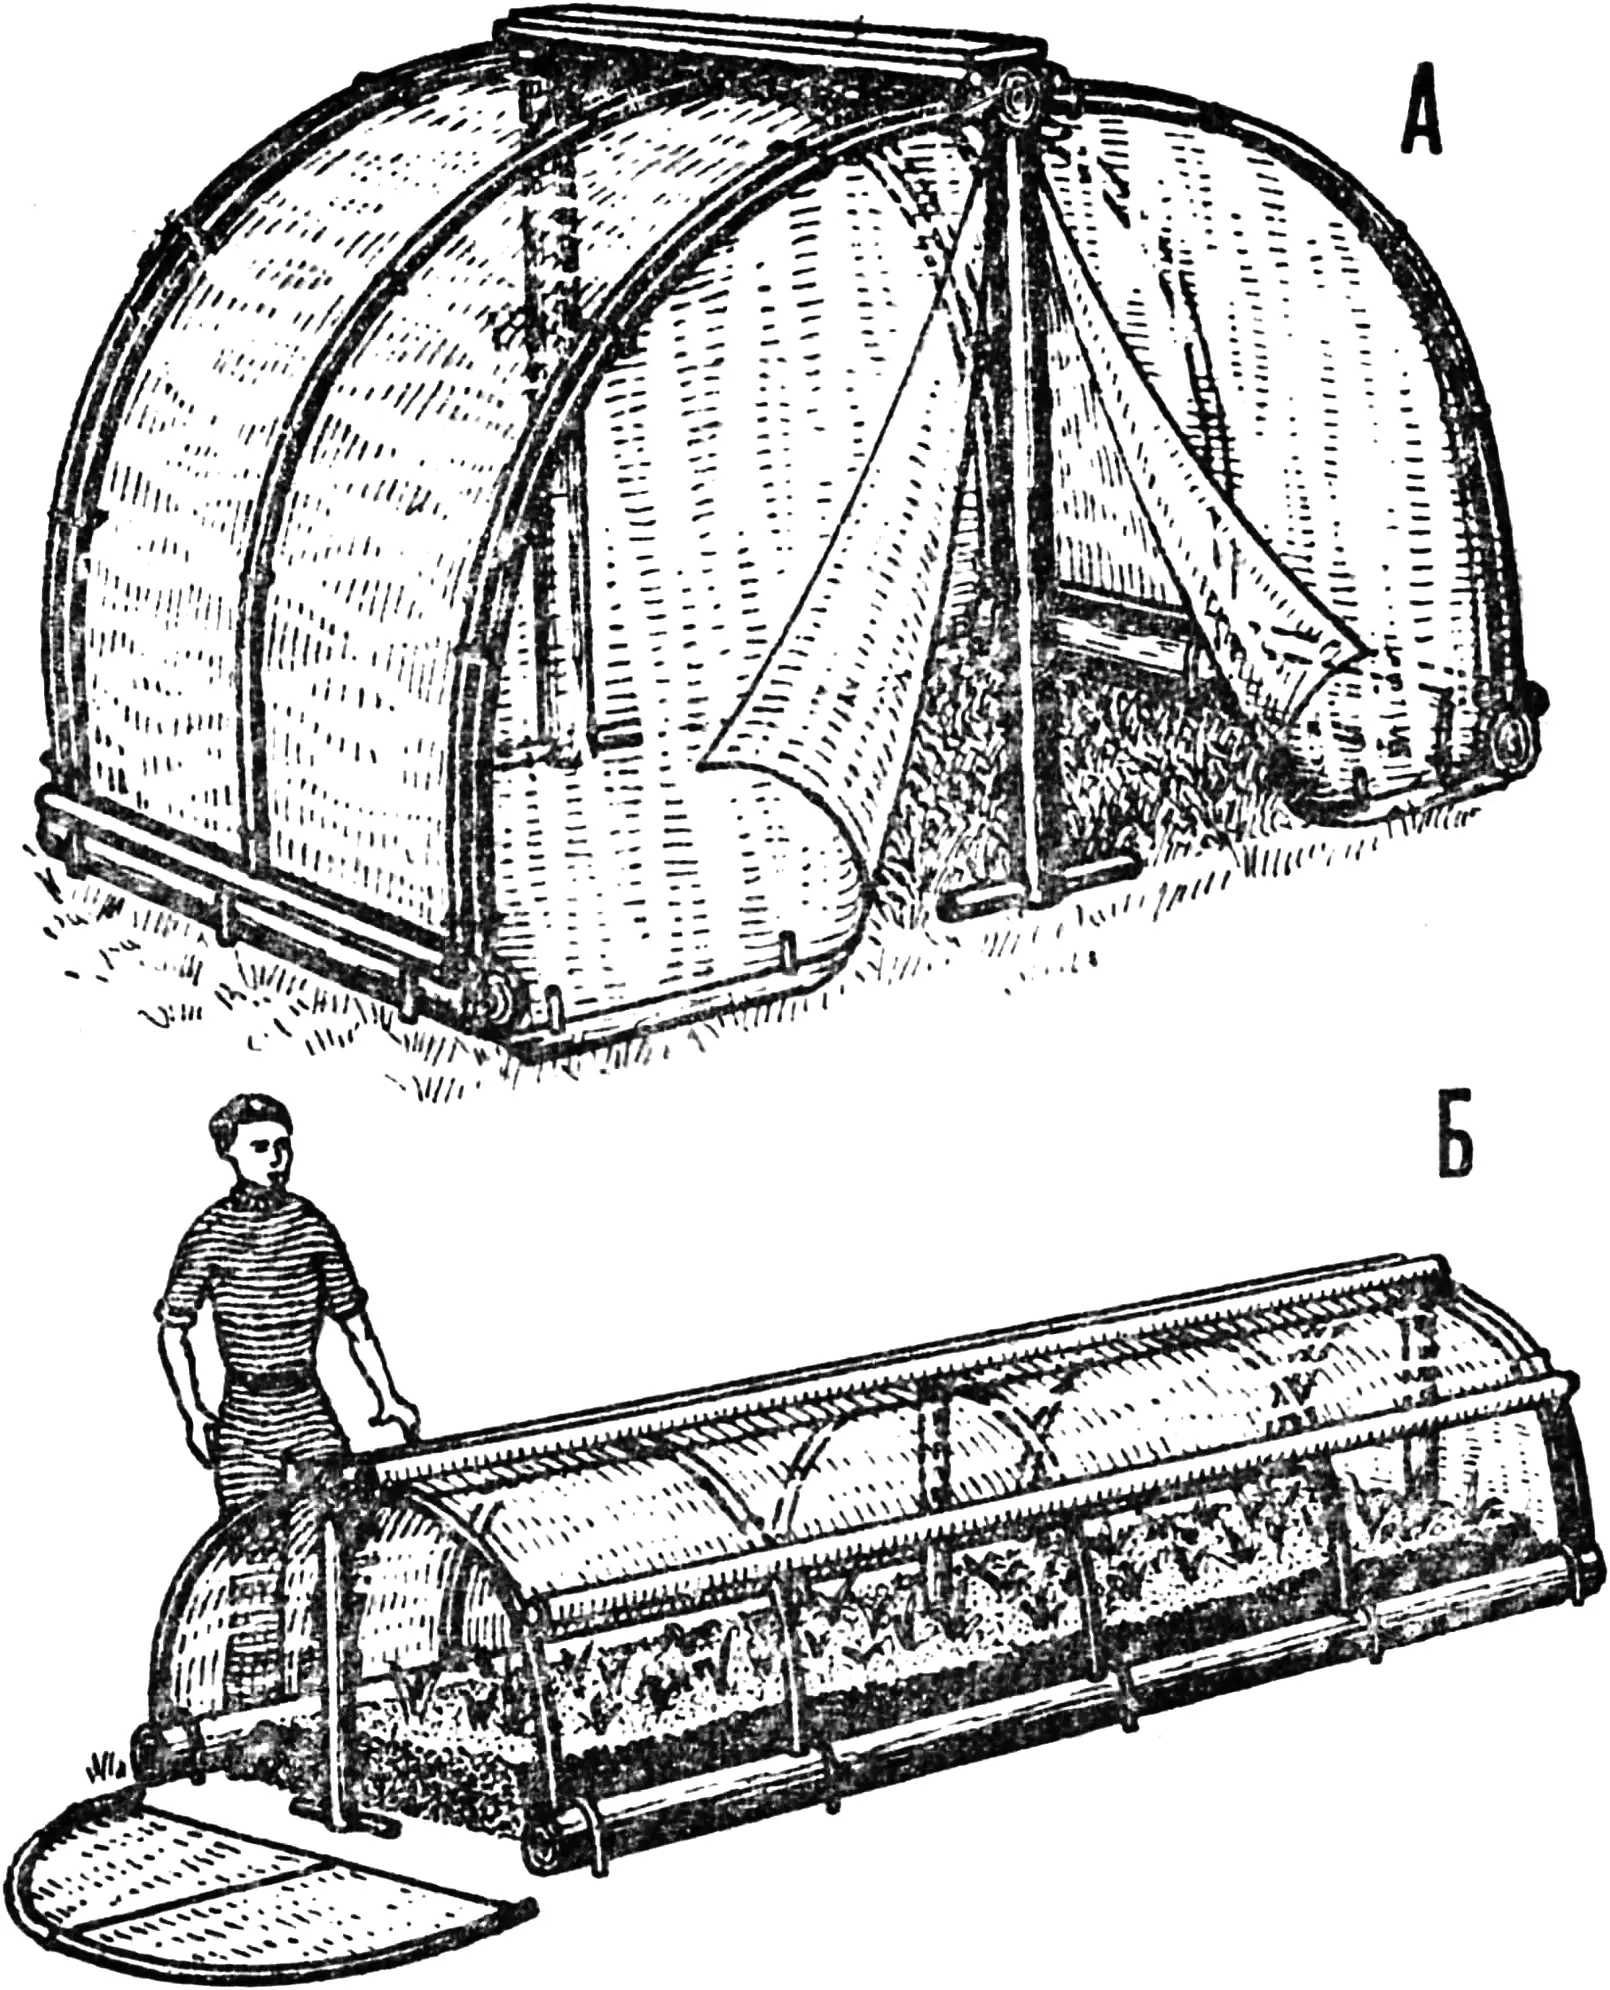
A — greenhouse, B — cold frame.
The amount of material needed depends on the chosen dimensions. Thus, for a cold frame 1 m high and 3 m long, you will need 15 m² of polyethylene film, three logs or sufficiently thick poles 3.5 m long, four stakes-supports 1.5 m long, one ridge board 3.2 m long, four metal brackets or corner pieces, a few nails, scraps of 1 mm soft wire, four poles the length of the greenhouse, and, finally, twelve flexible rods 1.5 m long for the load-bearing half-arches. If you plan a greenhouse of human height (1.8 m) and 2 m long, you will need three logs 150—200 mm in diameter and 2.2 m long for the longitudinal ties, three logs of the same diameter 2.5 m long for support stakes, ten rods for the half-arches 25—30 mm in diameter and 2.9 m long. With sectional construction, the cold frame can be extended as far as the size of the plot and the available materials allow.
It is advisable to begin work by preparing the longitudinal frame members. In each log or pole, drill holes for the flexible rods with a brace (see the drawing). Also make three saw cuts in each for clamp brackets. Then proceed to prepare the support posts. From the top edge of the post, measure off a distance equal to the height of the greenhouse and drill a through hole for the stop-limiter; sharpen the lower end of the post. Treat the ends of the flexible rods on both sides so that they enter the lower and upper holes of the longitudinal ties without much effort, yet tightly enough. Now you can begin assembling the main frame.
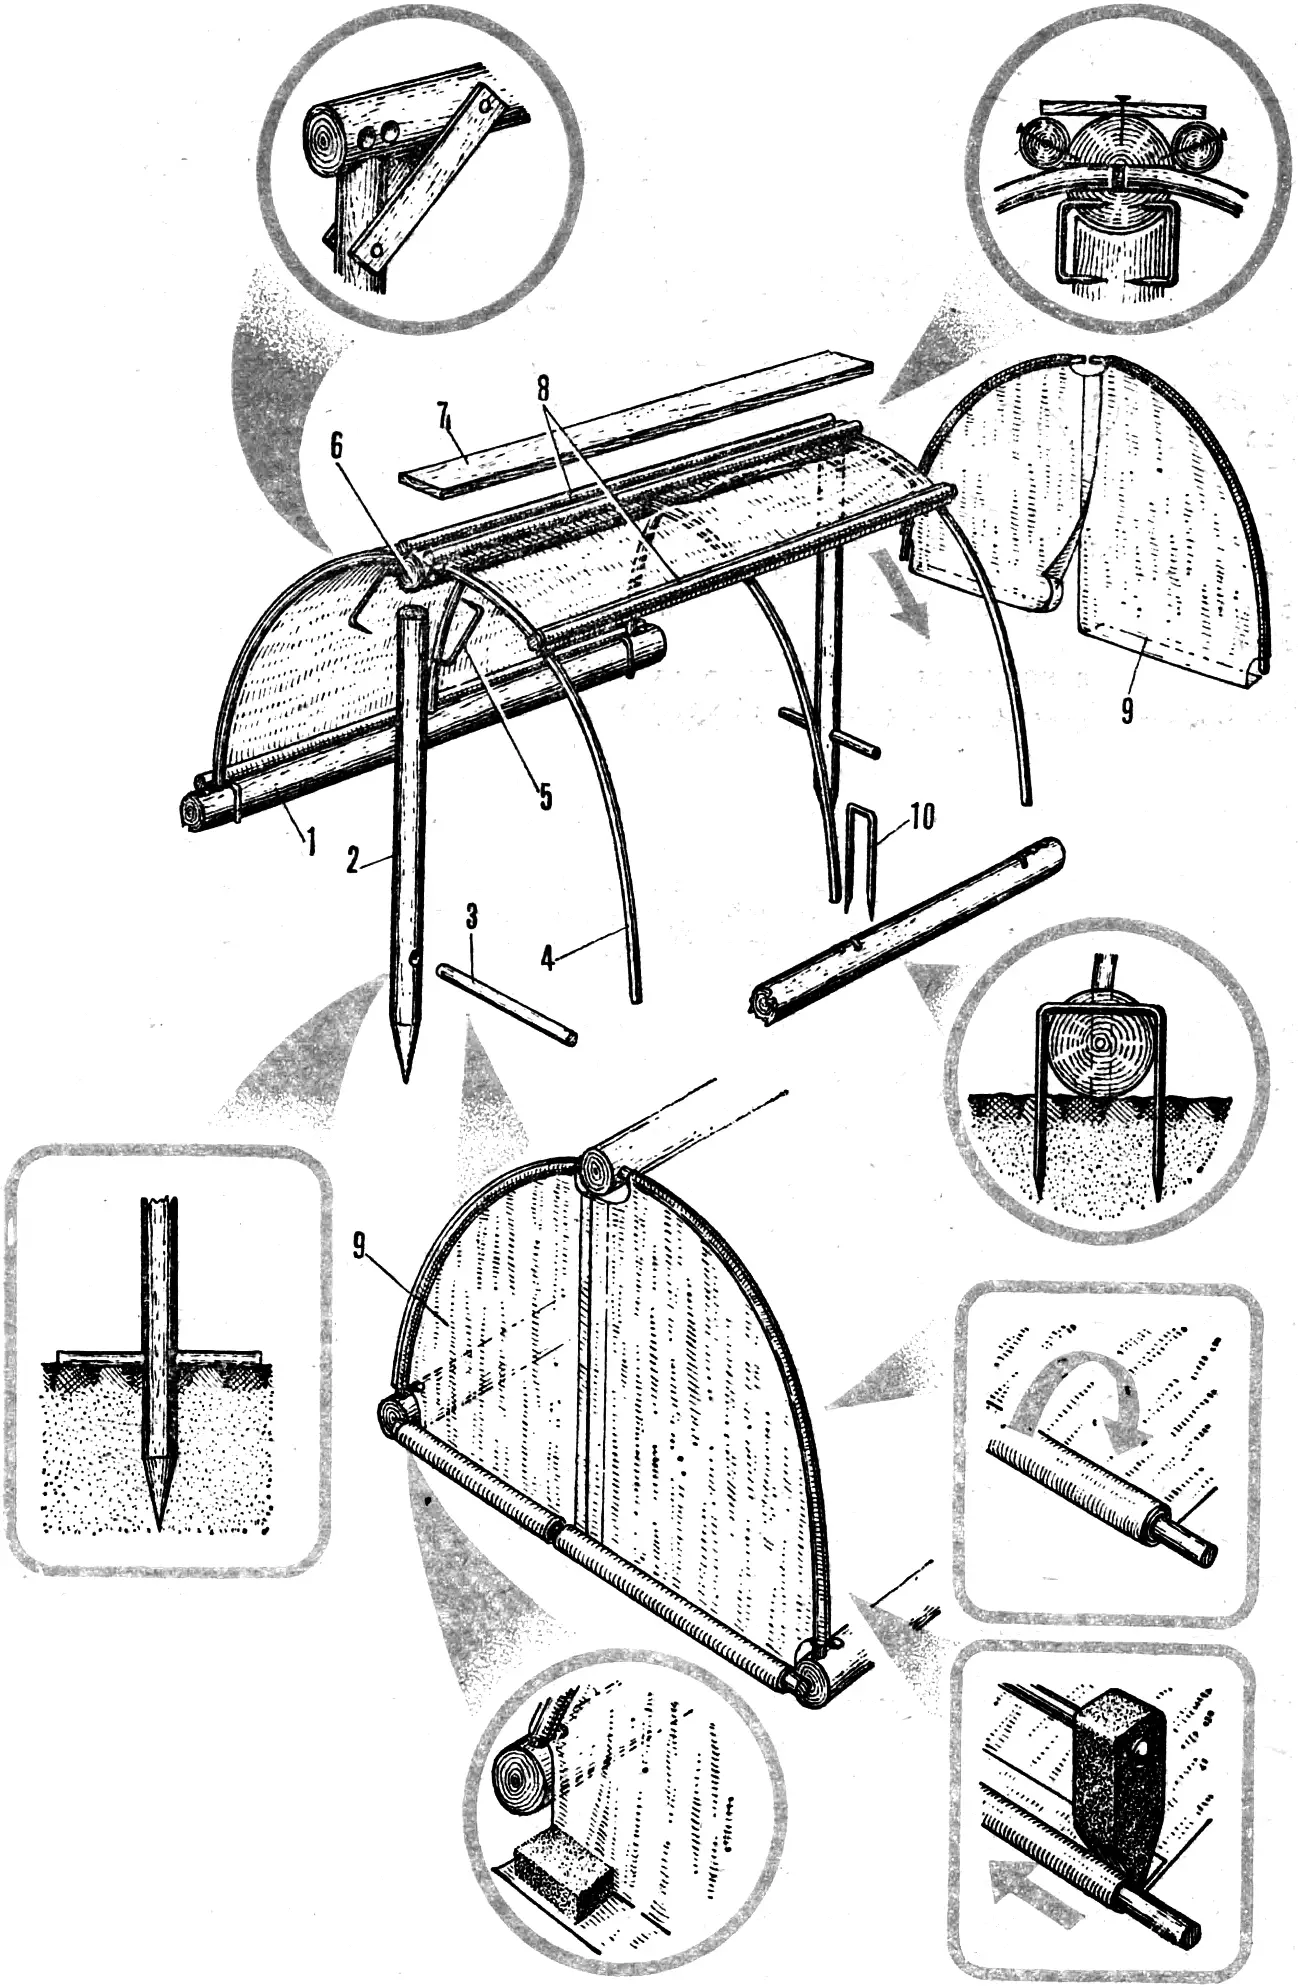
1 — lower longitudinal log, 2 — support post, 3 — stop-limiter, 4 — flexible rod, 5, 10 — clamp brackets, 6 — upper longitudinal log, 7 — ridge board, 8 — longitudinal poles, 9 — end walls.
Having driven the vertical stake-posts into the ground up to the stop-limiter, attach one of the marked longitudinal logs to them using metal brackets or wooden strips so that the holes for the rods are strictly horizontal. Insert the flexible rods into these holes on both sides of the upper longitudinal tie. After that, at a distance from the vertical posts equal to their height, lay the longitudinal logs on both sides and fix them with metal brackets (wooden stakes will also do), then, carefully bending them into an arc, insert the rods into the holes of the longitudinal logs. The remaining free holes at the edges of the logs serve for attaching the end walls, but more about that below.
The next operation is covering the frame with polyethylene film. Wind the required amount of film onto a long pole, wrap the free end of the film twice around a second pole of the same length, and nail it to the upper part of the frame (see the drawing). Unwinding the film, lay it over the half-arches down to the lower longitudinal log and secure it with nails. After covering both sides of the greenhouse with film, cover the joint between the poles with a ridge board so that water does not collect there.
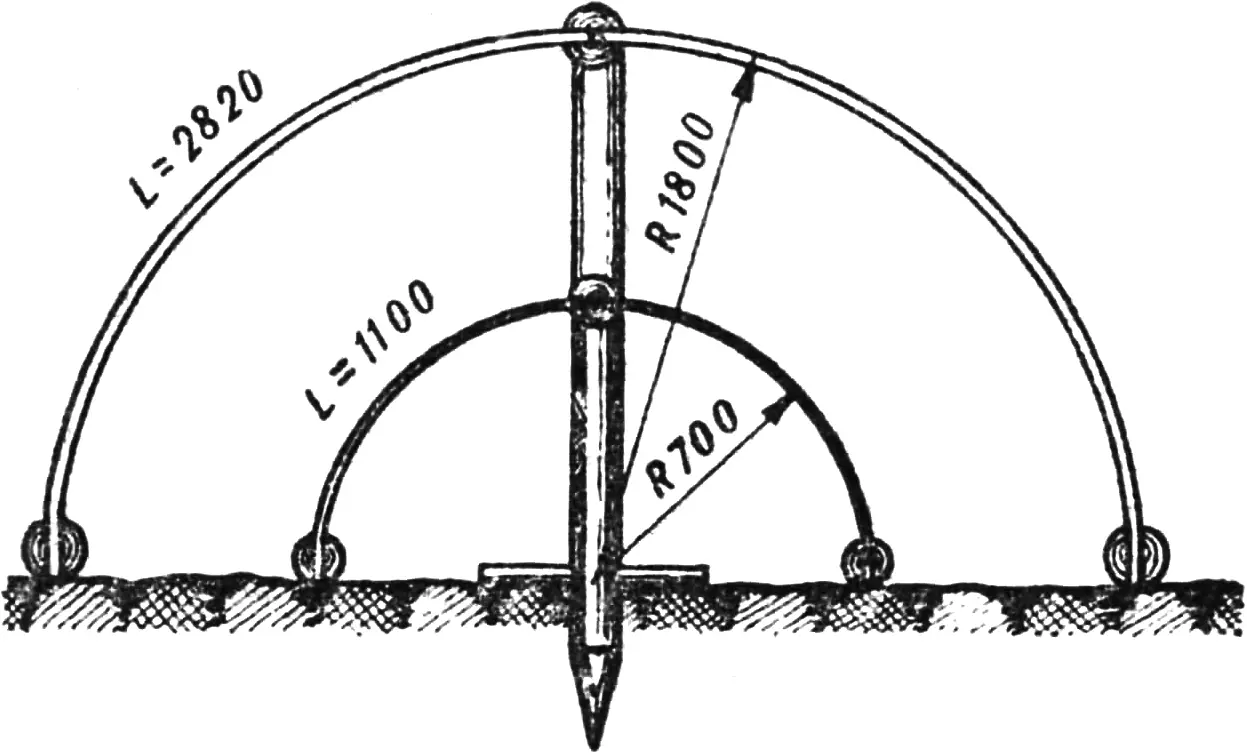
Prepare the end walls of a low cold frame from plywood or boards. High greenhouses are more difficult. In that case, I recommend making the end walls as follows: prepare flexible rods (the same as for the frame half-arches), wrap them in two layers of polyethylene film, and secure them at the edges with small nails; then cut a notch in the film for the upper longitudinal tie with scissors and, carefully bending the rods, insert them into the holes of the lower longitudinal logs. Notches for the longitudinal logs must also be made in the lower corners of the end wall. Both half-walls should be made so that they overlap each other by 100—150 mm. I fastened the half-walls using 1 mm soft wire, connecting two adjacent half-arches — of the end wall and of the load-bearing frame. The remaining film at the bottom can be wound onto a stick, a pipe, or simply weighted down, for example, with a brick. Note that one of the greenhouse walls should preferably be fixed; therefore the film should be wrapped around the half-arch and welded with a soldering iron along its entire length.
So, the main work is finished. All that remains is to carefully check all the film joints so that in windy weather no “sail effect” occurs at loosely joined spots, which is clearly undesirable.
In conclusion, I will add that a similar structure can also be used as a temporary rain shelter for vegetables and fruit during harvest.
“M-K” 4’87, M. SIMAKOV
Recommend to read
 PHYSICAL TEREMOK
Boys and girls older — of those with parents engaged in morning exercises and Jogging successfully perform various exercises on the "adult" gymnastics cross-complexes. But for children... FLYERS COME IN HANDY
In any directory gardeners will find the Council to bend to the ground the raspberries for the winter, and, as a rule, linking Bush with Bush. I modified this bitch-flyer: quickly,...
