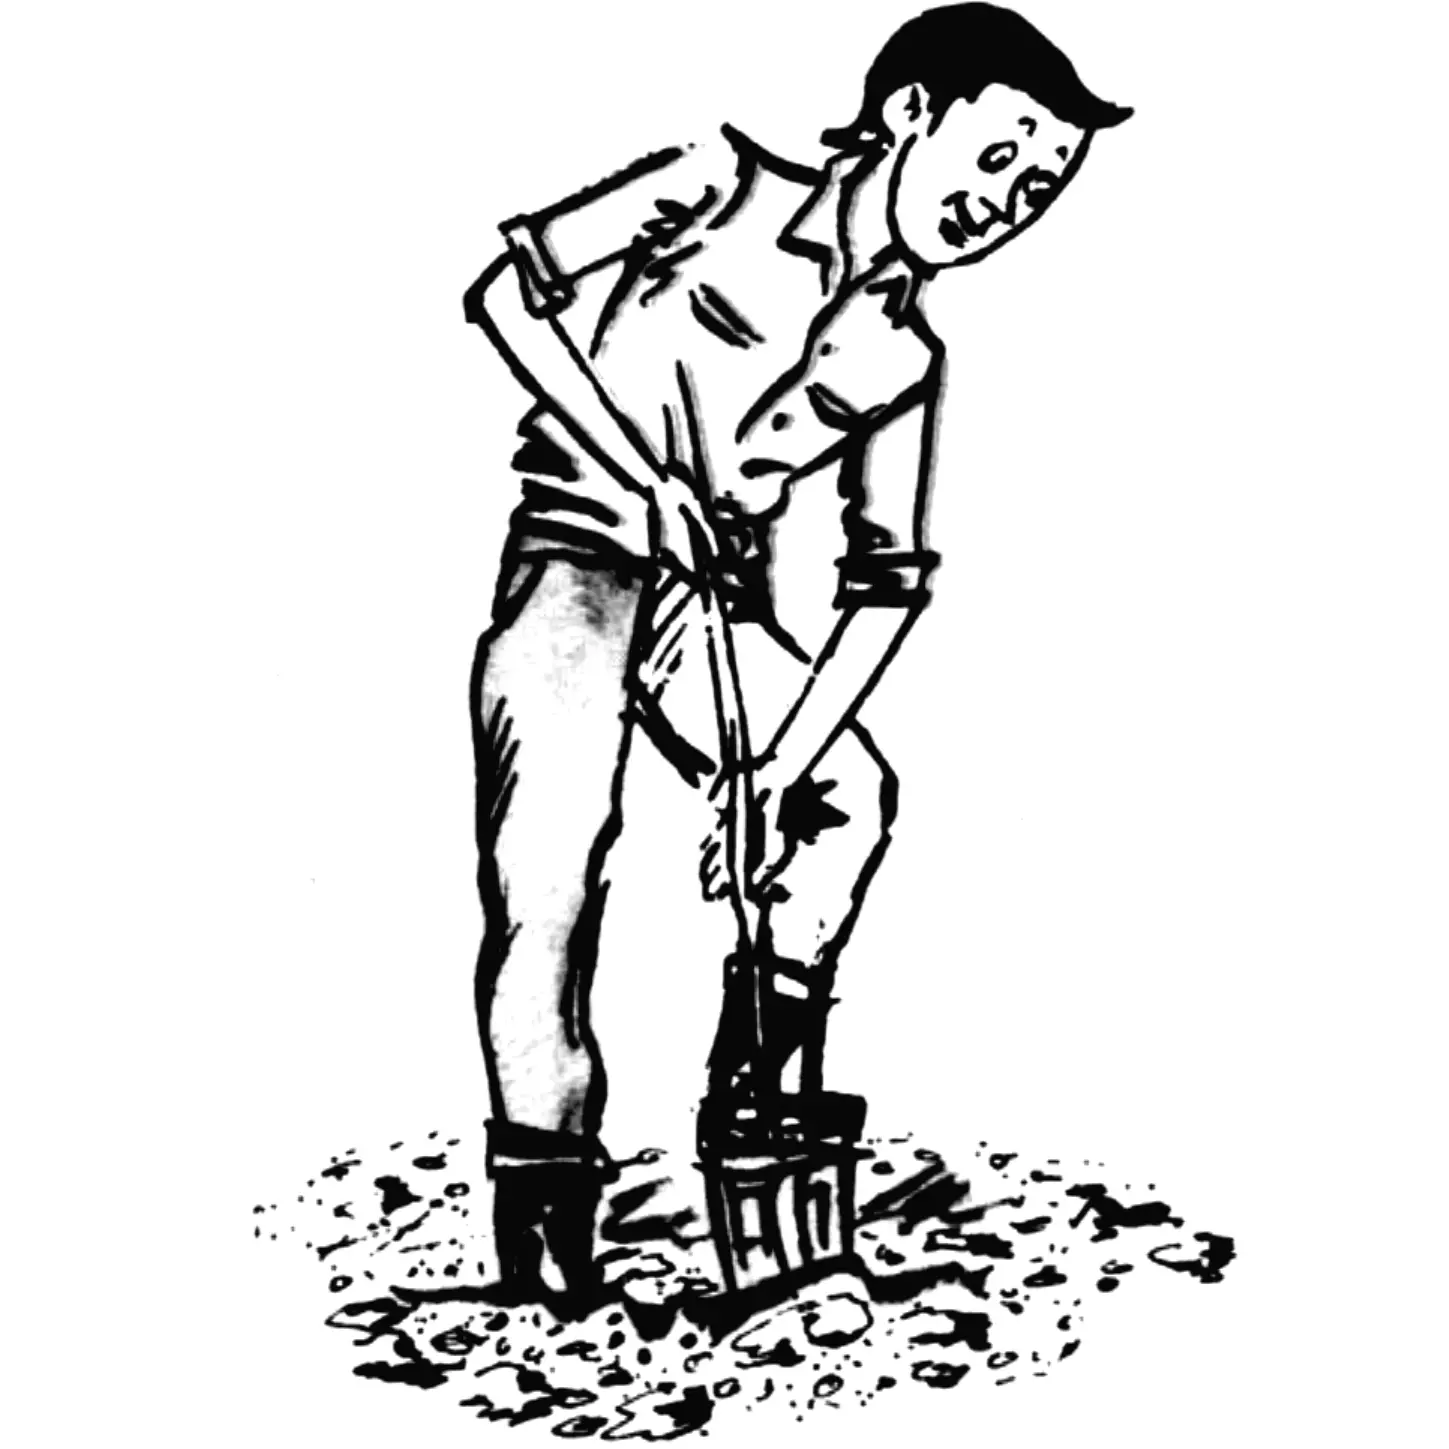
When people want to emphasize that someone has done a great deal of work, searching for a fitting comparison, they involuntarily turn to the hard labor of digging the earth and say: “They’ve shoveled so much!” Then everything becomes clear at once, and memories of stubborn soil, an aching back, and blisters on the hands are sure to come up…
Yes, digging a plot with an antiquated shovel is not for the weak. Especially exhausting is lifting the blade-bayonet with a cut sod of soil. After all, you come face to face with the inexorable laws of physics, straining to overcome school basics, when a mass of 6…7 kg acts on a lever arm of 0.6…0.7 m.
The lightweight shovel (LS) I propose makes it possible to reduce labor by two to three times. Moreover, not only thanks to the frame bayonet, which has a small contact area with the sod, but also thanks to an auxiliary clod-breaker blade, a convenient footrest-stop, and an optimally shaped handle.
Even a beginner can make an LS, let alone experienced DIY-ers. No scarce or expensive parts and materials are needed. Welding operations are reduced to a minimum. And simple tools—a cold chisel, a hammer, a drill with an 8.2 mm bit, a file, and a hacksaw—can be found in almost every home.
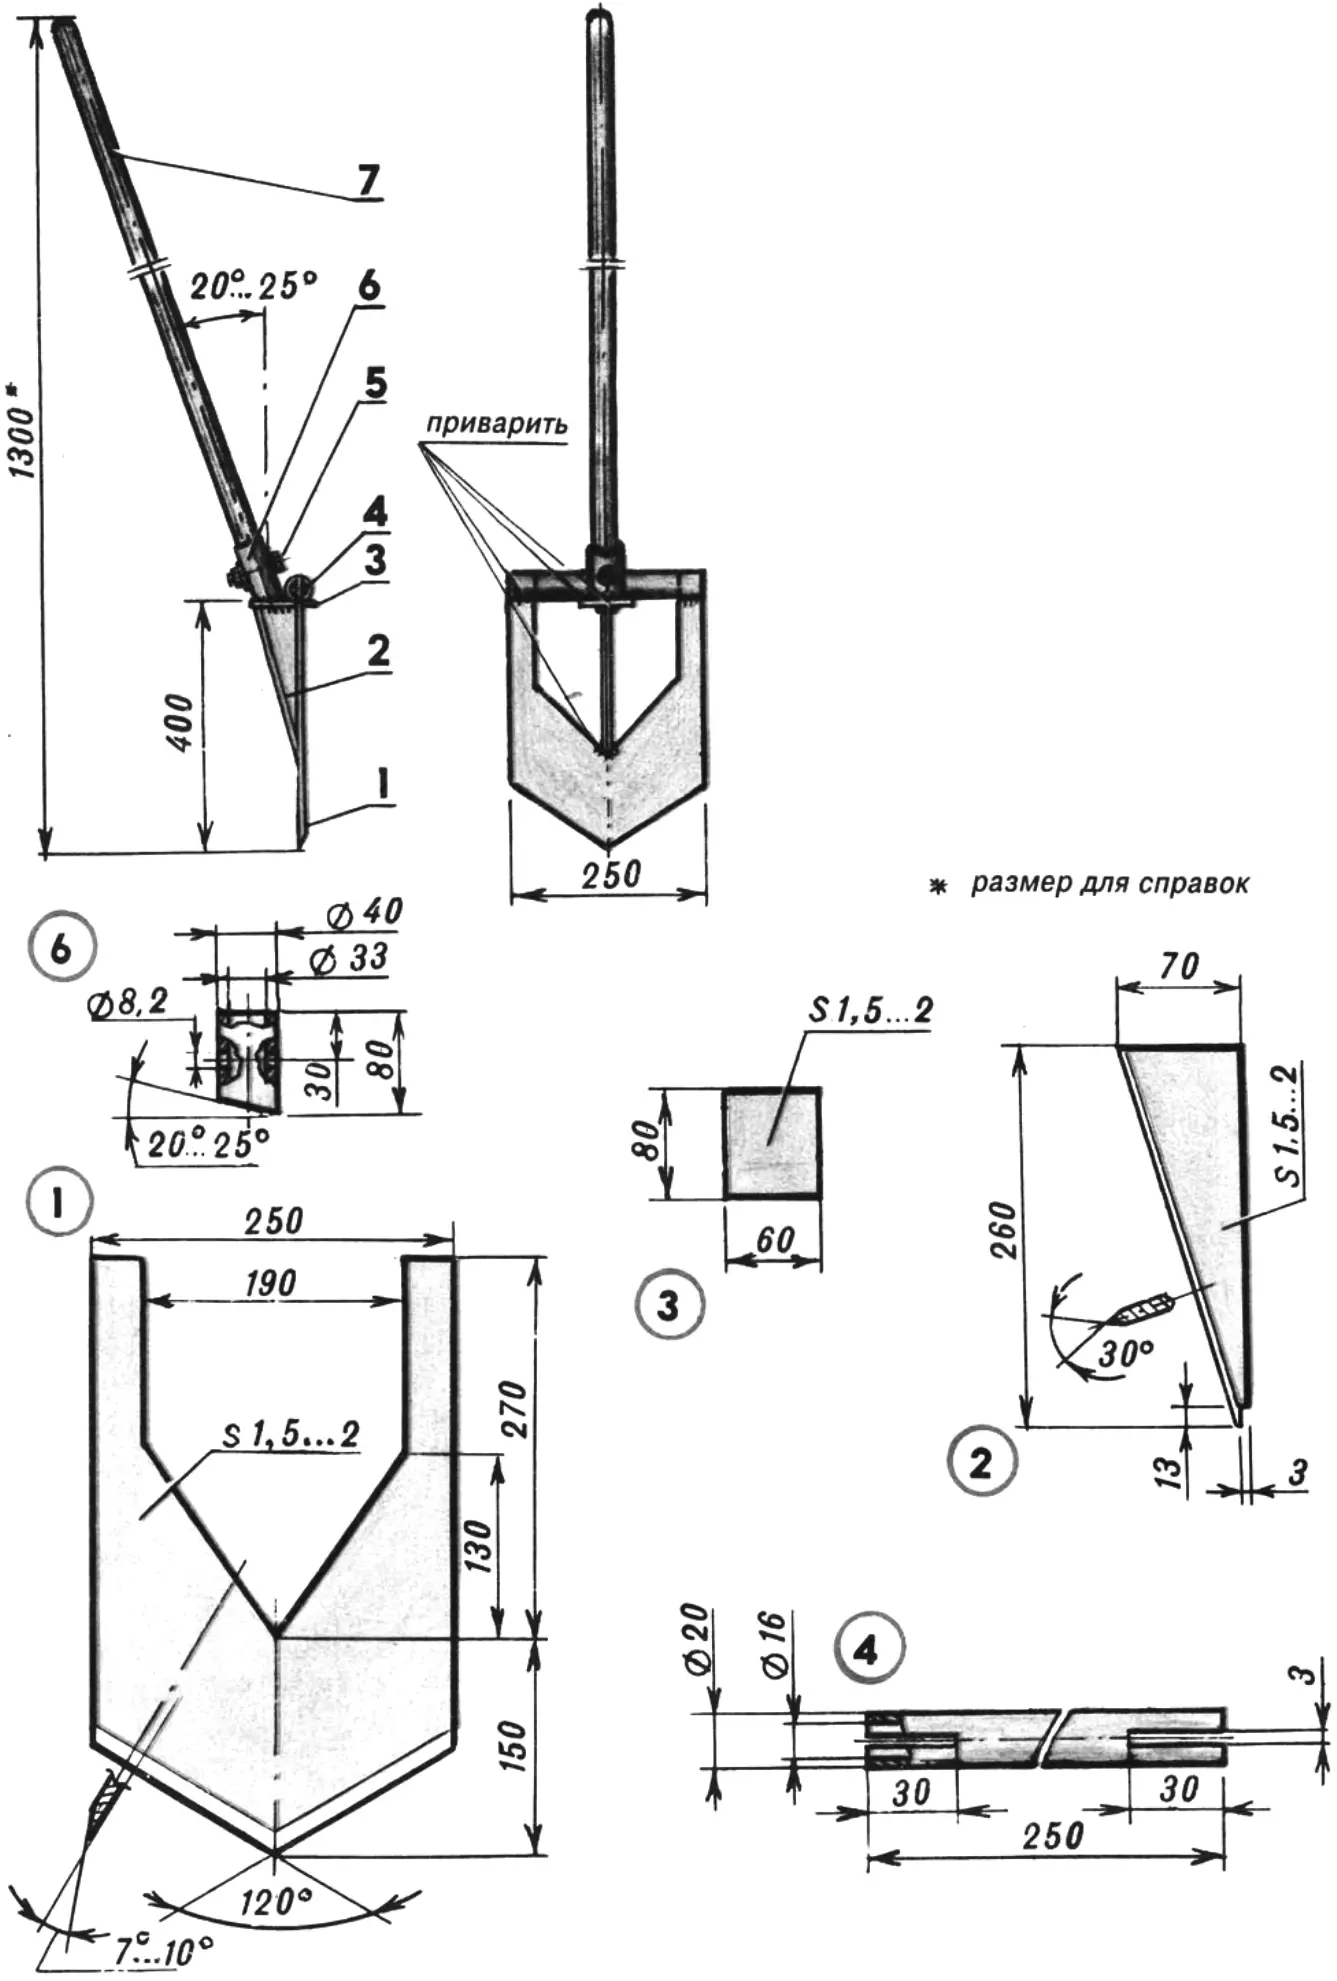
1 — frame bayonet, 2 — clod-breaker blade, 3 — stop, 4 — footrest, 5 — M8 bolt with nut and two washers, 6 — sleeve, 7 — handle.
Where to start? At least with cutting blanks from sheet steel so that, after the appropriate machining, you get the needed parts (items 1, 2, and 3). Remove the burrs with a file and sharpen the blade edges. Then make the sleeve and the footrest. Use pipe sections of the sizes shown in the drawing as blanks for them. One end of the sleeve must be cut at an angle—its value largely determines the ergonomic characteristics of the whole shovel—and 30 mm from the other end drill a hole for an M8 bolt to secure the handle reliably.
As for the footrest, make it symmetrical, with a saw-cut at both ends into which you insert the sides of the frame bayonet and then rigidly fix them with a weld seam. Weld the remaining metal parts of the shovel as well (except for the aforementioned bolt with nut and washers). Clean the seams and coat them with nitro putty. Plane the handle from hardwood and install it in the sleeve.
Working with the LS somewhat resembles riding a wheelchair with a lever hand drive. The digger first drives the shovel bayonet into the ground vertically (against the footrest). At the same time the operator holds the handle in an outstretched arm in front of him. Pulling the handle toward himself and thereby “setting” the initial angle of 20…25°, he easily tears off a fairly large sod of soil.
As the LS moves upward, the sod breaks up on the auxiliary clod-breaker blade and on the edges of the frame bayonet. Under gravity, most of the crumbling lumps fall into the hole that has not yet fully opened, while a small amount of loosened soil is carried to the surface by the bayonet frame itself. Then the work cycle is repeated.
“Modelist-Konstruktor” No. 9’97, S. MOLOTKOV
Recommend to read
 MICROVIDEO POLYARNIK
Central to the exhibition NTTM-78, dedicated to the XVIII Congress of the Komsomol, and the 60th anniversary of the Komsomol, very popular among the visitors enjoyed the section... ON TAKEOFF – A ROCKET PLANE
We offer our readers a model class S4B (raketoplan) designed by the famous Soviet athlete A. by Karapinar common aerodynamic configuration "duck". She translates from planning mode to...
