Bread baked in a village oven needs no advertising: it is superior in every way. However, storing bags of flour is troublesome; keeping grain is much easier. Therefore, it is necessary to have the ability to grind grain at home without going to a flour mill. Moreover, it should be possible to produce both fine and coarse flour. In rural households, it is often necessary to peel grains, process sunflower seeds, crush and grind chalk, salt, and various grain waste. And preparing animal feed on your own farm is the dream of every villager, as the number of livestock and poultry in private households increases day by day.
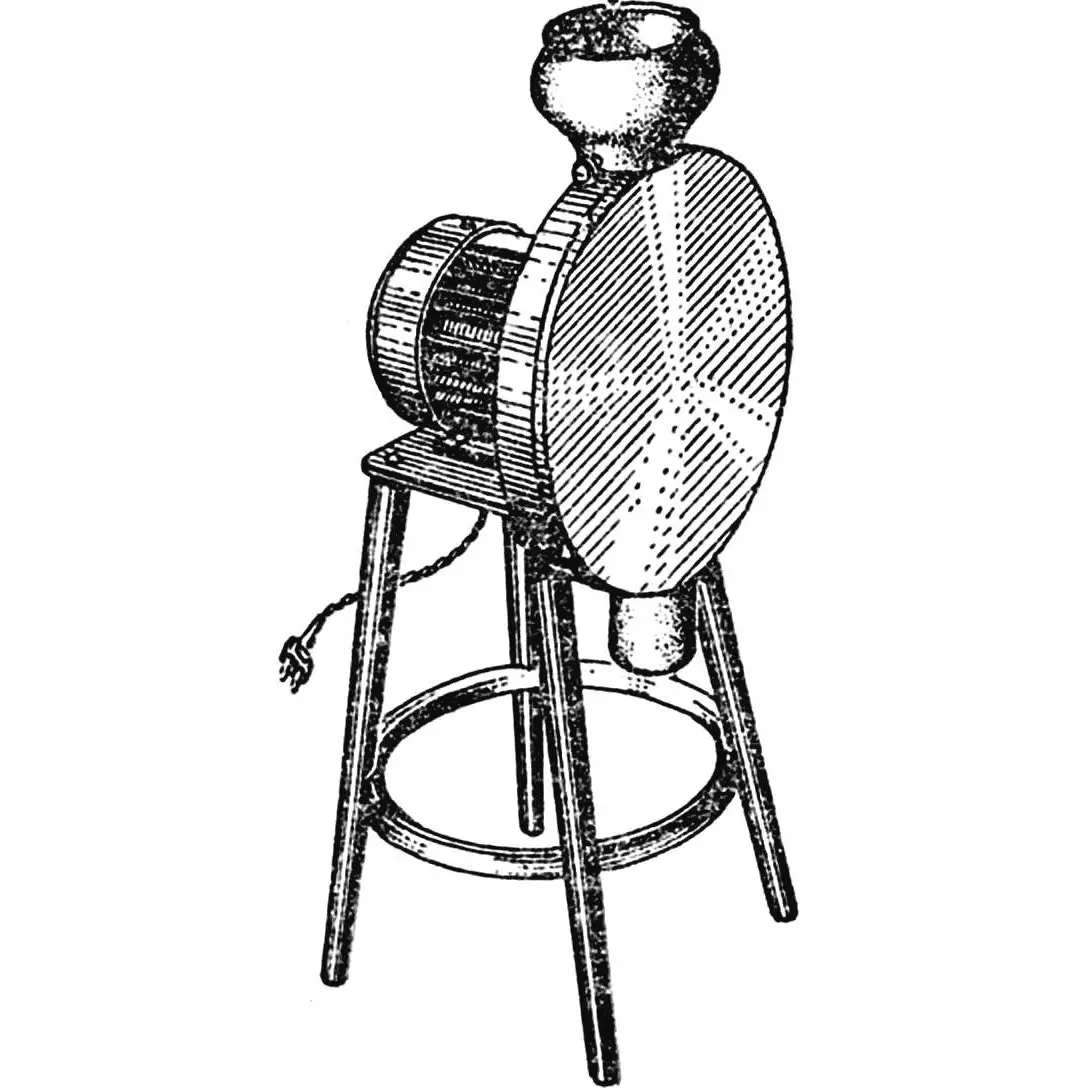
This is exactly the kind of mechanism I built for myself, and I called it a grain crusher-mill. The main working parts are the rotor and the stator. They function like millstones — the first rotates inside the second. Overall, my mill looks like this. On a wooden stool sits an electric motor with a power of 1 kW, 220 V, single-phase, rewound from a decommissioned three-phase unit. The mill itself is attached to it with brackets so that the bearing in its central hole slides onto the motor shaft: this shaft drives the rotor, which rotates at up to 3000 rpm.
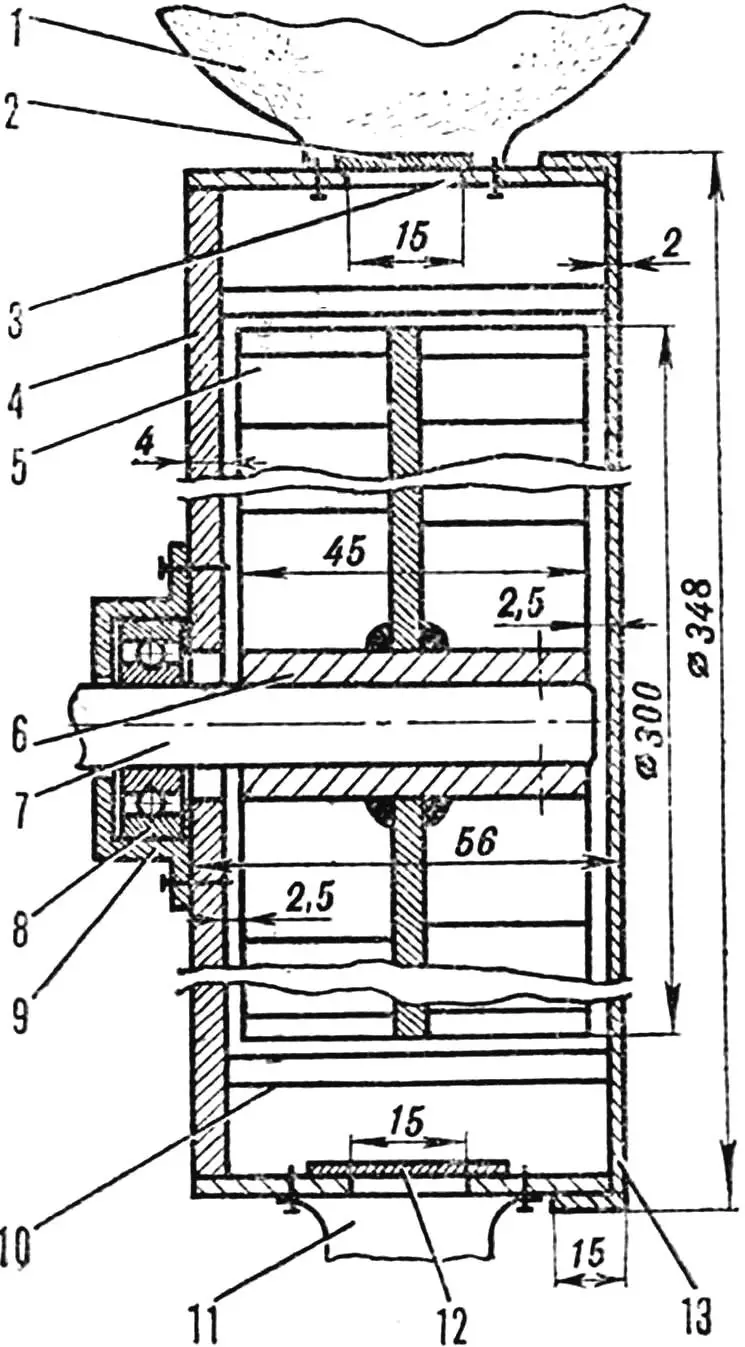
1 — grain hopper, 2 — hopper gate, 3 — intake opening, 4 — stator body, 5 — rotor, 6 — sleeve, 7 — motor shaft, 8 — bearing, 9 — bearing housing, 10 — stator brackets, 11 — dust-proof sleeve, 12 — sleeve gate, 13 — cover.
The mill body is very similar to round candy tins, 56 mm thick and Ø348 mm in diameter. The bottom of the tin with a 50 mm rim acts as the stator, while the 15 mm high lid covers the “insides.” On top of the body, a small cast-iron pot with a cut-out bottom is attached with M4 screws. Instead of the missing bottom, a sliding gate plate is installed. At the bottom, a dust-proof sleeve made of canvas is fastened with the same screws. Openings for “inlet — outlet” measuring 15×30 mm are made in the stator under the upper gate and above the dust sleeve. Through the top opening, when the gate is slightly open, raw grain enters from the pot, while through the lower opening the finished product pours out. The sleeve is strongly recommended: the ground flour won’t scatter around but will fall directly into the prepared bag or container.
The stator is made of a steel strip 2 mm thick and 54 mm wide. It was bent into a circle, placed into a mold, and filled with aluminum at one end, forming a cup with a 4 mm bottom. Then, 20x20x50 mm brackets were cut and welded to the inner rim of the cup, leaving spaces for the windows, which made the surface ribbed. (Later I realized that the brackets could simply be fastened with screws — the effect would be the same.) A hole for the shaft was drilled in the center of the stator.

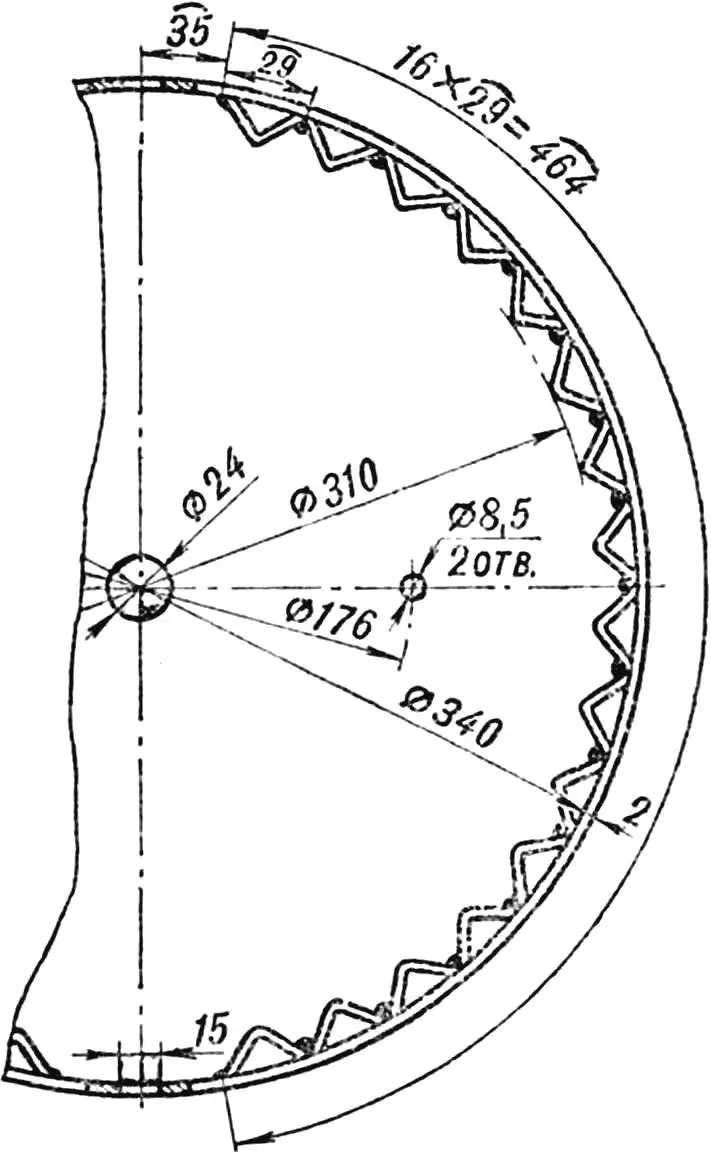
The rotor blank — a Ø322 mm circle — was cut from a 3 mm thick steel sheet. Then, a Ø300 mm circle was drawn on it and divided into 32 equal sections. At each marking point, Ø3 mm holes were drilled. Saw cuts were made radially outward to these holes, and the resulting blades were bent as shown in the drawing. In the center of the rotor, a sleeve 45 mm long and Ø28×5 mm was welded in.
During assembly, the stator was first placed on the shaft, followed by the rotor fixed with a key, and finally secured with a pin through the sleeve and shaft. The cover was attached on top with four M6 screws around the body circumference.
When operating the mill, the following procedure should be observed: fill the pot with grain and start the motor. Once it reaches speed, open the top gate and pour in a portion of the grain. Refill it as you remove flour through the bottom gate. Avoid overfilling: you will quickly get used to the rhythm. Still, constant attention is needed, since the mill’s productivity reaches nearly 5 kg/min.
As practice has shown, the quality of grinding depends on the motor’s speed and, of course, on the gap between the rotor and stator. In my design, the gap is 5 mm for peeling or crushing grain. For flour, it should be reduced to 2 mm, which requires an additional rotor with a larger diameter. Another option is to modify the drive system: remove the mill from the motor shaft and, by placing it separately, set up a belt drive with interchangeable pulleys to increase speed when producing flour.
I. SHAMOTOV
Recommend to read
 PUMP WITH CONSOLE
All cyclists know how uncomfortable to pump up the tire pump that comes with the bike. To facilitate this task, I from aluminum bar machined to the console, which allows during operation... Electronic thermometer
This device can quickly and accurately measure, for example, the temperature of a human body, water, and air. An electronic thermometer is needed by agricultural workers to determine the...
