It often happens that guides on how to build a boat yourself simply scare off beginners with such “mysterious” words as “epoxy resins,” “foam,” “fiberglass,” “bakelized” or “aircraft plywood,” etc. More experienced boaters are scared by something else: the difficulty of acquiring these materials. Meanwhile, a good boat can be built from simple materials available to everyone. The “Fish” canoe kayak that we suggest making requires only a few pine boards, one sheet of plywood, and a few nails, screws, and aluminum wire. Despite its small size, the “Fish” can easily carry two adults or three teenagers.
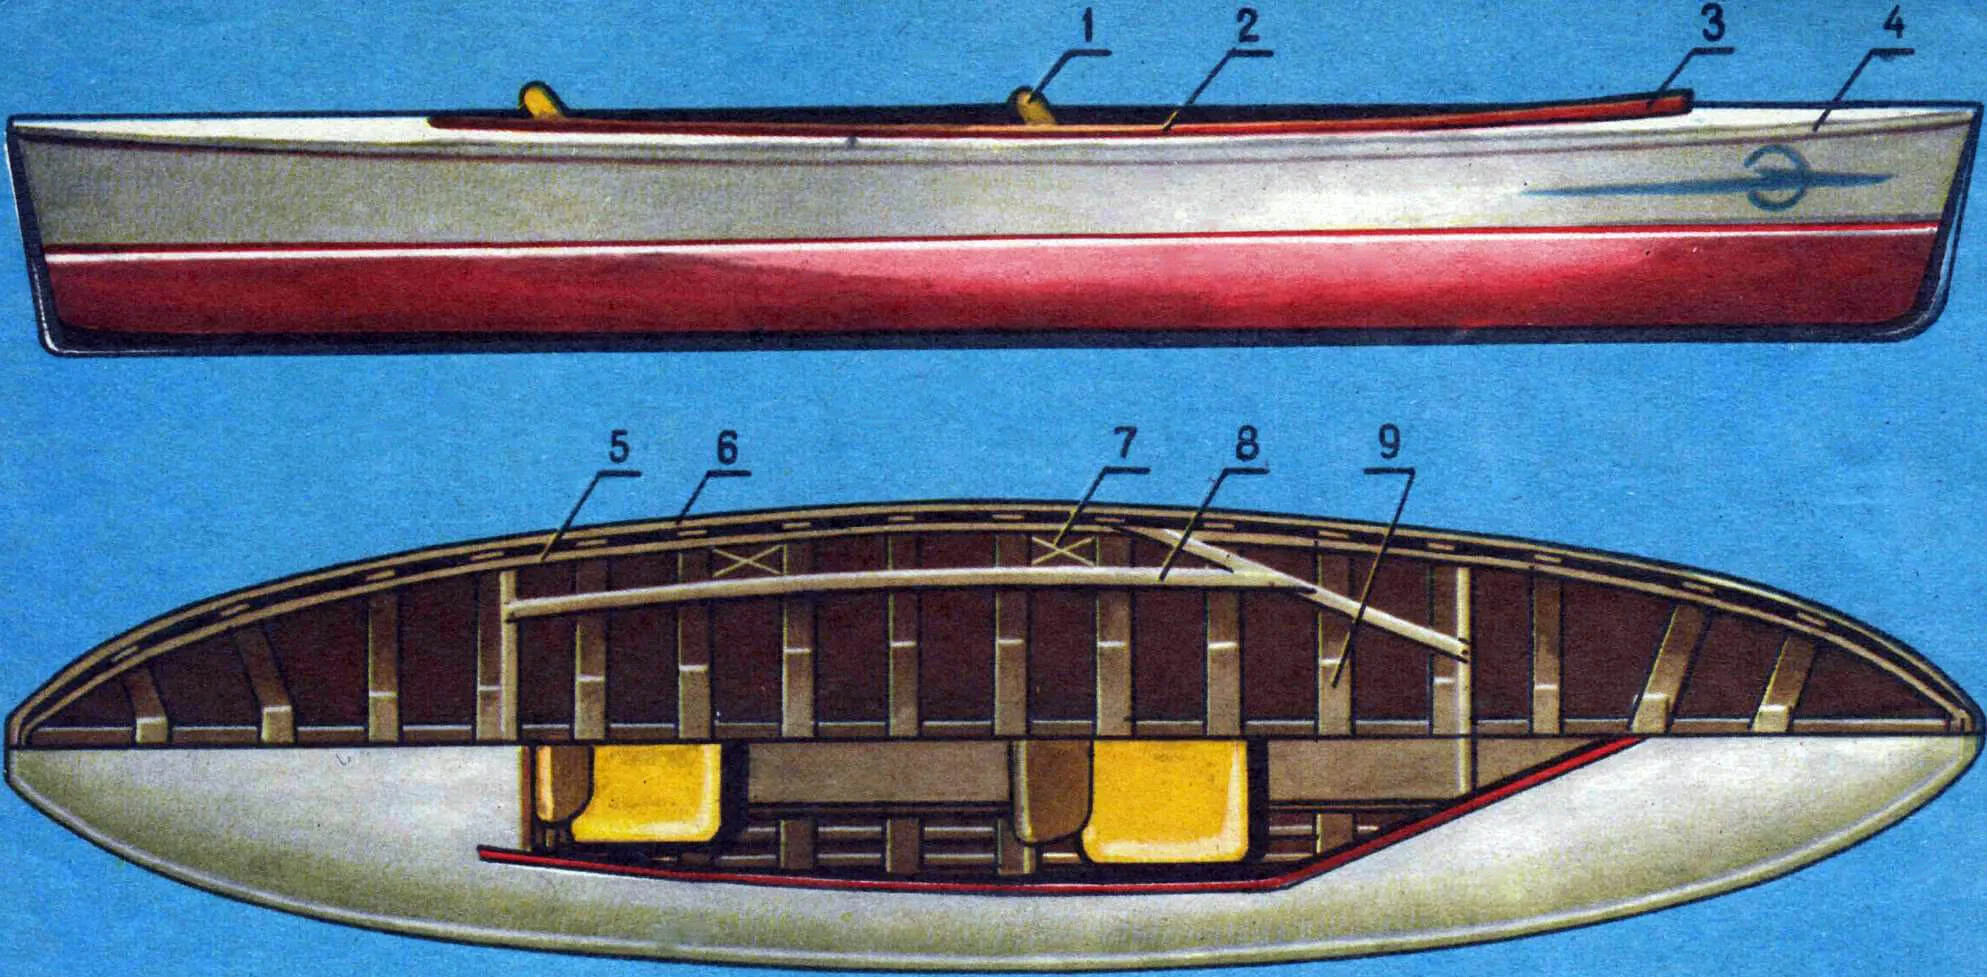
1 — seat back, material — 4 mm plywood; 2 — coaming, material — oak or pine, 16×60 mm; 3 — breakwater, oak or pine, size on site; 4 — flange, 10×30 mm; 5 — inner rubbing strip, pine, 16×30 mm; 6 — outer rubbing strip, pine, 16×30 mm; 7 — cracker, pine, size on site; 8 — carlings, pine, 16×30 mm; 9 — floor; 10 — single frame; 11 — midship weiss, pine, 16×30 mm; 12 — coaming; 13 — carlings, 14 — cracker; 15 — reinforced frame, plywood 2x4x40 mm; 16 — inner rubbing strip; 17 — stringer, pine 10×25 mm; 18 — underdeck stringer, pine 10×30 mm; 19 — flange; 20 — outer rubbing strip; 21 — connecting strip, oak or pine 16×16 mm; 22 — stern knee, 4 mm thick plywood; 23 — bow knee; 24 — connecting strip, oak or pine 16×16 mm; 25 — bow knee; 26 — inner rubbing strip; 27 — stern knee; 28 — sternpost
The main design feature of the boat is the small cross-section of the stringers and plywood frames. The relative weakness of these parts is compensated by their number (see the figure above and Fig. 1), which makes the hull somewhat heavier, but allows the use of any sufficiently strong fabrics for the sheathing (for example, tent fabric).
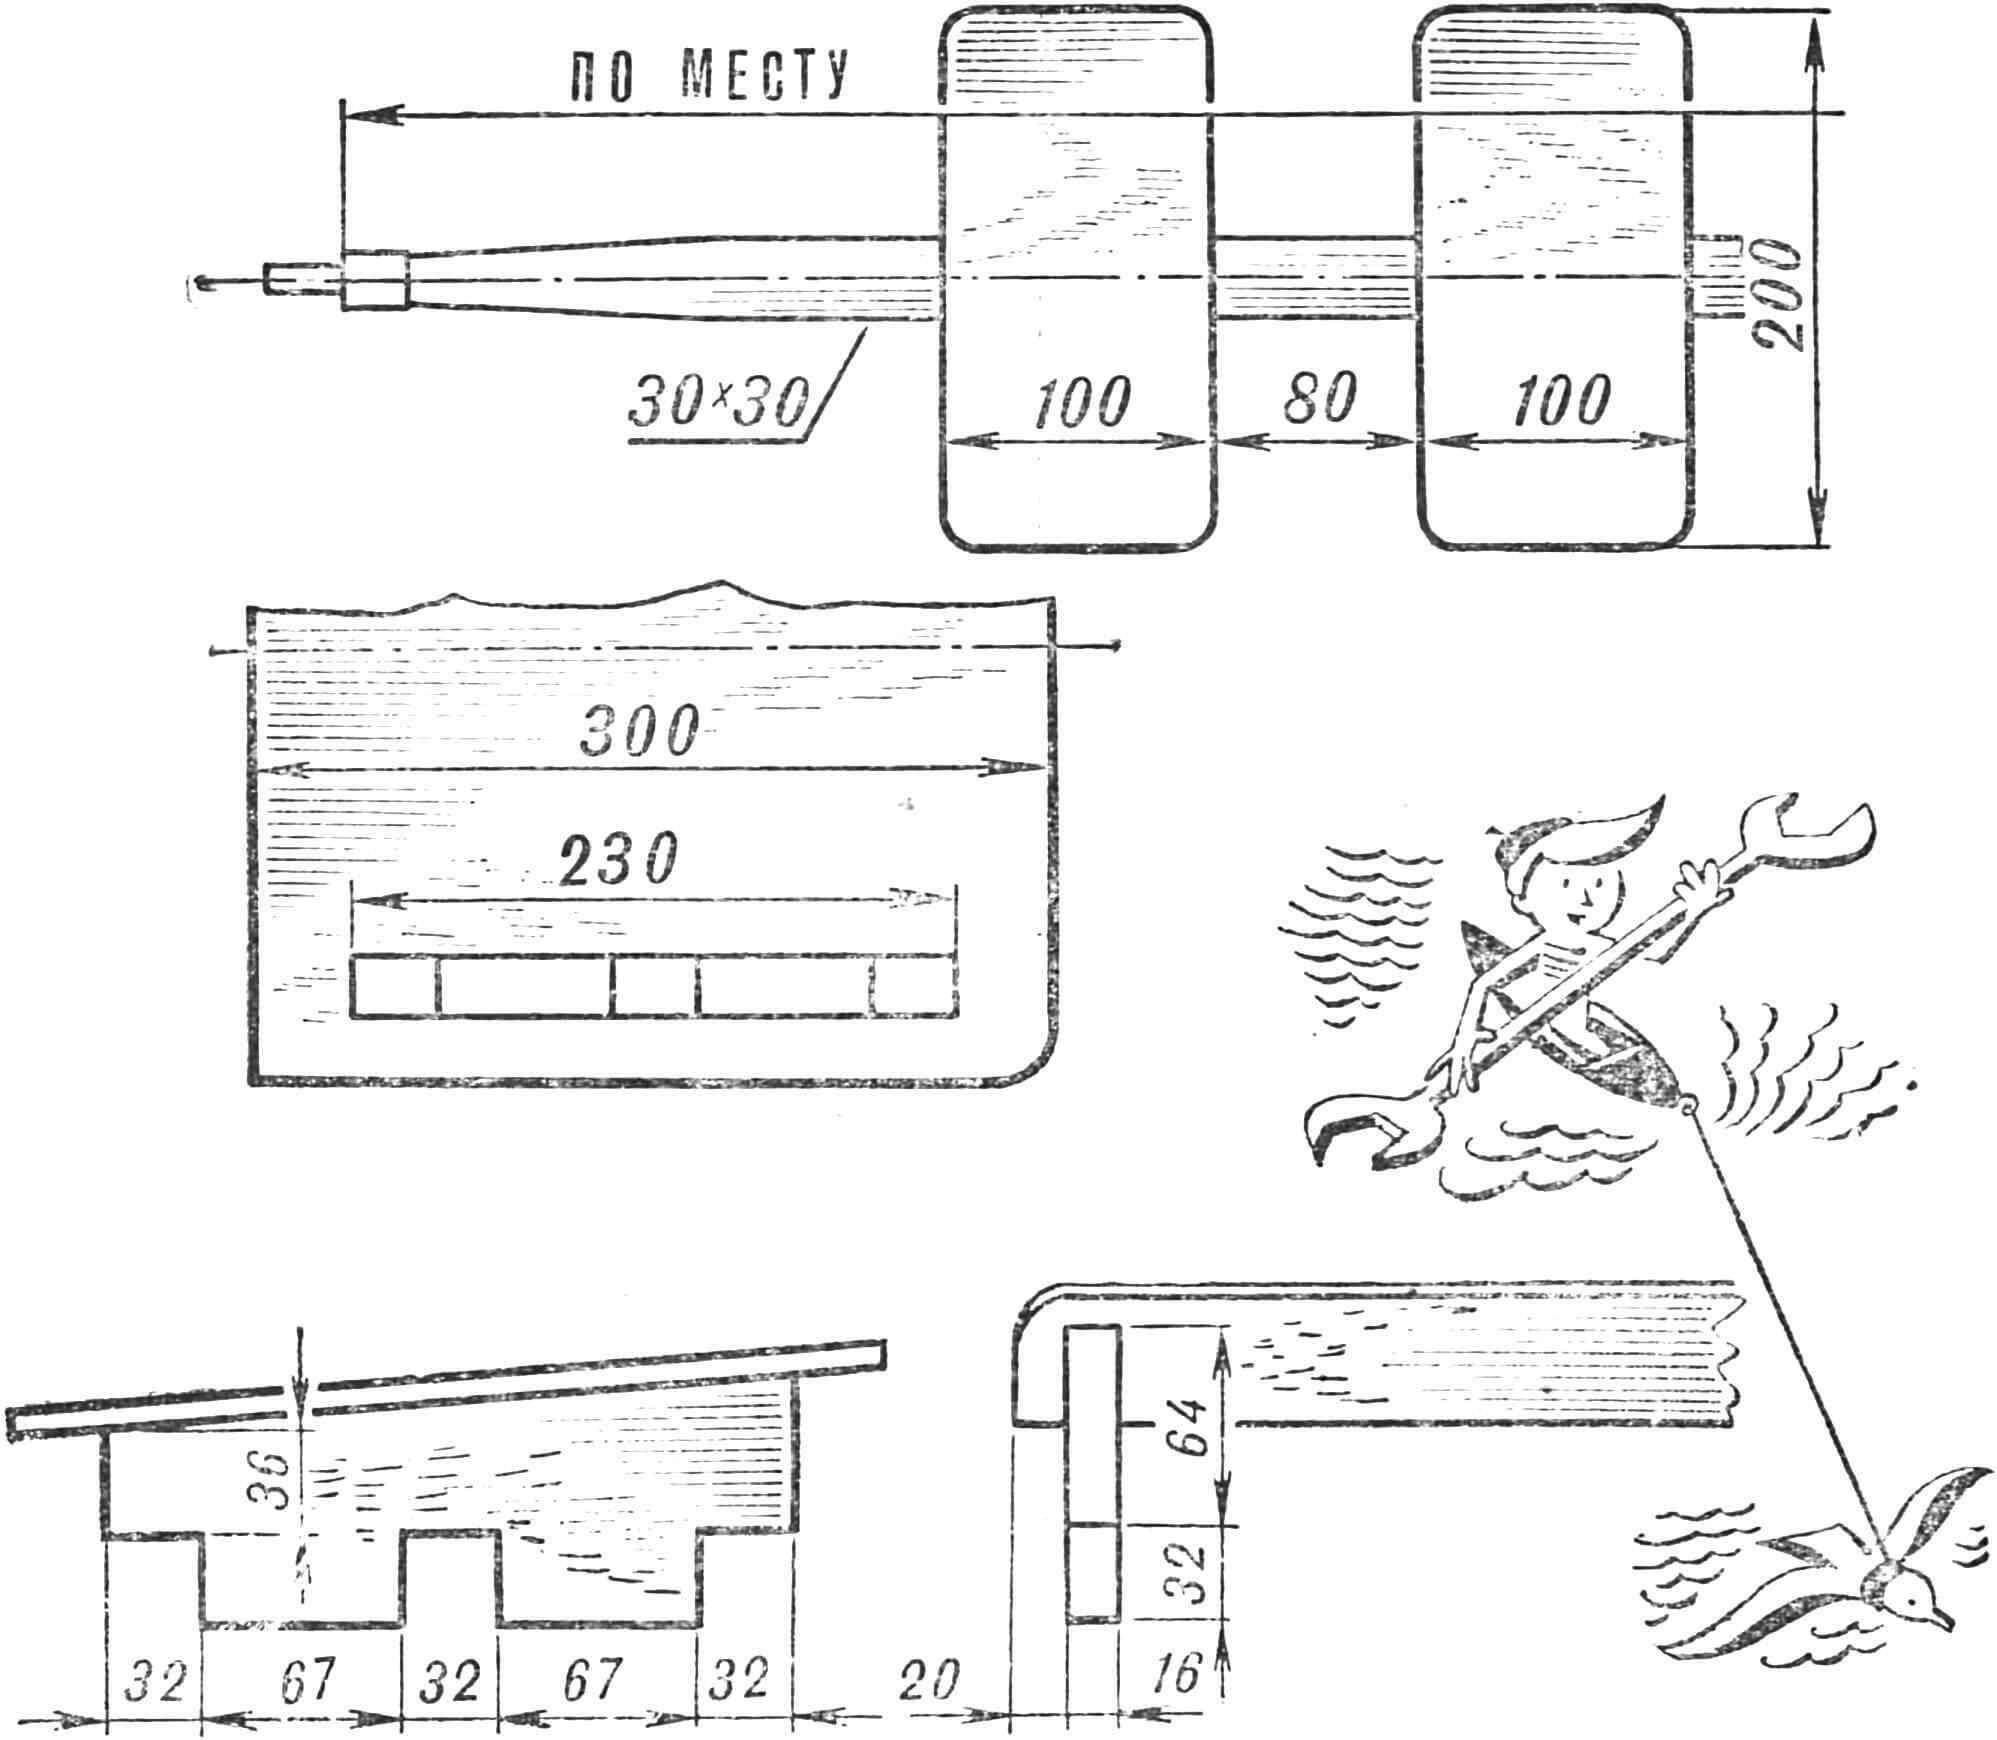
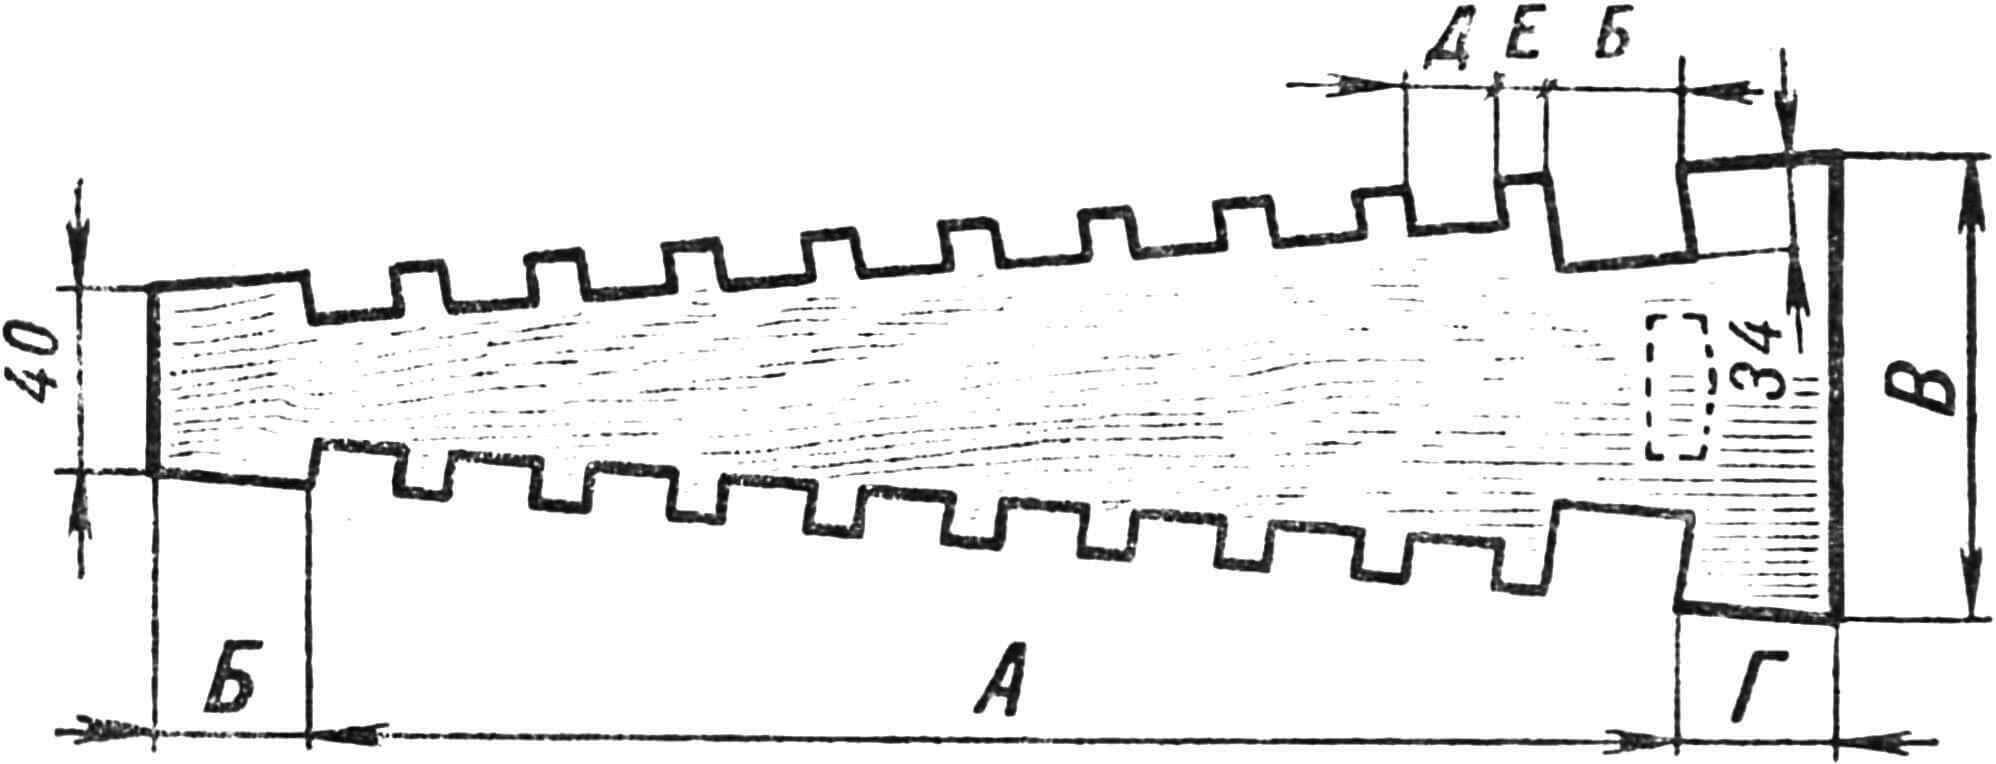
The construction of the boat begins with the preparation of the parts. The basic dimension “A” for each floor (Fig. 4) is given in Table 1. The floors must be carefully numbered to avoid errors during assembly; the numbering is from the bow to the stern.
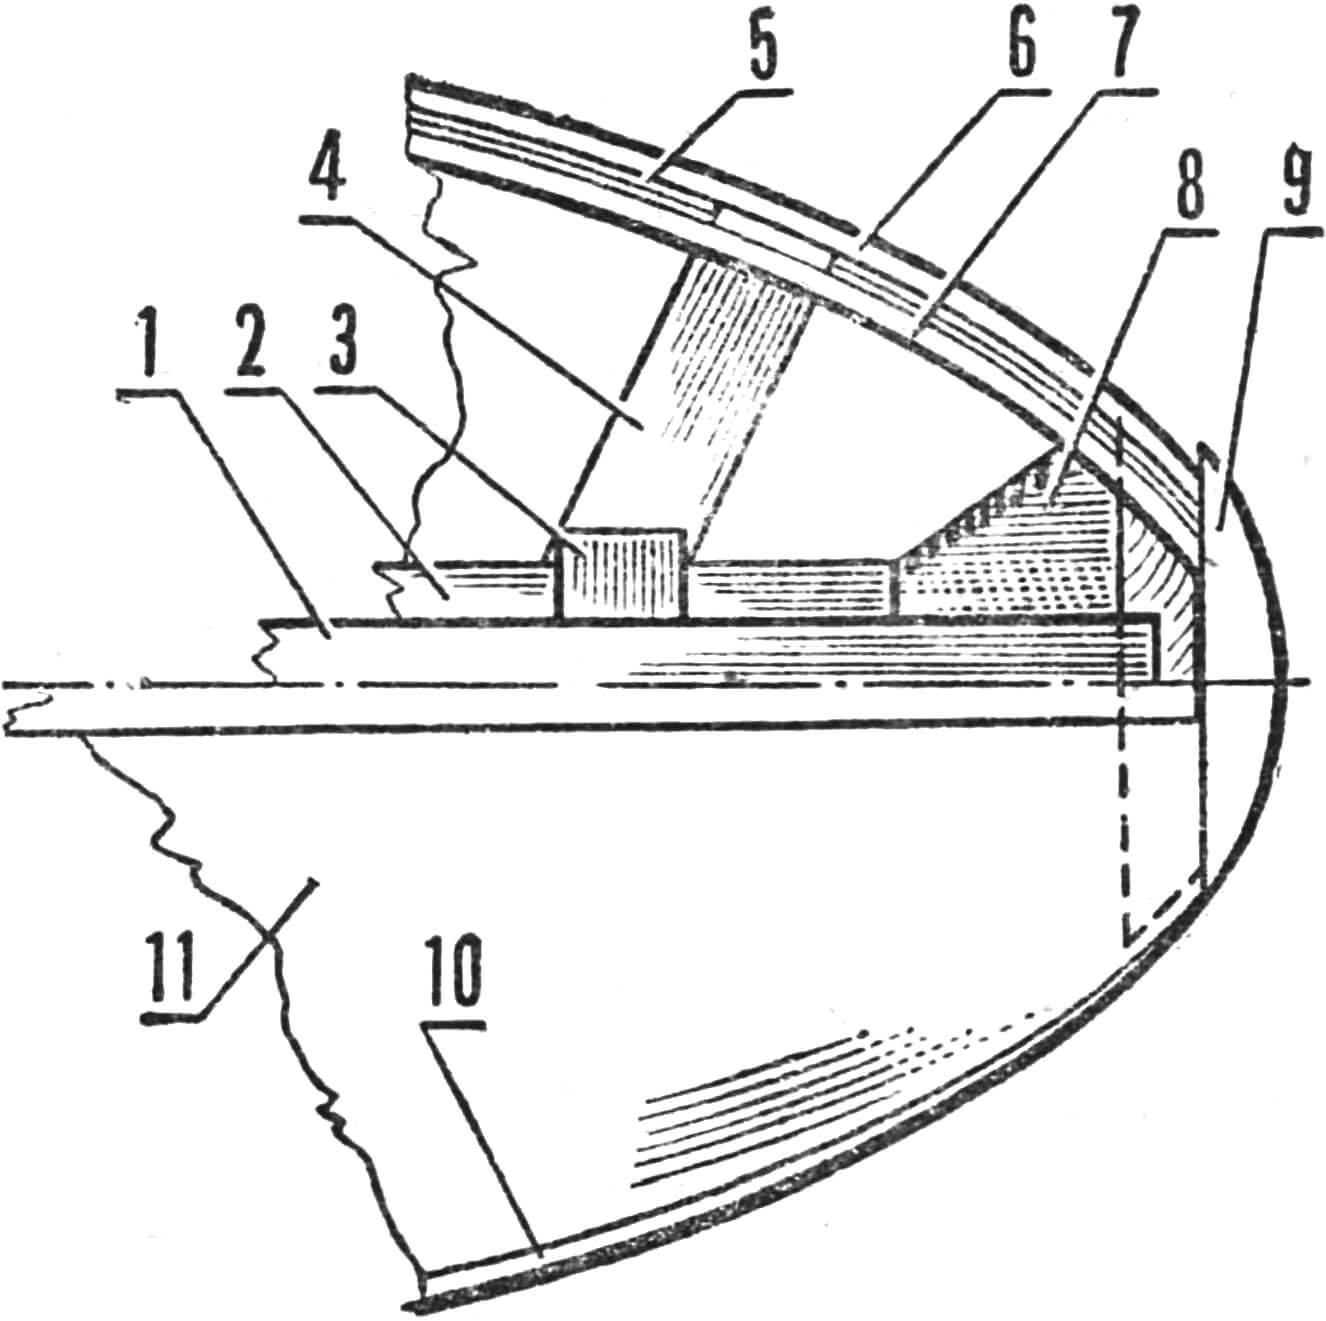
1 — midship; 2 — keel; 3 — floor; 4 — double frame; 5 — seal; 6 — underdeck stringer; 7 — inner rubbing sill; 8 — stem; 9 — cutwater; 10 — flange; 11 — deck.
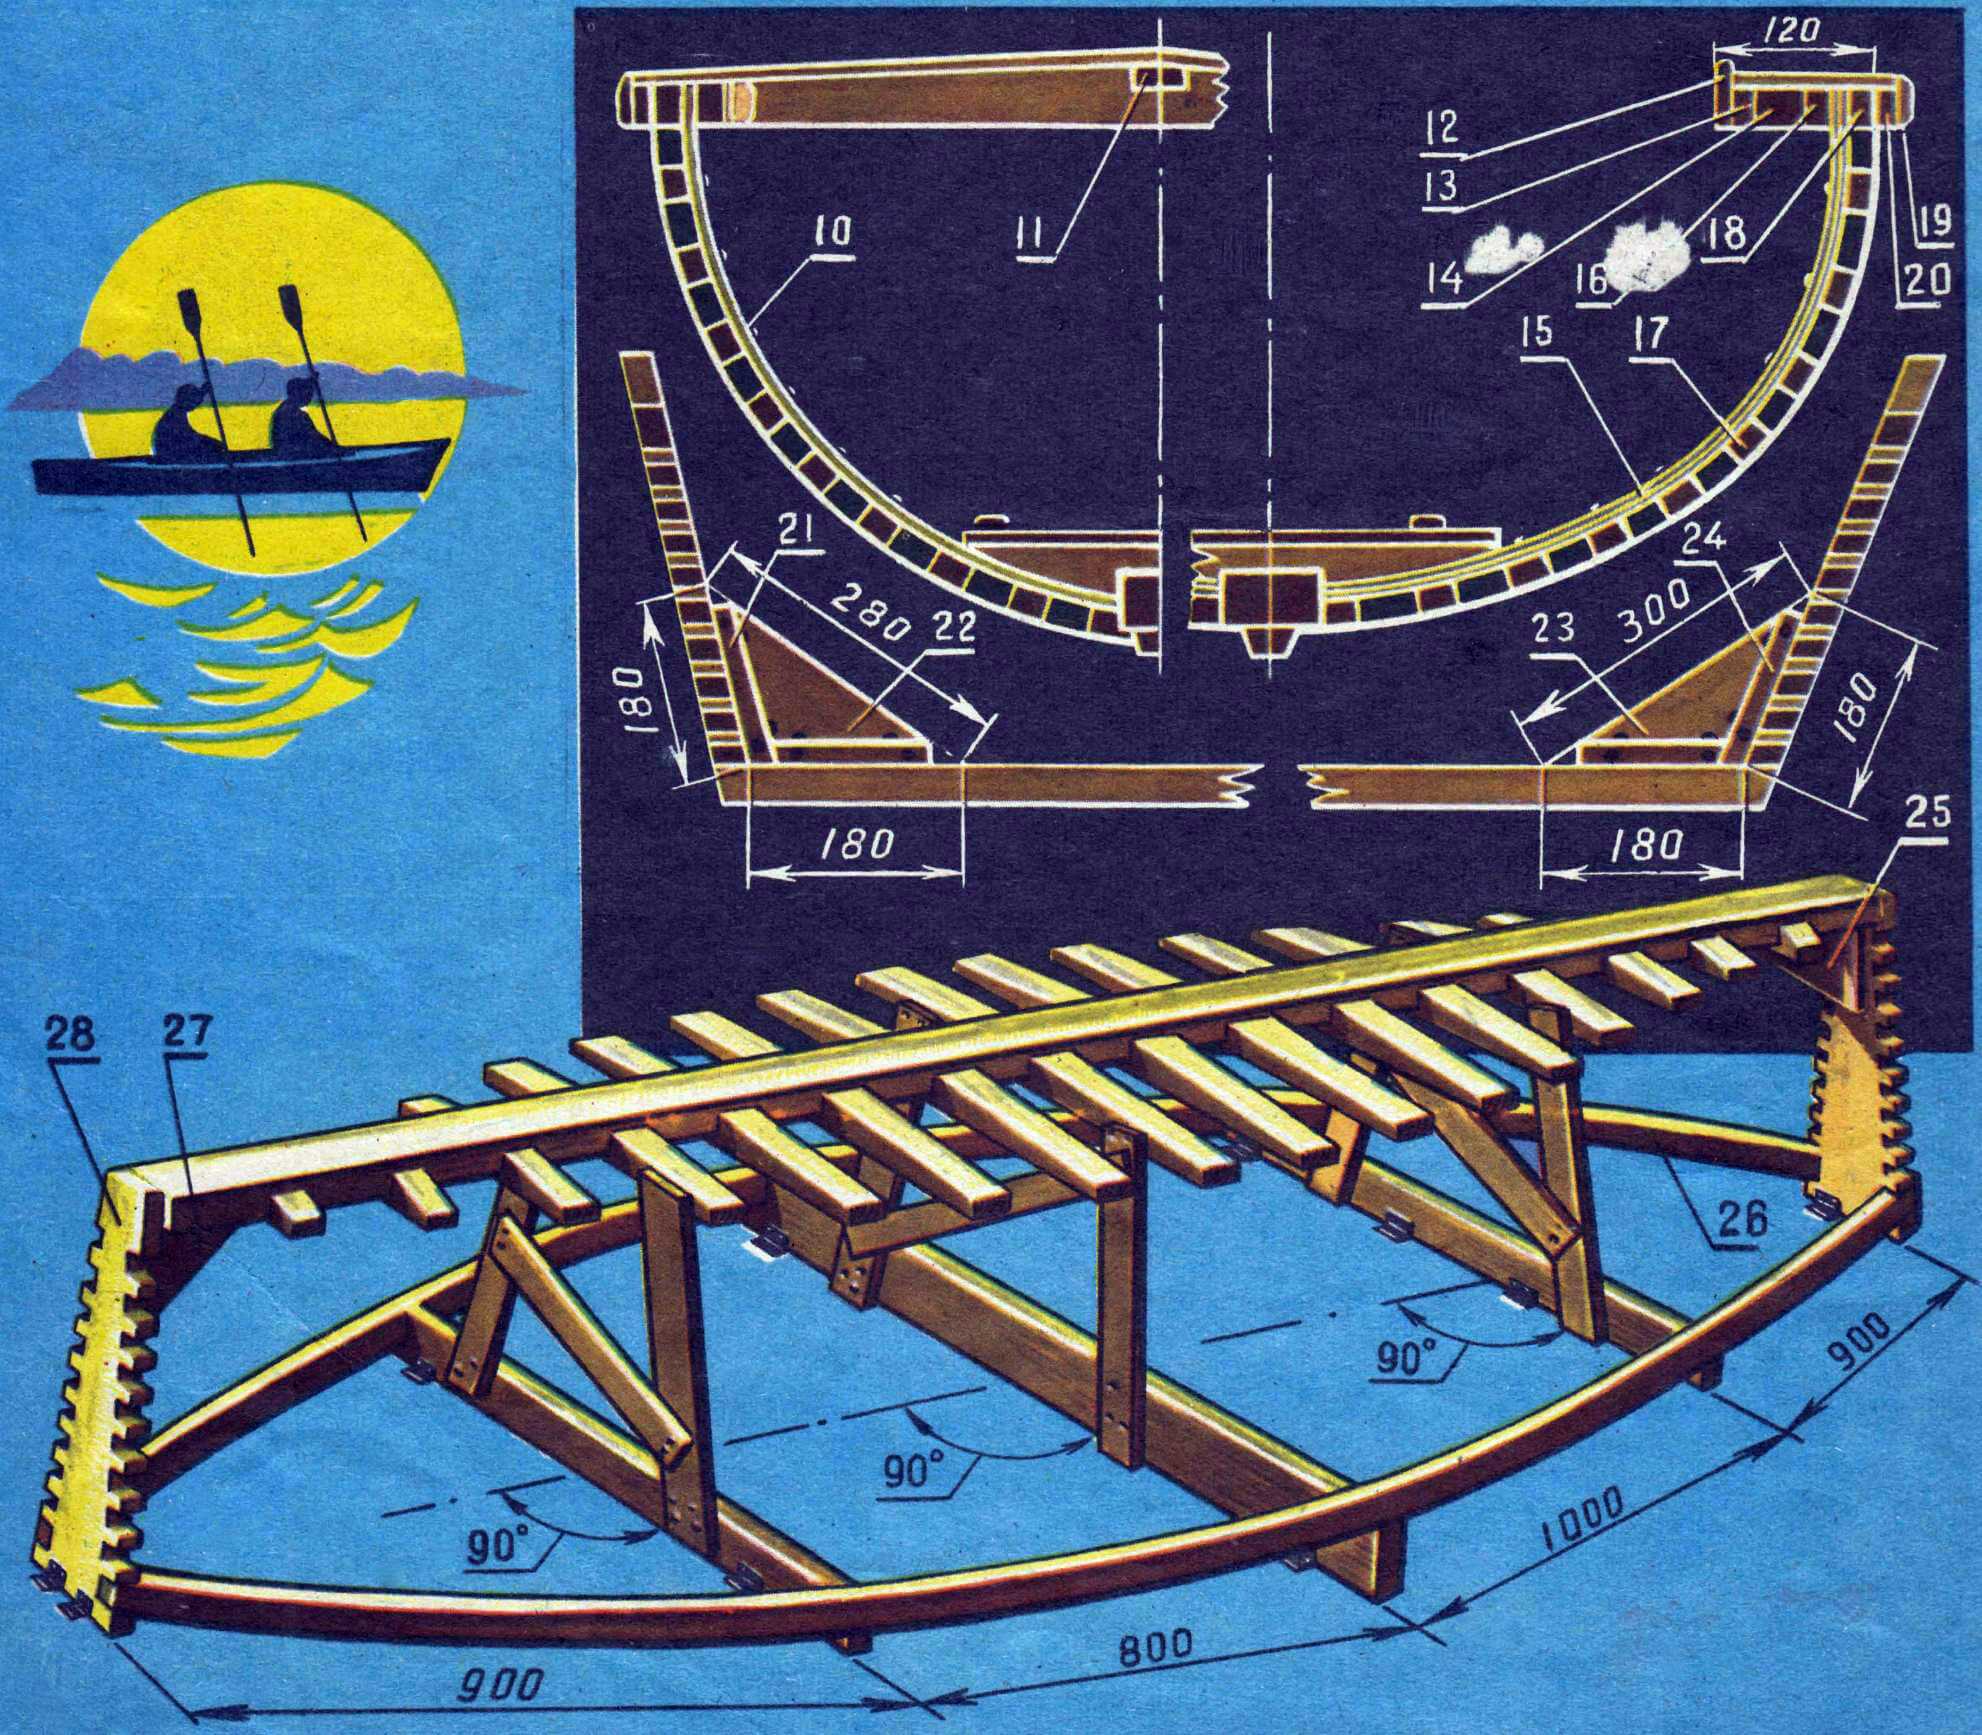
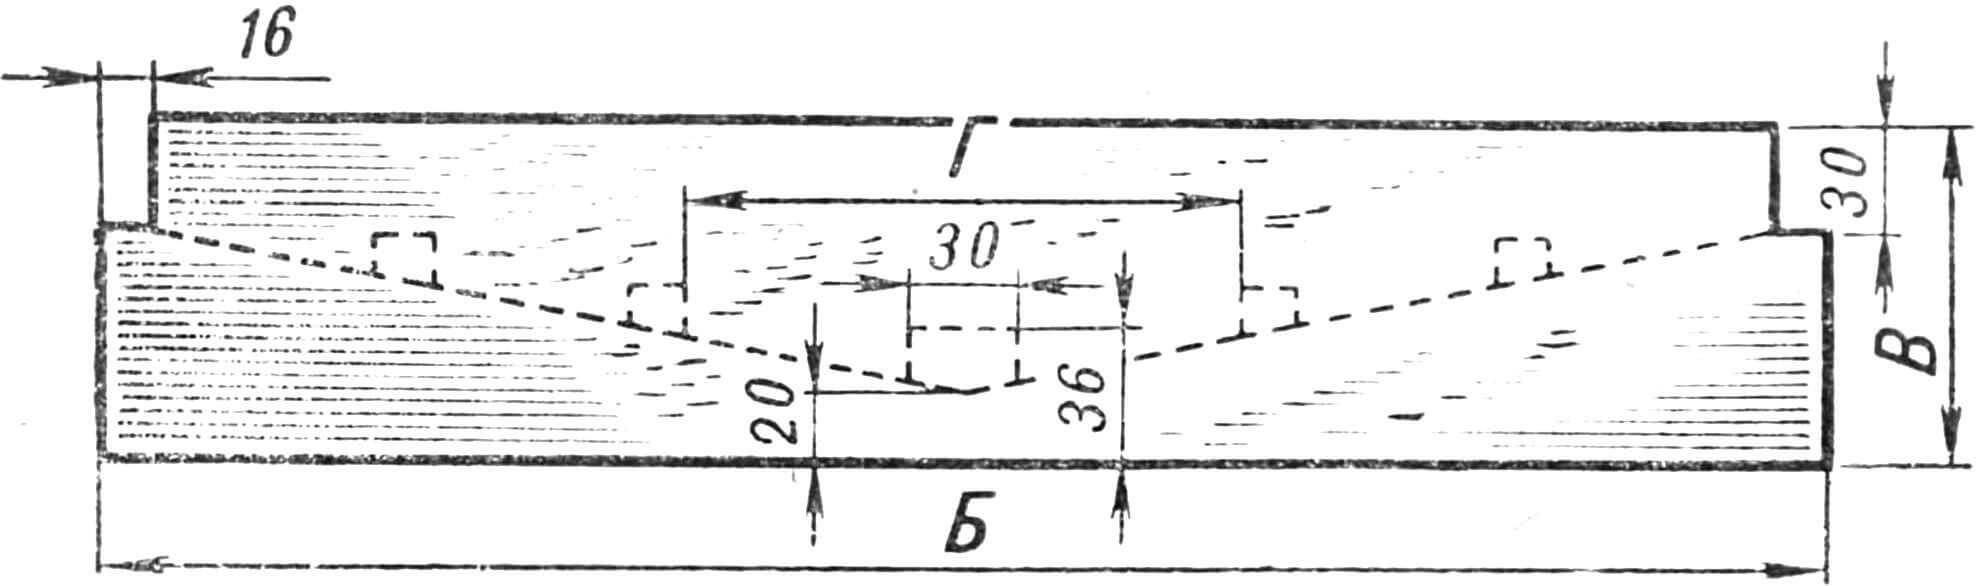
First make a bookmark: a unit consisting of a keel and stems (stem and sternpost), and the dimensions of the stems (Fig. 6) in table 2. Then floors are attached to the keel, with one screw each. The first of them is placed 150 mm from the bow end of the keel, and the rest are 200 mm from each other. Thus, with a floor thickness of 30 mm, the gaps between them will be 170 mm.
Table 1.
| No. flora | 1 | 2 | 3 | 4 | 5 | 6 | 7 | 8 | 9 | 10 | 11 | 12 | 13 | 14 | 15 | 16 |
|---|---|---|---|---|---|---|---|---|---|---|---|---|---|---|---|---|
| The value of “A” | 85 | 128 | 195 | 265 | 345 | 398 | 435 | 450 | 450 | 440 | 400 | 350 | 270 | 198 | 130 | 90 |
Table 2.
| Size | A | b | V | G | d | e |
|---|---|---|---|---|---|---|
| Stem | 385 | 32 | 128 | 21 | 27 | 15.8 |
| Sternpost | 360 | 30 | 90 | 20 | 25 | 11.7 |
Table 3.
| Size | Beam name | ||
|---|---|---|---|
| nasal | average | stern | |
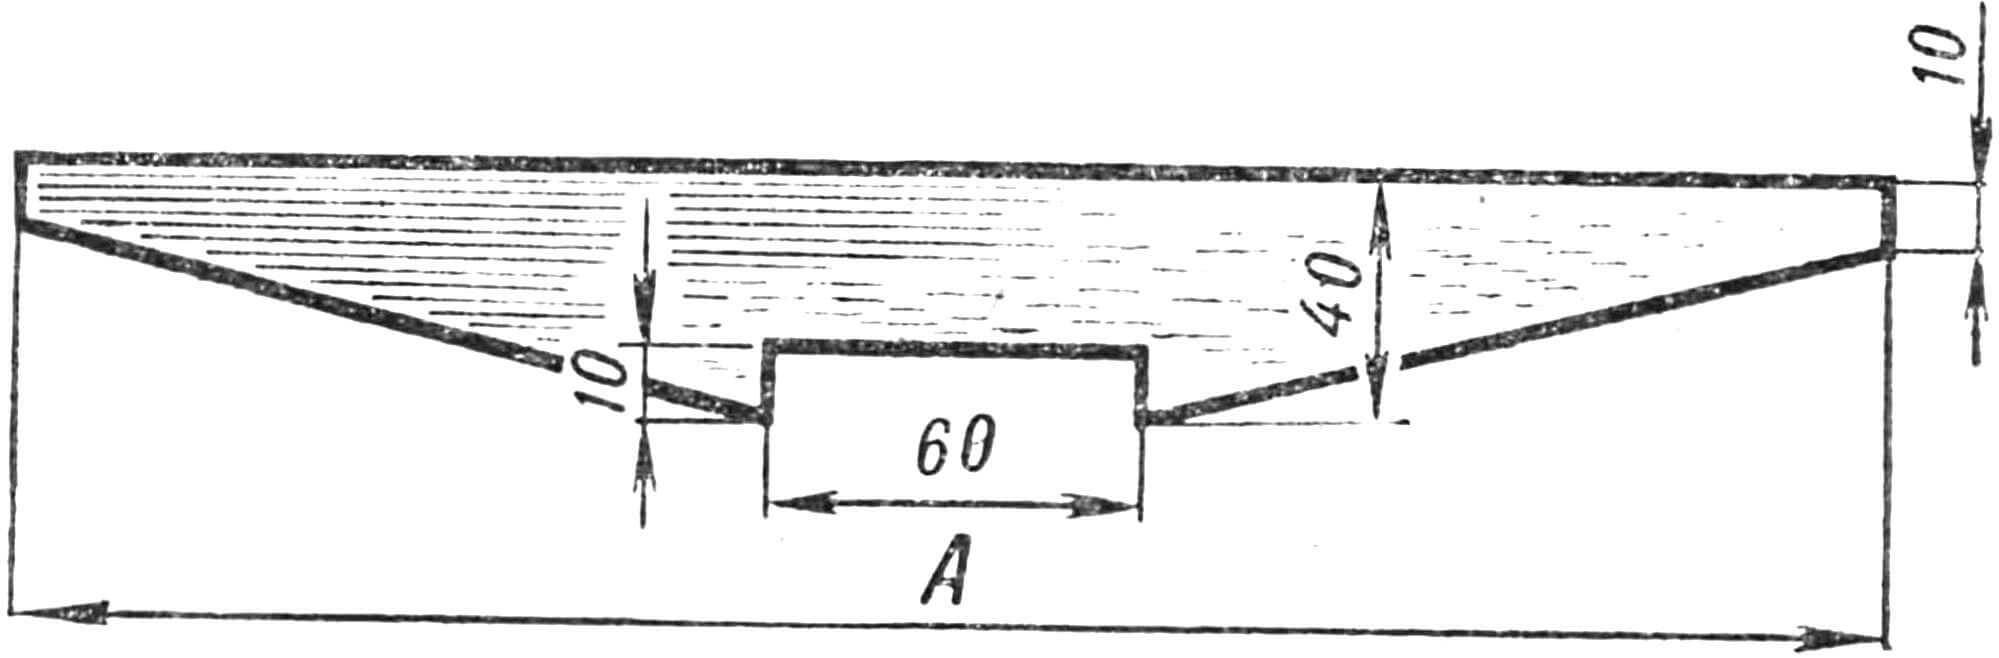
| B | 740 | 900 | 725 |
| IN | 74.5 | 80 | 14 |
| G | 368 | — | — |
The beam blanks (Fig. 3 and Table 3) are made, marked and fastened to the floor (using metal brackets and small screws). For this purpose, markings are made on the floor with chalk beforehand.
When installing the keel, it is necessary to ensure that the distance from the floor to the keel along its entire length is equal to 350 mm. In this case, the ends of the stems are attached to the floor according to the markings. Then floors No. 4, 9 and 13 are connected to the corresponding beam blanks with posts, to which (after checking the correct installation of the keel) the struts are attached. Now the internal rubbing bars are inserted into the grooves and secured with thin nails. Note that the floors are numbered from bow to stern.
An important operation is the installation of the side branches of the frames. The plywood is firmly attached to the floors, and to the rubbing beams – temporarily, with a small nail. On frames No. 2, 3, the strips have to be attached to the floors somewhat diagonally, which is necessary for the correct fit of the stringers.
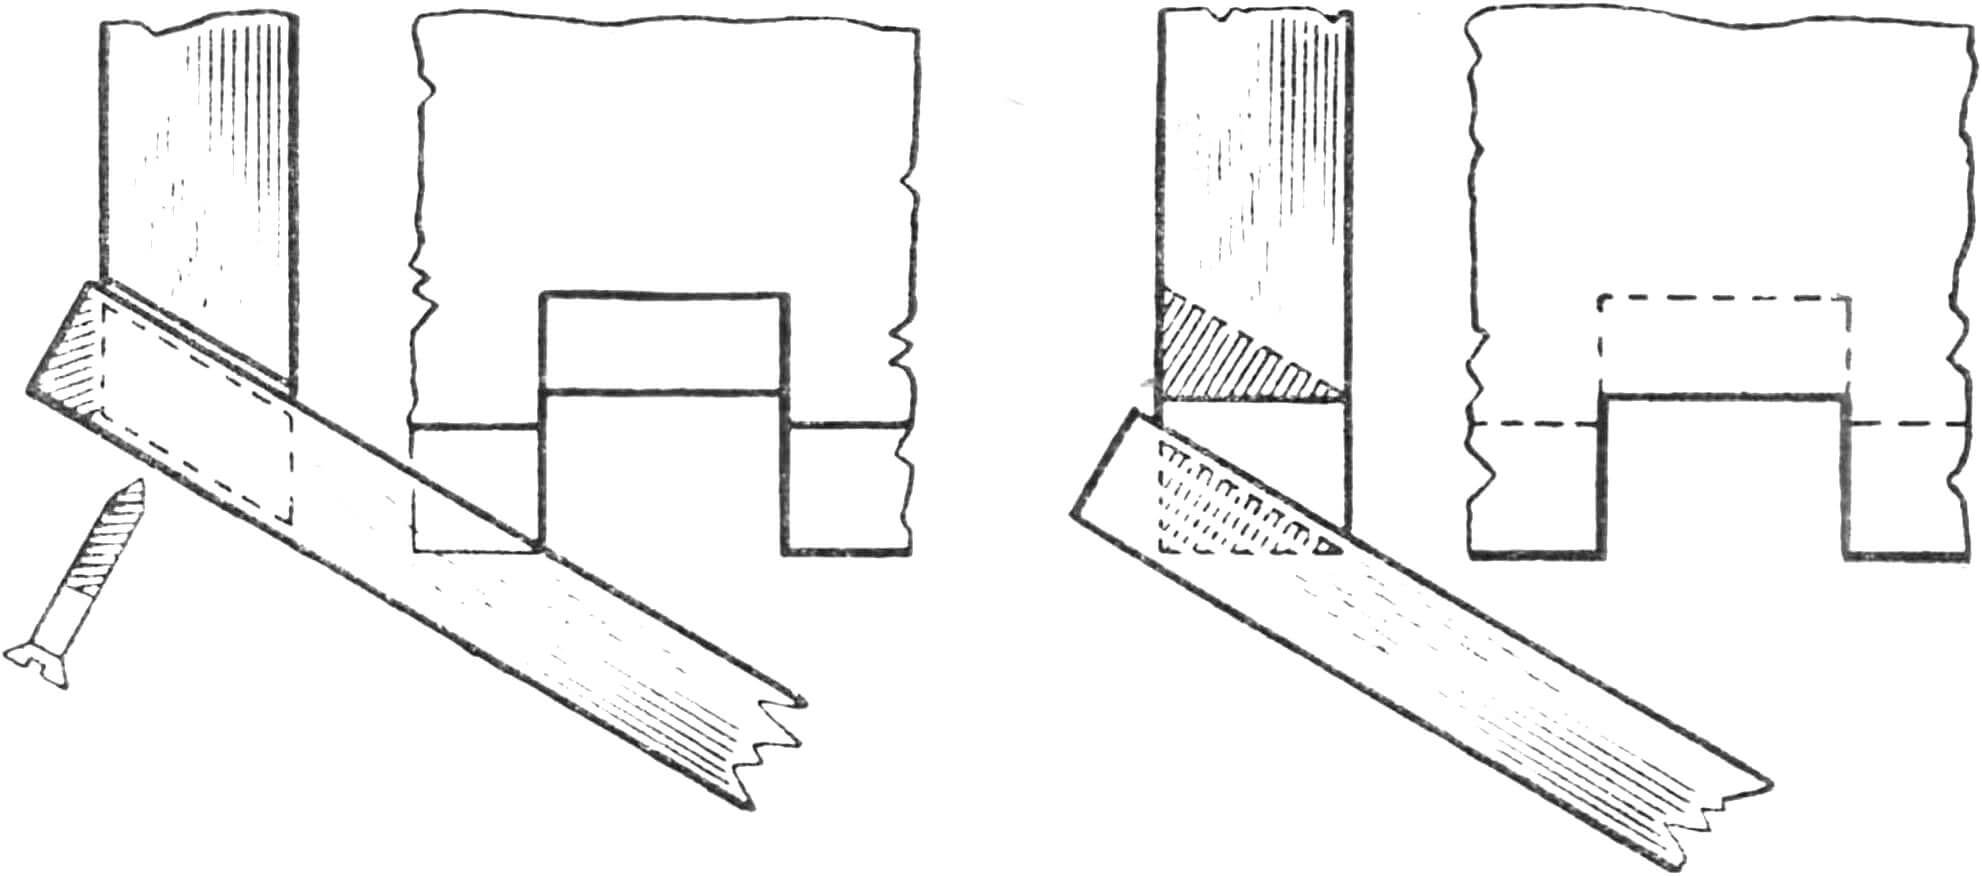
Now comes the most important work — checking and final finishing of the frames. Applying a long thin strip to them, it is necessary to achieve a smooth fit to all the frames along the entire length. Frames that protrude excessively outward or, conversely, have sunk inward are unfastened from the rubbing beam and adjusted. At the same time, it is necessary to ensure that the length of the left branch of each frame is equal to the length of the right one. Then each of the branches is divided into 10 equal parts and the stringers are installed according to the pencil marks. They must be fastened to the frames with small aluminum countersunk rivets, and to the floors and stems — with nails. When fastening the stringers to the stems, the latter are beveled (Fig. 5): the shaded part of the wood is removed with a sharp chisel. When installing the outer pair of stringers adjacent to the deck, strips of plywood equal in thickness to the frames are placed under them (between the frames). It is very useful to soak the assembled set in hot drying oil and dry it.
The boat skin can be sewn like furniture covers. However, the best results are achieved by covering the hull with two panels (right and left) without sewing them together. In this case, both panels are joined (overlapping each other by 30-40 mm) on the keel and stems. The fabric is attached to the chock and to the deck stringers with small nails in a taut state. Good results are obtained by stretching the skin while wet (with subsequent drying in place).
The final plating is secured by installing external rubbing beams, a cutwater, a sternpost overlay and a false keel.
The edges of these parts adjacent to the shell are covered with a layer of thick paint before installation, which is partially squeezed out and removed with a rag when the screws are tightened. The finished shell is painted with oil paint in two or three steps, applying the next layer only after the previous one has completely dried. Now the boat is unfastened from the floor and turned over. The excess wood is removed from the beams with a plane (up to the marking line), nests are made for the midships and for the Carlings, which are attached to the inner rubbing beams using “crackers” (see Fig. 1). A deck is cut out of plywood (no more than 4 mm thick, but preferably 2.5 or 3 mm) and installed on nails or small screws. First, the upper edges of the midship beams, carling beams and fenders are beveled to ensure that the plywood fits them perfectly, and the ends of the stems are cut accordingly. These surfaces are also covered with thick paint, and the plywood is covered with hot drying oil. The middle beam is removed after the deck is installed. It is recommended to paint the deck in lighter tones than the shell. After this, the flanges, overlays on the midship beam (on top of the plywood), breakwater and coamings are installed.
It is very good to make these parts from oak and not paint them, but cover them with oil varnish.
The work is completed with the production and installation of the stools, seats and backs (Fig. 2).
V. KUIBYSHEV, engineer
Recommend to read
 AND THE CARGO ON THE TRAILER
When there is a need in the trailer for transportation of household goods, there is the problem of choosing which trailer to buy, good this choice was. That's the only difference in... THE MACHINE DICTATES THE SPEED
In the "M-K" No. 4 in 1983 was about a cord of car-class copies of "rally", developed under the direction of E. Voronin. The design proved so simple and reliable that are built on...
