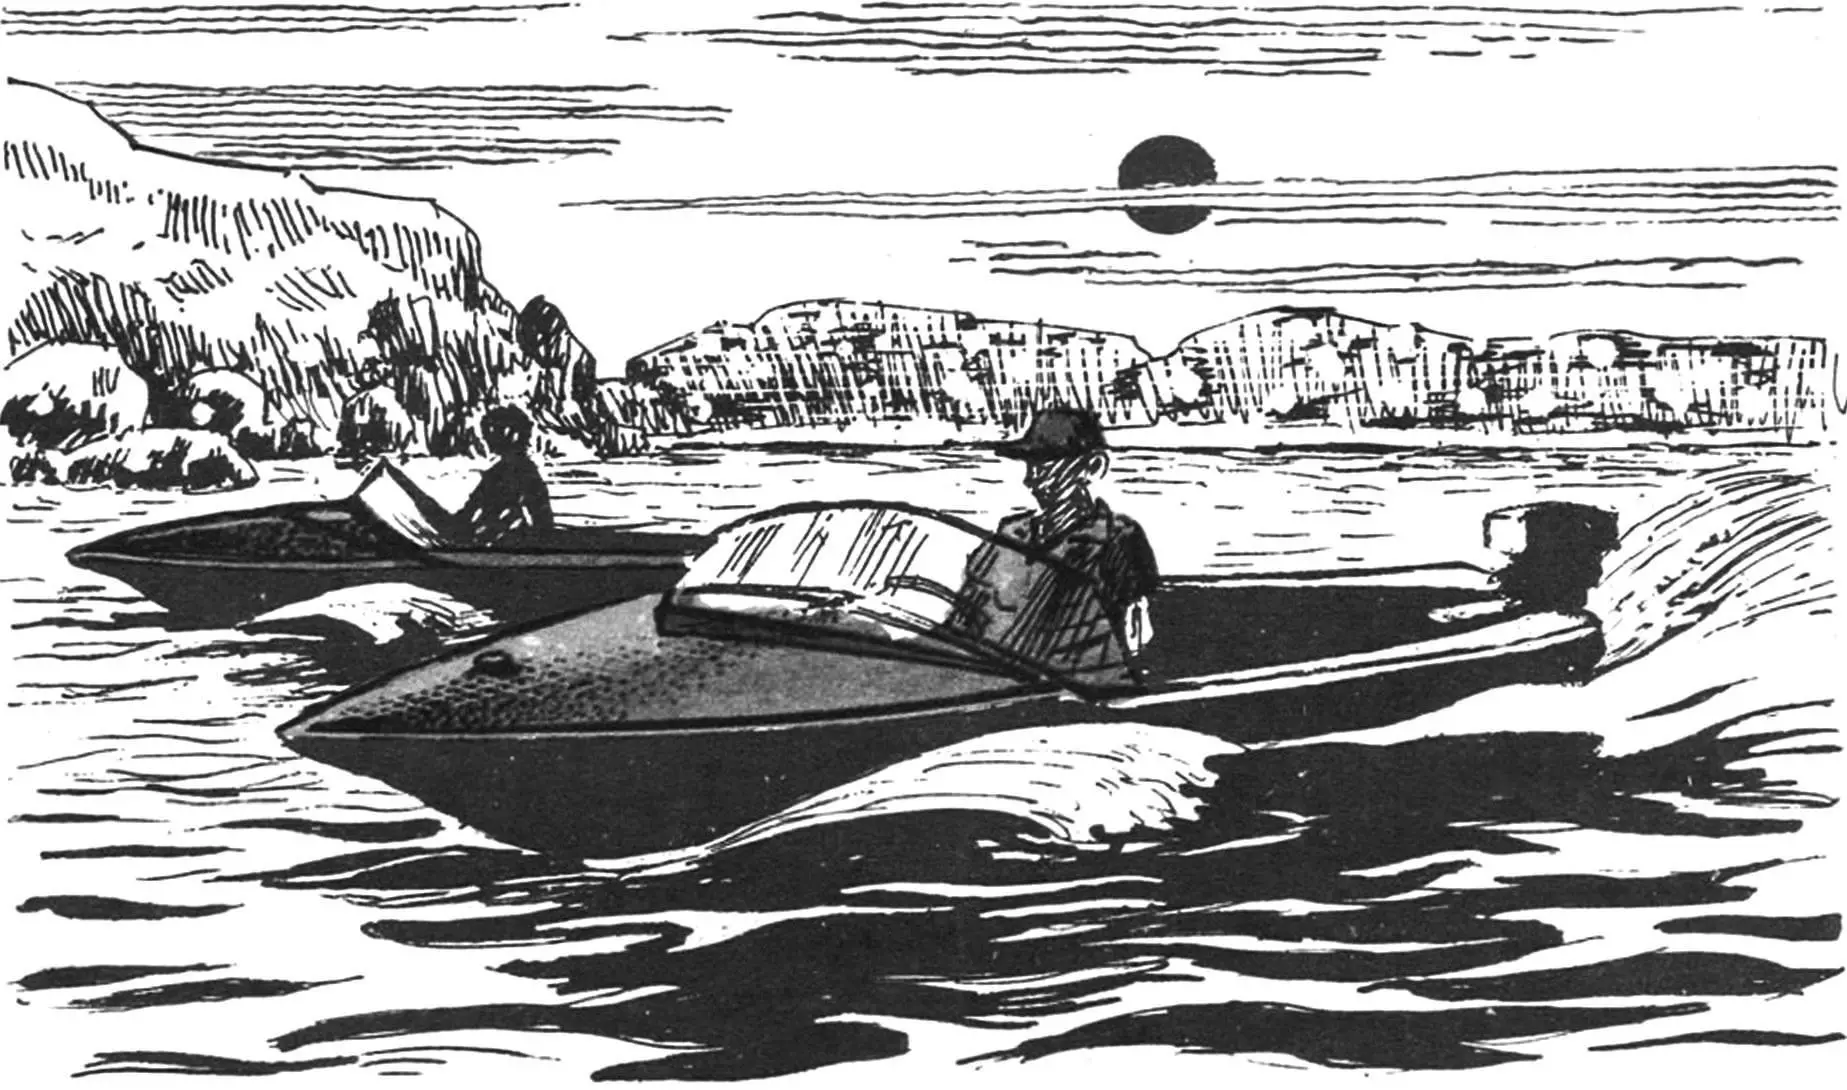
For those living near water, a motorboat is no less important than a motorcycle or a car: people use it to commute to work, visit neighboring villages, or go shopping in the district center.
“Modelist-Konstruktor” has repeatedly published descriptions of various motorboats. However, judging by the editorial mail, readers are still interested in watercraft designs. Fulfilling the wishes of our subscribers, we’ll explain how to build one of the simplest boats.
The “Veterok” is designed to operate with an outboard motor of up to 25 hp. The boat’s weight without the engine is around 70 kg, and its speed reaches up to 45 km/h.
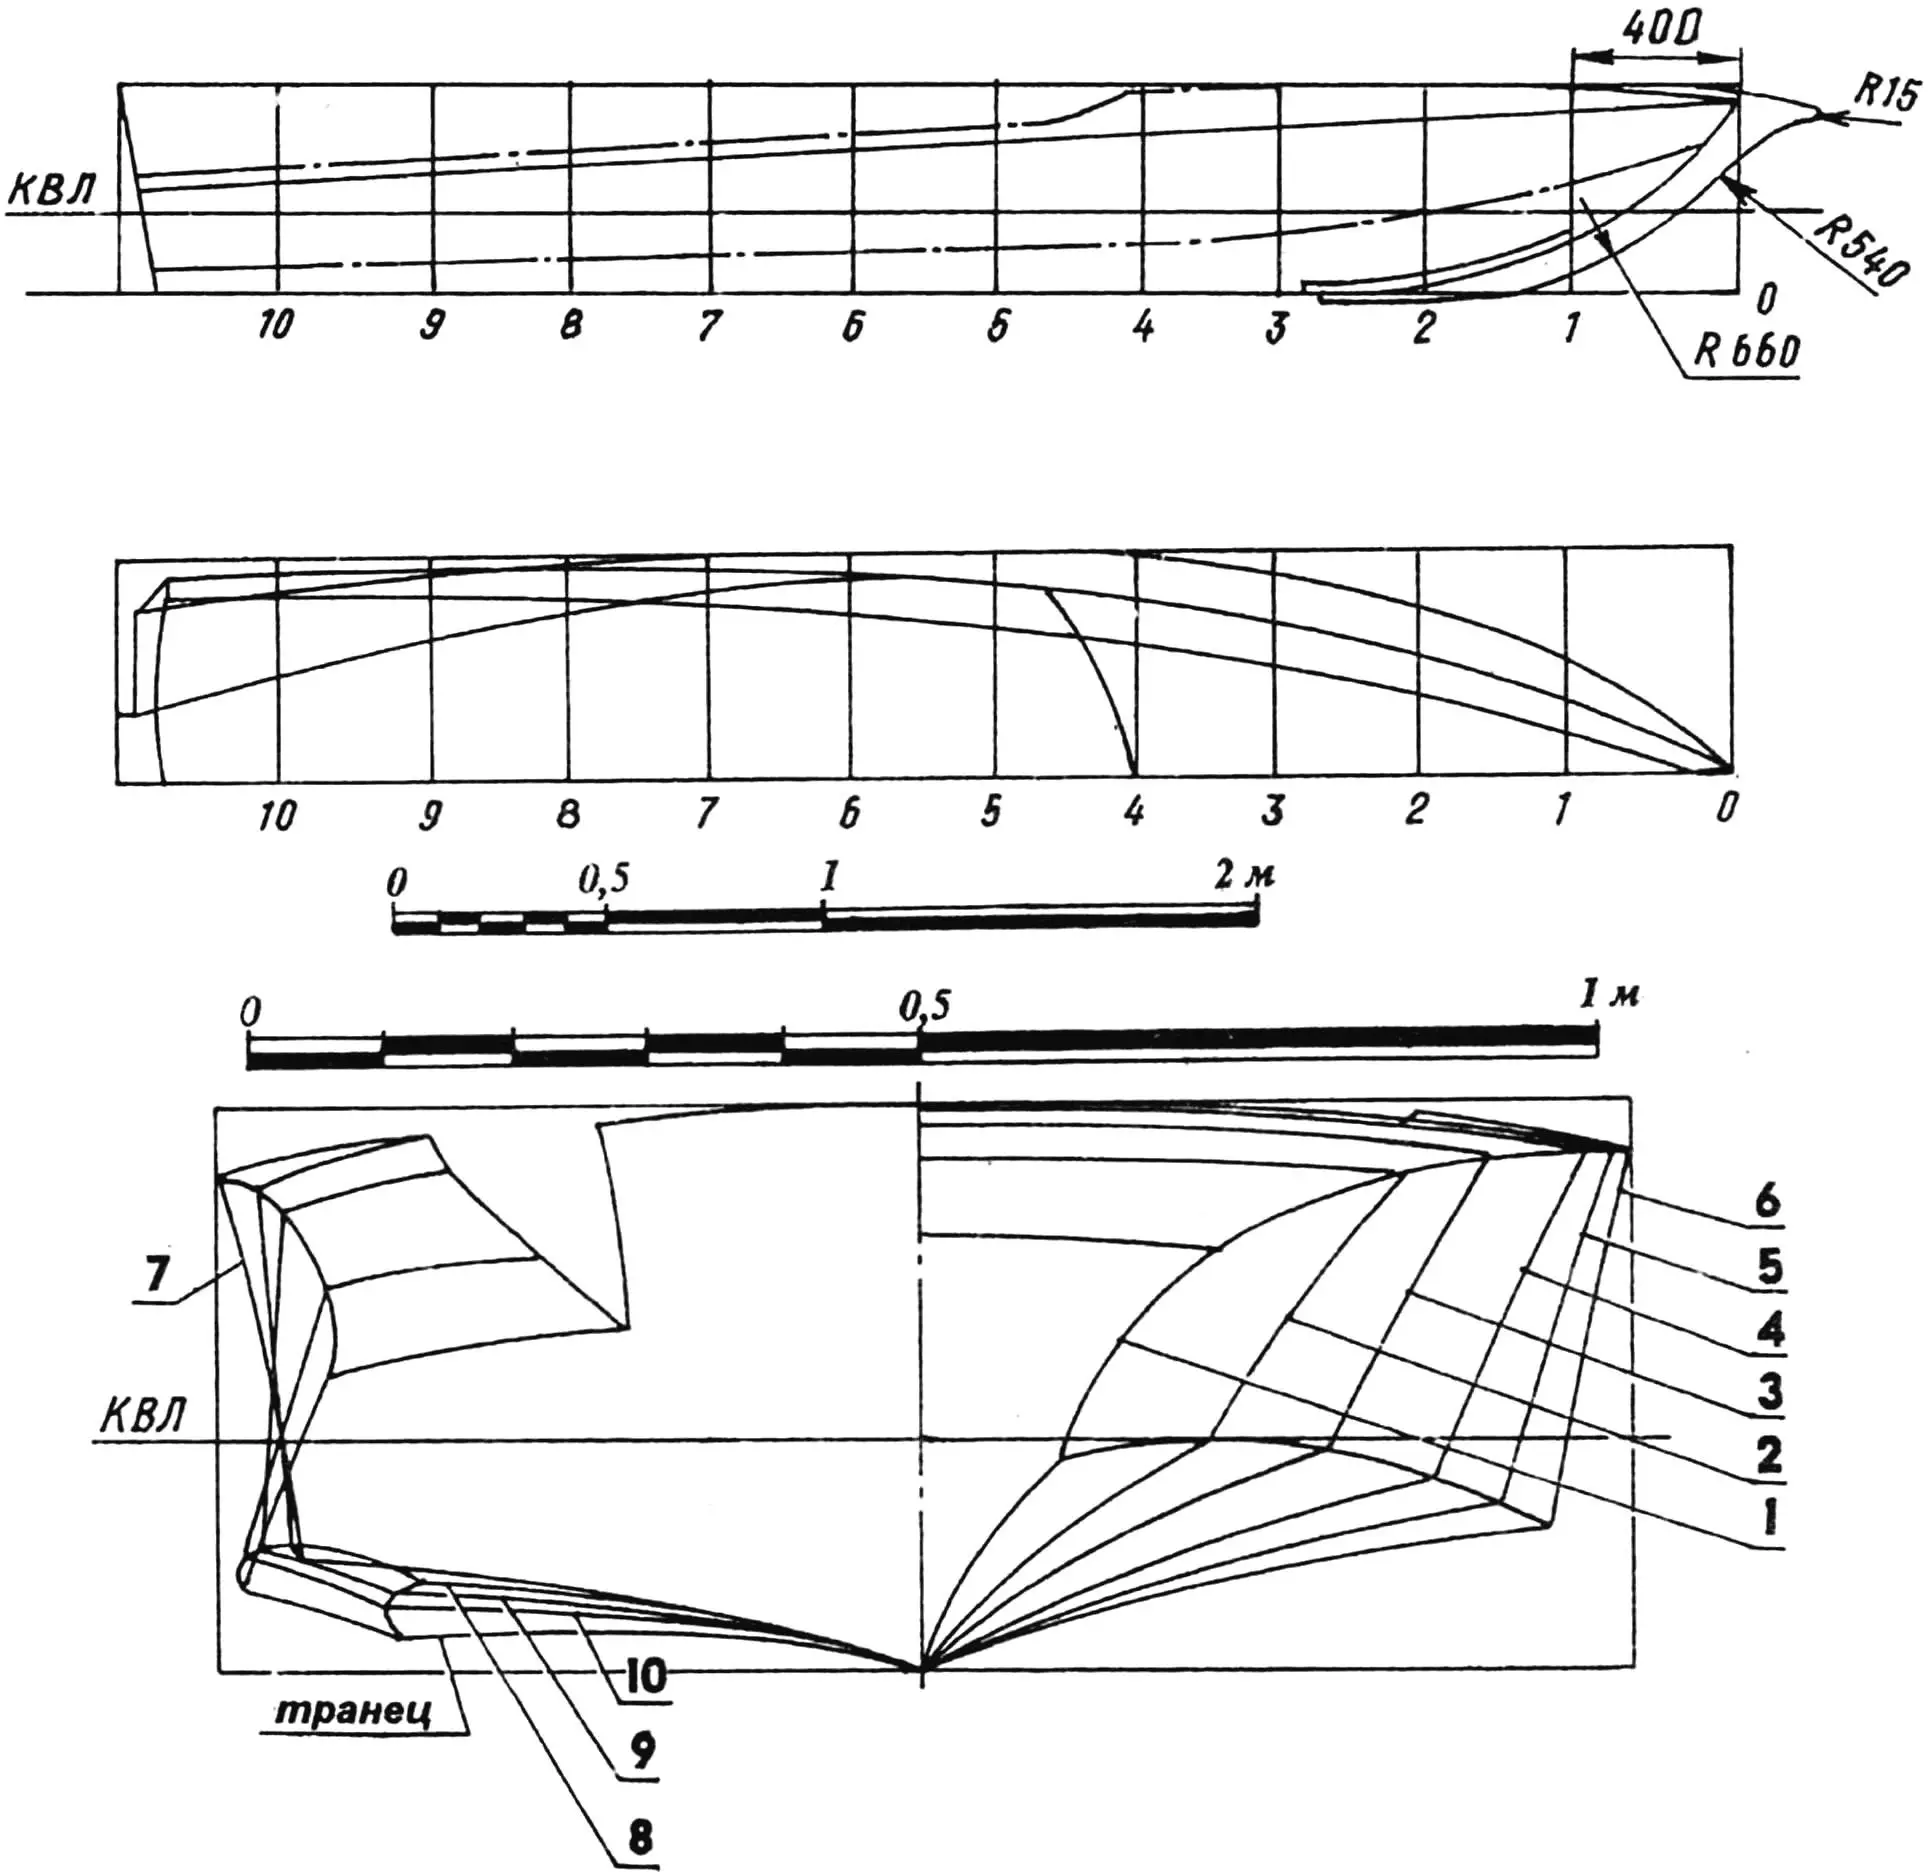
Theoretical drawing of the motorboat hull.
Let’s start with the hull structure. The frame is composed of transverse frames (bulkheads) and longitudinal stringers. The sheathing is made of plywood covered with fiberglass and epoxy resin.
You’ll need dry pine bars, slats, and plywood for the build (the dimensions of parts are listed in the table).
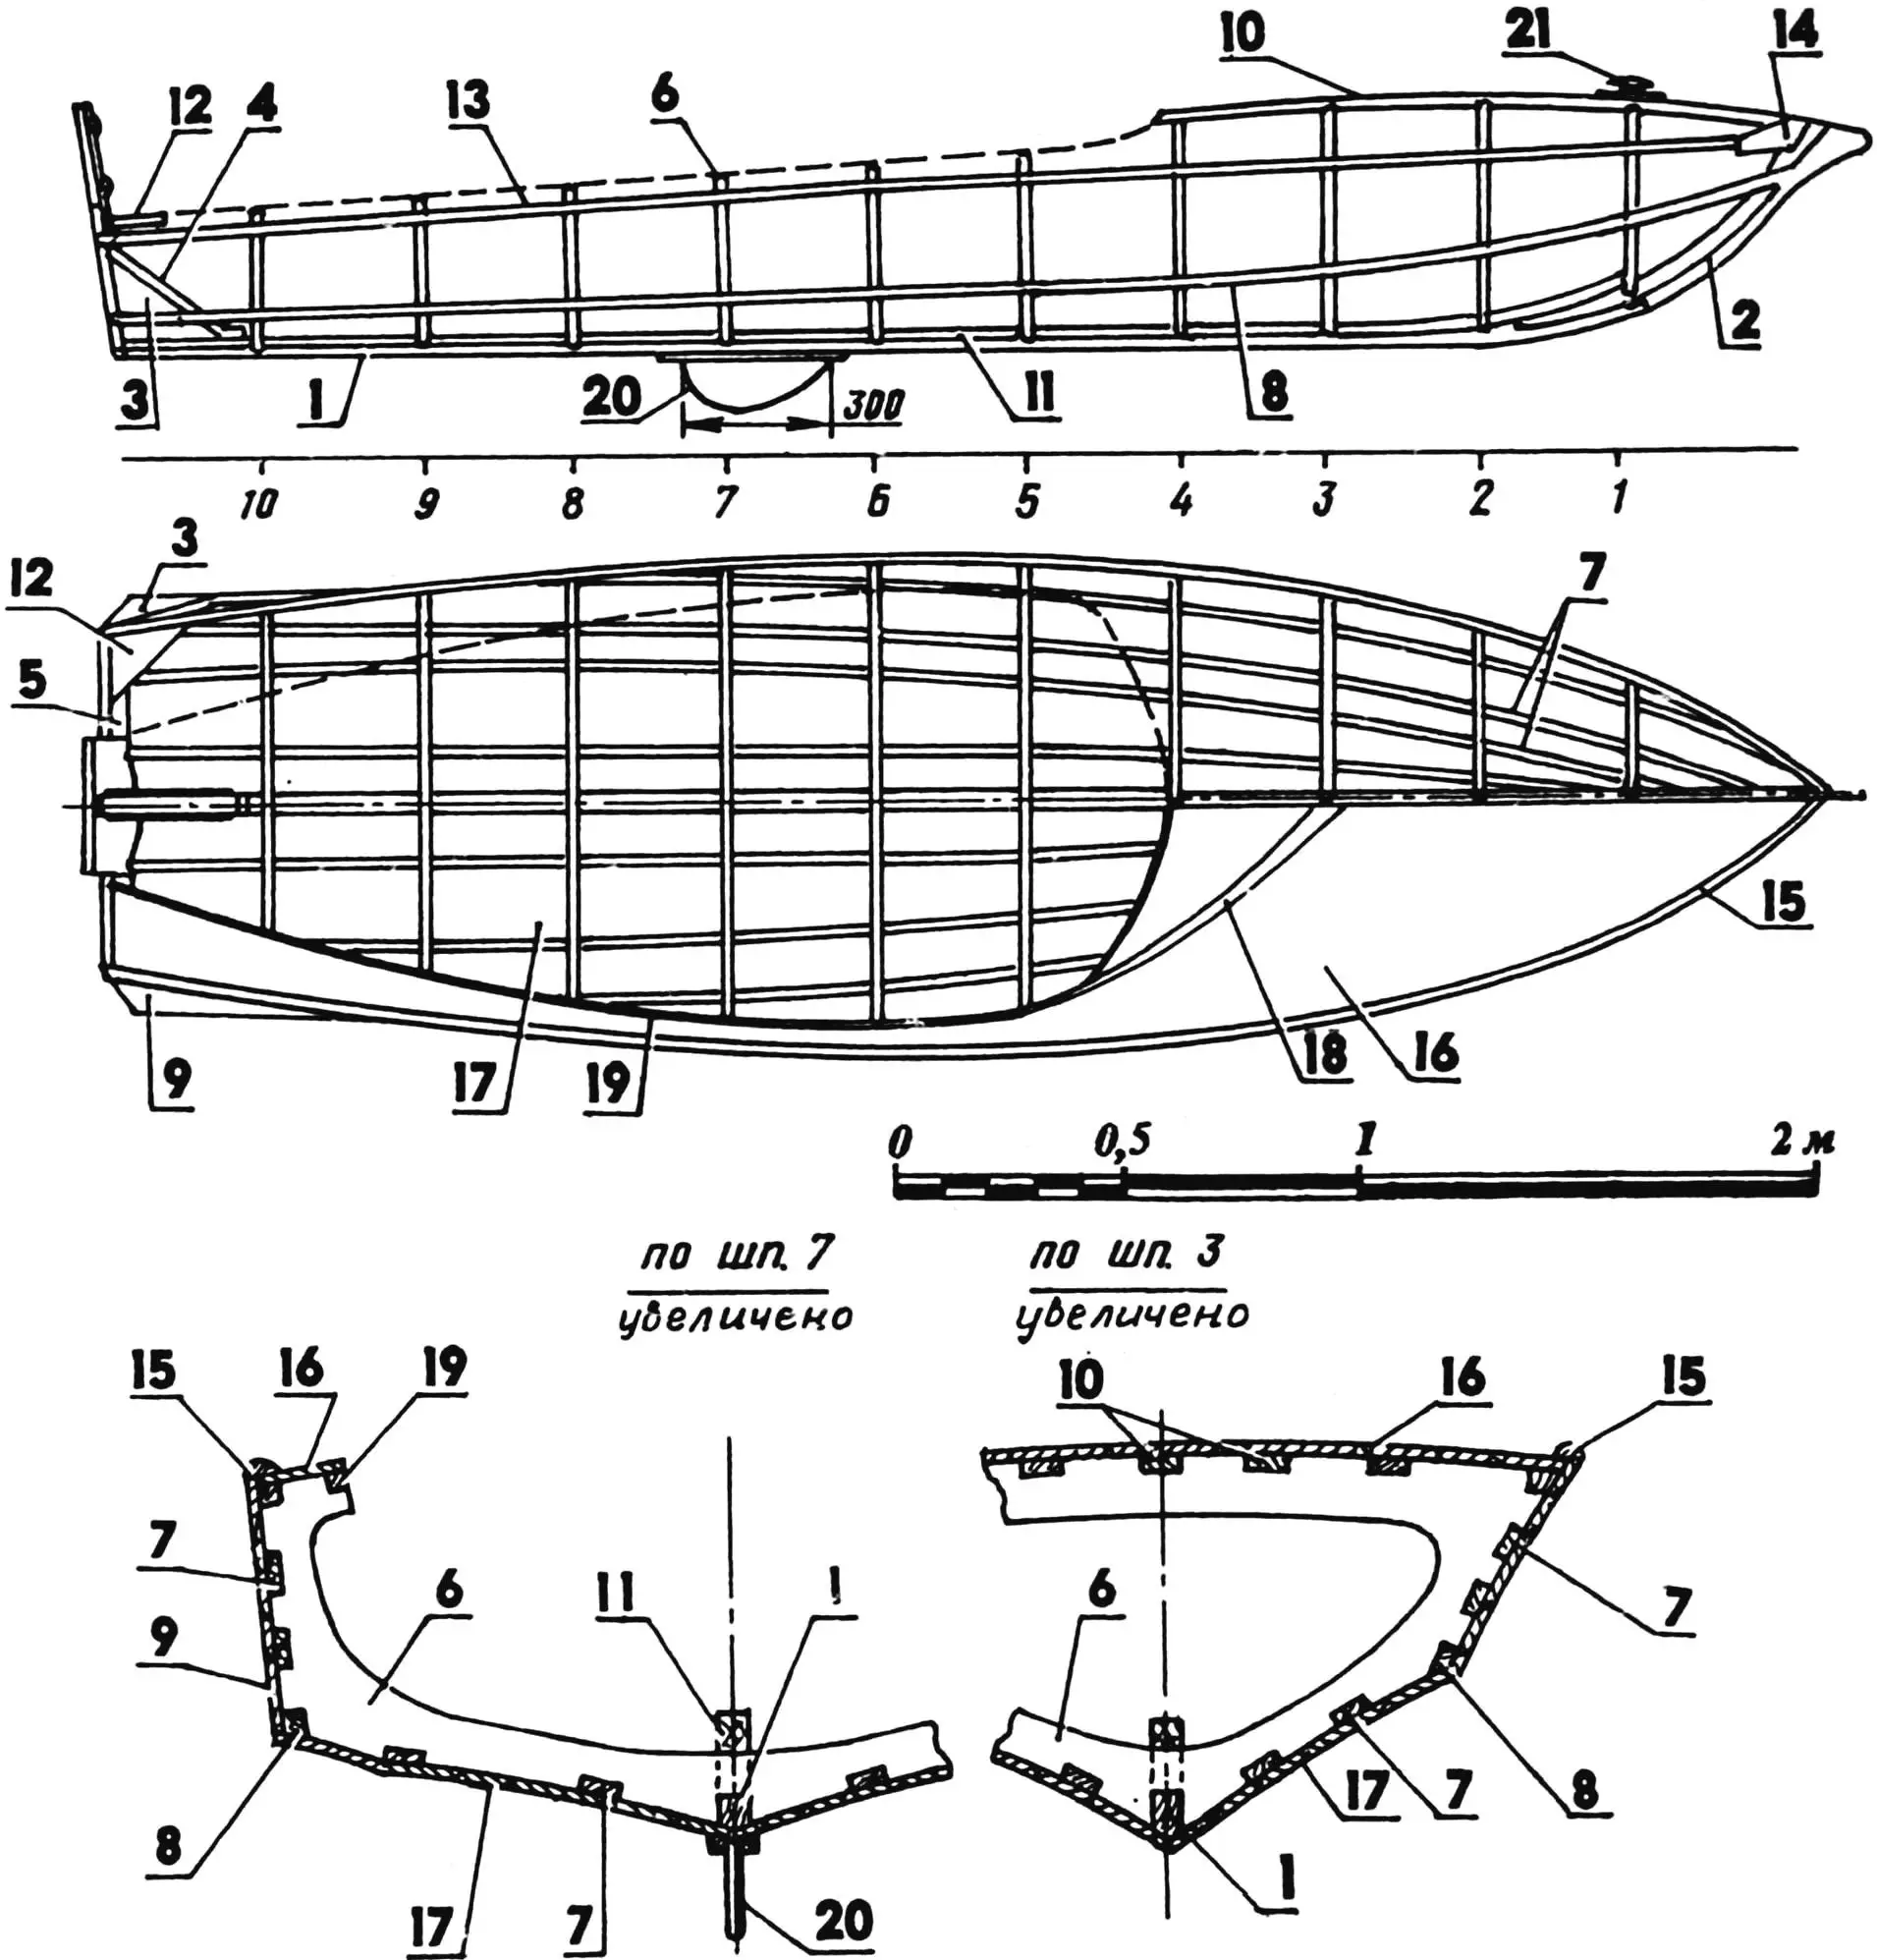
Structure of the motorboat hull:
1 — keel (beech, 60×60 bar); 2 — stem (beech, s60 board); 3 — rear gusset (pine, 250×20 board, 3 pcs); 4 — brace (steel, 30×5 strip); 5 — transom (plywood, s30); 6 — frame (plywood, s20, 10 pcs); 7 — bottom and side stringers (pine, 30×20 slats, 12 pcs); 8 — bilge stringers (pine, 40×40 slats, 2 pcs); 9 — side sheathing (plywood s4); 10 — deck stringers (pine, 30×20 slats, 5 pcs); 11 — keel beam (pine, 100×60 bar); 12 — gusset (pine, 150×20 board, 2 pcs); 13 — corner stringers (pine, 40×40 slats, 2 pcs); 14 — front gusset (pine, 150×20 board, 2 pcs); 15 — overlay (beech, 25×20 slats, 2 pcs); 16 — deck sheathing (plywood s4); 17 — bottom sheathing (plywood s4); 18 — spray rail (beech, 70×20 board, 2 pcs); 19 — cockpit edging (beech, 40×40 slats, 2 pcs); 20 — fin (duralumin, s5 sheet); 21 — cleat (beech, 50×25 bar, 3 pcs).
The construction begins with drawing the full-size template — either the “body” projection alone or in combination with the “side” and “half-breadth” views. Hardboard (or plywood) is suitable for this. The marking must be done with maximum precision to avoid having to fix errors with chisels or planes later.
The second step is making the frames. You’ll need plywood approximately 20 mm thick. If unavailable, cut double sets from 8–12 mm thick sheets and glue them together. The transom board requires three identical pieces.
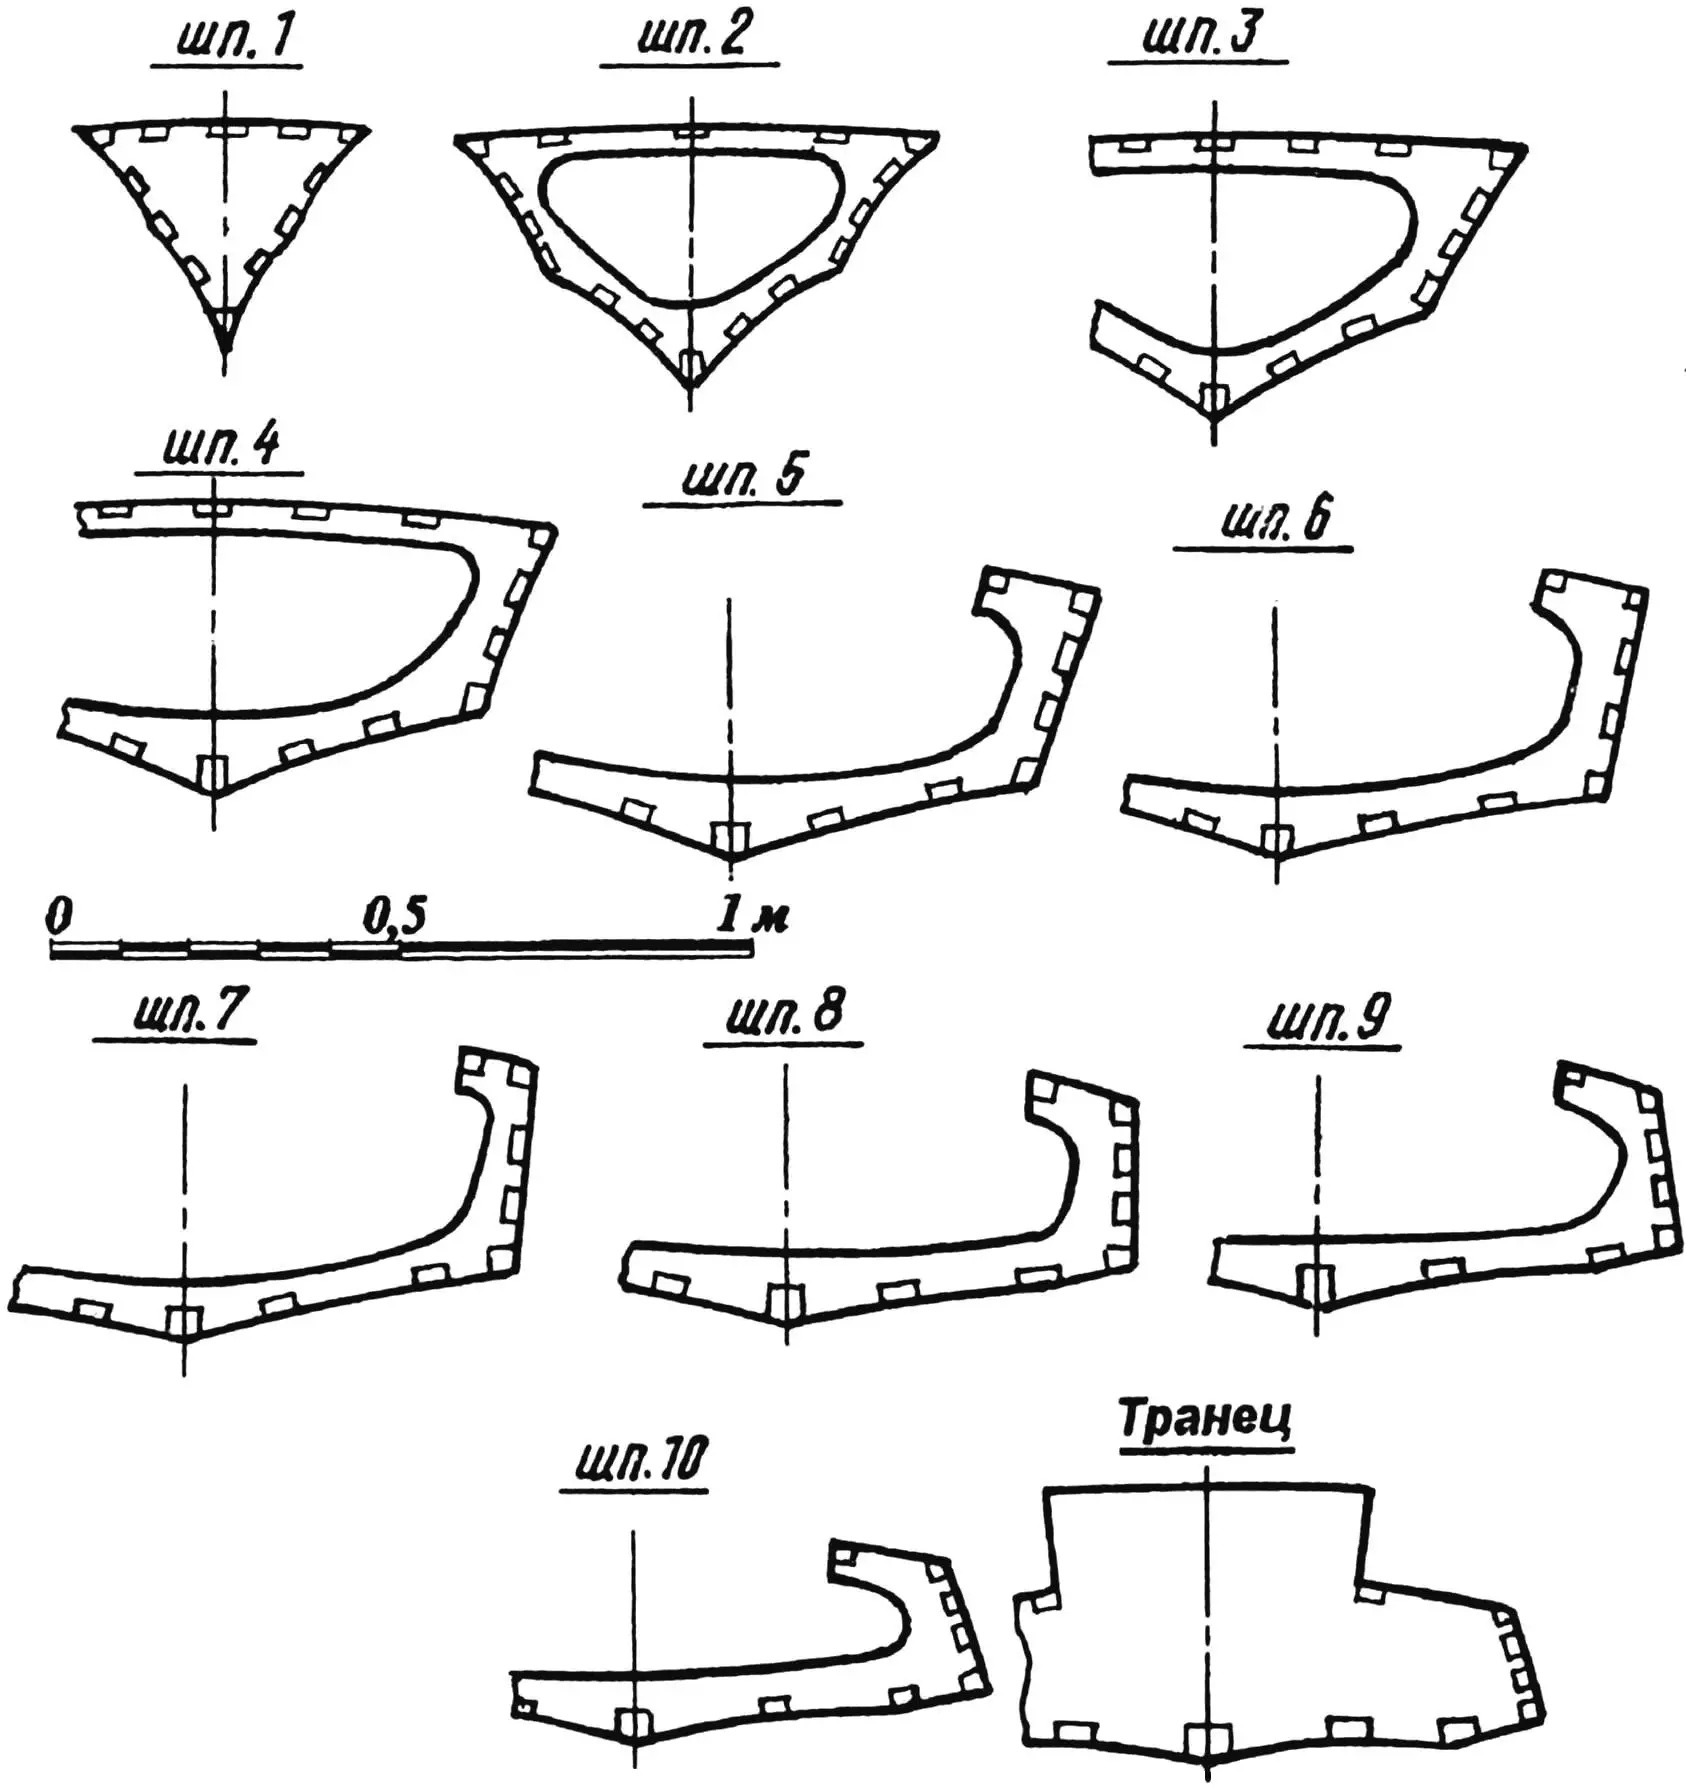
Configuration of frames and transom board.
When marking the frame templates, remember that the theoretical drawing — including the “body” projection — shows the outer contour of the sheathing. So, the practical contour of the frame should be reduced by the thickness of the sheathing.
The third step is building the jig. You’ll need three stands and a keel beam (dimensions shown in the drawing). The bottom of the beam must be perfectly horizontal. Cut grooves into the beam to fit the frames according to their thickness.
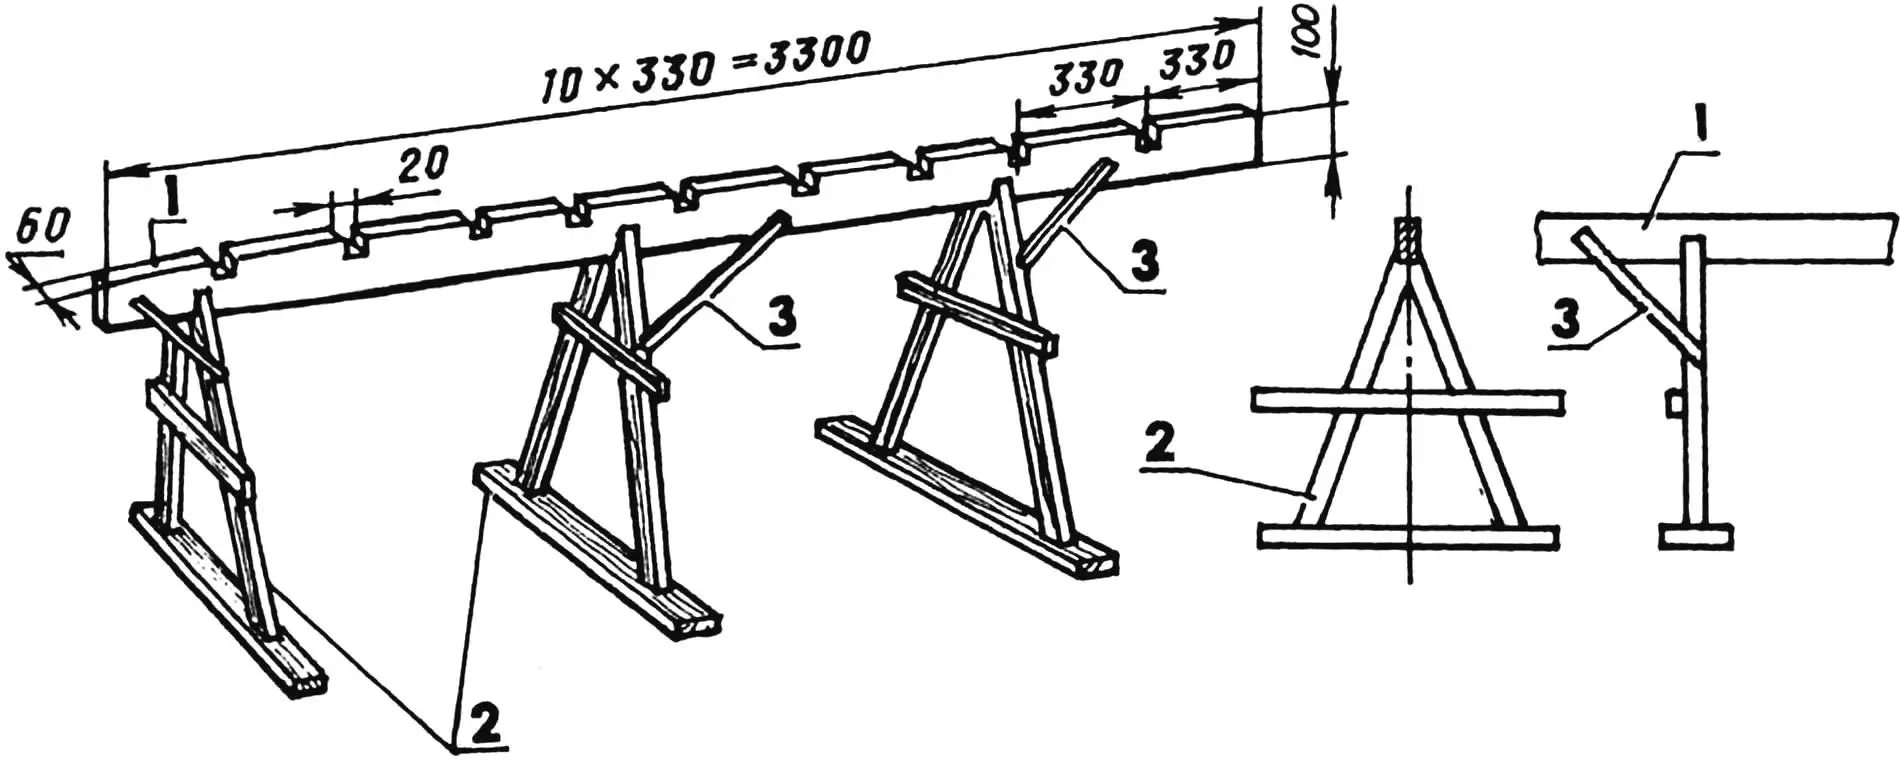
Installing the jig:
1 — keel beam; 2 — stands; 3 — braces.
Step four — install the frames onto the keel beam. Each frame should be perfectly perpendicular to the keel beam, and their positions should match the theoretical drawing (“body” projection). Then mark and cut slots in the frames for the stem and keel, and fasten them using epoxy glue and screws.
Step five — install the stringers. Mark the grooves according to the hull frame diagram. Secure the stringers to the frames with epoxy and screws. Use stainless (galvanized or chrome) screws. After the epoxy cures, fair the frames and stringers using a flexible batten.
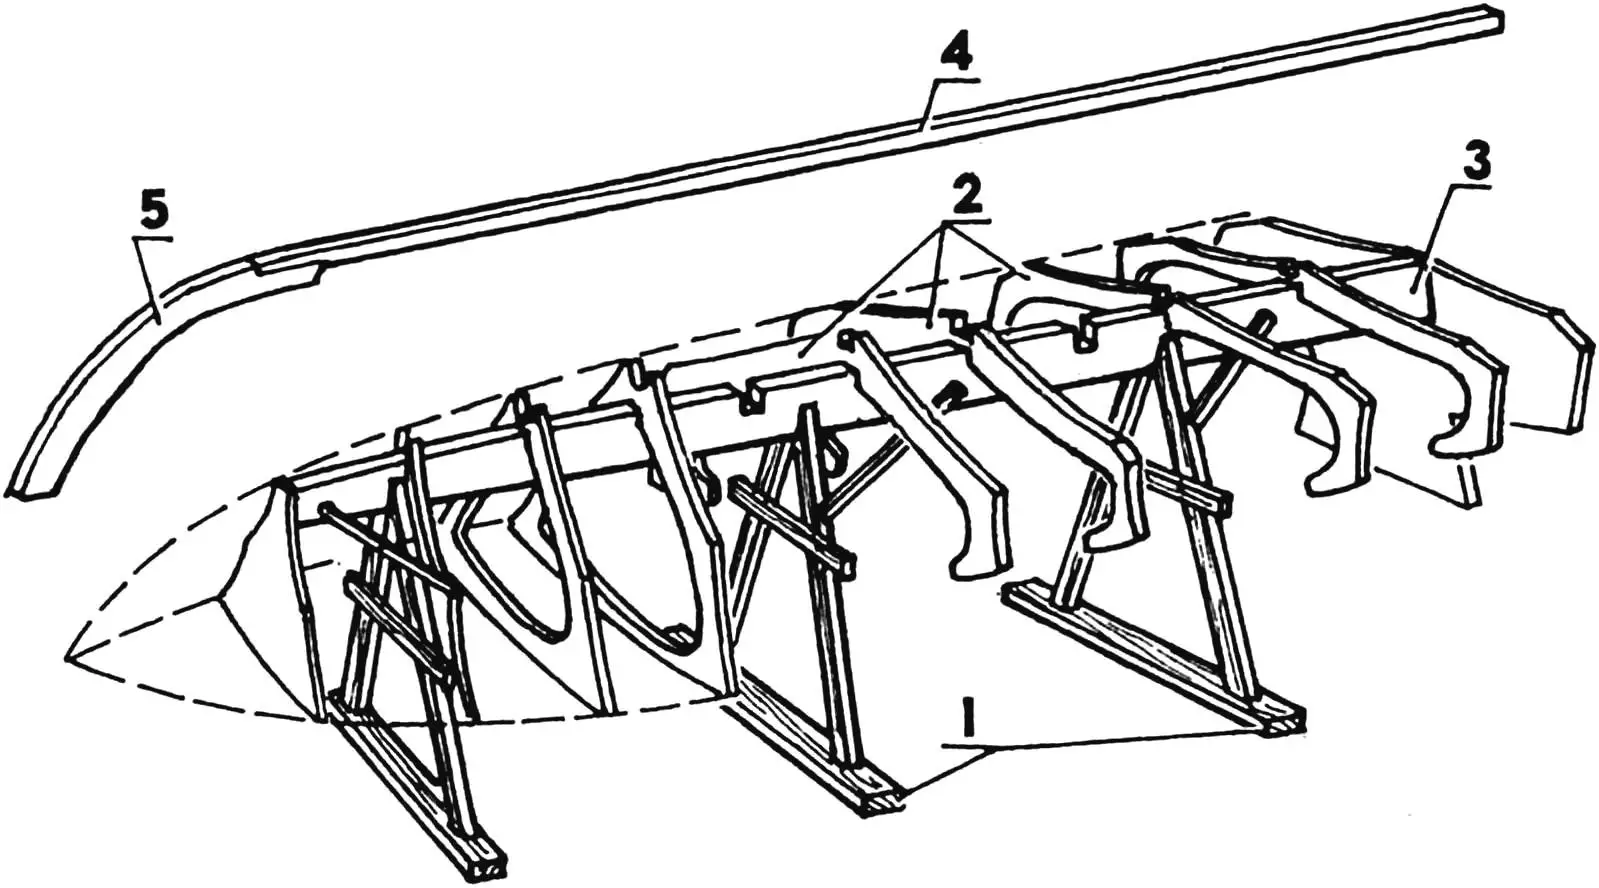
Assembling the frame on the jig:
1 — stands; 2 — frames; 3 — keel beam; 4 — keel; 5 — stem.
Step six — sheathing the frame with plywood (see diagram). Use 4 mm thick plywood. Make paper templates before cutting the panels. Attach the sheathing to the stringers with epoxy glue and galvanized nails. Start with the bottom, then the sides, and finally the deck. Sand the hull, level it with epoxy filler, and cover it with fiberglass cloth. Pressing a thin polyethylene film onto the resin with a dry cloth accelerates curing, reduces toxic fumes, and results in a high-quality finish requiring minimal post-processing.
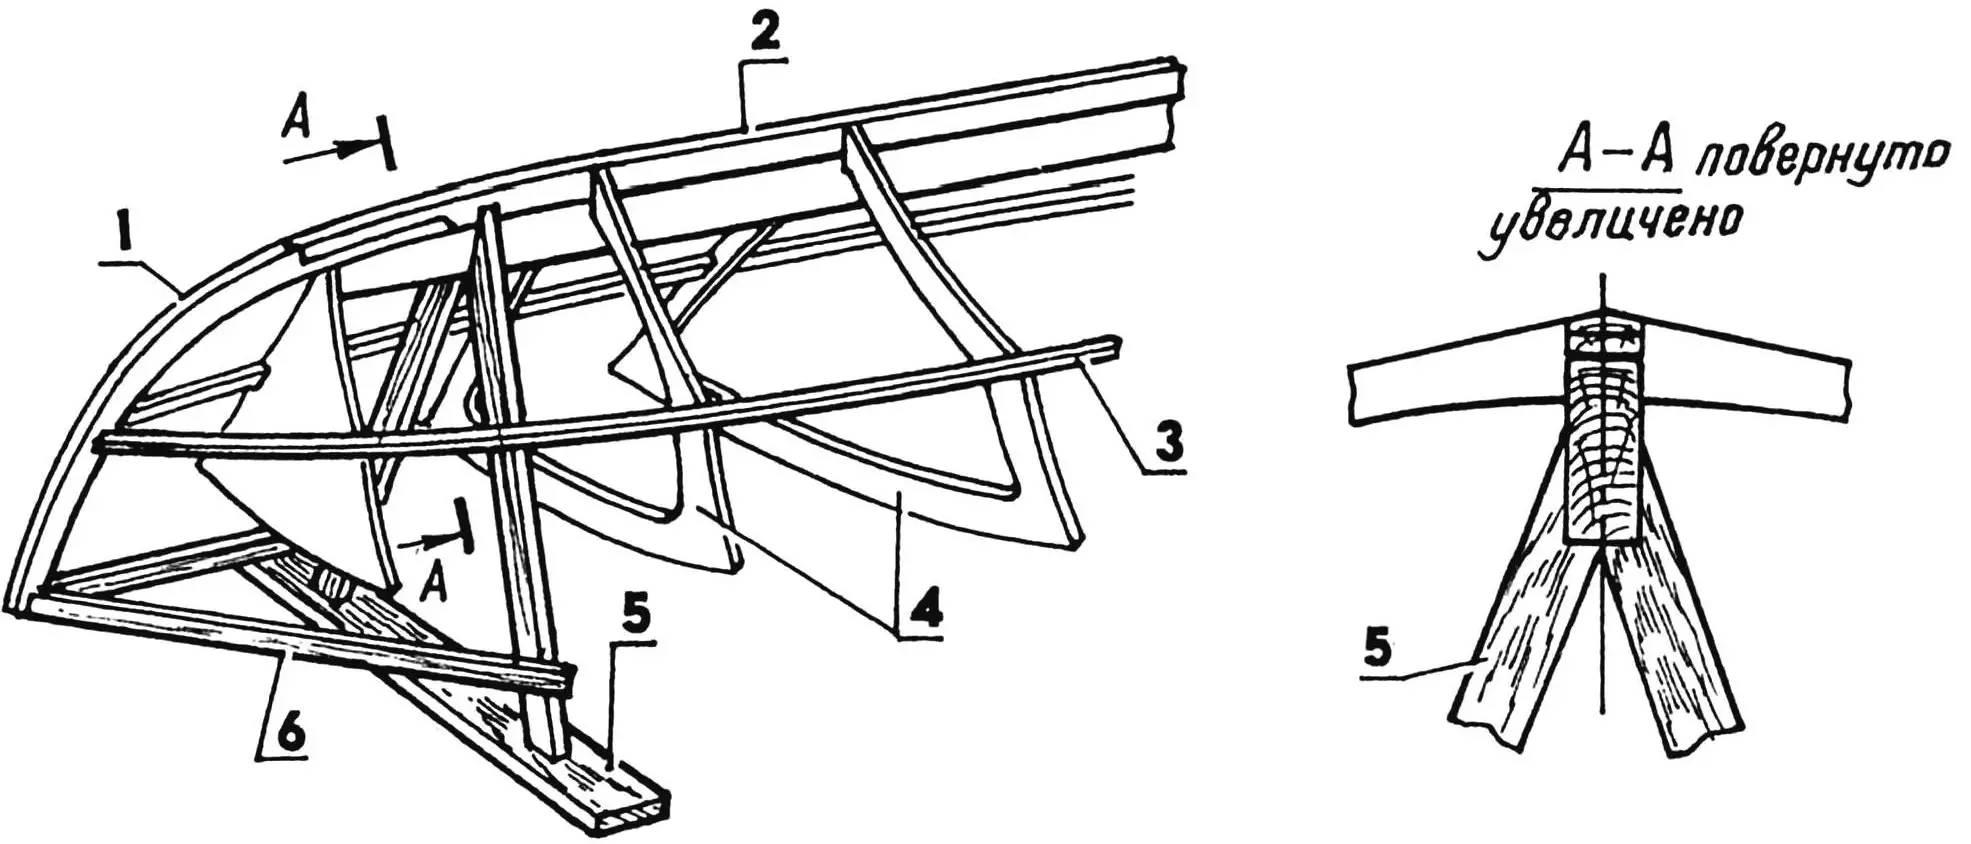
Assembling the bow section of the frame:
1 — stem; 2 — keel; 3 — bilge stringer; 4 — frames; 5 — stand; 6 — mounting brace.
Carefully sand all inner surfaces and apply two or three coats of hot linseed oil with drying intervals. Final treatment — coat with oil-based varnish.
The steering system is cable-operated via a steering wheel mounted on a slanted post in the front of the cockpit. The system includes two self-aligning pulleys, a turnbuckle, and a tubular tiller.

Sheathing the frame:
1 — stand; 2 — frame; 3 — deck stringers; 4 — transom; 5 — sheathing; 6 — bilge stringer.
The seats for the driver and passengers are lightweight frames covered with 50×25 mm slats. They are finished with several coats of hot linseed oil and oil-based or parquet varnish. The seat design allows easy removal and stowage in the cockpit before departure.
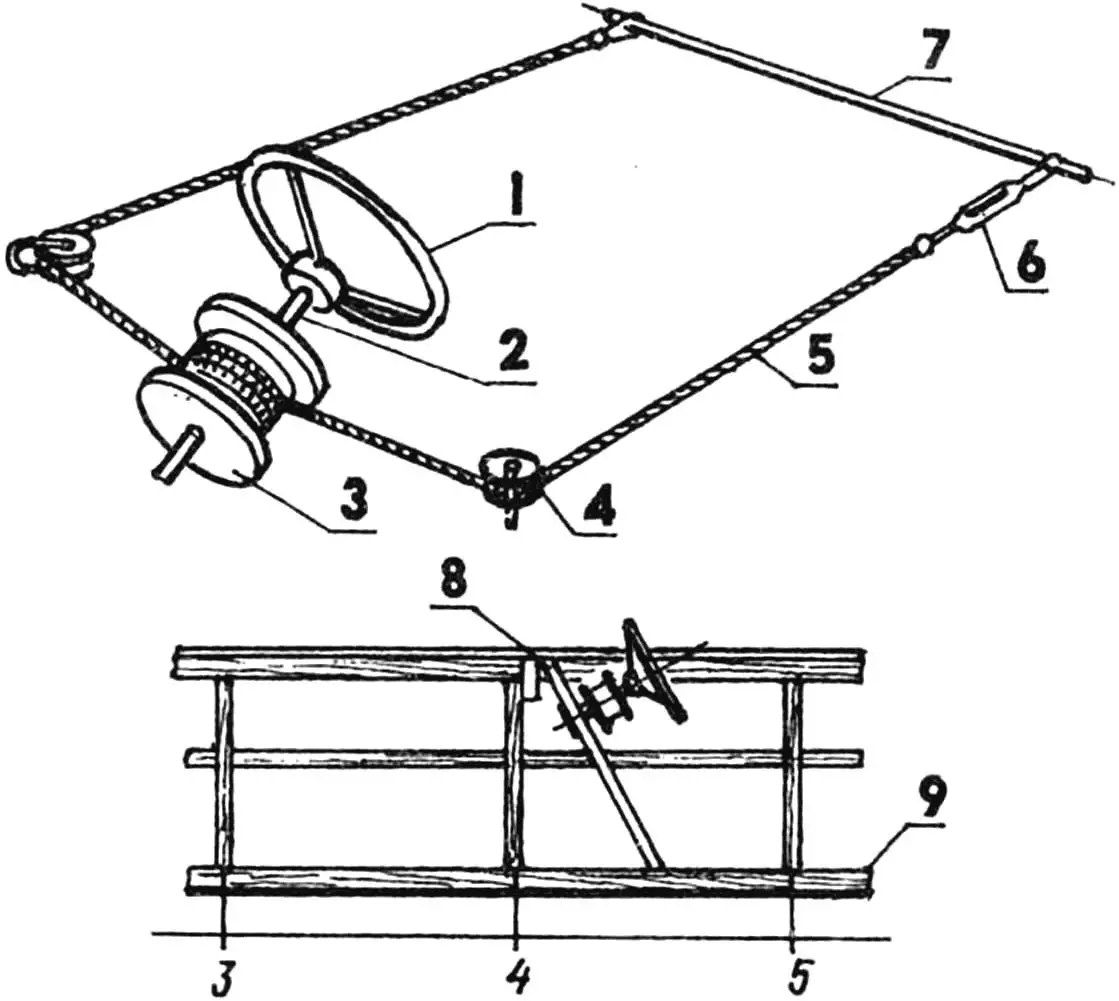
Steering system layout:
1 — steering wheel; 2 — steering shaft; 3 — drum; 4 — pulley; 5 — cable; 6 — turnbuckle; 7 — tiller; 8 — inclined post; 9 — keel beam.
Finally, install the spray rail, windshield, and 3–4 cleats on the deck, and fit rubbing strakes (made of beech or oak) along the sides.
And that’s it — all the essential guidance for building this simple motorboat. We hope readers will appreciate its seaworthiness and ease of use.
Based on materials from “Tehnium” magazine (Romania)
Recommend to read
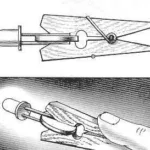 FLASHLIGHT FROM CLOTHESPINS
A makeshift flashlight can be made from clothespins, two drawing pins, disc batteries and a bright led. Disk battery should be installed between the findings of the led, observing... THE DRILL – CULTIVATOR
We have already talked about the agricultural arrangements, where the engine used electric mowers — rotary and shearers knife (see No. 9 of 1980, No. 2, 1981), plough on electric (see #...
