-2… ON the BATTERY

2... ON BATTERIES
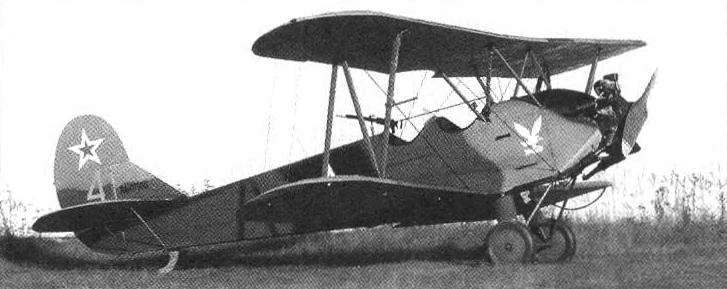
RC model-polyopia motor. Motors together with batteries increasingly gaining ground in the modeling. Today, the growing power motors and improved battery options allow you to create a comprehensive, well-flying model aircraft, including radio controlled.

 
Not too big of a problem is the acquisition of remote control equipment. Beginners can even take advantage of the cheap “toy” equipment, which are equipped with radio-controlled cars. Typically, such equipment is dogtraining, which is enough to control simple flying radiomodule. When disassembling the car, carefully separate the conductors that go to the motor and to the steering — on the model of plane they will be used on the drive motor and ailerons.
 
In the journal “modelist-Konstruktor” has repeatedly published materials about flying “trains”; the last time it was about radio-controlled elektrootoplenie. Continuing the theme — the story of the construction of model-polyopia Po-2 with remote control.
-2 (up to 1944 — U-2) construction.N. Polikarpov is a single-braced biplane of wooden construction, made mostly from pine and plywood with fabric covering.
 
Biplane “box” is assembled from two pairs of detachable consoles are almost identical in design. The frame of each of the wings consists of two spars and six ribs. Wing profile — type TSAGI-541, PLANO-convex, with the relative thickness of 8.12%. The ailerons are provided on the upper and on the lower wing. Wing stand first, was made of steel tubes with wood fairings, and further from dural pipes guttate section.
 
Prototype RC elektroleta training biplane Po-2 construction.N. Polikarpov
 
Prototype RC elektroleta training biplane Po-2 construction.N. Polikarpov
 
The fuselage is of rectangular section, rounded on top. It is based on pine spars associated with the front part of the web frame and rack system. In the front part of the fuselage pinned welded pipe sub frame and tail section is a farm of pine spars and struts, reinforced, wire stretch marks.
 
Tail unit — normal scheme, with rudders and height of the zoomed area.
 
Chassis with rubber cord shock absorption. The wheels are spoked, covered on both sides with canvas. In the rear part of the fuselage installed a managed skid of ash with steel fittings that are rejected simultaneously with the rudder.
 
The power plant of the biplane consists of five-cylinder radial air-cooled engine M-11 designed by A. D. Shvetsov, equipped with a wooden propeller with a diameter of 2.4 meters.
 
The Po-2 aircraft was painted usually in dark green, the lower surface of the wings, tail and fuselage in blue.
 
Currently, the most popular material for manufacturing a rechargeable is the foam, or rather the foam ceiling panel thickness from 3 to 6 mm. the selection of panels should be preferred to plates with smooth surface, no convex pattern. From these we can produce almost all parts of the airframe from the wing spars and ribs to the skin. Notice that the ceiling plate is 6 mm thick can be cut with the help of glow current to the nichrome wire into two 3-mm plate.
 
In addition to ceiling panels, fine pieces with a smooth surface are foam food trays — the kind used in grocery stores for packaging of goods; their flat part has a thickness of 3 to 4 mm, which is quite suitable for the manufacture of the frames and the fuselage skin.
 
Geometric scheme of the RC model polyopia
 
The geometric scheme of the RC model polyopia
 
Wing profile model
 
The most appropriate to connect the foam parts is glue “Titan” — the glue seam is almost as durable as foam and elastic enough the same as the foam.
 
The model designer should keep in mind that some parts of the model will have to be strengthened by pasting their paper.
 
A few words about this technology. Veneer is best done on the plate of laminated chipboard, the surface of which is covered with plastic film. Another such plate need for uniform pressing of the veneer to the foam. Note that the adhesive should be applied in a thin layer on the foam, and paper. After 5 min air drying, the paper is uniformly pressed against the foam blank. Next on the “sandwich” is laid down over which is not too much of a burden. Full adhesive strength is gaining for the day, but to continue the work with the workpiece will be in half an hour.
 
In the manufacture of foam power of the model elements, in particular wing spars, note that their hardness and bending strength is small. Strengthen these items are not too difficult — just use manorastroman of fiberglass yarn or, better yet, synthetic filaments that can be “extracted” from the modern rope for drying clothes, sold in hardware stores (it consists of a harness with heavy-duty filaments enclosed in a vinyl shell). These threads should be privorovyvat with glue “Titan” to the upper and lower surfaces of the spars, as well as the reverse sides of the foam cladding panels, positioning them diagonally — this will make the parts more rigid in torsion at almost the same weight.
So, start manufacturing model Prokopii of the aircraft Po-2.
 
Polycopy class provides a constructor models known space when it was created. The focus here is on the awareness model, not the accuracy of reproduction of its individual elements. In particular, nominally copied on the model of Po-2 engine, landing gear, wing struts, tail boom crutch and cockpit. Instead of PLANO-convex wing profile is used in two ways asymmetric-convex profile of the type P-II with good bearing properties. The ailerons are equipped with only the bottom wing for easy model elektroleta that is enough. The vertical tail has no rudder, since the piloting of this model on management is almost never used — to rotate the model, the ailerons create a roll and at the same time with the elevators is introduced procopiu in turn.
 
The layout of the RC model (the top wing is not shown)
 
The layout of the RC model (the top wing is not shown):
 
1—simulation engine (basswood or balsa); 2—fairing (plastic); 3 — bulkhead-motor mount (foam covered with paper); 4—the top panel of the fuselage (foam); 5,6,8 — polosamote (foam covered with paper); 7—battery compartment batteries; 9—mount the servos (screws M2 nuts); 10,36—frames (foam covered with paper); 11 —lower panel of the fuselage (foam); 12—rod Elevator drive (dural needle with a diameter of 2 mm); 13 — Kiel (foam); 14—crutch (OVS wire with a diameter of 2 mm); 15—stabilizer (foam); 16—the base of the tail spike (Linden); 17—the corner trim of the fuselage (basswood, rail 4×4); of 18.21 — servos; 19—base servos (foam covered with paper); 20—the side panel of the fuselage (foam); 22—thrust actuator Aileron (dural needle with a diameter of 2 mm); 23,25—torsion actuator Aileron (dural needle with a diameter of 2 mm); 24—the lower the wing; 26—spring chassis (aluminum, strip s3 mm); 27 — landing gear (Linden); 28 — support brace chassis (Linden); 29 — propeller with a diameter of 150 mm; 30—cage motor fixing (Vileika of two layers of Whatman); 31 —motor type Speed-500; a 32—receiver system remote control; 33 — strut landing gear (dural needle with a diameter of 2 mm); 34—the wheel (from a child’s toy with a diameter of 40 mm); 35—battery

 
The fuselage of the model is assembled from two side, top and bottom panels, and three frames. All of these parts are cut from 3 mm sheet foam, and the frames still hang drawing paper.
 
Each of the sidewalls is enclosed top and bottom rails fake a cross section of 4×4 mm. Gluing of the foam and the wood produced by glue “Titan”, edging in the process of gluing are fixed on the rails of tailor’s pins.
 
The top panel is bent on a heated steel pipe of suitable diameter.
 
To it glue “Titan” stick three polosamota (foam panels lined with Whatman) and edging of lime reek a cross section of 4×4 mm. The bottom panel consists of two foam parts, the front and rear.
 
When assembling the fuselage, note that the top panel is removable, so the mount must provide a simple fixing the lock. It is also necessary to provide for the installation of the support springs the chassis of the lime block, lime also support the front chassis struts, the tail support crutch and panels for assembling on them servos, receiver, remote control equipment and power pack consisting of 12 batteries.
 
In the front part of the fuselage at the first bulkhead is secured the yoke for the mounting of the motor, laminated of paper. In its manufacture makes sense as a mandrel to use the motor itself (by the way, this model is quite suitable electric type SPEED 500 or SPEED-400) — only need to protect it from glue a couple of layers of plastic film. From the outside of the cage glued the foam cowl and dummy engine M-11. The last is easiest to carve on a lathe of lime, however, a good simulation of these elements of the motor you can glue the washers is cut using a sharpened steel tube of suitable diameter from Linden veneer thickness of 1 mm.
 
Horizontal tail
 
Horizontal tail:
 
1 —stabilizer (foam s 5 mm); 2—Elevator (foam s5 mm); 3 — torsion (dural needle with a diameter of 2.5 mm); 4—loop (nylon braid 8 mm wide)

 
The upper and lower wings of the model are almost identical, the only difference is the scale and lack of ailerons on the top. As in the prototype, the wing is two-spar, the spars — sheet 4 mm foam pasted on both sides of the paper. The top and bottom of each spar, as mentioned above, should stick manorastroman thread.
 
Wing ribs cut out of sheet foam with a thickness of 3 mm, covered on both sides of the paper. Each of the ribs consists of three parts, which during Assembly of the wing are pasted respectively between the front edge of the wing and the front spar between the front and rear spar and rear spar and trailing edge.
 
The front and rear edges of the wing — lime, and the front edge is glued together from two strips, forming in cross section a “T”. The front edge steams in boiling water and bent in accordance with the shape of the wing in plan, forming an elliptical ending.
 
The wing skin foam, from a sheet thickness of 3 mm. it Consists of five elements: a Central, two terminal and two main. Form foam panels it is desirable to clarify, using pre made patterns out of construction paper.
 
The lower wing is equipped with ailerons are suspended on the rear spar with a hinge, which is a pieces of nylon fishing line with a diameter of 1.2 mm. Fixing the line in the spar and the Aileron glue “Titan” — only need using a soldering iron to do on the line of the transverse incision.
 
Both upper and lower wing secured to the brackets for fixing of racks, which will create a biplane box. Each one is made from a segment of a knitting needle, one end of which is flattened in a heated appearance, and it drills a hole with a diameter of 1.2 mm, and the other tapped M3, is designed to insert the bracket into the fake boss was solid.
The drive of the ailerons is via dural torsion bars — they’ll need knitting needles with a thickness of 2.5 — 3 mm. At the point of passage of the torsion bar through the ribs in the latter are pasted plastic sleeve — cuts used refill gel ball pen.
 
The lower wing is fixed to the fuselage by a Central rod made of beech with a diameter of 5 mm (glued to the bulkhead between the wing panels) and attracted by rubber rings to a pair of beech rods with a diameter of 5 mm mounted in the lower part of the fuselage
 
The upper wing is attached to the bottom and through a set of stands and brackets made of aluminum knitting needles with a diameter of 2.5 mm. the Brackets represent the segments with flattened spokes (after heating in the flame of a candle) ends, in which are drilled with a diameter of 1.2 mm. Each of the brackets affixed to the fake boss, is fixed during Assembly of the wing front and rear spars.
 
The length of each of the racks mini biplane is determined “at the place”, for which upper and lower wing with the help of wooden beams fixed to the plane chords consoles were parallel to each other, and go forward of the upper wing relative to the bottom was 44 mm.
 
The ends of each of the stands with both sides flattened (after heating) and they drilled holes with a diameter of 1.2 mm. connecting struts from the brackets on the wing is carried out using segments of nylon twine of the same diameter — they are skipped in the holes in the brackets and racks, after which the ends of the line using the electric soldering iron is attached to the balls.
 
Mount stands wing
 
Mount the wing struts:
 
1,4,8,9—boss brackets stands (Linden); 2,5,11,12 — mounted wing stands (dural needle with a diameter of 2.5 mm); 3 — upper wing; 6,13,15—axis (segments of nylon fishing line with a diameter of 1.2 mm); 7—wing stand (dural needle 2.5 mm diameter); 10—bottom wing; 14—Aileron

 
The lower wing
 
The lower wing:
 
1—the front edge (lip); 2 — loop Aileron (nylon fishing line with a diameter of 1.2 mm); 3—trailing edge Aileron (lime); 4—torsion actuator Aileron (dural needle with a diameter of 2 mm); 5—elements of the ribs (foam covered with paper); 6—rear edge of the wing (Linden); 7—front spar (foam covered with paper); 8—rear spar of the wing (foam covered with paper); 9—jumper the front edge (lip); 10 — wing (foam s3); And—the leading edge of the Aileron (Linden); 12 — pin-retainer (beech with a diameter of 5 mm); 13 insert (Linden)

 
Stands and brackets in the Central part mini-biplane mounted similarly.
 
The finished model is painted — it is best to do this alkyd enamel, which does not dissolve the foam. Alignment of biplane within certain limits you can change the movement of the battery or, in an extreme case, a shift forward or backward of the upper wing. However, the latter measure would require alteration of all bilanich racks.
 
Before the first flight it makes sense to train, “fly” on the spot, which you need to wait for good wind to hang the model on a solid base of thread to a tree branch or, for example, a rope stretched between two pillars. The suspension point must be located in the center of the center of gravity of the model. By controlling the joysticks of the remote control transmitter, you will learn in the first approximation to control the model’s pitch and roll.
 
It is not always possible to find for radio controlled models suitable airfield, so the flight will have to take an assistant — at your command throw it will launch a biplane in the air horizontally and towards the wind.
 
Some radiomodules (those who have not found a helper) use the catapult, consisting of a flat Board and rubber shock absorbers — harness of the model aircraft rubber. The model is fixed to the catapult using a simple stop (e.g., binds to hammered into a Board nail with string, knotted “bow”), and it is attached to the stretched rubber band. After checking equipment and turning on the motor, the pilot pulls a cord, the knot untied and electroanalyt takes to the air.
 
In principle, a model with a well-chosen center of gravity and not having warps of the wings and tail and without your help can make a straight flight you have to just gently adjust the position of it in space. The fit at first is best done at the parachuting mode, for which the model at low speed is supplied to the ground (also into the wind!), then the engine turns off and at half-meter height, you begin to pick up the joystick rudder itself, until the model finally will lose speed and will not go to the parachuting mode. Well, if it happens on grassy lawn — in this case the model will be more likely to survive, you have to carry out another flight.
 
I. KHOROSHEVSKAYA

Recommend to read

  • AUTOSTART CORDAUTOSTART CORD
    If all the other aircraft models EU chose kordovye, certainly, but successful flights behind you, still a lot of "model wood", without which no cost pilot training. And not always the...
  • INSTEAD OF FUEL – CO2INSTEAD OF FUEL – CO2
    The release of carbon dioxide industry miniature engines has caused many young technicians ' interest in the models in which you can use this reliable, silent, environmentally friendly...