 Every thing in the house requires a certain space. Updated your library, increasing the number of objects or devices for work and leisure — in each case the problem arises of their placement. As one of the solutions to this problem can serve as a makeshift rack simple but original design.
 For its manufacture will require six-inch water pipes and five or six boards or narrow oblong panels of chipboard or plywood with a thickness of about 20 mm. length of the pipes and the dimensions of the shelves to stipulate does not make sense, because in each case this will depend on the height of the ceiling, the purpose of a rack, as well as the amount available under it square.
Manufacturer
Length of tubes is determined by the height of the ceiling of the room in which you intend to install the rack.
On the upper ends of the tubes later to put on rubber tips — you can buy them at the pharmacy (those that are designed for wheelchairs canes). On the lower end of each threaded pipe: screwed water couplings with screwed lengths inch pipe thread on the back that can be immediately put on the rubber tips. They are necessary in order to use them you could stretch the webbing between the floor and ceiling made of pipe rack stand.
In harvested wood panels for shelves drilled holes, and the last — at appropriate levels — through holes for the dowel pins hold the shelves. Now of these blanks, you can begin to assemble the rack directly to the intended location.
Assembly
Partially we have already started wintu in the lower threaded ends of the struts clutch limit switch-cuts of pipes to put on the rubber tips. After that, if space allows room, put a rack on the floor for ease of thrusting them on the shelves, passing through their apertures the upper ends of the uprights. The shelves are coming in sequence, while alternating long and short, in accordance with the intended “picture” of the rack.
Each shelf looming up intended for her holes on the struts, which plug pins-holders. After all the shelves pulled down, the upper ends of the struts put on the rubber tips and rack ready. Gently, so as not povypadali pins-mounts shelves, raised, placing it on the planned location. Remains with a pipe wrench to tighten up the spacer of the coupling to the rack securely against the ceiling. Possible even more spin couplings once the shelves are loaded with books.
As nevinovna and twist push-in couplings on the racks can be performed without the use of a key. To do this, simply drill holes in them under the metal shaft knob diameter 6 — 8 mm (it can be itself used for these drill holes).
Finish
All plates of the rack are processed in the stages prior to the Assembly. Metal parts are thoroughly cleaned from dirt and rust using a metal brush and processed with sandpaper, then painted any nitro. Color is chosen at its discretion, but any one, such as brown or black, — the main thing is to avoid bright colors and excessive brightness: it is the supporting elements of the rack.
But shelves require more careful finishing, depending, in particular, used them for material. If they are out of the boards should be planed smooth ostrogany to Samedov or a hangnail. Then, all planes and edges of the treated sandpaper on a wooden block, sanded with consequent reduction of the abrasive grains, and then cover with several layers of a furniture varnish with intermediate drying and additional polishing. The same applies to the shelves of thick plywood. And if you’ve used panels of chipboard, then after processing, it is necessary to paint oil or enamel paints — not only for aesthetic reasons, but also to ecological requirements.

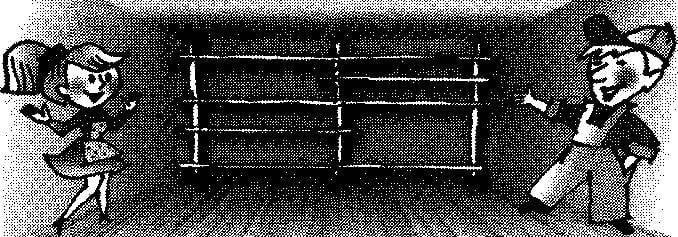
Solution rack:
And small, on two posts; B — average on all three racks; wall-to-wall with the appropriate number of racks.
The main parts of open shelving:
1—rubber end caps; 2—resistant pipe; 3—spacer coupling; 4—a pipe-rack; 5—shelf support pin; 6—shelf.
V. SERGEEV, Alma-ATA, Kazakhstan


