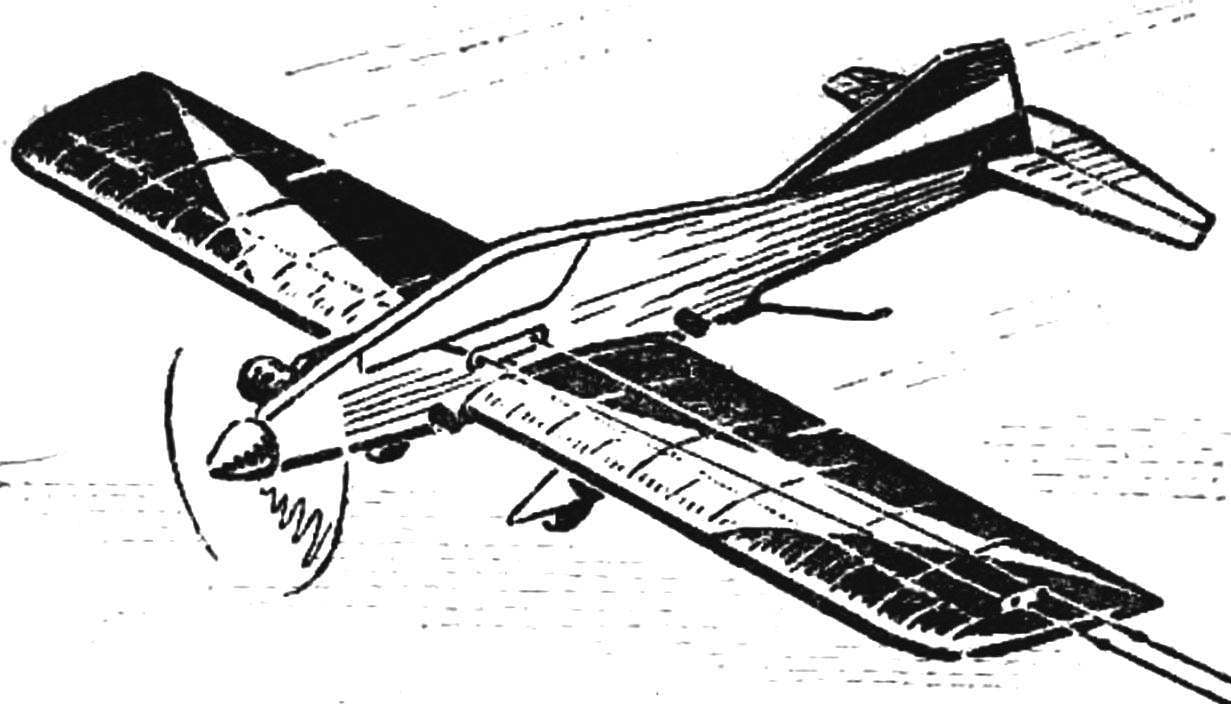
Develop some automaticity in managing the cord of the model during takeoff and horizontal flight, you can begin to build more complex apparatus. It will help you to learn how to perform all the basics of flight complex: forward and backward loops, turn and slide flight “on the back”. Unfortunately, your first robust model of these figures can not do too heavy reinforced design. Therefore, flight training is based on a different principle: the minimum weight, which gives good flight characteristics at maximum ease, which will allow you to repair the microplane for a few hours and re-enter the track or in the field.
Manufacturer model start with the most time-consuming part is the wing. Make two of them at once. Time and effort this will require a little more but have a spare you will appreciate, once the model will visit in an emergency situation
Harvesting rib cut-out mm plywood or fake plates 2 mm thick. Holding a stack of blanks between the plywood templates of the profile of the wing, drill two holes of Ø 3 mm and pull the package of bolts of suitable length. A knife and a file handle pack of hacksaw and cut the grooves for the shelves of the spar and edges. Examining the ribs, don’t forget to number them. Numbering will help you gather smooth, without distortions and twist in the wing. Lightening the ribs, do not touch only the two Central, which are highly loaded rubber band wing mounting. Take an extra nose ribs, using as templates ready end rib. It will improve the aerodynamic characteristics of the bearing planes.
For the longitudinal set of a wing, choose a pine or spruce slats without ROE, knots, curvatures and strong molestati. Check out how sit on the slats of ribs: gaps should not be, but too tight to score them. Having marked longitudinal set on Amalia glue or epoxy frame. Will remain to cover the gap between the Central rib plywood (1 mm layers of the shirt along the scale) and set the ending cut out of plywood with a thickness of 2.5 mm. Lugs, connecting the ends of the shelves of the spar and support the ending, twist of lime. Downloading the outer end of the wing (20-30 g) and kleiv guide for a cord, viscoride the whole frame and fit an wing Mylar film on glue BF-2 or Н88.
 Develop some automaticity in managing the cord of the model during takeoff and horizontal flight, you can begin to build more complex apparatus. It will help you to learn how to perform all the basics of flight complex: forward and backward loops, turn and slide flight “on the back”. Unfortunately, your first robust model of these figures can not do too heavy reinforced design. Therefore, flight training is based on a different principle: the minimum weight, which gives good flight characteristics at maximum ease, which will allow you to repair the microplane for a few hours and re-enter the track or in the field.