IN FLIGHT — THROW

FLYING — TOSSThrowing gliders with a passion for design both beginners and experienced modelers. Draws here is that models of readily available materials to be not worse than those collected from scarce balsa.
It should be recalled that in competition with such models, the most important is the achievement of the maximum duration of flight, the athletes can run the glider only throw hands.
 
We present two simple modelers throwing a glider “pioneer” and “Junior”, developed in the circle of experimental modeling of syt of the city of Kostroma. Both models showed good results in competitions, even in the absence of significant updrafts duration of their flight was at least 30 seconds.
 
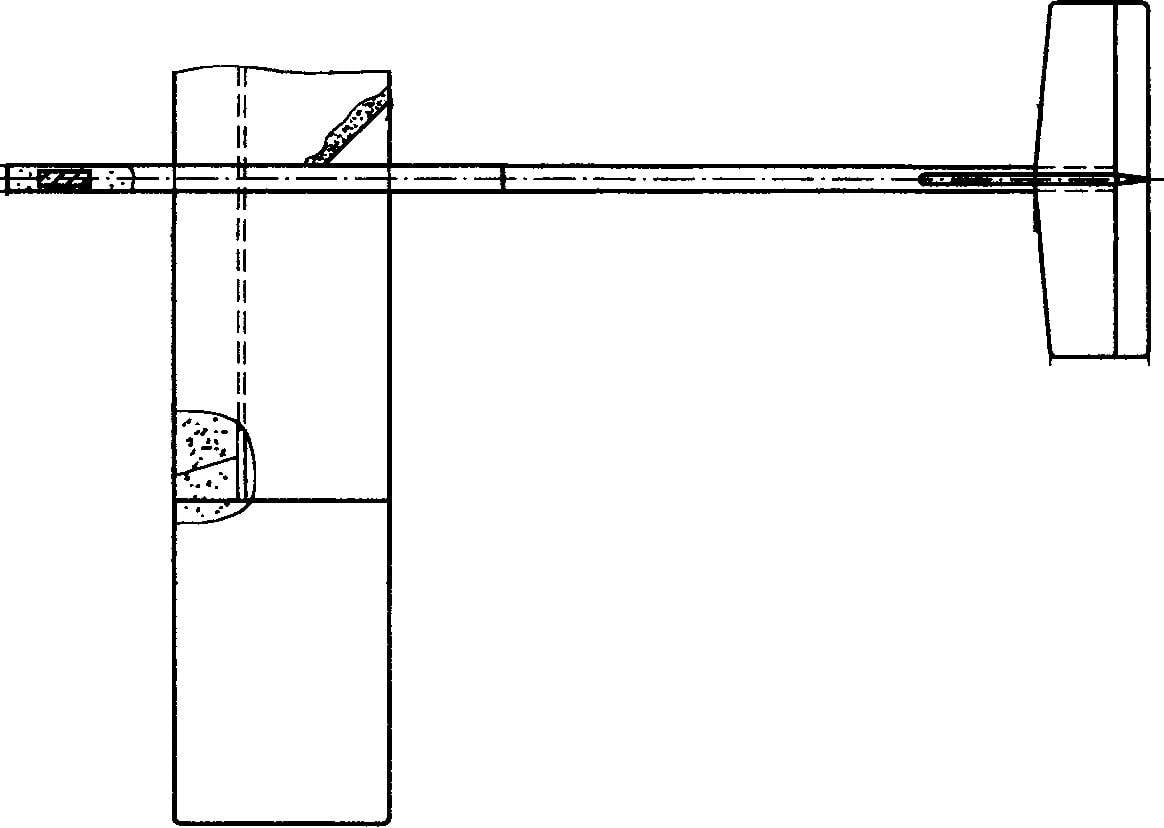
Preparatory work begins with the implementation of drawings of parts of the airframe in scale 1:1, making templates of the wing, stabilizer, fin and forward fuselage, as well as selection of materials. For the wing, stabilizer and fin are best to use Styrofoam ceiling tiles are 3.5 mm thick with dimensions 500×500 mm, which can be purchased in stores of building and finishing materials. For the forward fuselage will need a more dense foam. The tail boom and wing spars are best planed pine. Will also need thick drawing paper (Whatman), thin writing paper, and PVA glue and nitro.
 
The creation of models it is recommended to start with the manufacture of bearing surfaces, fin and stabilizer. The details of these after marking the outline on the templates should be cut from foam a sharpened scalpel.
As can be seen from the drawings, in both models the shape of the wing in plan is rectangular with a constant profile. For the wing of the “Pioneer” will require a thickness of 3.5 mm, and for the wing “Junior” — 7 mm thick (such a blank can be obtained gluing two foam 3.5-mm plate). After curing of glue in the wing is cut a groove under the spar, and then produces profiling.
 
The wing profile is PLANO-convex. Initially to give it the desired shape best using a sharpened knife, but finally bring you can use of skins of different grits glued to a plywood plate dimensions 200×50 mm, using a template from thin plywood.
 
Further, the wing should be cut off the end portions (the so-called “ears”) and after the fit glue them in the same locations, maintaining equal angles. It is recommended to use a simple template — a wooden wedge, cut according to the size of the limb of the consoles specified on the appropriate drawing of the glider. After the wing Assembly the leading edge up to the spar fitted by a thin writing paper with PVA glue diluted with water.
 
The profile of the fin and stabilizer are flat with a rounded front and pointed rear edges. At the rear of every detail of shallow incisions are marked with rudders and height — they are useful for debugging models of gliders.
 
In the manufacture of the fuselage, use the fine-pored foam and pine. In the nose of the fuselage is cut a hole in the airfoil with a given angle of 2°, and the groove under the balancing lead weight.
 
Assembly of the airframe is made using PVA glue. The finished wing is gently inserted into the hole in the fuselage and secured with glue. Further, on the lower surface of the right wing close to the fuselage is glued to the triangular plate out of plywood with a thickness of 1.5 mm — support for the index finger of the athlete at the start of the model. The junction of the wing and fuselage is enhanced with strips of drawing paper. And at the end of the Assembly is permanently set up and fixed with glue the stabilizer and fin.
 
Finishing models is in the color of nitroenamel covered with paper plots of the wing and tail boom. Weight ready to fly “a Pioneer” must not exceed 26 g, “Junior” — 30 g.
Throwing gliders
 
Throwing gliders
Throwing gliders “pioneer” (above) and “Junior” (bottom) (the numbers and titles of positions of both models are the same):
1 — balance weight (lead); 2 — the forward fuselage (fine-pored foam); 3 — fuselage beam (pine rail); 4 — Kiel (foam tiles s 3.5); 5 — wing (foam tiles s 3.5); 6 — strengthening the trailing edge of the wing (plywood 1,5 s); 7 — the wing spars (pine rail); 8 — stabilizer (foam tiles s3-5).
 
Debugging gliders should start with eliminating disparities, then you can start to balance. It lies in the fact that with the help of downloading or facilitate the forward fuselage of the airframe to ensure that its center of gravity located on the axis of the wing spar. The download is performed using pieces of lead, put in cut in the forward fuselage groove and relief — drilling in the fuselage holes. After this preliminary balancing pieces of lead melted and cast in a suitable size shape; ready to lead the block wrapped thread, promazyvayut glue and again is laid in the groove.
 
During trial runs necessary to achieve a smooth transition models from a set height to the guy in the left turn. The deviation is adjusted with the help of minor limb of the trailing edges of the wing, stabilizer and vertical stabilizer.
 
TIKHONOV, Kostroma

Recommend to read

  • WRITTEN FROM THE DININGWRITTEN FROM THE DINING
    In my family there was a situation when my daughter went to first grade, and hence it took for her workplace, where they could prepare lessons. However, the area and the interior rooms...
  • DESIGN… OF THE SHARDSDESIGN… OF THE SHARDS
    No need to be a technician to do such wonderful things. Old vase turned into the original decoration of the interior; a simple clay bowl in the Cup with an elegant geometric ornament; and...