Appreciating the harsh reality and weigh all the circumstances, I decided to come up and make a design that would meet all my requirements: adorned the plot was solid, the cost is not too expensive, does not corrode and is not attracted “guests”.
Below is a detailed description of this task.
Let’s start with the fact that the future capacity need to decorate the garden, that is, at least, its design and form should fit harmoniously into any place, becoming like a part of the landscape. For example, my garden is divided into terraces, and so the capacity I have designed as a retaining wall upper. In other conditions probably will require other forms and additional functions of the structures.
The second problem is the material: anti-corrosion properties and unattractive to uninvited “guests”. The bare hardware is no longer on the first reason, non — ferrous metals- for the second.
After going through different options, I chose what I think is most successful: to make the basis of the capacity of sheets of galvanized steel, “dressed” it in concrete.
Manufacturing technology basics of the following:
The steel sheets dimensions 1000×2000 mm connected to each other by a ring. The length of the ring (number of leaves) depends on the planned volume of the container. My capacity has a volume of 1 cubic meter, so I had the two sheets.
The sheets joined.
Placing the sheet on a flat surface, such as a DSP, and stepping back from the edge 10 mm, hold the Scriber line that pliers, gently bend the edge of the sheet at an angle of 90°. Further, the bend produced by light blows of a small hammer gradually along the whole line, as shown in Fig.1. The same operations performed from the opposite edge of the sheet. Preparing this way all the sheets, connect them as shown in .Fig.2, squeezing in a little seam sealant (sealant for plumbing, and you can use ordinary clay). Then light hammer blows gradually “press-fitted” seam and in three or four places with a center punch make a good “castles” that the sheets are not shifted. After the connection is obtained springy flexible ring, which can be given any shape: to bend fasolino, pulling in ellipse or to come up with something intricate.
The next stage is the manufacturing base. For the capacity 1 cubic meter is enough to make a Foundation with a thickness of 120 — 150 mm, placing it on a pillow of crushed stone. Of course, the area of the basement should be slightly larger than the area of the bottom of the tank. By choosing the place, take out the soil to a depth of 150 — 200 mm, fill the hole with rubble and sand, sheds water well and press it. Now put a layer of concrete at half its total thickness on the concrete — rebar (steel rods and pipes), and on it — the rest of the solution. Concrete in the ratio 2:2:1, respectively is prepared from a mixture of crushed stone, sand and cement (instead of gravel, you can use expanded clay). Water in the mixture it is necessary to add enough so that the concrete did not spread, and resembled gingerbread dough — then the Foundation will not require formwork, and its edges will be similar to “stone burrs”. Concrete should not be poured out, and put in place a shovel and tamping (ramming, you can use a wooden mallet).
On the bottom you can set the wall, that is, before the ring is made of galvanized steel. Before installing the ring make it two holes: one at the bottom at the base under the drain pipe, another 300 — 400 mm above — for the selection of clean water.
The ring is quite springy, so fixing it in position using all the same bricks. If the previous work was done correctly and accurately, then between the wall and bottom there may be gaps not exceeding 5 mm — quality tanks are not affected.
Then obkladyvaetsya outside the junction between the ring and the bottom is steep, but the plastic “test” of cement-sand mixture (1:1) with addition of glue PVA in about 1 tablespoon of glue on 0,5 l of water. Dry “dough” day, remove the bricks and install in the hole of the ring at the bottom of the drain tube from aluminum, stainless steel or plastic.
Now the steel substrate ready for the next stage — the construction of a concrete wall.
Then you will be able to materialize all your feelings and get exactly what I wanted.
By building the wall, we must not forget that at the height of 300 — 400 mm from the bottom of the wall necessary to mount another drain tube with a screw thread for valve to take away clean water.
In order for concreting the steel substrate is not deformed, it is advisable inside the container to build out of bricks line backup (Fig.5), which will not allow a thin wall to “go” inside pressure of the concrete. Put 5 — 8 layers, the concrete wall should be allowed to dry until the next day, otherwise it may “float” or destroyed some of the details. In that case, if the molded sharply prominent ledge near him never to do anything until the next day. The same applies to depression or any part of the position and form of which must be preserved. Work in these areas can be continued only after the concrete has hardened.
Completing masonry, it is necessary to make a small influx into the container on the upper edge of the steel base, so it does not peeled off from the concrete.
The last stage — finishing the concrete wall.
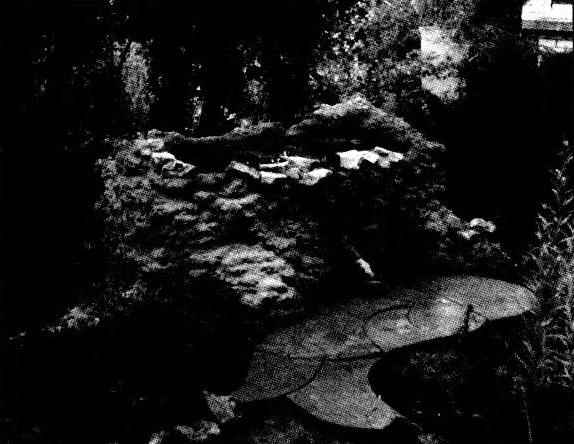
What eventually came out of my design, seen in the photos.
To summarize, I would say about the obvious advantages of the design.
1. It is relatively cheap. Capacity of 1 cubic meter of consumed three sheets of galvanized steel, six bags of cement, 13 bags of expanded clay, 13 bags of sand.
2. Ease of fabrication. There is neither welding nor soldering, nor any complex techniques that require special tools, materials and skills.
4. If the water is hard and rich in iron, which, when water contact with the air precipitates in the form of rust in this tank the water settles faster, the rust settles to the bottom, and a raised tube in the wall allows you to drain pure water that can be used for the bath, and after filtration, even for cooking.
5. Capacity aesthetic. Perfectly matched with stone hill, waterfall, fountain, flowers, herbs, thus it fulfills its prosaic purpose: serves as a reservoir for water storage.
6. Capacity tech. It can be made any shape and size, using the same techniques that “fit” to the desired location without disrupting the already existing structure of the garden.
7. Finally, capacity is not “taking”, very actual for our reality. The lack of capacity, perhaps, only one: it can’t be moved, so the place should be chosen carefully, keeping in mind that built permanent structures.
KOVALEV, Volgograd
Recommend to read THE REFLECTORS ON THE STROLLER On wheeled vehicles are widely used reflectors-reflectors, warning drivers of, for example, the movement of bikes or motorcycles. It is proposed to install the reflectors on the sides of... BACKPACK ON WHEELS Our housewives, especially elderly ones, have long appreciated the shopping cart — a small two-wheeled cart with a bag attached to its frame, resembling a tourist backpack in shape. How...

 There is no need to prove how important it is to have in the garden water supplies that happen with irrigation system and flower beds with lawns for the week of the July heat will turn to hay. So when my old steel tank had rusted and sprung a leak, there was an urgent need to find a replacement.