Our magazine has already dedicated several articles to the topic of making good use of such a seemingly useless material as various bottles. And today, we are once again returning to this subject, offering our readers an article by V. B. Akimov, who shares his advice on how to repurpose many of the household items we usually throw away for use in country house construction.
Whatever I have to build at home or on my six-hundred-square-meter garden plot, I always start by thinking about how to combine several functions with minimal effort, especially when land is limited.
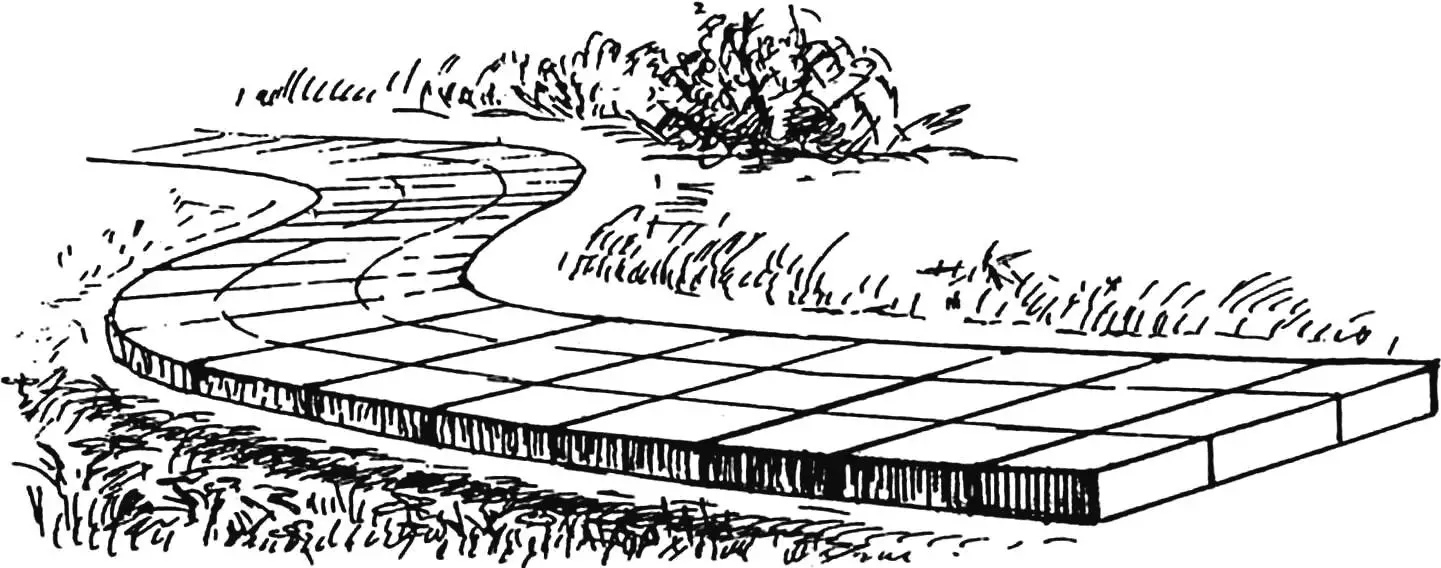
Since the spring meltwater remains on our plot until late May or early June, the issue of drainage to make the land usable sooner has always been a challenge. In addition to the drainage ditches along the perimeter, I also had to think about additional drainage through the middle of the plot. At the same time, I needed to lay a paved walkway made of concrete tiles across the entire area. So I decided to combine both tasks — to build a walkway and a drainage channel at once. And for the drainage system, I decided to use… discarded glass bottles. I already had experience using them before: in the past, I used to lay such containers for water diversion under driveways. Practice showed that the gaps between several rows of bottles allow water to flow through easily — they make an excellent substitute for traditional drainage pipes.
If there’s an idea — it’s time to bring it to life.
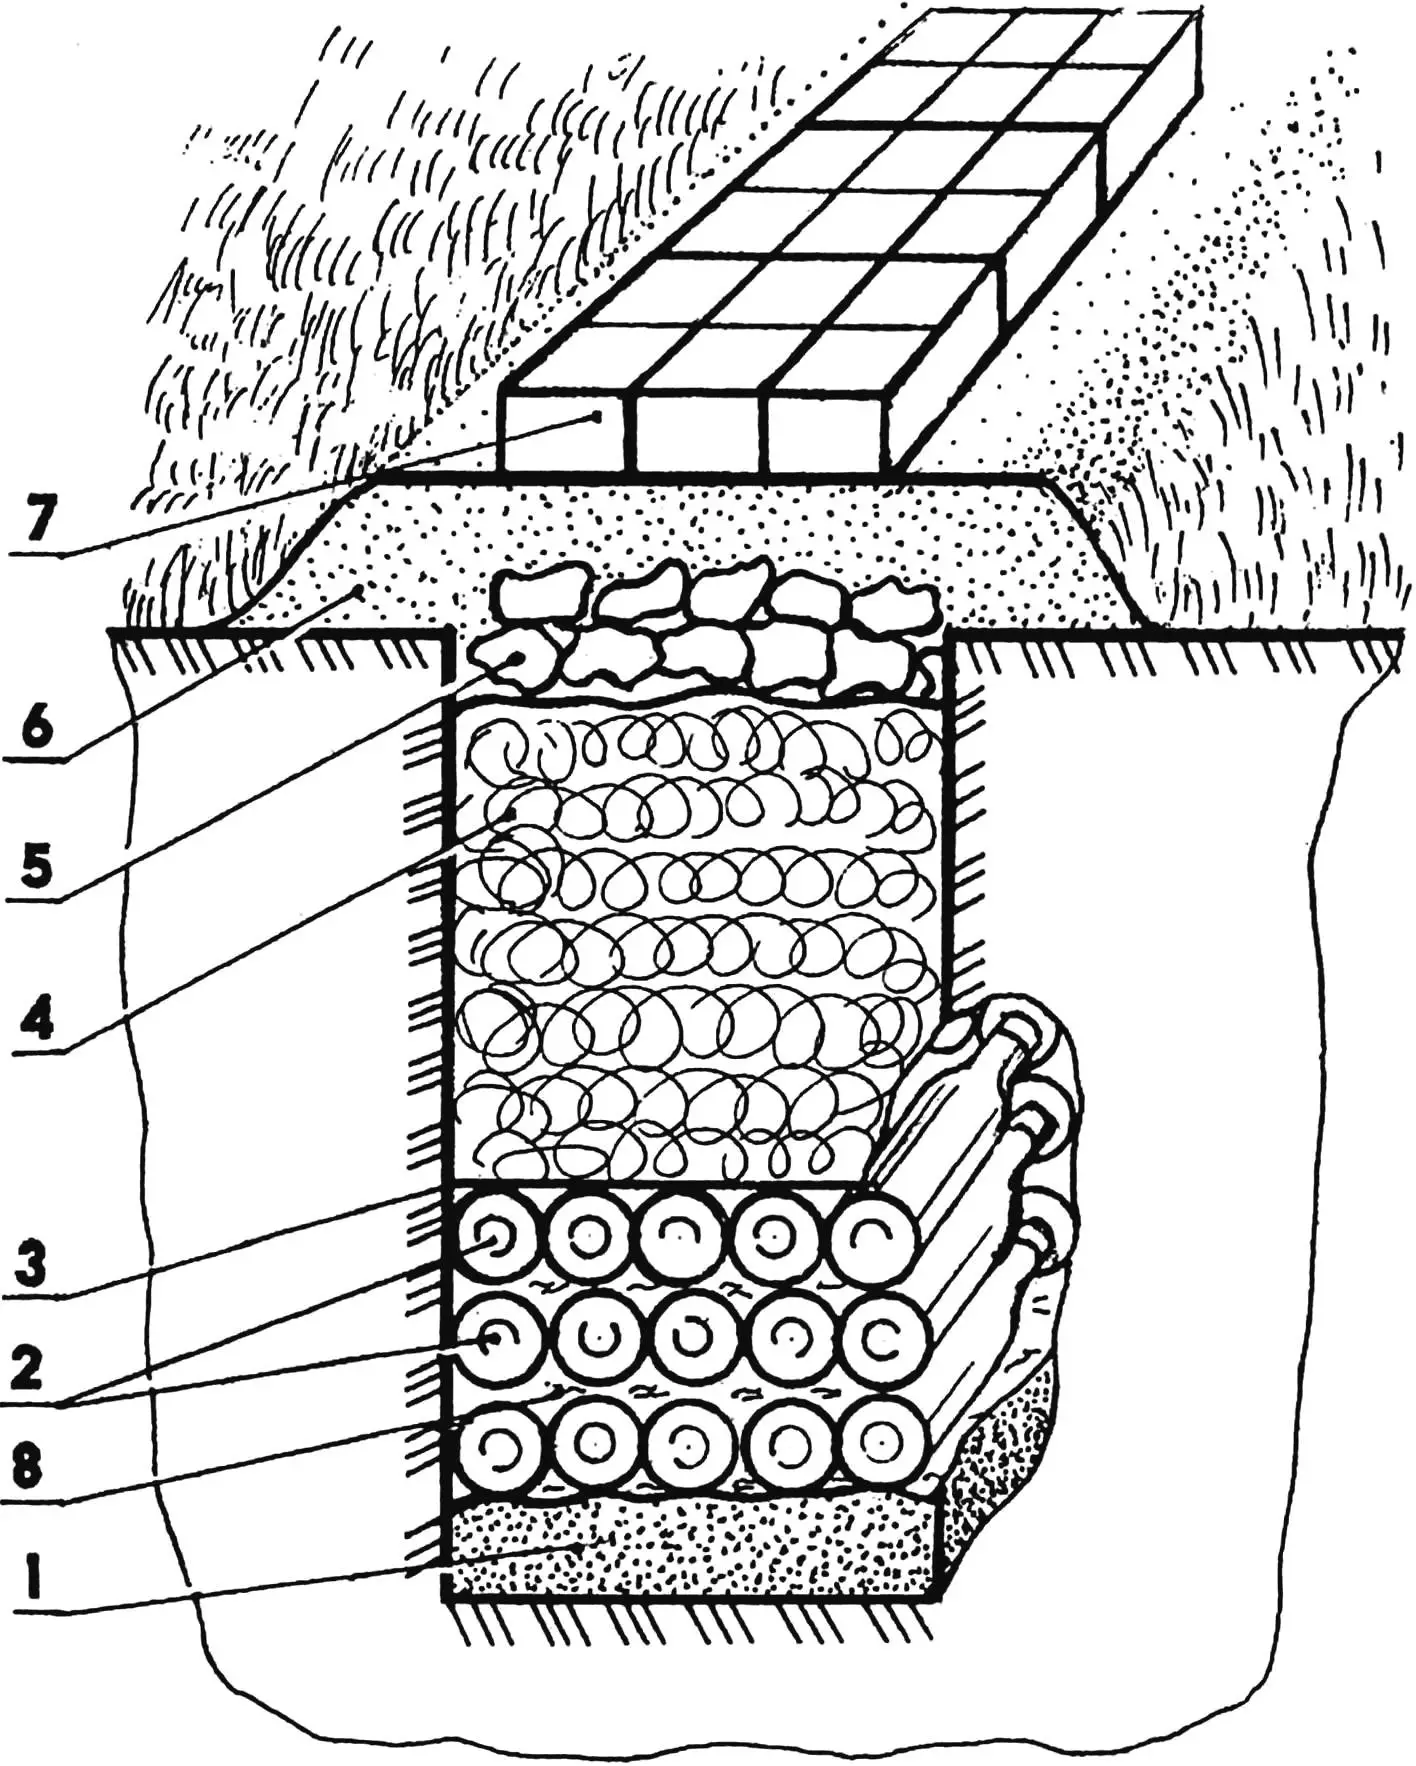
1 — bottom sand layer 5–8 cm thick; 2 — rows of glass bottles; 3 — sheets of iron, roofing felt, film, etc.; 4 — layer of clay; 5 — layer of broken block pieces; 6 — sand cushion 10–15 cm thick; 7 — paving tiles; 8 — water flowing through gaps between bottles
First, I marked out the route for the walkway and the drainage ditch with stakes and a string. The ditch was dug to a depth of 0.8–1.0 m, making sure the bottom sloped toward the lowest part of the plot. While digging, I tried not to mix the topsoil with the clay.
I covered the bottom of the ditch with a 5–8 cm layer of sand, then laid several rows of glass bottles on top. To fill the remaining space, I threw in tin cans, broken glass, pieces of slate, and bricks — all sorts of “good stuff” that had accumulated on the site. On top of that, I covered everything with sheets of rusty iron, bits of roofing felt or slate, and polyethylene film — everything came in handy.
Then I covered the whole thing with a layer of clay that had been removed earlier from the ditch. Using a simple wooden tamper, I carefully compacted the clay, occasionally moistening it with water from a watering can.
After building the house, I had plenty of broken aerated concrete blocks left. After crushing them into smaller pieces, I poured them into the trench on top of the clay layer, although it would have been better to place them earlier — directly on the bottles.
The resulting “trench sandwich” was then covered with another 10–15 cm layer of sand. To prevent the soil from settling under the paving tiles later, I thoroughly watered the sand layer, adding new portions until it compacted properly.
Once the sand base was ready, I started laying the paving tiles. To keep them even, I laid a pipe along the future walkway for alignment. Using a wooden (or plastic) float with a spirit level, I leveled the sand before laying each tile — both along and across the walkway, taking the slope into account.
After laying each new tile, I aligned it with the pipe and tamped it against the previous one, checking the level and adding sand underneath or between the tiles where needed.
As a result, I managed to “kill two birds with one stone” — I built a walkway and provided drainage for the plot, all with minimal material costs. Moreover, the fertile topsoil removed from the ditch was used to enrich the garden beds.
V. AKIMOV, engineer
Recommend to read
 “BEACH JEEP”
The idea to build this car came about because my family and I really love active recreation and traveling to our native places. And not only where there are roads, but more often where... ON THE ROAD, THE ELECTRIC CAR!
Imagine: around the entrance waiting for us miniature car a nice modern shape. Let's do a small trip. The door swings open, as usual, and gently rolled back, releasing a wide opening for...
