
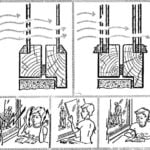
To store the harvested root crops and vegetables, as well as plant seeds, flower tubers and bulbs, throughout the entire winter on any garden or dacha plot, a root cellar is necessary. If groundwater lies deep, building one is simple — directly under the garden house. Its construction will not present any particular difficulties; you only need to make reliable waterproofing so that in spring, when the snow begins to melt, and in autumn, during rains, the cellar is not flooded.
If, however, groundwater is close to the surface, no waterproofing will help. As the folk proverb says — water will find a hole. For this case we recommend N. Gavriilkin’s design. The structure does not require large financial expenditures or scarce materials. High carpentry qualifications of the builders are not needed either. Yet at the same time the cellar is very spacious and convenient, equipped with lighting and heating. During the severest frosts the temperature in it does not drop below +2°C, and usually stays within +3…+5°C. Thanks to constant air humidity and stable temperature, potatoes in this cellar keep excellently until the end of May — the beginning of June; dahlia tubers and tulip bulbs, having lain all winter, look as if they have just been dug out of the ground; cabbage keeps without wilting for three months.
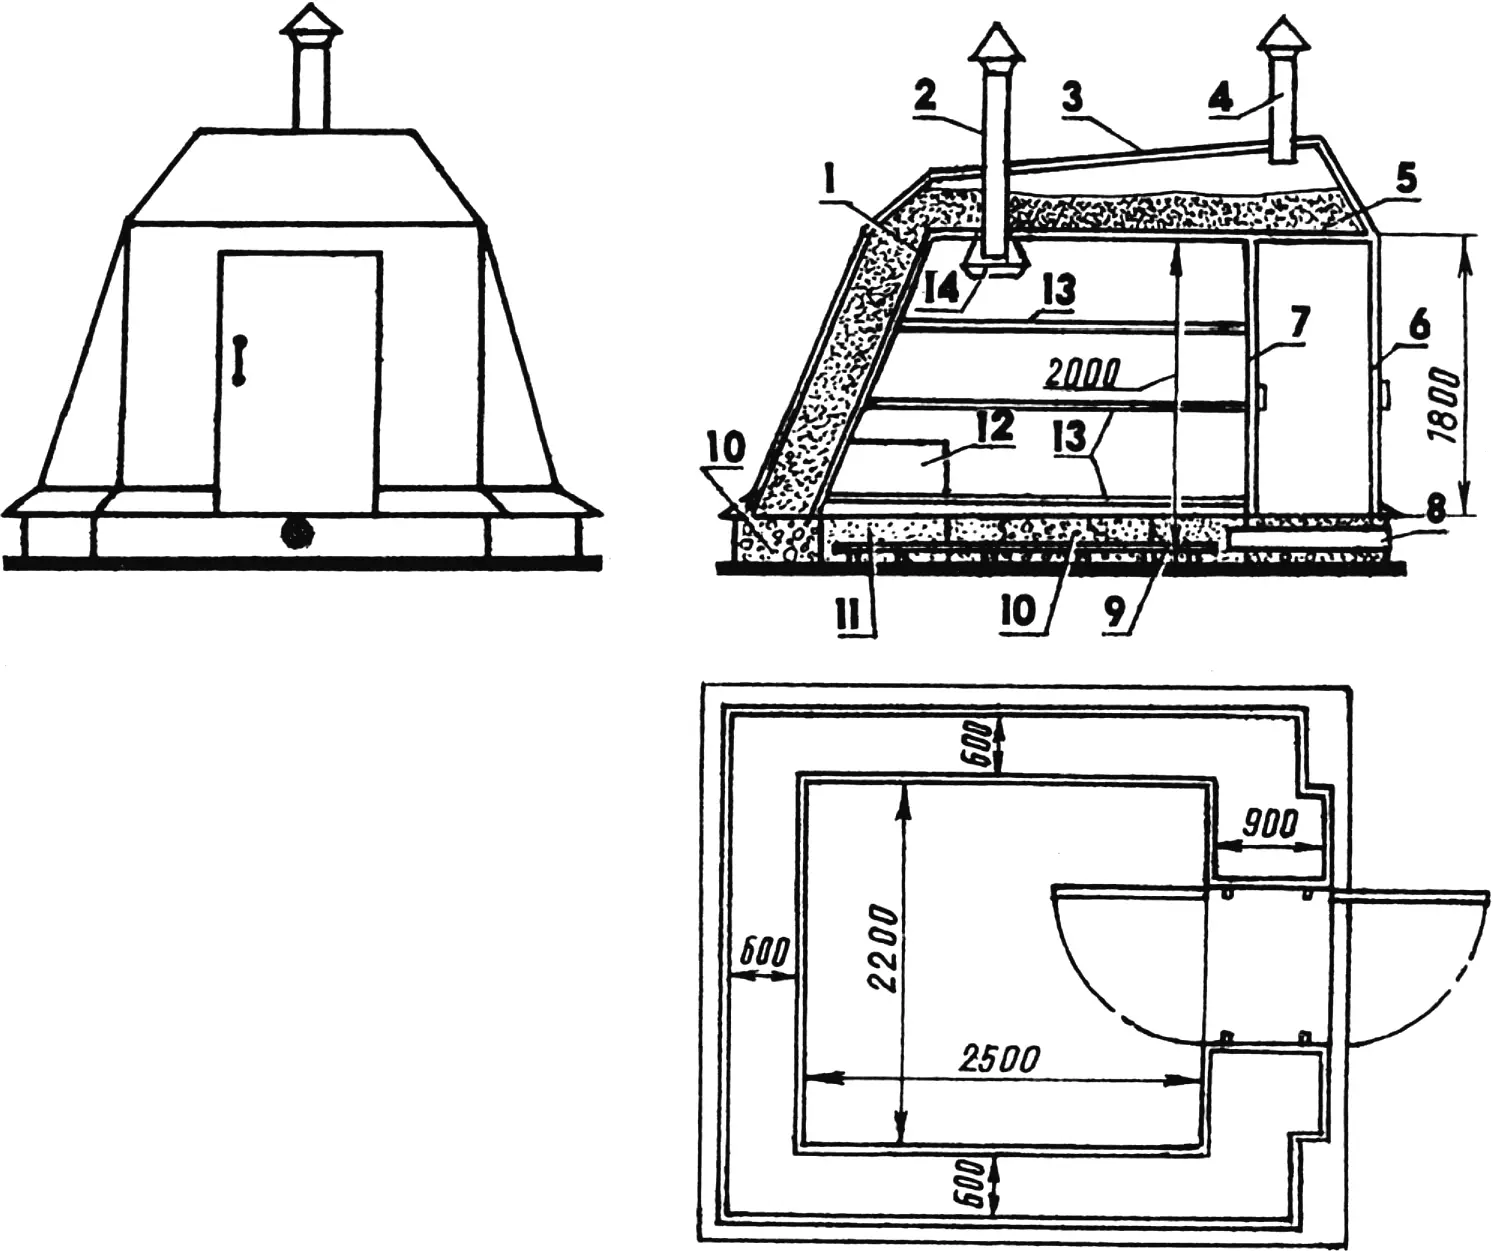
1 — inner wall cladding; 2 — cellar ventilation pipe; 3 — outer wall cladding; 4 — insulation ventilation pipe; 5 — insulation; 6 — outer door; 7 — inner door;
8 — ventilation pipe; 9 — floor grating; 10 — foundation supports; 11 — foam plastic; 12 — box for storing potatoes; 13 — shelves; 14 — condensate collection container.
Construction of the cellar begins with the foundation. For this purpose, a trench 30—40 cm deep and 70—80 cm wide is dug along its perimeter. On the outer side of the trench, foam plastic panels 30—40 cm high are installed. If only packaging foam plastic is available, it is first wrapped in roofing felt. Installing such panels serves two purposes at once: preventing the cellar floor from freezing in winter and keeping rodents out.
After installing the thermal insulation, the trench is filled with sand 10—15 cm above ground level. Then, on a surface slightly larger in area than the cellar, waterproofing of two or three layers of polyethylene film or roofing felt is laid on the sand. The waterproofing is also covered with sand on top, and the surface is leveled.
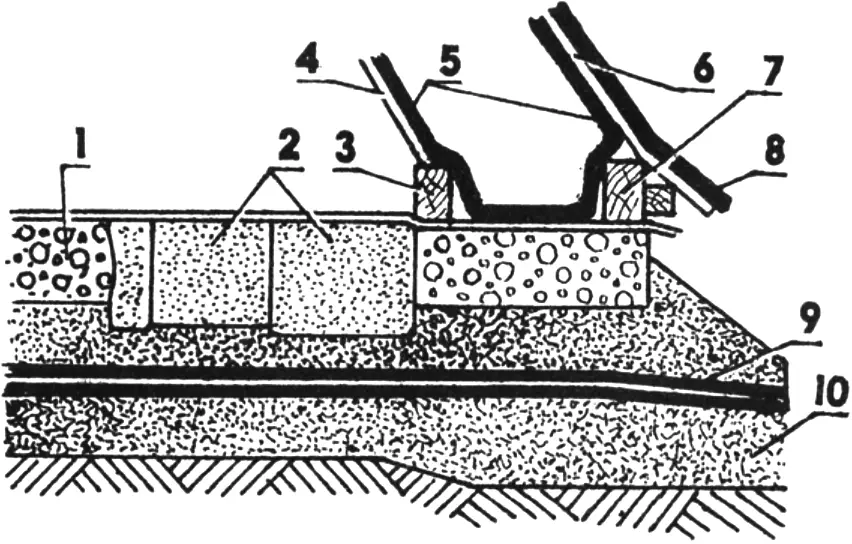
1 — foundation support; 2 — foam plastic; 3 — inner wall beam; 4 — inner wall cladding; 5 — inner roofing-felt cover; 6 — outer wall cladding; 7 — outer wall beam; 8 — outer roofing-felt cover; 9 — waterproofing; 10 — sand.
As foundation supports for the cellar, curb stones, pieces of piles, or any standard blocks of sufficient strength are used. The number of supports depends on what beams are laid in the lower binding of the cellar, but the distance between supports must not exceed 70 cm. The gaps between supports are filled with foam plastic (Fig. 2).
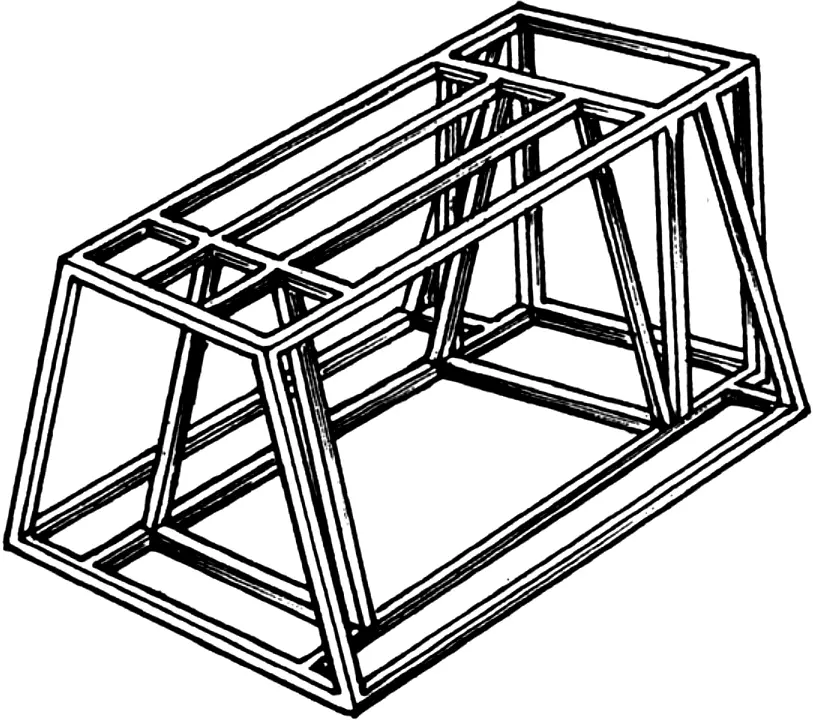
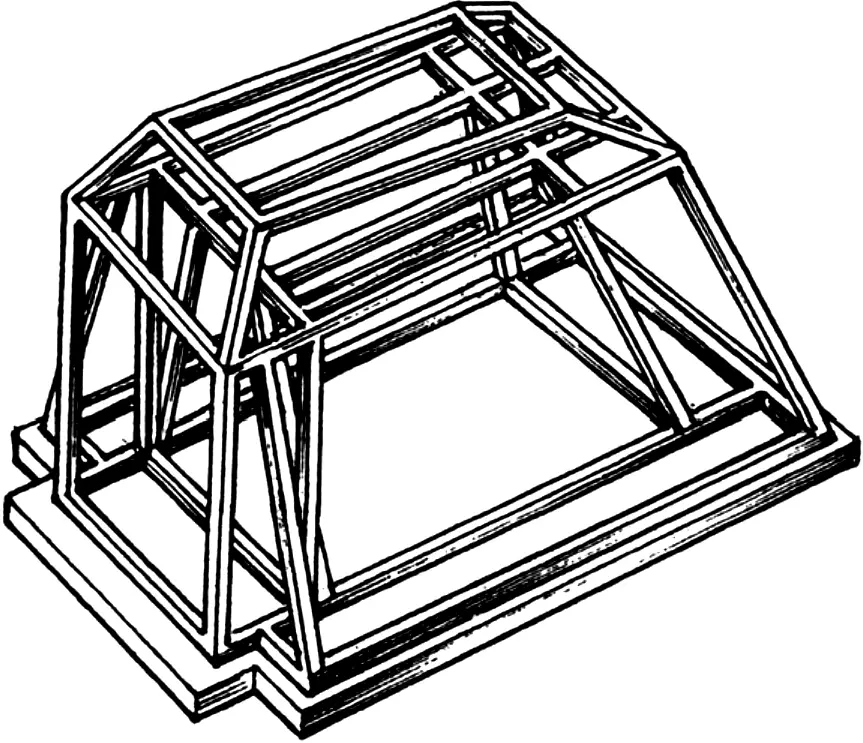
The frame is assembled from wooden beams 100×50 mm in cross section. Three walls of the cellar are made sloping, and only the front one, where the entrance is located, is vertical. The roof is made in the form of a truncated pyramid. Such a shape helps retain snow on the cellar roof, which makes it possible to preserve heat better beneath it (Fig. 6).
The walls are double; the distance from the outer to the inner cladding is 60 cm. The space between them is filled with insulation — waste from the production of asbestos chipboard. This type of insulation is chosen because insects do not settle in it and it retains heat quite well. Other materials can also be used as thermal insulation, for example, foam plastic, fiberglass, fiberboard, and others. In an extreme case, the cellar walls can simply be filled with ordinary wood shavings, previously treated against rotting with creosote or another suitable agent.
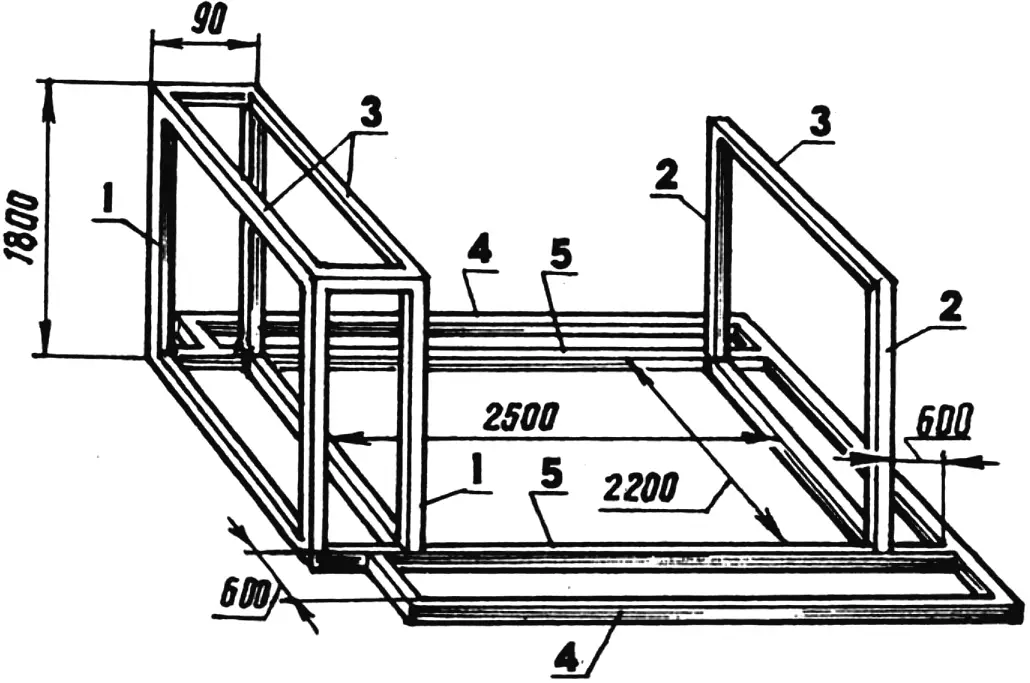
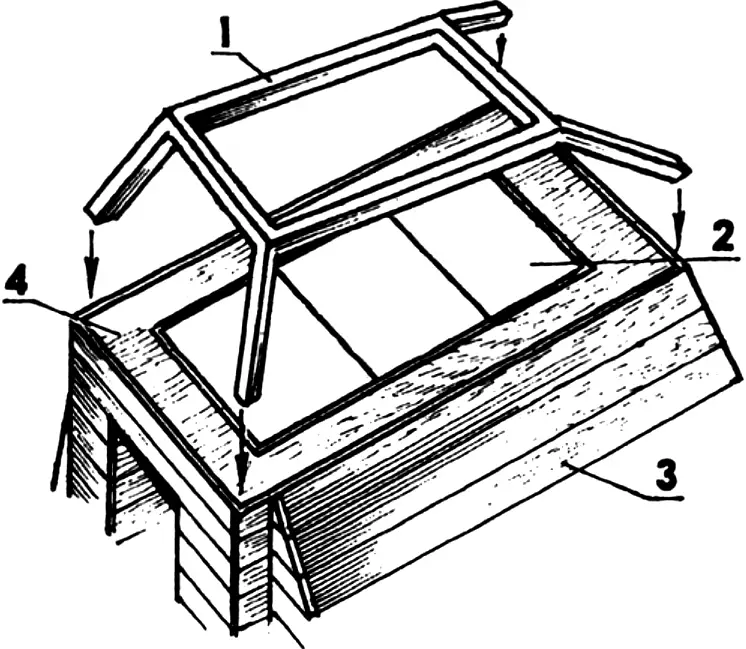
1 — vestibule frame; 2 — temporary posts for installing ceiling beams (removed after the frame is assembled); 3 — ceiling beams; 4 — outer binding beams of the cellar; 5 — inner binding beams of the cellar.
Assembly of the frame begins with laying the lower inner and outer bindings of the cellar, installing the vertical posts and the ceiling of the front wall vestibule, and two temporary posts supporting the cellar ceiling beam (Fig. 3). Then the ceiling beams themselves and the inclined posts of the outer and inner walls are installed (Fig. 4).
Cladding of the cellar frame begins with the inner walls. Moreover, over their entire area, except for the facade, unplaned boards or old, previously used boards can be used. Roofing felt or parchment is laid over the boards. The lower edge of the insulation is placed on the foam plastic installed between the supports, bent upward, and nailed to the outer wall with battens (Fig. 2). This is done for the airtightness of the cellar and so that the insulation does not spill out through gaps in the wall. Then the outer wall is clad with boards, and along its lower edge an eave for draining water is nailed on.
Insulation is poured into the space formed by the outer and inner walls and lightly tamped. Care is taken to ensure that the layer of insulation on the ceiling is at least 80 cm thick. Such a fill thickness makes it possible to avoid heat loss.
After insulating the cellar ceiling and cladding the roof frame with boards, they proceed to one of the most critical stages of construction — installing the outer roofing-felt covering. It is made in three layers, on bitumen mastic. When cutting the sheets, care is taken to ensure that they fit tightly against the cellar roof boards everywhere. The roofing-felt sheets are glued to the boards and to each other with mastic of the following composition: two parts bitumen and one part diesel fuel or kerosene. Sheets bonded in this way hold well, do not crack in frost, and do not peel off in the sun.
1 — roof frame; 2 — roofing felt of the inner cover; 3 — outer cladding boards; 4 — insulation.
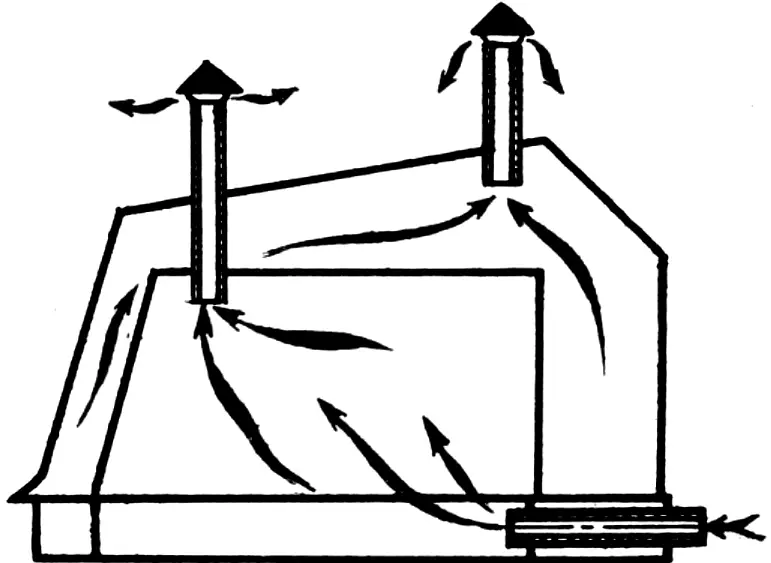
For ventilation of the cellar and removal of condensate from the insulation, the following are installed: an inlet ventilation pipe at the bottom under the door, an exhaust duct at the rear wall of the cellar passing through the ceiling and roof, and an exhaust vent in the cellar roof (Figs. 1 and 7). Asbestos-cement pipes 120 mm in diameter are used as the material. For winter, ventilation channels 2 and 8 are plugged with straw to prevent heat loss, and a condensate collection container is hung under exhaust 2 (Fig. 1).
Ready-made doors are used for the cellar, trimmed on site, but they can also be made by hand. For this purpose, insulation — foam rubber, felt, or foam plastic — is attached to a light frame of the outer door on both sides, and of the inner door on one side, and then the entire door is clad with hardboard or plywood. Seals are glued or nailed to the door frames. For greater airtightness of the vestibule, the doors are drawn together with a bolt (Fig. 8).
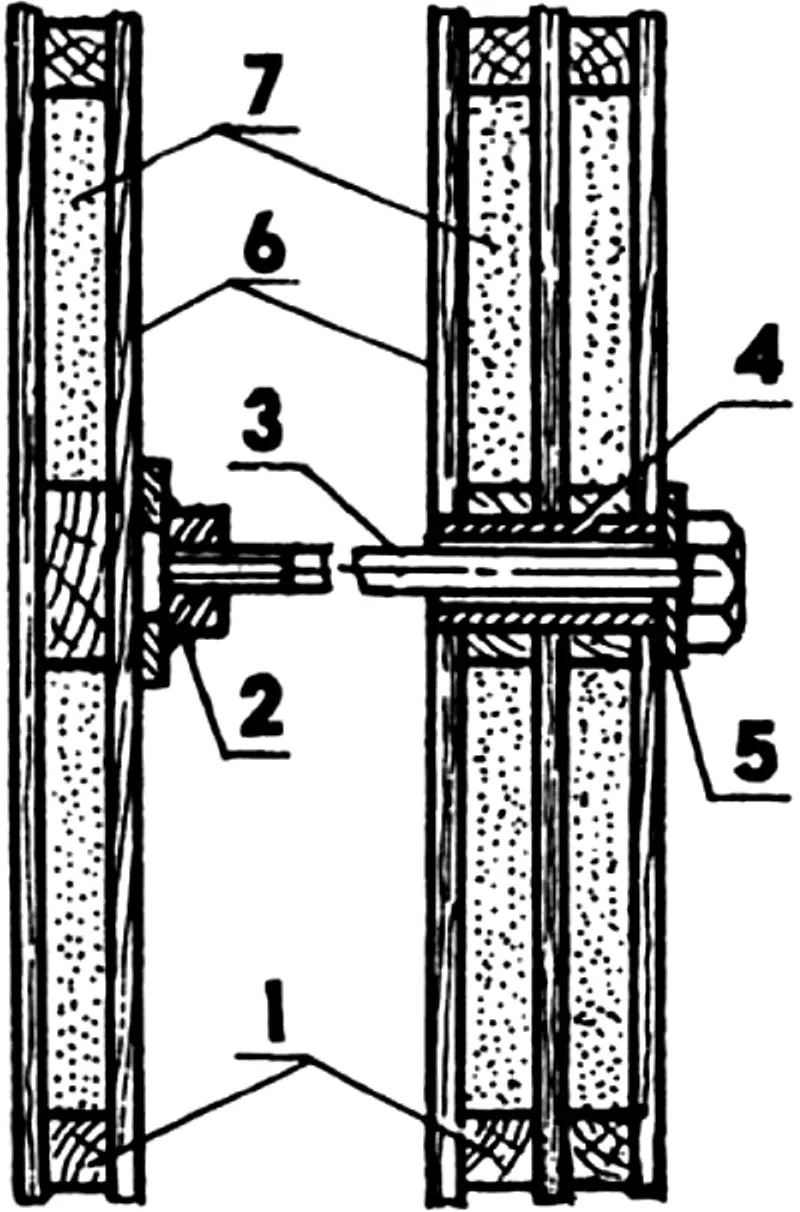
1 — door frame; 2 — M10 nut; 3 — M10 bolt; 4 — guide tube; 5 — support washer; 6 — plywood door cladding; 7 — foam plastic.
Shelves in the cellar are installed last — three along the side walls and two along the rear wall. The lower shelves for storing vegetables are made with a high rim and lined with sheet foam plastic. The box for storing potatoes is made with a lid.
Wooden gratings are laid on the cellar floor in such a way that they do not serve as a thermal screen, since in winter the temperature inside the cellar depends on the temperature of the ground.
The cellar’s electrical equipment consists of a light fixture, a switch, two sockets, and a resistor battery. For safety, all switching devices are installed in a sealed version.
The resistor battery serves to maintain temperature. It is made from ten PEV-20-1.1 kOhm resistors, of which the first four are connected in series and the remaining six in parallel. Such a battery, connected to a 220 V AC mains, heats up to a temperature of 50—60°C. Asbestos-cement slabs 8 mm thick serve as both the battery housing and the dielectric.
«Modelist-Konstruktor» No. 9’99, N. GAVRIILKIN
Recommend to read
 “NO NOISE OF THE CITY…”
If the Windows of your apartment face the street with heavy traffic, the silence in the house should not wait. Meanwhile to prevent in your home decibelle excessive noise anyone. To do... Drilling on the table
There was a time when it was difficult to buy any attachment in a shop, and especially a metalworking machine tool. It was expensive, and you had to run around the trading outlets. Today...
