I have been subscribing to your magazine for many years. It is a real helper for those who do something with their own hands. We live in the south of Ukraine, where such building material as wood is in short supply. Many of my neighbor gardeners have started building utility structures from cement panels of their own manufacture. Some structures have wall thicknesses of only 1.5—2 cm and are not inferior in strength to structures made from other materials. On my garden plot, I built a shower cabin using this technology, as well as a basement — it turned out well. I would like to share this with readers. I think it will be useful to many.
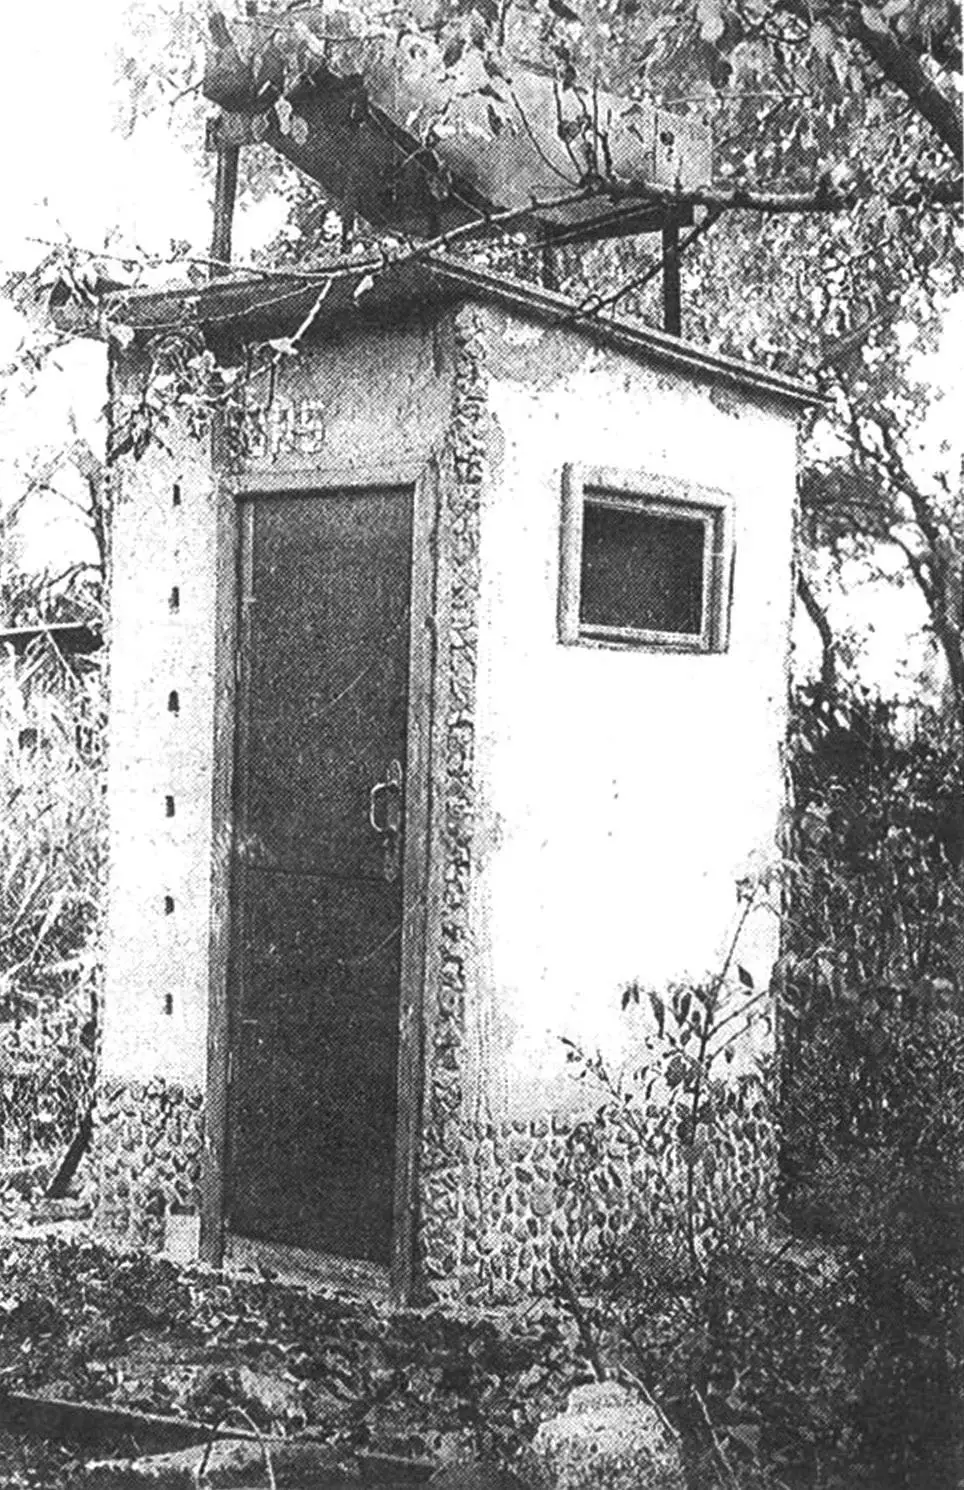
Who doesn’t dream of having a shower on their country plot? It’s pleasant to refresh yourself in hot weather after garden and vegetable garden chores. It’s even more pleasant if the shower is not cobbled together from slab wood and old rusty iron, but is neat and convenient.
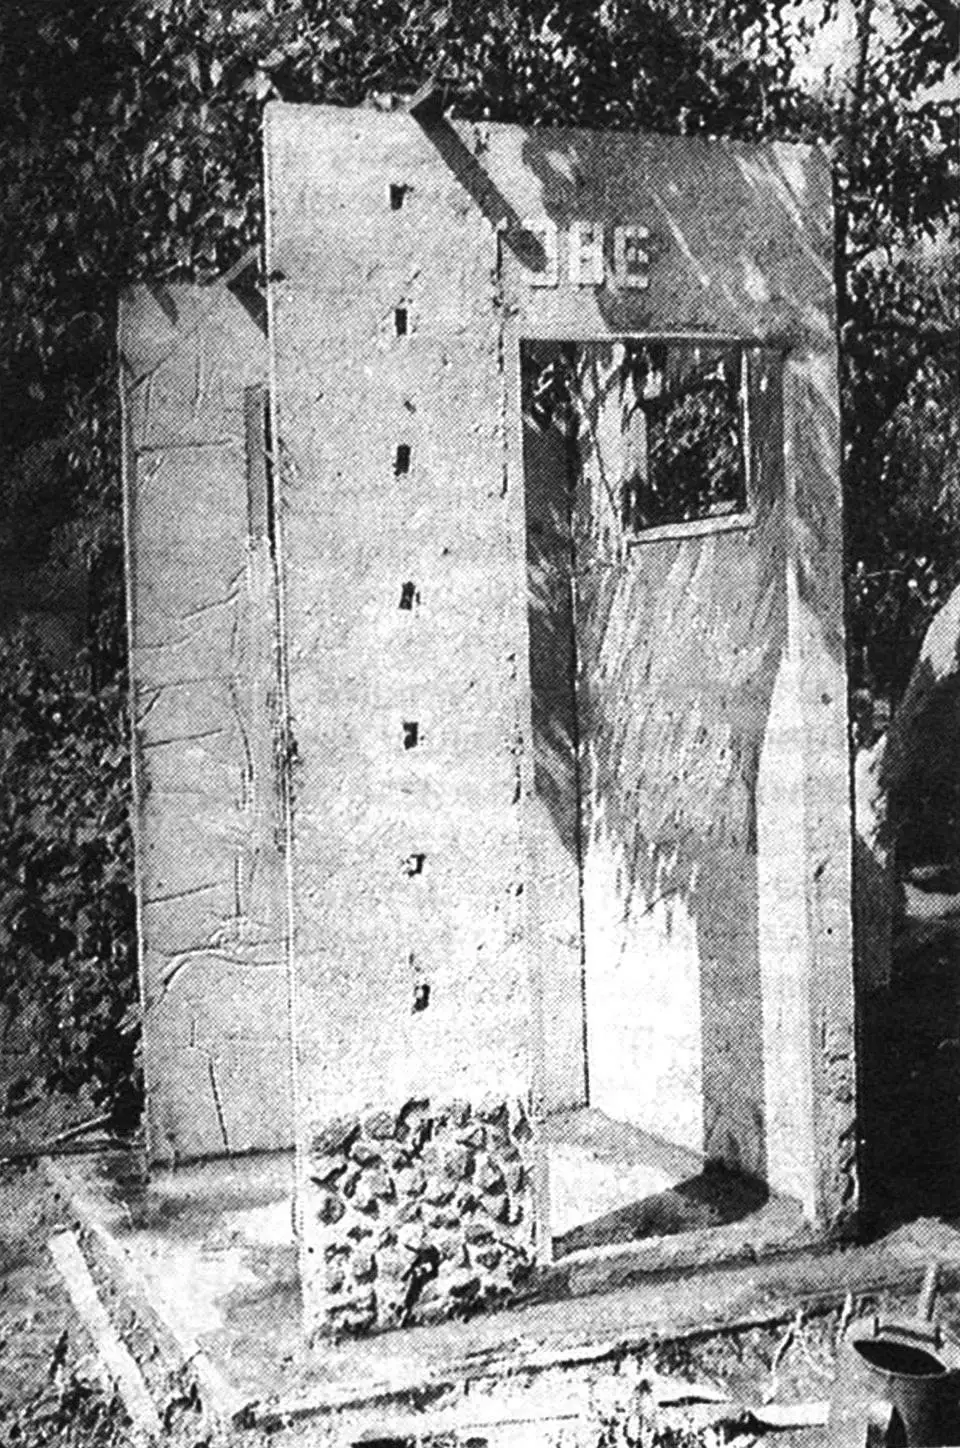
Here is an example of such a solution — a shower cabin made of small homemade reinforced concrete panels. The source material was chosen as the most accessible, relatively cheap and durable.
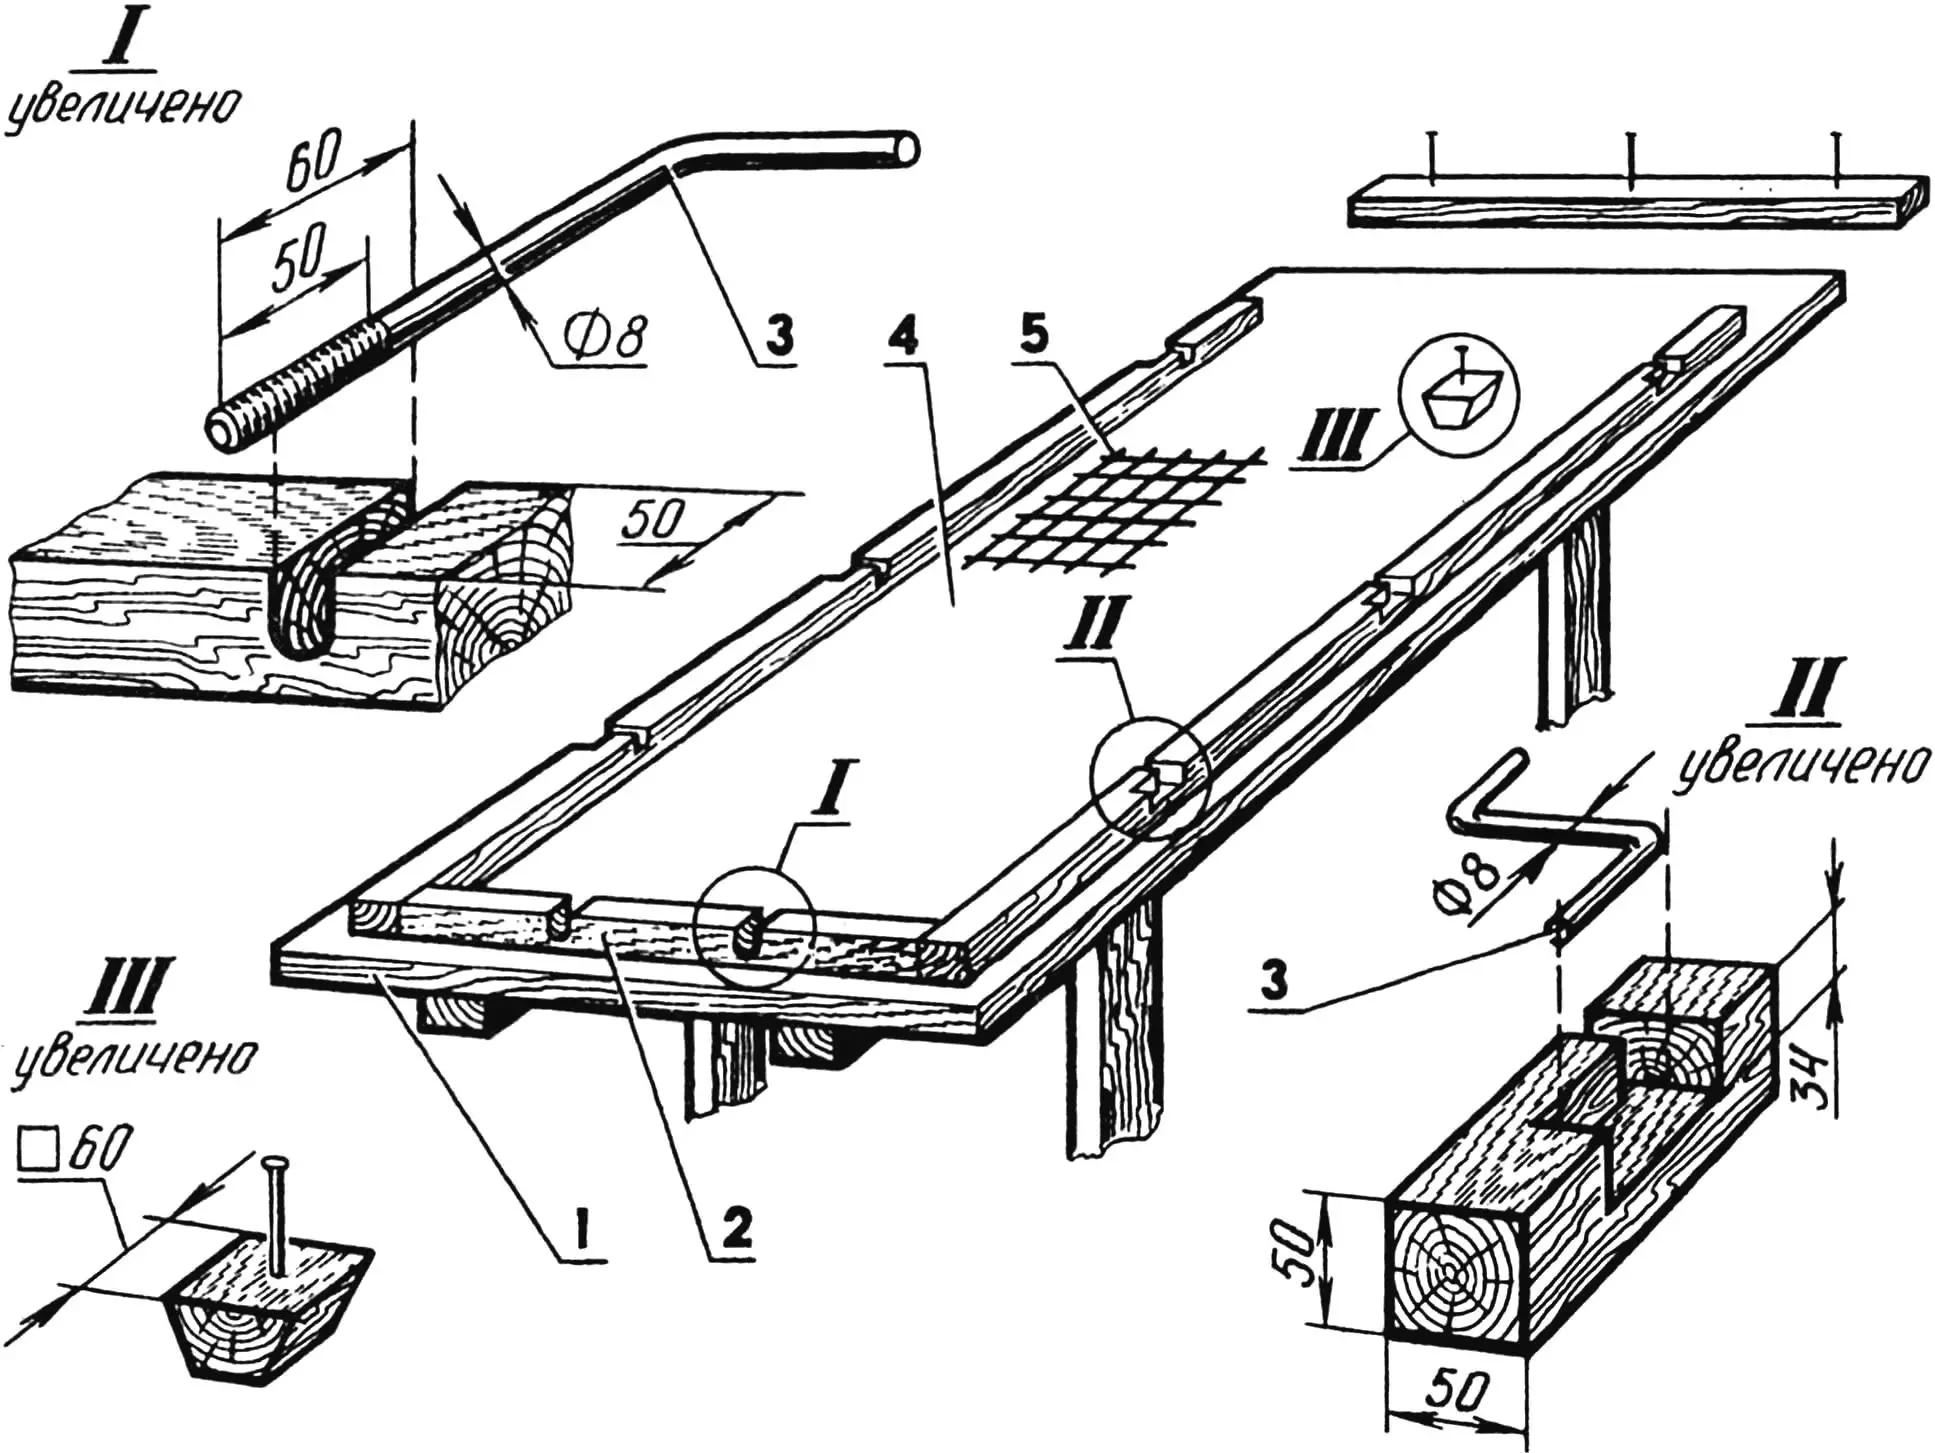
1 — table; 2 — formwork (wooden beam 50×50); 3 — embedded parts for assembly; 4 — film; 5 — reinforcement.
To make a shower cabin, you need 0.2 m3 of concrete, reinforcing bars (steel mesh) and wire with a diameter of 1 mm — for tying.
Work begins with preparing a table on which the walls and ceiling panel are cast. Its surface must be level, so a metal sheet or chipboard is laid on top. A level is used when installing the table.
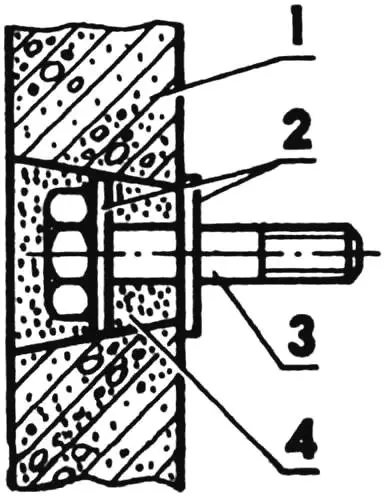
1 — wall; 2 — washers; 3 — bolt; 4 — mortar.
The formwork boxes for the walls and ceiling are laid on the table sequentially. The corresponding embedded elements are prepared in advance — everything that will be included in the panels: window and door frames, ventilation window frames, firebox doors, reinforcement, wooden insert plugs for fastening internal equipment, and metal pins for subsequent assembly of the structure.
The formwork is made based on a wall thickness of 40 mm, but it can be thinner; for the ceiling, 25 mm is sufficient if barrels and the like are not planned to be installed on it.
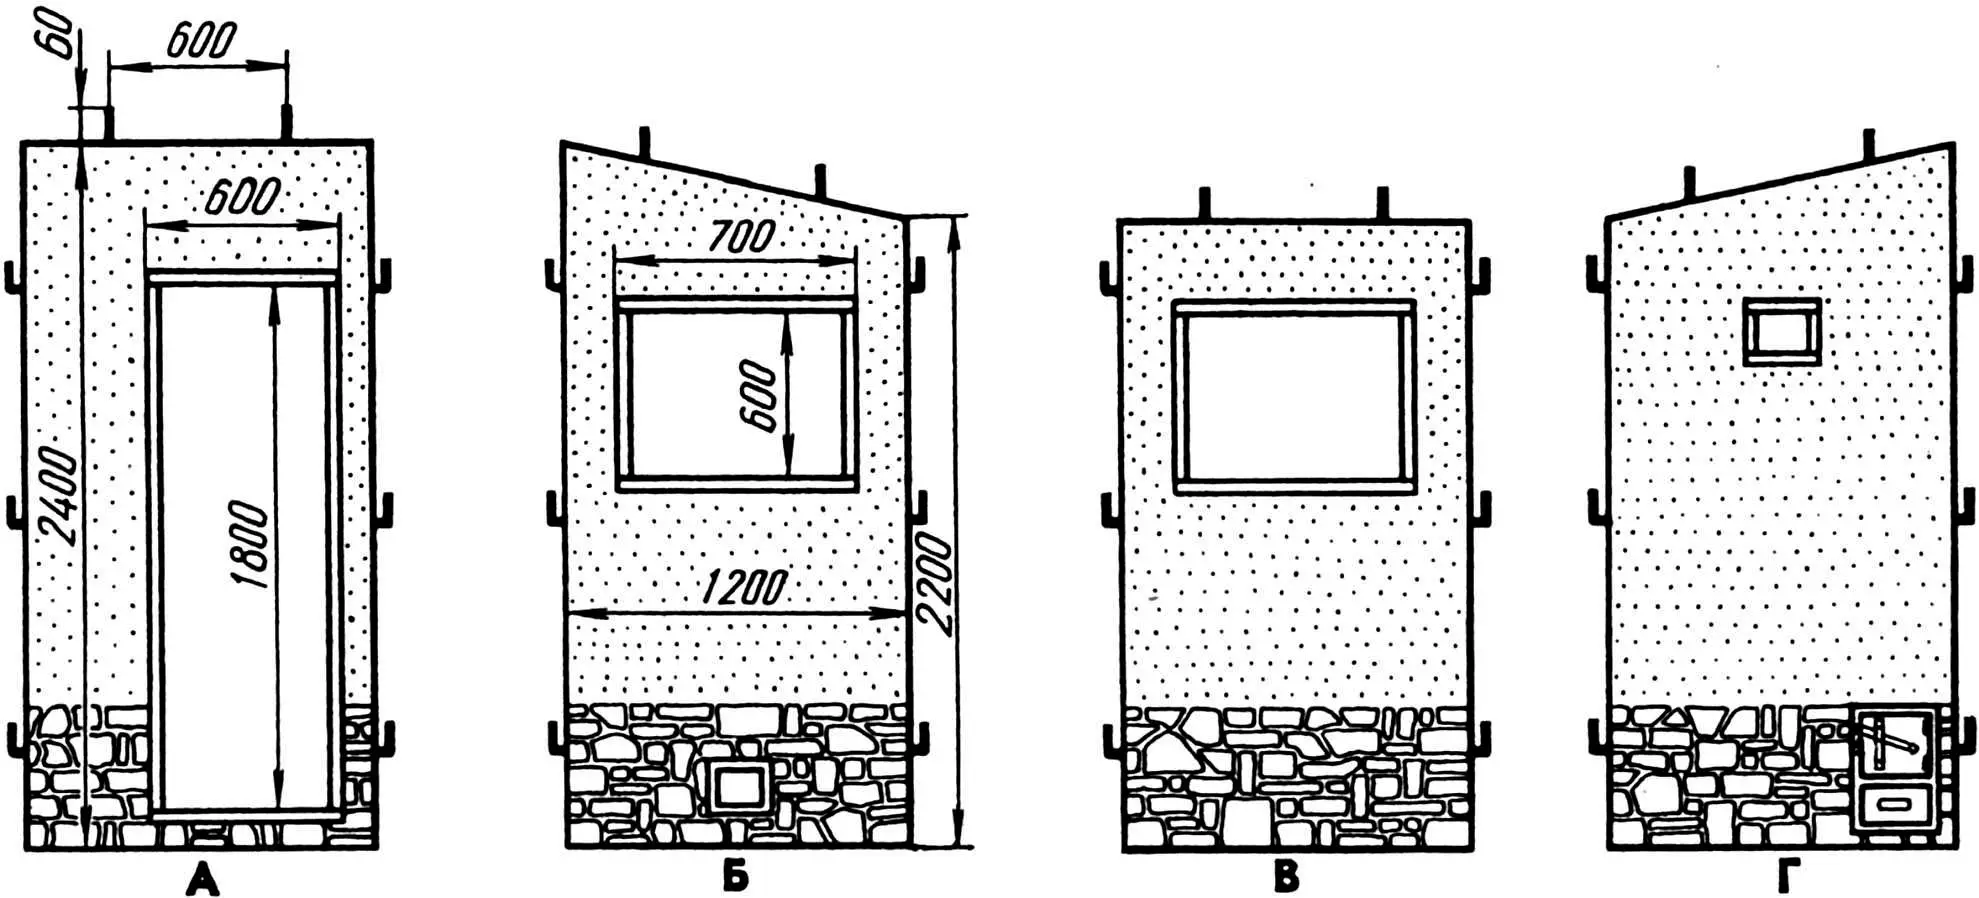
A — front; B — right; C — rear; D — left (with external firebox doors of the boiler).
The diagrams show the main points of preparatory work and the main structural units. To obtain a beautiful external surface of the panels, a polyethylene film is laid on the table in advance. To create decorative relief in certain places, a layer of sand is poured under the film, in which patterns are imprinted by hand or with special tools, or stone panels are laid along the bottom of the walls.
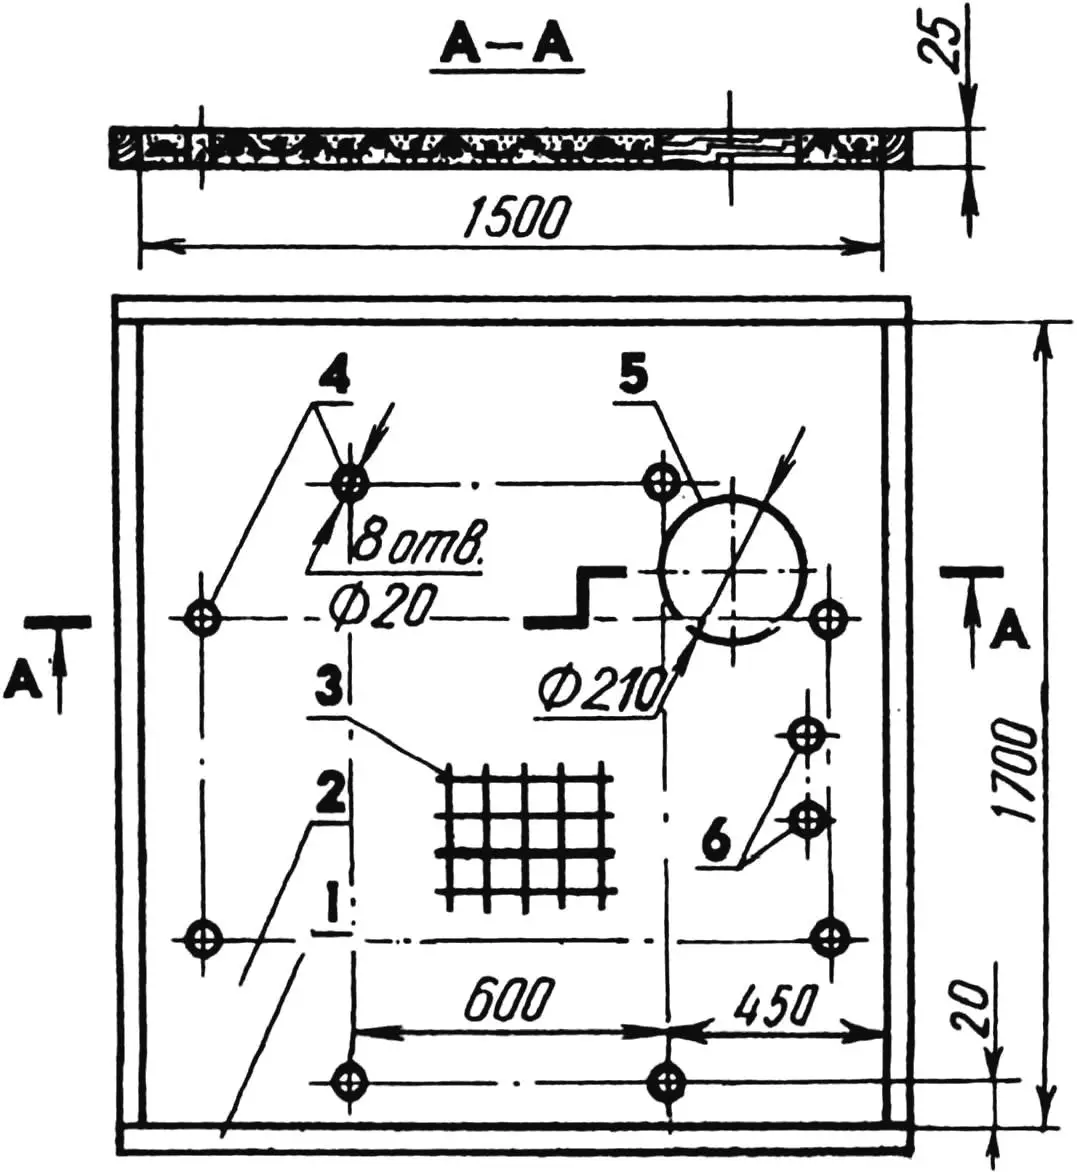
1 — formwork; 2 — film; 3 — reinforcement; 4 — embedded plugs for assembly holes (8 pcs.); 5 — embedded plug for boiler pipe; 6 — embedded plugs for water pipes (2 pcs.).
Before filling the formwork with mortar, the reinforcement is distributed so that at the time of concreting it is in the middle of the panel thickness. Nails are driven into the wooden boxes of windows and doors on the sides — for better anchoring in concrete. In places where subsequent installation of internal equipment (pipelines, mixers, hangers, etc.) is planned, wooden conical plugs are installed. After assembly, they are knocked out, and the corresponding fasteners are installed in their place and sealed with mortar.
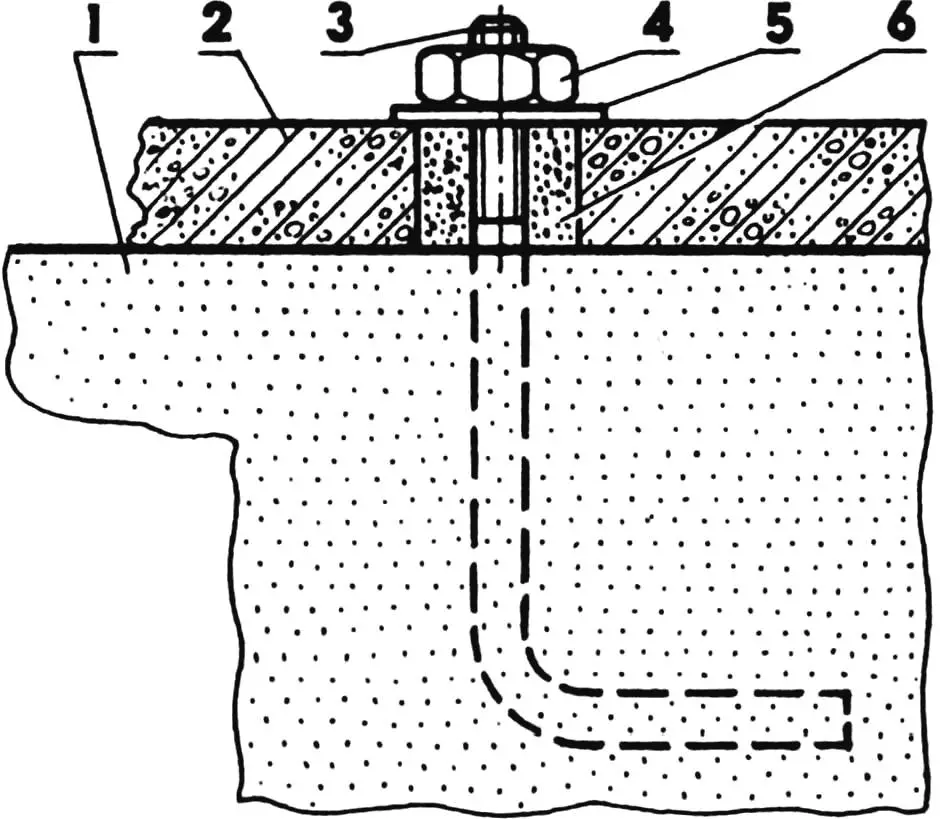
1 — wall; 2 — ceiling; 3 — embedded pin; 4 — M8 nut; 5 — washer; 6 — mortar.
The floor panel is laid directly on the ground, for which the allocated area is first leveled with a level and carefully tamped (a sand cushion can be used). Formwork made of wooden beams is installed based on a floor thickness of 40—50 mm. A film is laid inside, reinforcement is placed, an embedded beam for the drain channel, and it is filled with concrete.

1 — formwork; 2 — embedded part for drain; 3 — reinforcement; 4 — earthen platform.
A few tips on preparing concrete. Two buckets of coarse sand are poured into a spacious box with a smooth bottom or simply onto a metal sheet, into which, constantly mixing, a bucket of cement is added. The mixture is thoroughly mixed until it becomes homogeneous. Then, continuing to stir, four buckets of gravel or fine crushed stone are poured. A depression is made at the top and water is poured in small portions. The quality of the resulting mixture is checked with a “shovel test”, hitting it several times with the flat part of the blade: if voids are visible between the crushed stone particles — the concrete is too thick; easy immersion of the shovel into the mixture indicates that the concrete is thin. The mixture is used fresh, immediately filling the formwork.
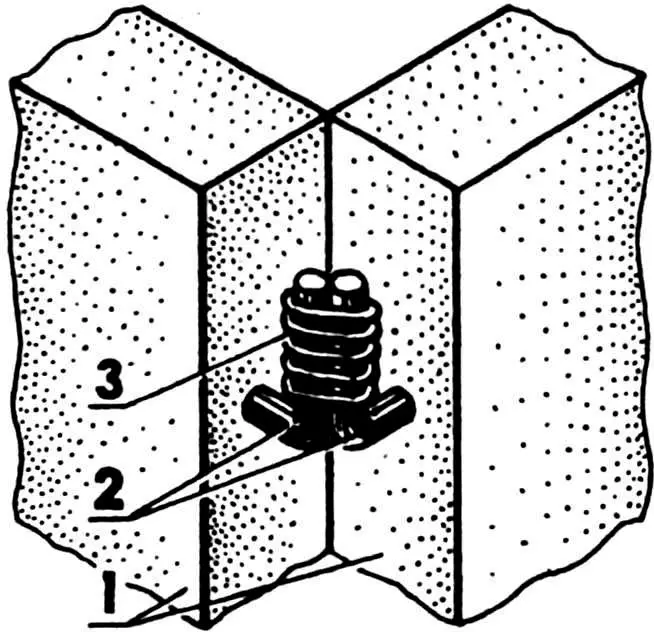
1 — walls; 2 — embedded pins; 3 — wire tie.
To prevent the mortar in the formwork from cracking when drying, the process is “restrained” by covering the panel with burlap or straw and watering it from time to time with water. After ten days, the panel is placed on edge to dry. When laying the ceiling formwork, holes can be provided in advance for subsequent fastening to the wall pins, as well as for the water heating boiler pipe. With this in mind, it is sufficient to lay the corresponding wooden plugs, having previously calculated their location (approximate dimensions are given in the figures).
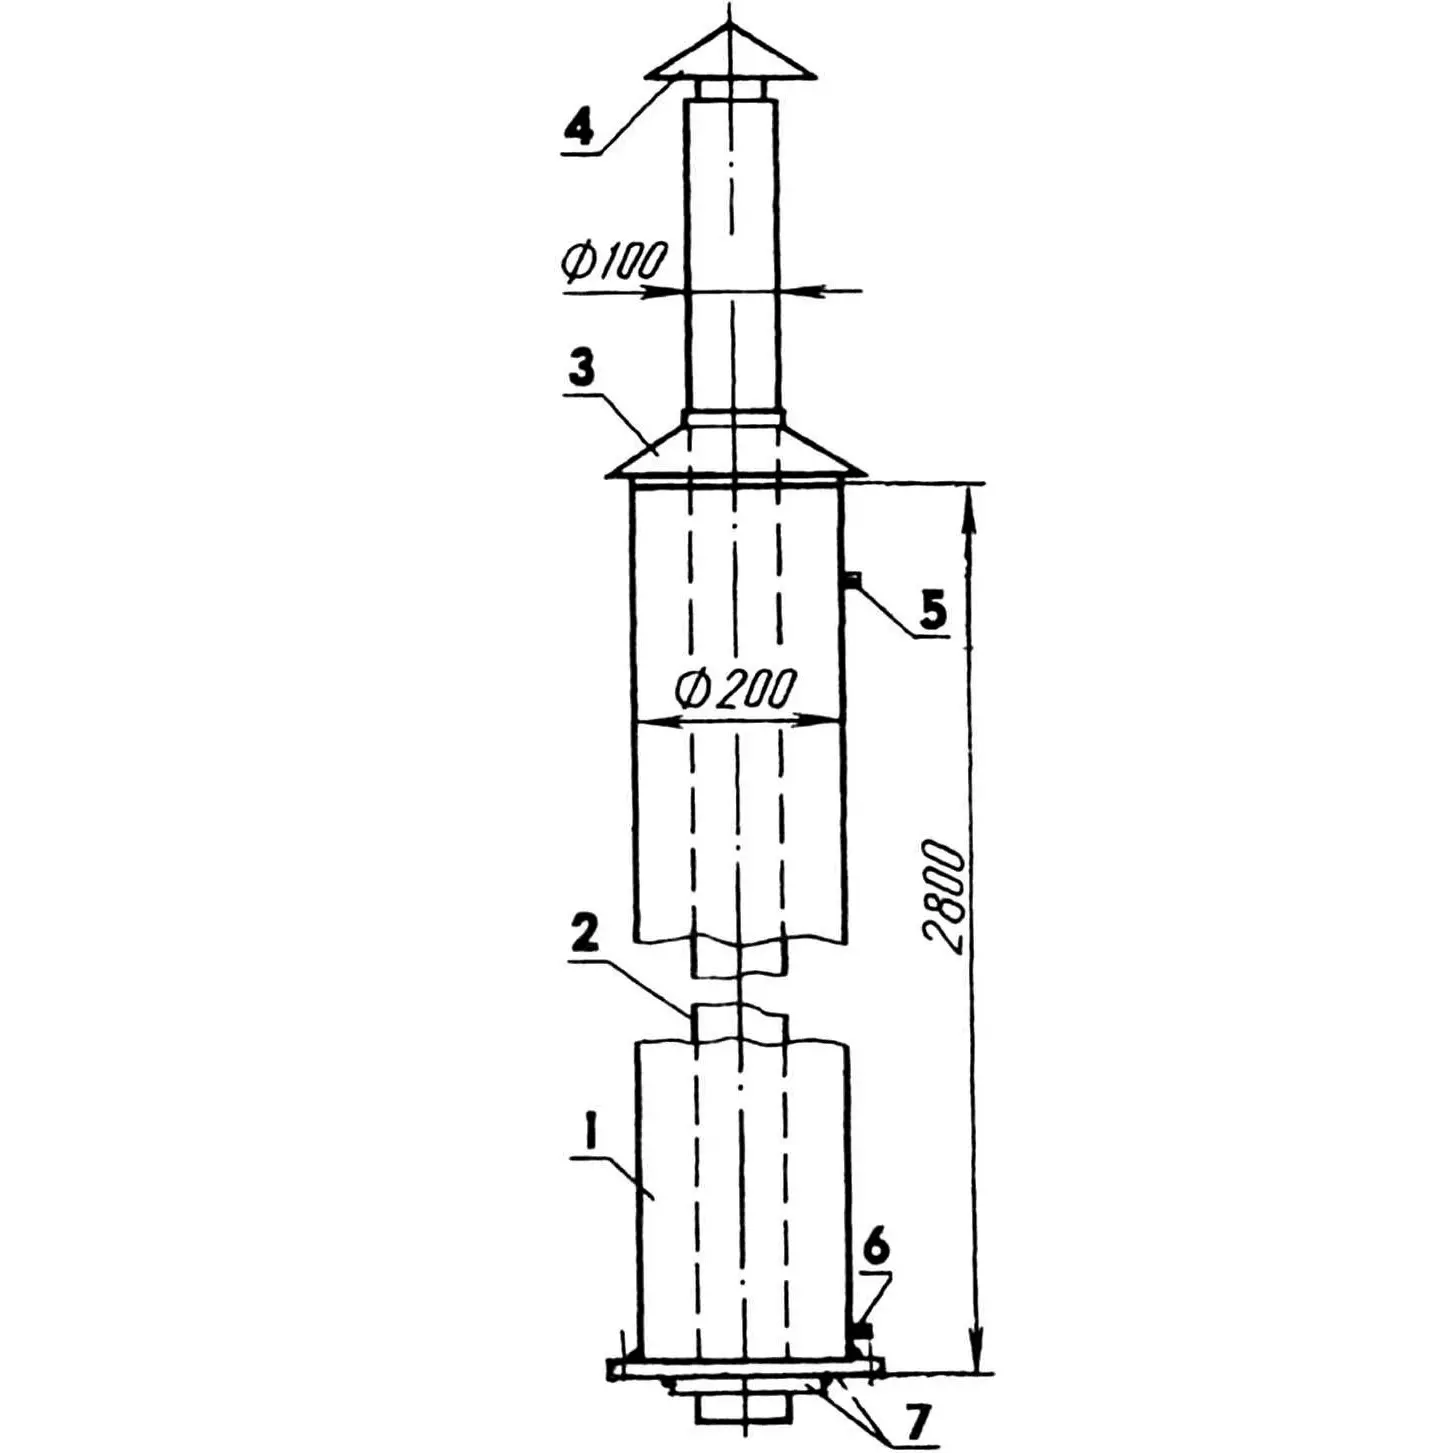
1 — boiler pipe; 2 — chimney pipe; 3 — boiler lid; 4 — chimney cap; 5 — hot water pipe (outlet); 6 — cold water pipe (inlet); 7 — pipe installation flanges.
A group of six people can handle the final assembly of the prepared cabin elements in half an hour. The walls are placed on the floor on mortar, tying the embedded pins with wire. Then the ceiling is also laid on mortar. If the concrete quality is poor, the ceiling may get wet, so it is advisable to cover the roof with roofing felt and tar it. All gaps are sealed with mortar, and wall irregularities are rubbed with wooden plaster floats. After this, the floor is covered with encaustic tiles, and a metal grate is installed over the drain channel. The outside corners of the cabin are decorated with granite stones or pebbles.

1 — drain valve; 2 — water heating boiler; 3 — cold water tank (150—200 l); 4 — hot water valve; 5 — switch;
6 — cold water valve; 7 — mixer.
If a water container — a barrel of 150—200 liters — is mounted on the cabin, its frame should rest on the junction points of the ceiling with the walls. The barrel is painted black for better self-heating, and a frame with glazing or polyethylene covering is placed around it — for a greenhouse effect.
For the cool period, it is desirable to have a water heating boiler — purchased or homemade. It can be placed outside the shower, but it’s better — inside, as this will also heat the room itself. And it’s more convenient to bring the firebox door outside the side panel. Some prefer an open-top boiler (samovar type) made of thin-walled (2 mm) pipe with a diameter of 200 mm. It takes up little space, is safe to operate and convenient for disassembly and cleaning. It is installed on the firebox using a large flange, to which a chimney pipe with a diameter of 100 mm passing inside the boiler is also attached with a flange. The cold water supply pipe is placed at the bottom of the boiler, and the hot water outlet — at the top. The pipeline connection is shown in the diagram.
Enjoy your bath, gardeners!
“Modelist-Konstruktor” No. 6’98, I. DANILOV, Kherson, Ukraine
Recommend to read
 Multi-welding all-purpose unit
Why “multi-welding”? Because this welding transformer (WT) has many important additional functions. Whereas in a traditional welder whose core is assembled from E- and I-shaped laminations...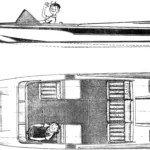 How to build a catamaran?
Tourist trips, water competitions, fishing! How many unforgettable summer days and winter dreams are associated with them! But for these dreams to come true, first of all, you need to have...
