
 “Ah, summer red, I would love you, if not for the heat, and dust, Yes mosquitoes, Yes flies!” Who would not think of these Pushkin’s lines, “fighting” in a country house or cottage with pesky insects, attacking tourists through the open Windows and doors. But it’s not going to trap myself in a closed room, came specially to get some fresh air. So start experimenting with a gauze canopy or curtains.
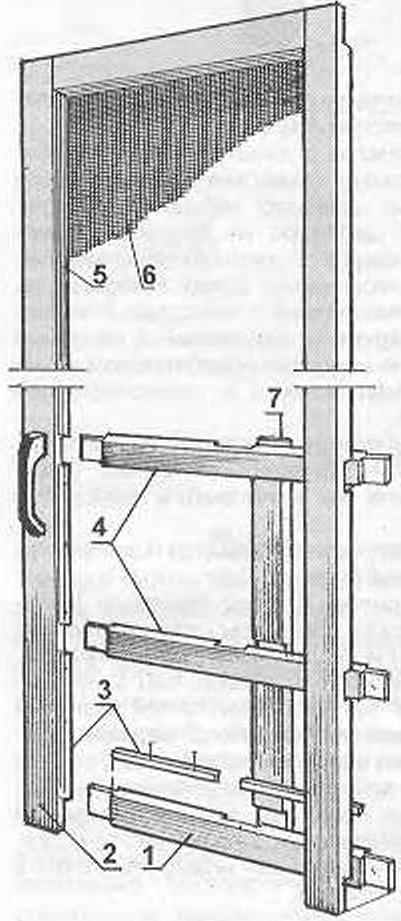
The main object of “defense” from the omnipresent flies, of course, the front door as the most frequently opened or open permanently for ventilation. And the most effective way to protect here, as shown, — additional mesh door hung on existing door frame: the entrance is almost closed, but available for the penetration of fresh air.
 The technology of manufacturing such a door, proposed by the American magazine “Popular mechanics”, designed for any home worker, so it is simple and requires no special or scarce materials. It is quite usual wooden bars and rails, as well as commercially available chicken wire mesh (called mosquito), synthetic or metal. Door frame (Fig.1) is arranged so that the lower part can optionally be panel, solid.
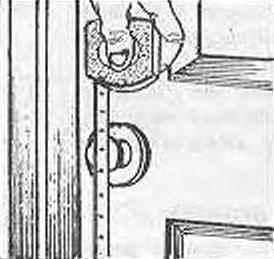
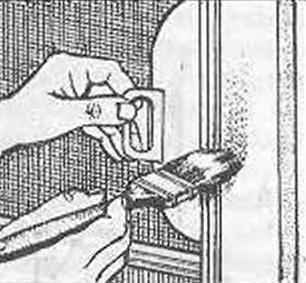
Work should start with a thorough measurement of the internal dimensions of the existing door frame — this will determine the required size of blanks. It is important to pay attention to the height of the door handle ( Fig.2) to have the screen door itself was not above or below, or at the closing, they will interfere with each other, if the door box will be tight.
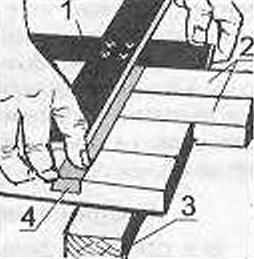
The preparatory part, and the manufacturer marking of the cross, whose horizontal and vertical strips at right angles, which facilitates the work pieces (Fig.3).
For main door frame and the elements to strengthen the lower half will need wooden bruski section 50×29 mm, and for fixing mesh — rails with cross section of 15×15 mm (front can be raised surface).
Harvested in the size of the bars of the frame previously laid out on top of each other as they are to dock with each other (Fig.4), and with a pencil mark the location of their connection.
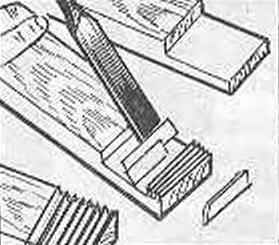
On marked places bars of the frame nadelwald using any saw or disc cutter (Fig.5) for connection vpoldereva.

These places are chosen with a chisel (Fig.6); the resulting finger nodes are carefully aligned and trimmed by a sandpaper.
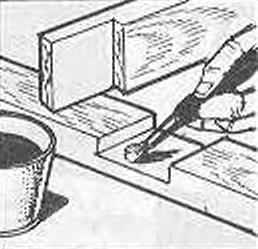
Prepared grooves promazyvaetsya glue with a brush (Fig.7); for bonding used carpenter’s glue, casein or PVA.
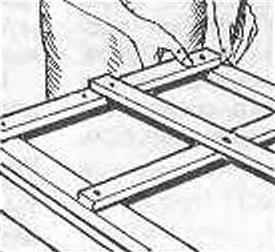
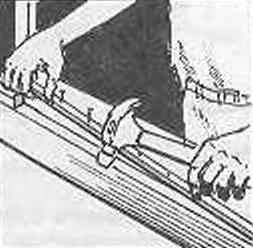
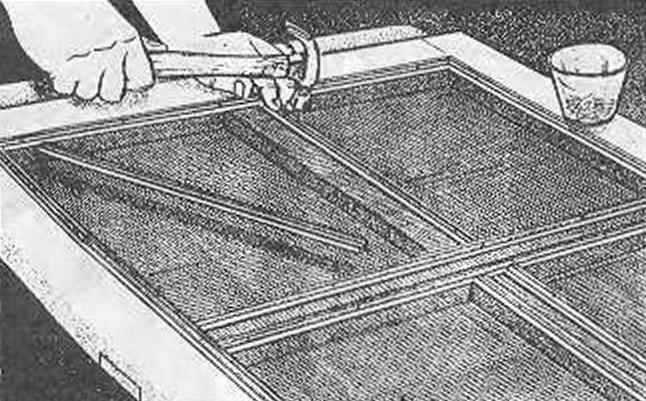
The connection elements of the frame between themselves and adding to them details of the gain (in the bottom half of the frame) are performed simultaneously. To the bond for the seal overlap safety strips and elements pulled together with clamps (Fig.8), it is then kept until the glue dries.

For mounting the grid on the inner perimeter of the frame on her stuffed Reiki (Fig.1 and 9), flush with the back side of the door. Bonding is performed with small nails.
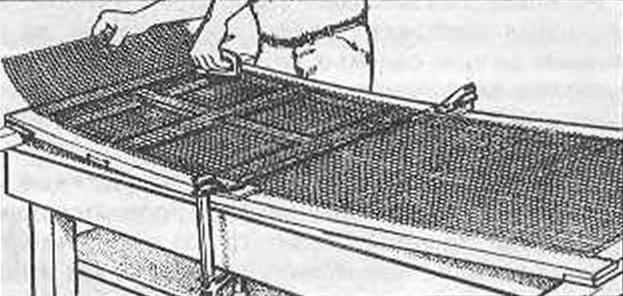
The prepared frame is applied to the grid and roughly trimmed with a minimum seam allowance (Fig.10).
Before attaching the grid frame pre-SAG (Fig.11) use the pads of the bars and clamps (in the middle) — thanks to the mesh then get uniform tension. The fixing nets is a carpenter with a staple gun or simply nails.
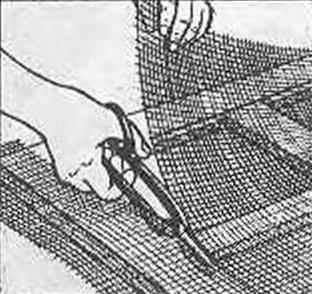
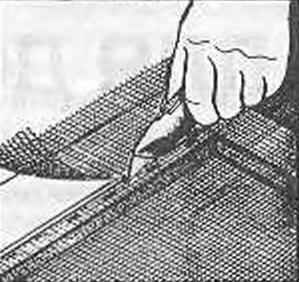
Nailed to the slats mesh neatly trimmed on the inner perimeter of the frame (Fig.12) so that on top you can cover the “seam” of the front rails.
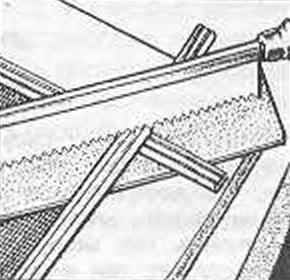
Facial Reiki stuffed, starting with the mid-frame until the crosshairs on the corners of the frame, where they placed a strip of plywood for sawing the ends at an angle of 45 degrees (Fig. 13,14).

All wooden parts door front Assembly can be primed for painting or varnishing, and after Assembly is completely painted, with the use of safety guard (Fig.16).
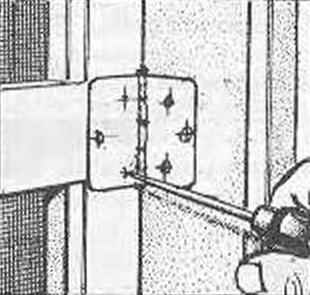
As already mentioned, the handle of the screen door to be mounted on a hook level, so as not to disturb the one on the main door, but at about the crosshair with the top horizontal bar (Fig.17).
Is ready a screen door on a two or three light (fortochnyh) loop (Fig.18).
Onoznaczenia:
Fig. 1. Net (“mosquito”) door:
1—the horizontal bar of the frame (2 PCs.);
2—the vertical bar of the frame (2 PCs.);
3—the inside rail of the mounting grid;
4—horizontal bars reinforce the frame (2 PCs.);
5 rail mounting bracket (front decorative);
6—reticle (synthetic or metal);
7—the vertical bar of the frame reinforcement.
Fig. 3. Marking bars of the frame under the trim:
1—crossbar;
2—bars;
3—stand from the bar;
4—tie out of duct tape.
Recommend to read
 ELLIPSOGRAPH
The construction of the ellipses associated with certain difficulties, that's why when drawing the axonometric images this process takes the lion's share of time. I invented ellipsograph... A TIN CAN WILL HEAT YOU
A mini-electro-calorifier (MEC) type heater is unlikely to surprise anyone these days. These compact and quite convenient household appliances can be purchased to suit any...
