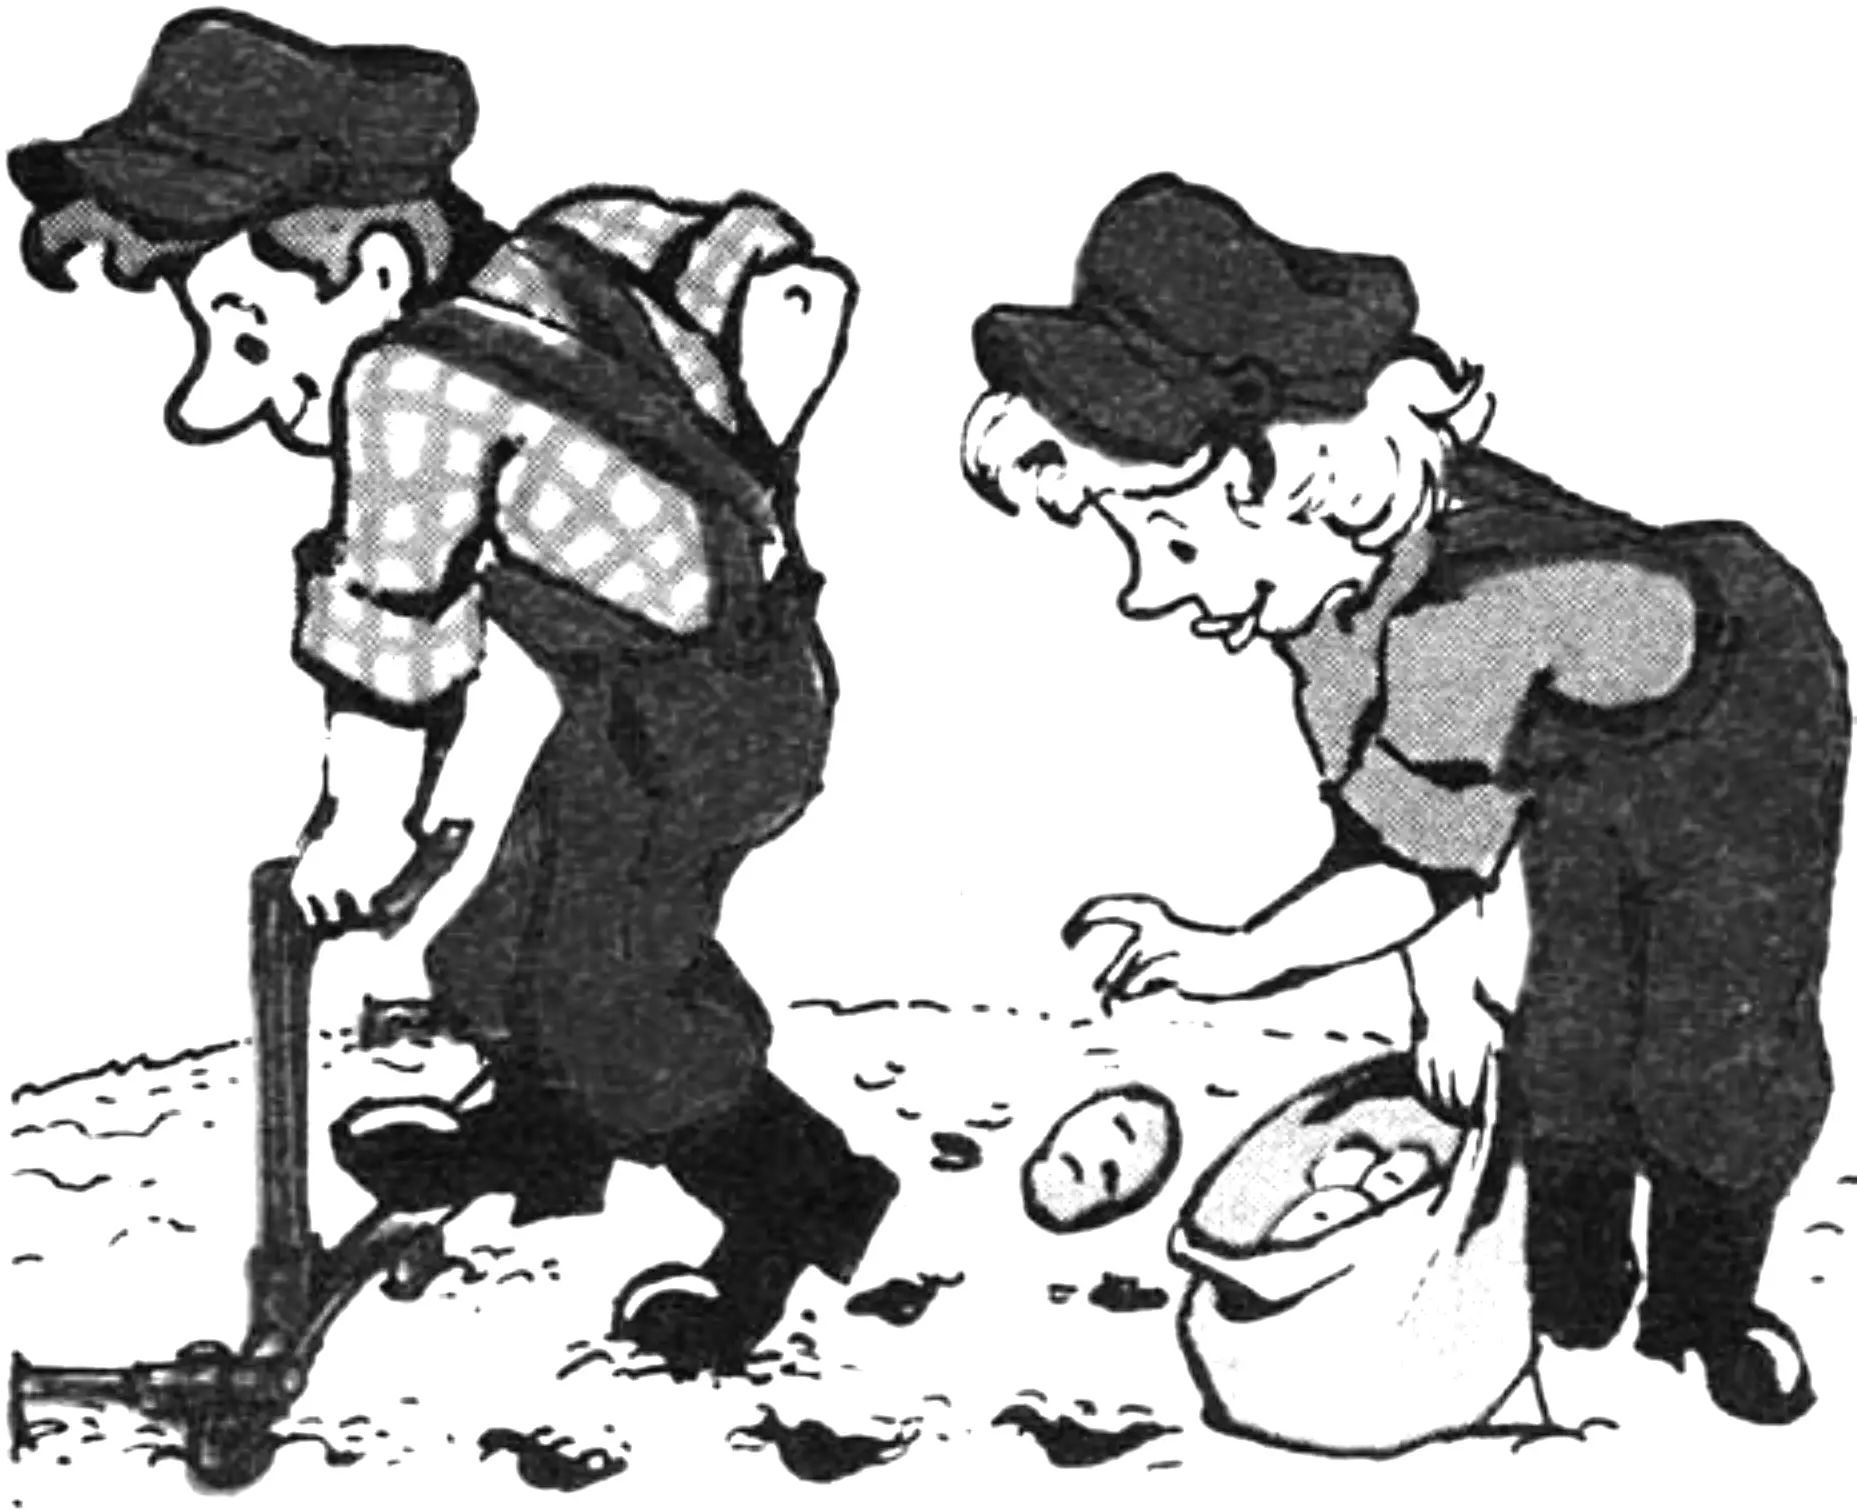
Potatoes are often called the second bread, emphasizing the extraordinary importance of this crop. Yet in terms of labor intensity, especially on individual plots, it is far from last on the list. All the more so if all the work is done here the old-fashioned way, without any means of mechanization.
A device I designed is intended to make the gardener’s life a little easier. It performs two functions at once: those of a tracer and a potato planter. After seeing the homemade machine at work, all the neighbors wanted to get one just like it (which, by the way, nearly triples labor productivity during tracing and planting) or a similar device for personal use. However, it is not possible to fulfill that request right now: I have neither the time nor the appropriate materials. But there are sketches by which (see the illustrations) anyone can personally make an accurate (and, most importantly, fully workable) copy of the liked “mechanical helper.”
It is easy to see that the proposed design is based on a welded structure made of water and gas pipes. It is fitted with two hole-forming elements, as well as a telescopically sliding bracket and three markers that can be securely fixed in any of the provided positions with locking bolts. In addition, the upper part of this structure has a welded bushing in which a tubular upright is secured with a clamping M10 bolt. Branching at the top, the upright forms two handles with limiters at the end of each.
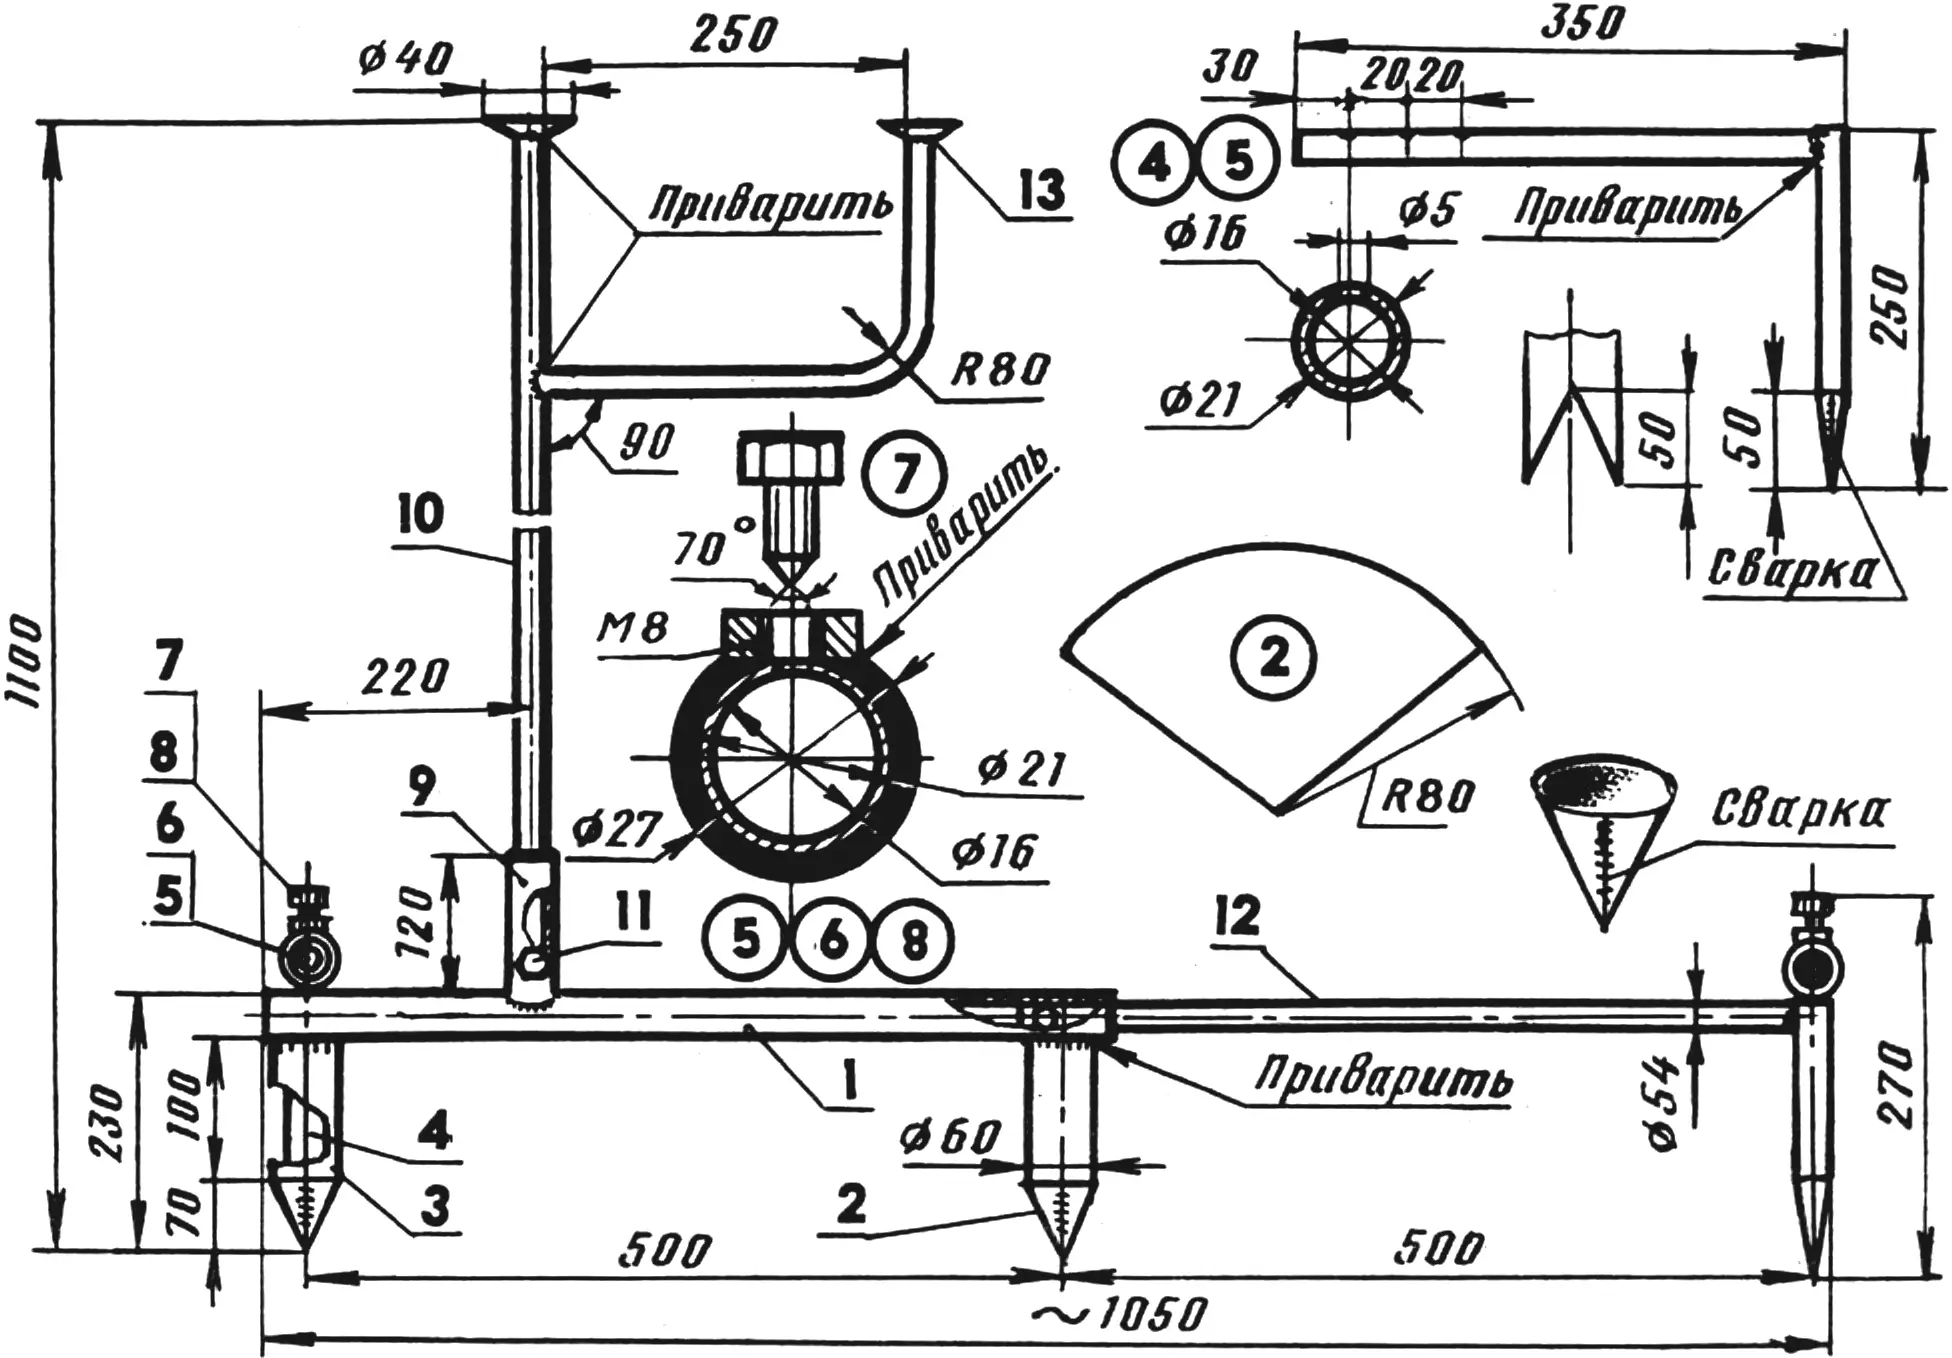
1 — base (water or gas pipe 60×3, length 565 mm), 2 — conical tip (from a development, made of St3 sheet 1.5 mm thick, 2 pcs.), 3 — hole-former body (pipe 60×3, length 100 mm, 2 pcs.), 4 — marker (pipe 21×2.5, length 250 mm, 3 pcs.), 5 — marker bracket (pipe 21×2.5, length 330 mm, 2 pcs.), 6 — guide bushing (pipe 27×3, length 65 mm, 2 pcs.), 7 — M8 locking bolt (3 pcs.), 8 — M8 nut (welded, 3 pcs.), 9 — welded upright bushing (pipe 27×3, length 120 mm), 10 — upright with handles (pipe 21×2.5), 11 — M10 clamping bolt, 12 — sliding bracket (pipe 54×2.5, length 560 mm), 13 — stop plug (2 pcs.).
Telescopically connected parts and assemblies make it possible not only to adapt this device relatively easily to specific working conditions (for example, to set the required spacing during tracing and planting), but also to disassemble it afterward for convenient carrying and compact storage.
As for the manufacturing technology of the structure, everything here, as they say, is without any significant peculiarities. The blanks are cut lengths of steel water and gas pipes and 1.5 mm steel sheet (St3) of the appropriate sizes (see the illustrations). Properly fitted parts are welded butt-to-butt. The seam is continuous, with subsequent grinding on an emery wheel.
The proposed design has no provision for adjusting the distance between rows, because such a device would inevitably make the entire structure heavier. For the inter-row spacing, I chose what I consider the optimal, practice-proven option. And if it does not suit someone, it is easy to make the appropriate changes to the sketches published in the magazine pages and build a tracer-potato planter with the distance between the hole formers that best suits the particular maker-user.
Now for the operating technique of our mechanical helper. After stretching a cord (only for the first row; after that it will no longer be needed), tracing and planting begin. The device is held with both hands, elbows slightly bent. It is set so that the first hole former is at the peg, and the right marker linked to it runs straight along the cord; then the right foot presses on the base pipe at the point marked on the illustrations with a wide arrow. At once, a pair of planting holes and three marking points appear on the plot. The two side ones serve as guides during tracing and planting of the next row, and the front one serves as a pilot signal for a new (next) placement of the mechanical helper. Then comes another foot press (more precisely, a step), as a result of which new holes for planting potatoes are formed.
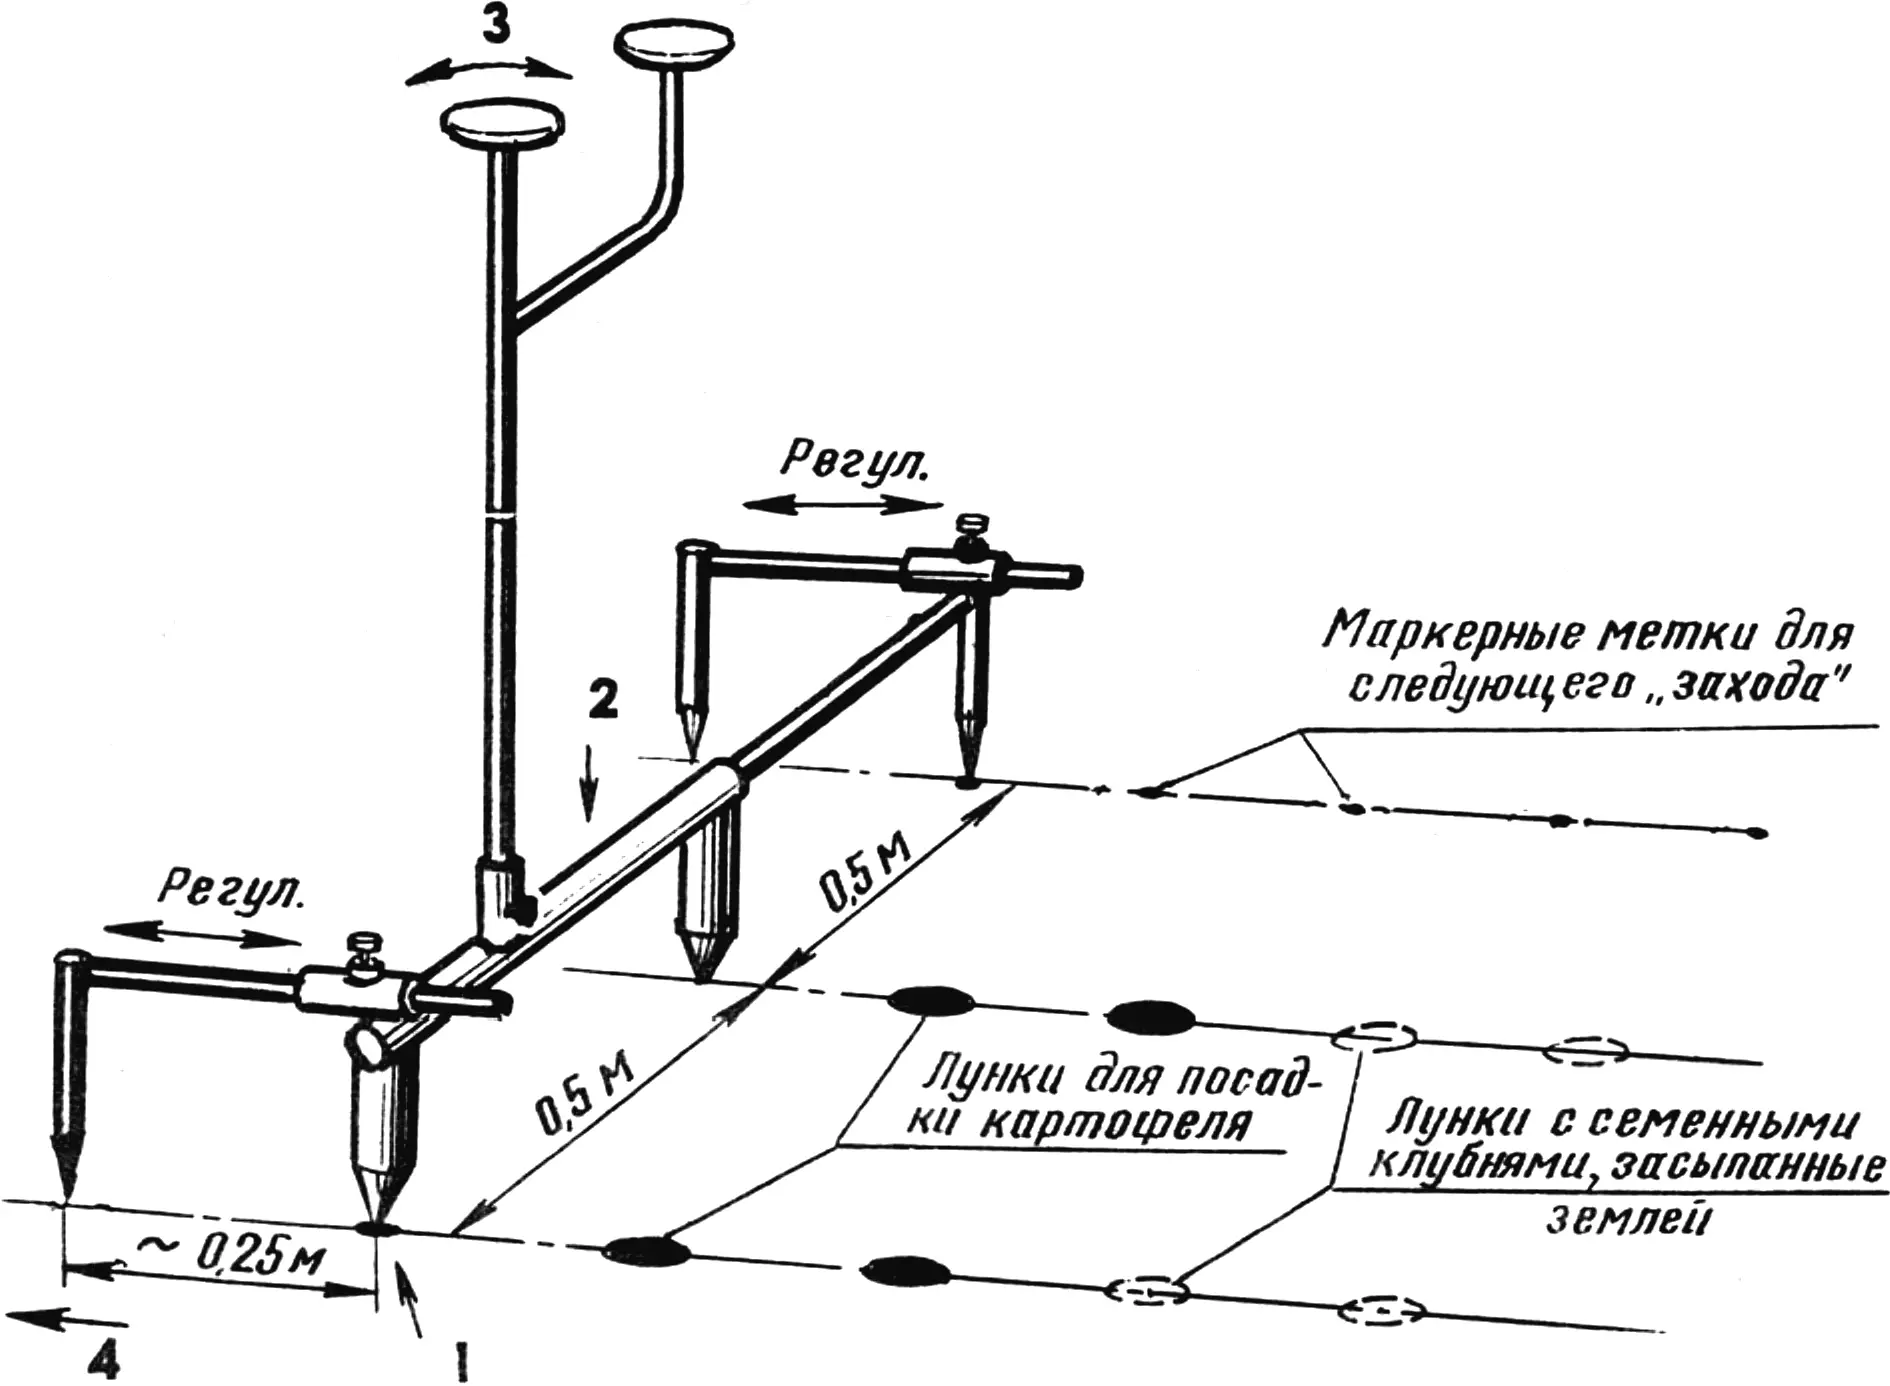
The work usually moves forward so quickly that the helpers working together with the “operator” barely have time to drop potatoes into the appearing holes while covering them at the same time. After completing the first pass, the workers turn around and just as successfully make the second pass, guided by the marks left by the pair of side markers. (Although the operator need not turn around and can continue working while moving backward.) Then comes the third pass, the fourth… And so on until potato planting on the plot is fully completed.
Further work — whether weeding, hilling, or harvesting — is also made easier, because all the rows are, as they say, ruler-straight. All the more so if you also have appropriate mechanical helpers here, such as original hand cultivators, hilling plows, and various potato diggers. Their descriptions and sketches were published on the pages of Modelist-Konstruktor, which I have read (as, probably, have many other DIY enthusiasts) since early childhood.
Modelist-Konstruktor No. 5’96, M. VALUI, Chernihiv region
Recommend to read
 “MINIMAX”: BIGGER INSIDE THAN OUTSIDE
CAR - FOR WHAT? Do you need a car? Which one exactly? This question arises before anyone who intends to purchase a factory-made car. But, as you know, the choice of the type of car you... DWARF SUBMARINES OF HER MAJESTY
British military shipbuilding has centuries-old experience of development and combat use of the most advanced designs and technologies. On the eve of the Second world war-the British...
