Very often spring in Siberia turns out to be prolonged and cold. That’s why most gardeners are in no hurry to plant seedlings of the most common vegetable crops—cucumbers and tomatoes—in open ground even at the end of May, because, according to long-term observations, frosts can return as late as June 10. However, you can’t delay this either—after all, the first autumn frosts occur as early as late August. In such a short warm period, vegetables don’t even have time to ripen.
The situation is not much better in most of the European territory of the country—it’s no wonder that even its middle zone is considered a zone of risky agriculture. That’s why growing vegetables without greenhouses is unreliable.
Meanwhile, in today’s time, it’s not only not difficult but also inexpensive for a skilled person to build a greenhouse. Moreover, for those planning a major construction project in the future (by family standards), building a greenhouse will be good practice.
Before starting the construction of the greenhouse, I made a preliminary design based on the available lumber. During the design process, the required quantity was determined and it became clear what and how much more needed to be purchased.
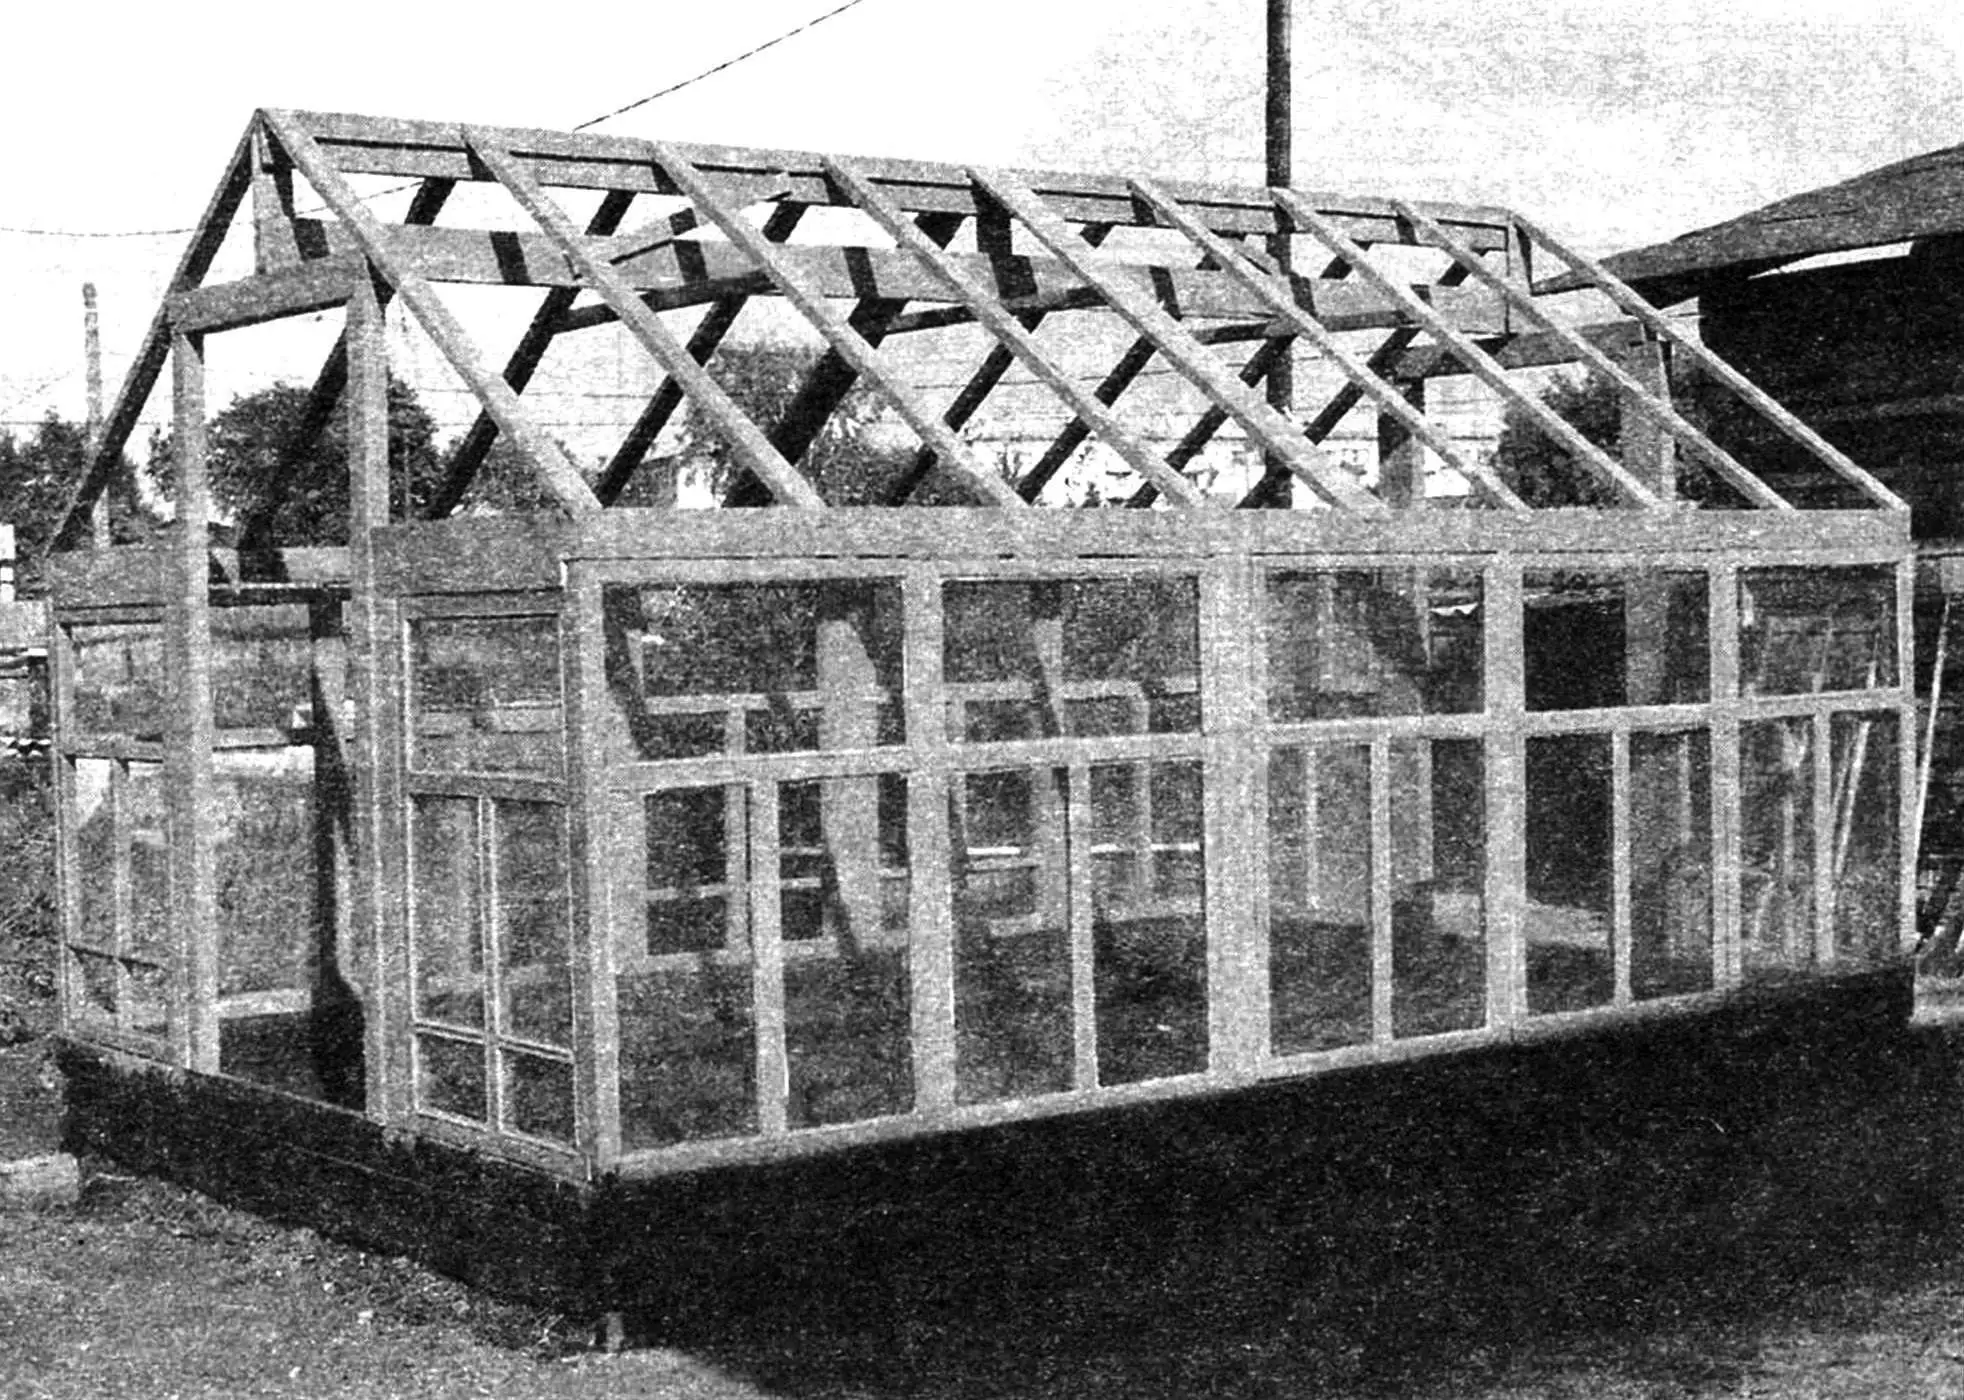
The greenhouse is stationary (non-dismountable), of classic form (if you can say that)—in the form of a house: in plan—rectangular with a gable roof and gables.
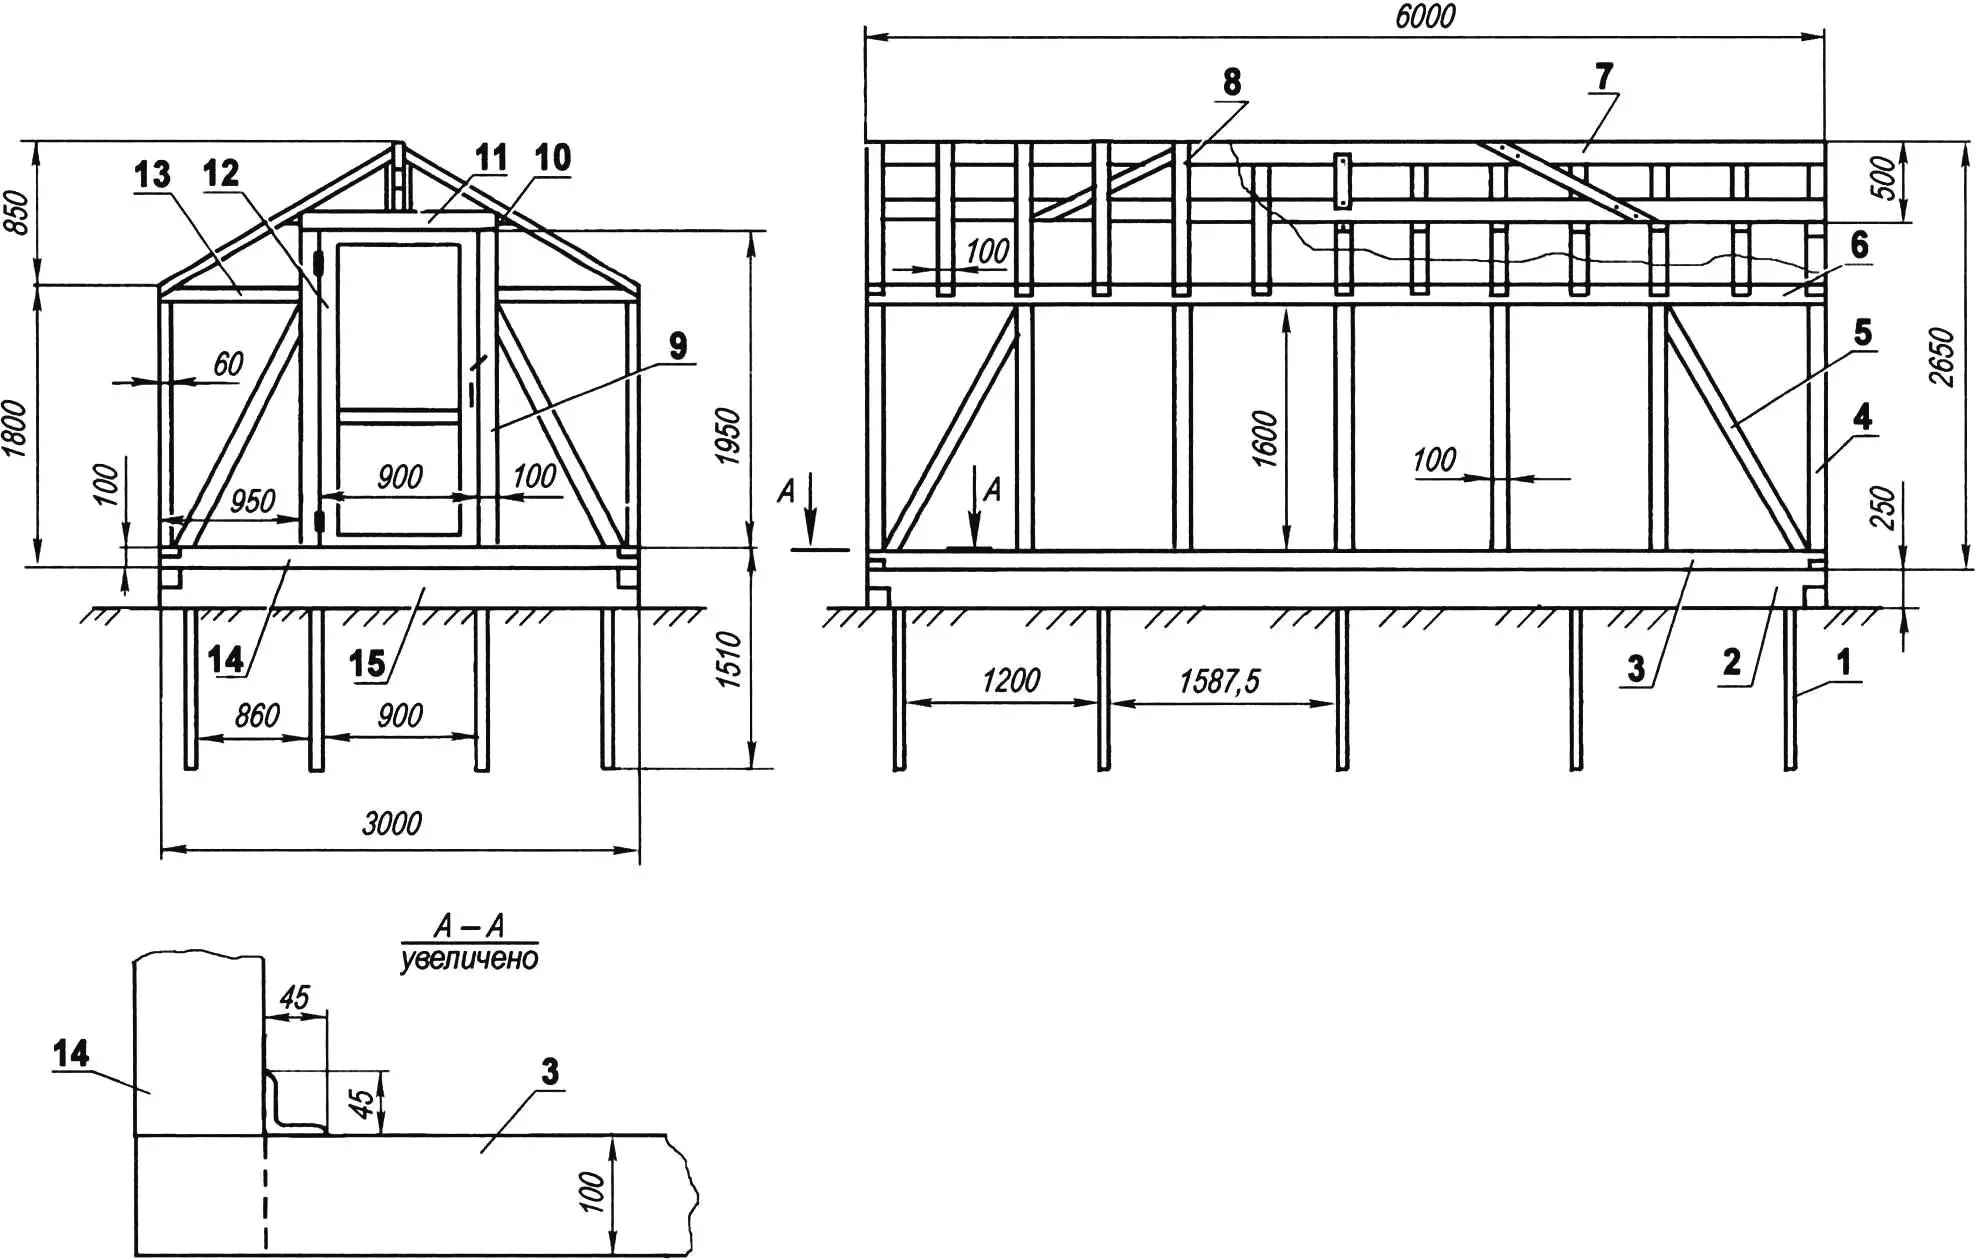
1 — pile (angle 45×45, L = 1510, 14 pcs.); 2 — longitudinal grillage (beam 250×100, L = 6000, 2 pcs.); 3 — lower longitudinal frame (beam 100×100, L = 6000, 2 pcs.); 4 — post (beam 100×60, L = 1600, 14 pcs.); 5 — brace (beam 100×60, 8 pcs.); 6 — upper longitudinal frame (beam 100×60, L = 6000, 2 pcs.); 7 — ridge beam-truss (2 pcs.); 8 — rafter (board 100×30, 20 pcs.); 9 — door jamb (beam 100×60, 4 pcs.); 10 — tie beam (beam 50×50, 2 pcs.); 11 — door lintel (beam 100×60,); 12 — door frame (board s20, 2 pcs.); 13 — upper transverse frame (beam 100×60, 4 pcs.); 14 — lower transverse frame (beam 100×100, 2 pcs.); 15 — transverse grillage (beam 250×100, 2 pcs.)
The greenhouse foundation is quite unique. First, powerful beams (almost the same cross-section as railway sleepers, and also impregnated with antiseptic) were laid along the designed perimeter of the walls. I made the corner joints of the beams “half-lap” and fastened them with steel brackets. Then, along the beams on the inside at the corners and at certain intervals, piles made of steel equal-leg angle No. 4.5 (45x45x5 mm) 1510 mm long were driven to a depth of about 1200 mm.
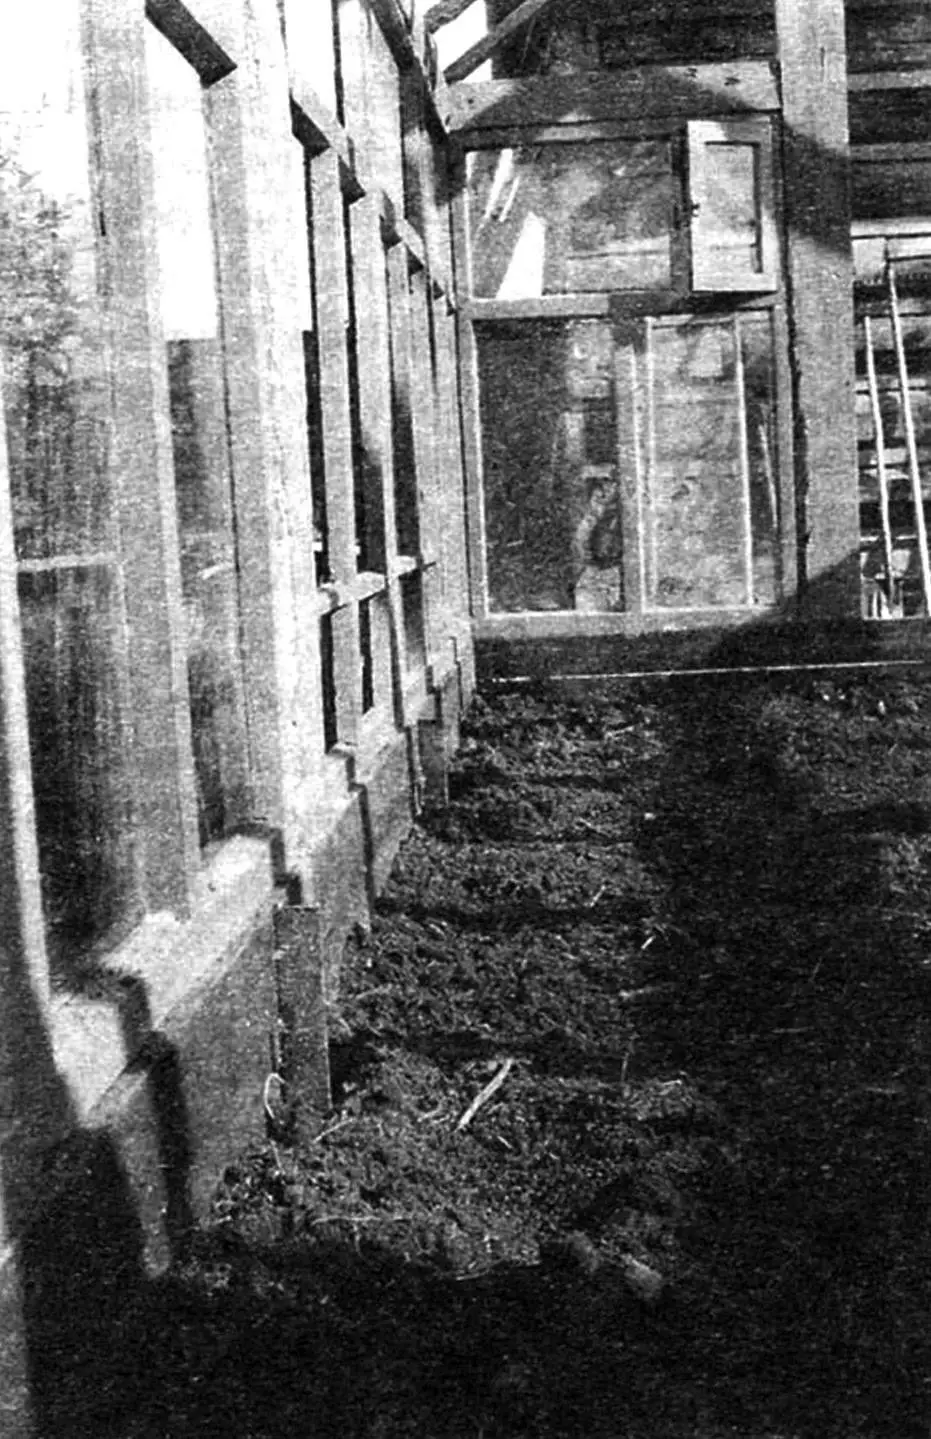
At the upper ends of the angles on the flanges adjacent to the beams, I drilled two holes 6.5 mm in diameter close to each other and through them attached the beams to the piles with 200-mm nails. It turned out that the beams hung at some distance from the ground, like a pile grillage. But this is for now. Later, I poured humus—a fertile organic soil layer more than 200 mm thick—over the entire interior area, which also got under the beams, covering the gap.
On the foundation beams, I laid the lower frame beams of the future greenhouse frame with a cross-section of 100×100 mm, fastening both with 200-mm nails.
I planned to make the wall frame from beams with a cross-section of 100×60 mm. I set the distance between adjacent posts at 1 m, since I intended to cover the walls with thick polyethylene film. With large gaps, it’s difficult to ensure such tension of the film that it wouldn’t flap in the wind and wouldn’t sag too much when heated by the sun’s rays.
The connection of posts to the frame can be different: mortise and tenon, with brackets, on connectors, or in the most primitive way—nails at an angle. The posts are connected at the top by the upper frame. The fastening of elements is similar to that done in the lower frame. In the gable walls, the frame is cut because door jamb posts are installed in the middle part. Since the greenhouse walls are not high, part of the door opening had to be extended into the gables. Moreover, a tall door promotes quick and complete ventilation of the greenhouse on hot days—after all, the most heated air accumulates right under the roof. I should also note that to regulate the moisture-thermal regime inside the greenhouse, small opening-closing ventilation openings like transom windows must be installed in its end walls.
Since the walls have a rectangular shape (as is known from geometry—a non-rigid figure), at least between the corner and adjacent posts, both in the side and gable walls, braces must be installed.
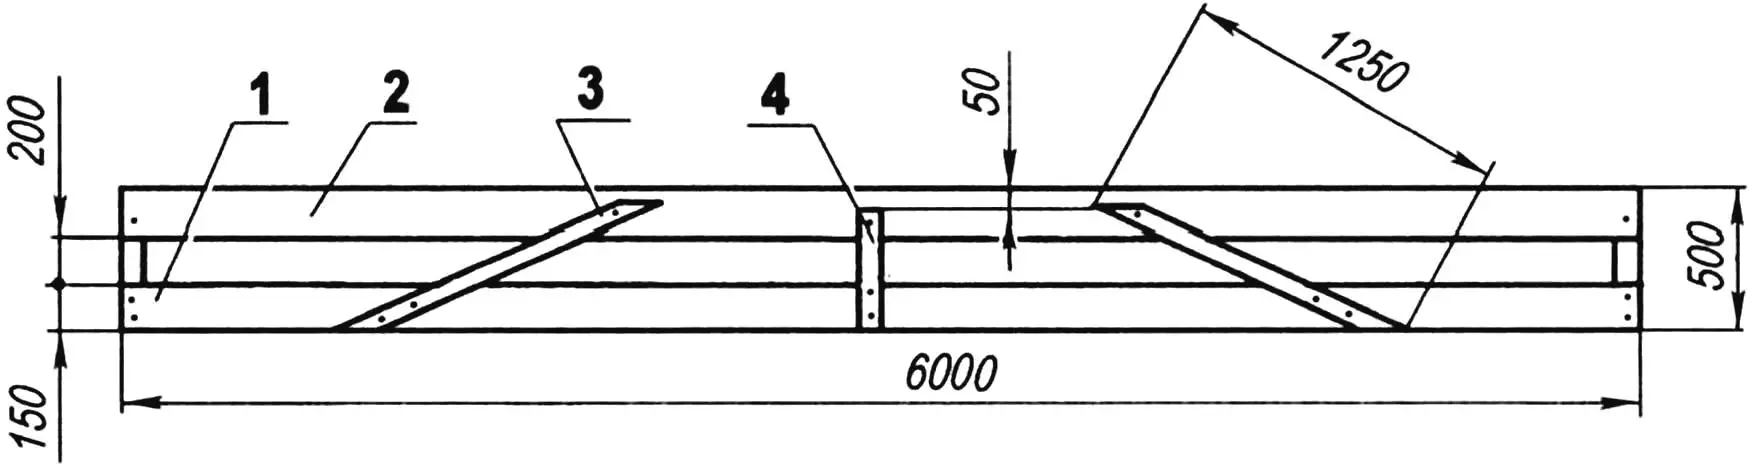
1 — lower chord (board s25, L = 6000); 2 — upper chord (board s25, L = 6000); 3 — post (board s25, L450, 3 pcs.);
4 — brace (board s25, L1250, 2 pcs.)
I’ll interrupt the description of the designed greenhouse structure here and return to the moment of its construction when the foundation, or rather—the pile grillage, was ready and the lower frame beams of the wall frame had already been laid on it.
At this time, while walking along a busy street one day, I saw how window frames were being replaced with double-glazed windows in one of the apartments of a multi-story building. A thought immediately occurred to me: wouldn’t it be great to use such frames for building a greenhouse. I asked the owner how he planned to use them. I heard the answer: “If you help me take them to the dump—I’ll pay.” After examining the windows, I realized that it was too early for them to go to the dump—the wood was without rot and dry—nothing better for a greenhouse. I immediately arranged for transport and brought the frames home.
At home, I measured the windows and figured out how to distribute them along the walls. Not all frames were the same, and most importantly—their sizes were not multiples of the length and width of the built foundation. In the end, this problem was solved quite simply: on the long (side) walls I installed two insert posts, and on the short (gable) walls I compensated for the size difference by adjusting the door width—they are also homemade, and I made them a bit wider than necessary.
In the lower frame, strictly speaking, the need disappeared, but I decided not to disassemble it—I had nailed its beams to the foundation ones too firmly. I left the upper frame as in the preliminary design—after all, it also serves as a support for the roof rafters.
I made the roof frame, as mentioned earlier, the same as I had planned in the original version, since the old frames were only enough for the walls.
First, I made the ridge beam from “twenty-five” boards 150 mm wide in the form of a flat truss. I laid the lower chord of the truss on the door lintels, and attached the upper ends of the rafters to the upper chord. I cut the lower ends of the rafters into the upper frames of the side walls and secured them with nails. After that, I fastened each pair of rafters with tie beams made from beam segments with a cross-section of 50×50 mm, passing them under the lower chord of the ridge truss.
The rafters were designed over each post and also between them (see drawing), so that the roofing film wouldn’t sag too much. In reality, I installed them more sparsely (see photo), which also turned out to be acceptable, since I used reinforced polyethylene film as the roofing. I pressed it to the rafters and upper frame with thin wooden battens, and nailed the battens with small nails. I also covered the door frames with the same film—they are quite tall and would be rather heavy with glazing. And the doors have to be opened quite often, and glass ones would be unsafe.
Now, having built the greenhouse, I have the opportunity to plant vegetable seedlings almost a month earlier than those gardeners who don’t have greenhouses, without fear of either late spring or early autumn frosts.
«Modelist-Konstruktor» No. 1’2008, A. MATVEYCHUK
Recommend to read
 MOVE THE FURNITURE? PLEASE!
To Express themselves easier. I have to move home furniture. Where will my wife say, women love such innovations. That's just the strength may not be enough, especially if you do not...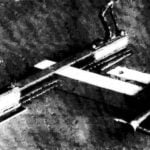 SPIKES? NO PROBLEM
Most comfortable furniture, "serious" joinery collect connecting parts on the thorns. Technical requirements for the quality of such nodes is usually very high. Run them by milling or...
