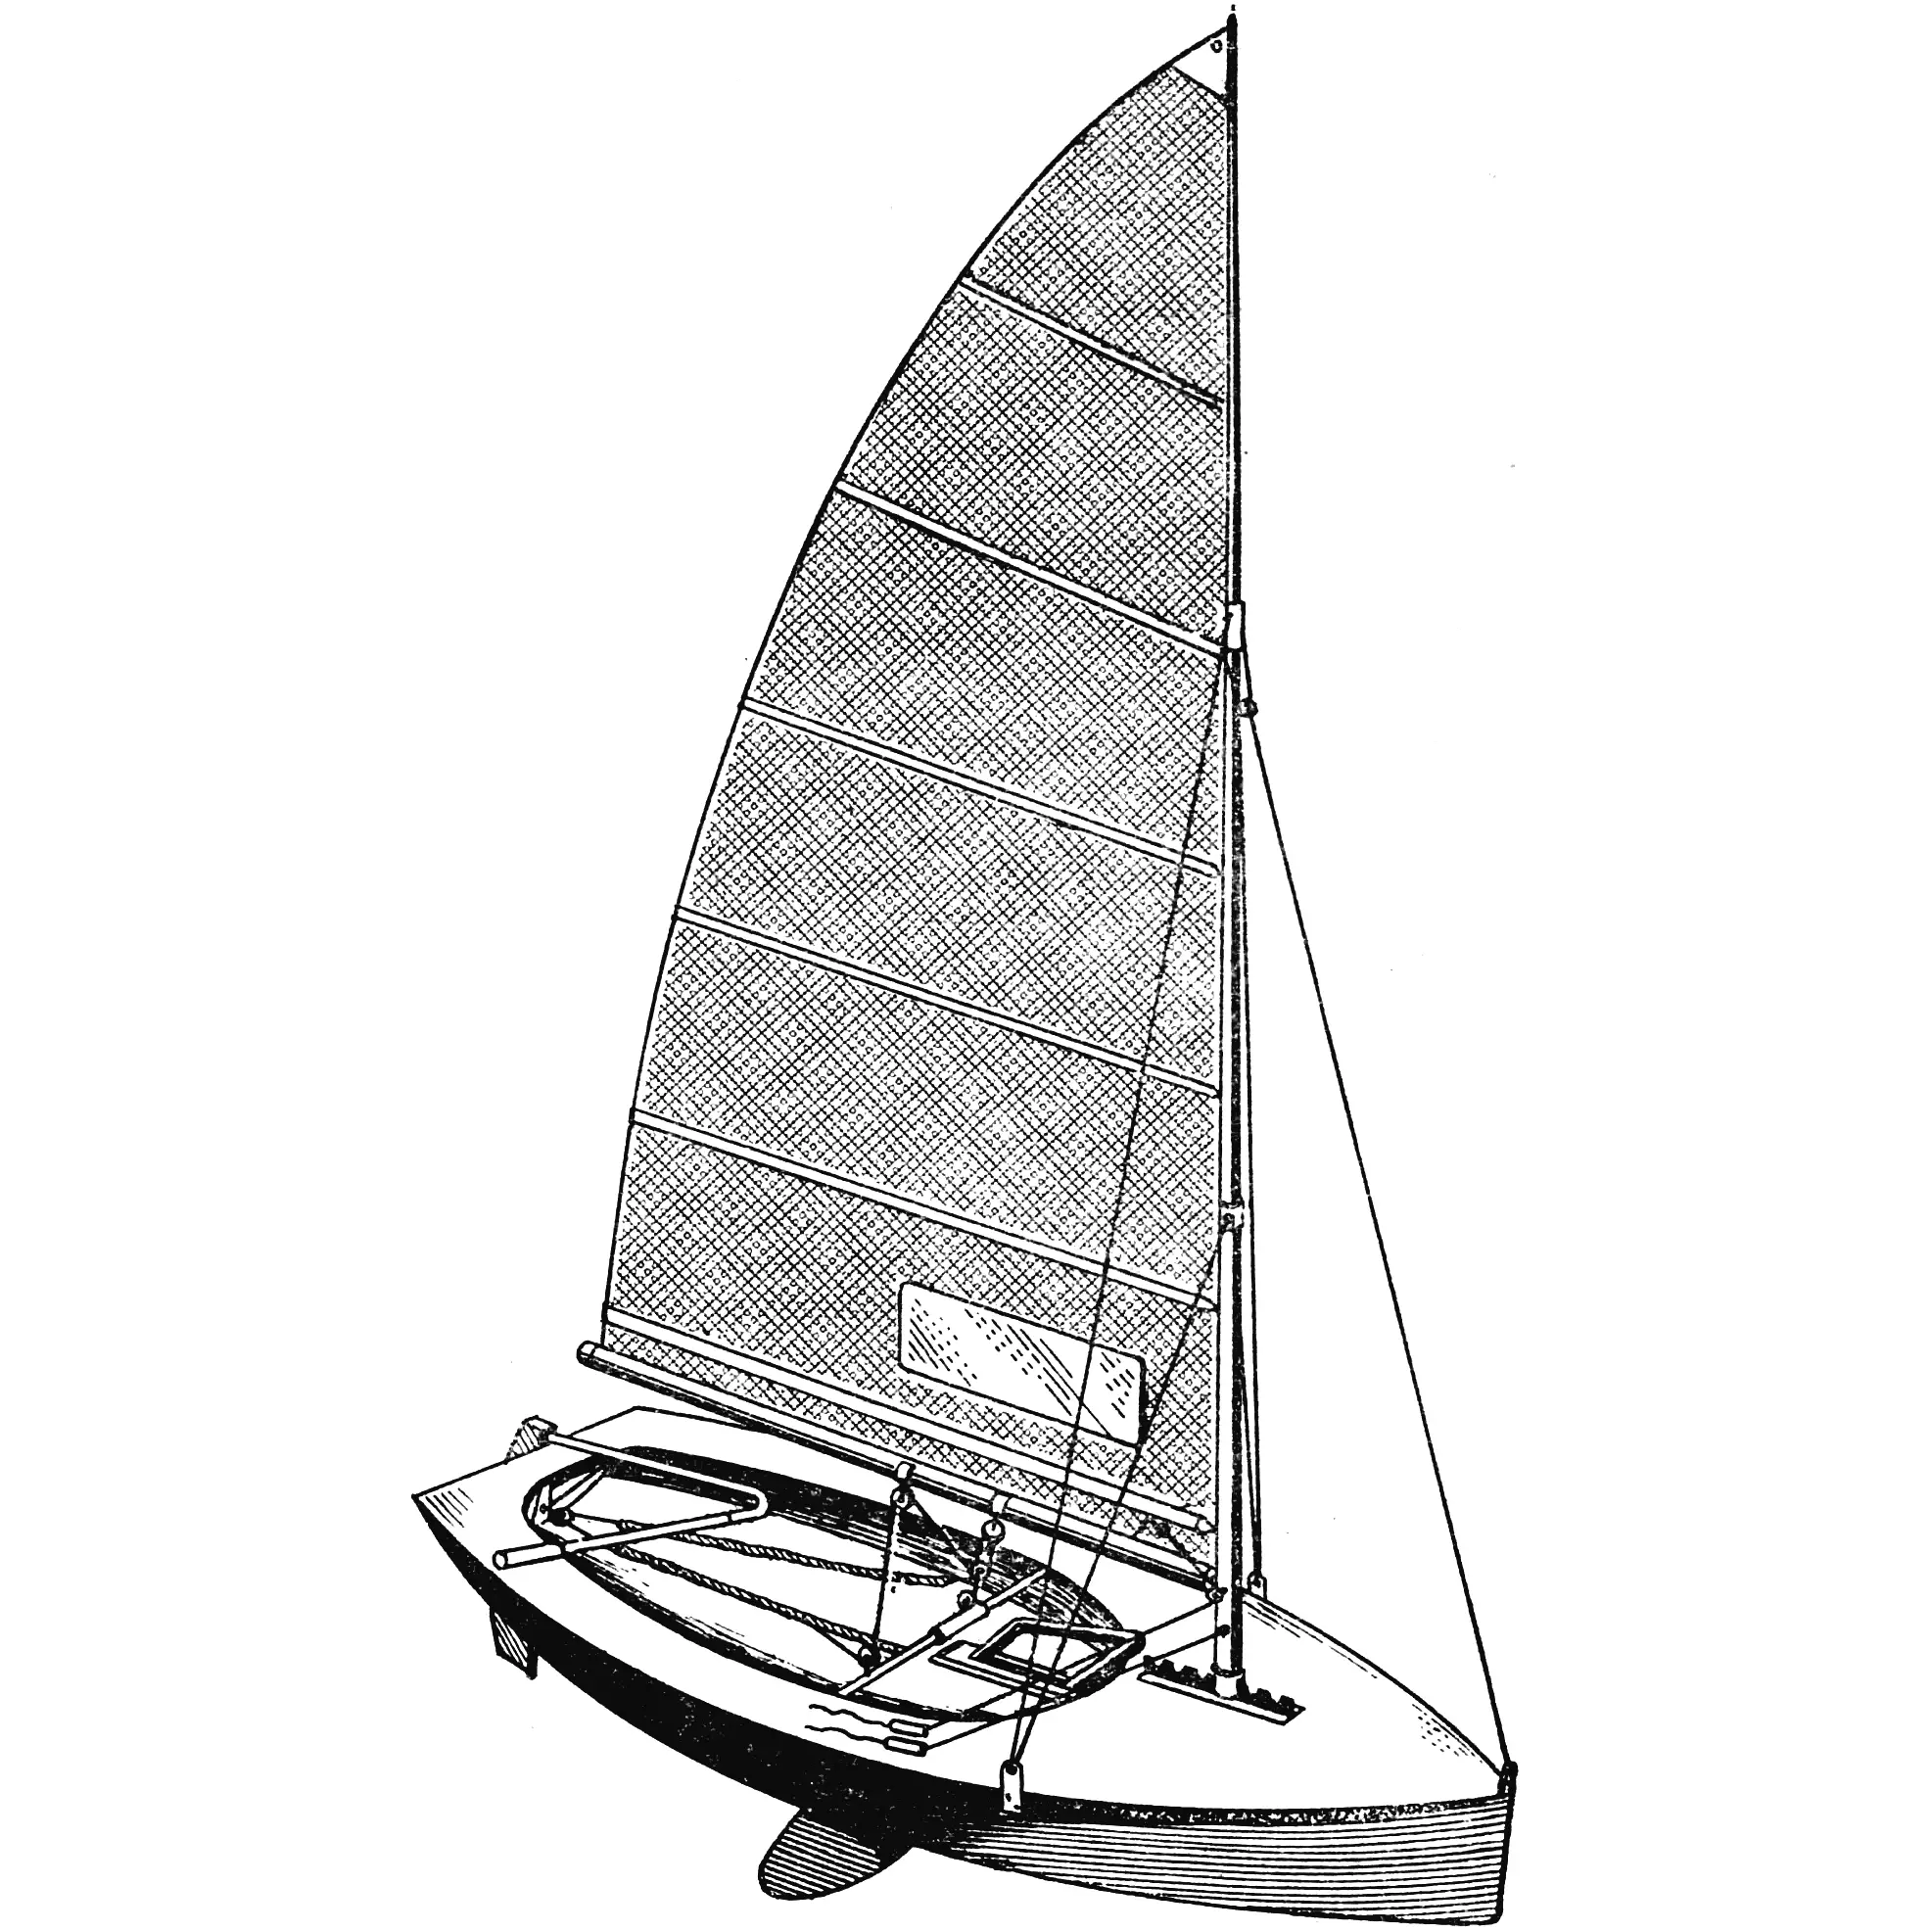
The ultra-light international Moth class dinghy — the “Moth” (fig. 1, 2) is simple in design, easy to build, and possesses all the most important qualities of a racing boat — it is fast, maneuverable, and responsive to the helm. All this makes it worth recommending as a first racing sailboat for those who dream of reaching Olympic heights in yachting.
According to accepted terminology, the “Moth” is a Bermuda cat, that is, a dinghy rigged with a single sail — the mainsail. With careful construction and strict weight discipline, the boat’s mass should not exceed 30 kg.
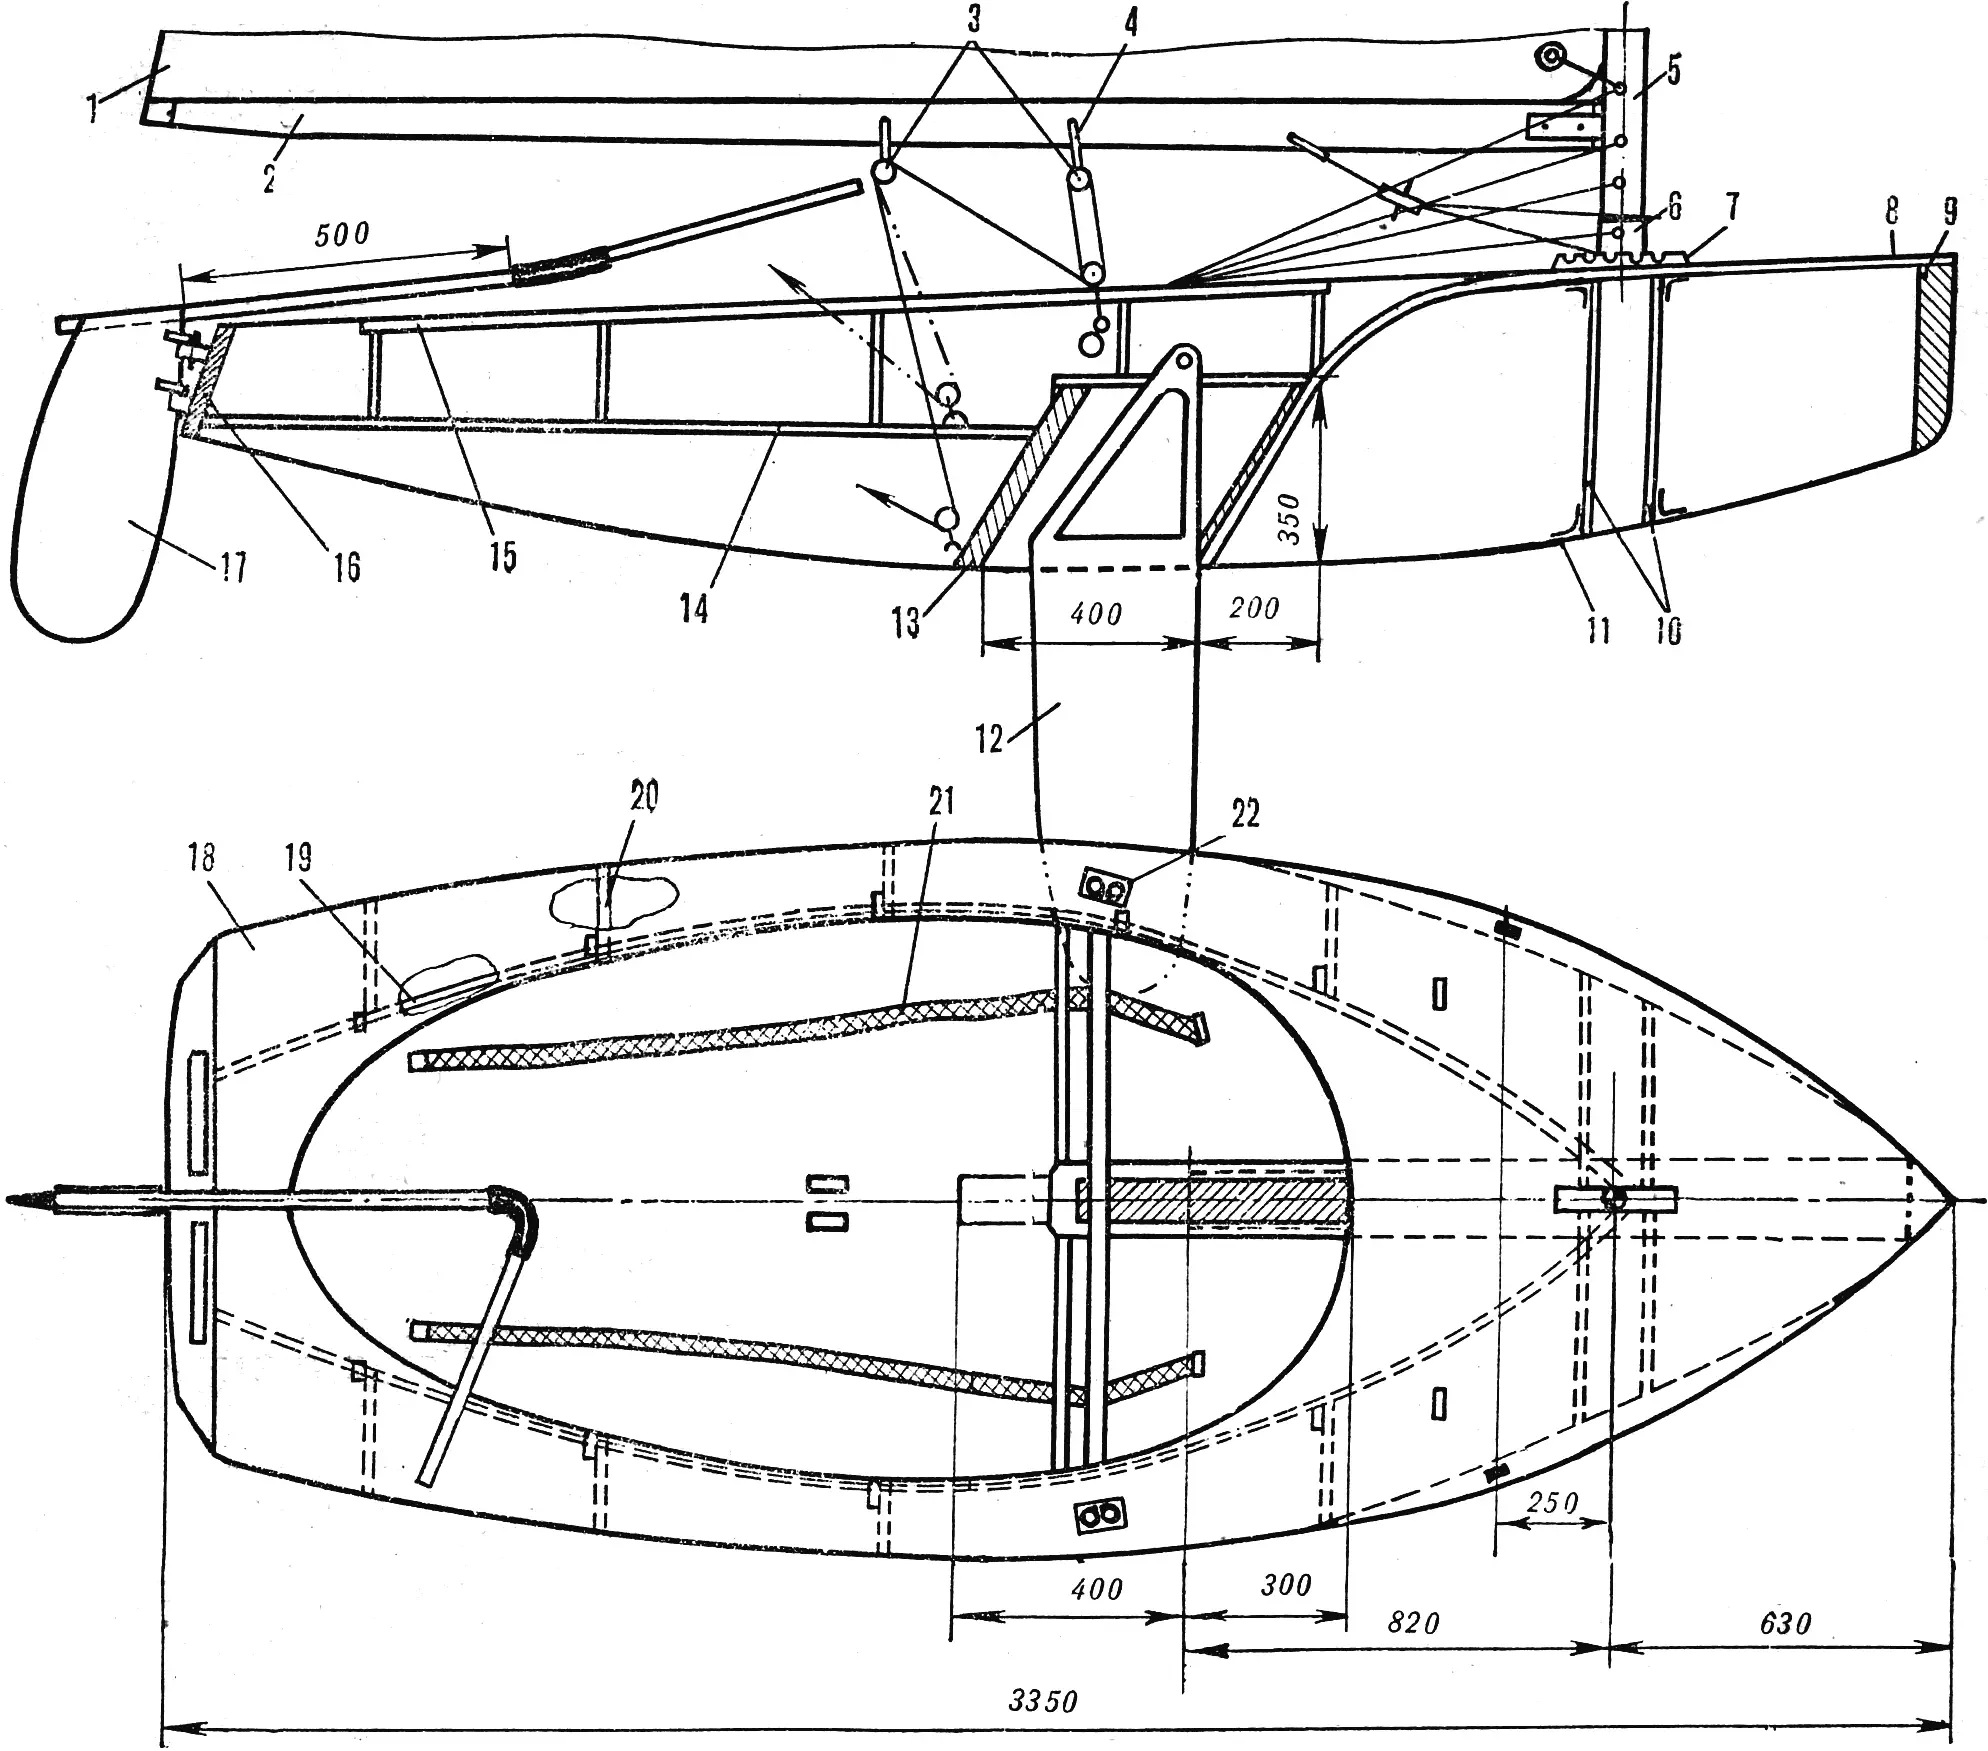
1 — sail, 2 — boom, 3 — blocks, 4 — block fitting, 5 — mast, 6 — mast fitting, 7 — step, 8 — deck, 9 — stem, 10 — reinforcing frames, 11 — hull bottom, 12 — centerboard, 13 — centerboard trunk, 14 — cockpit sole, 15 — cockpit coaming, 16 — transom, 17 — rudder blade, 18 — deck, 19 — deck reinforcement, 20 — beam, 21 — textile strap, 22 — cleat.
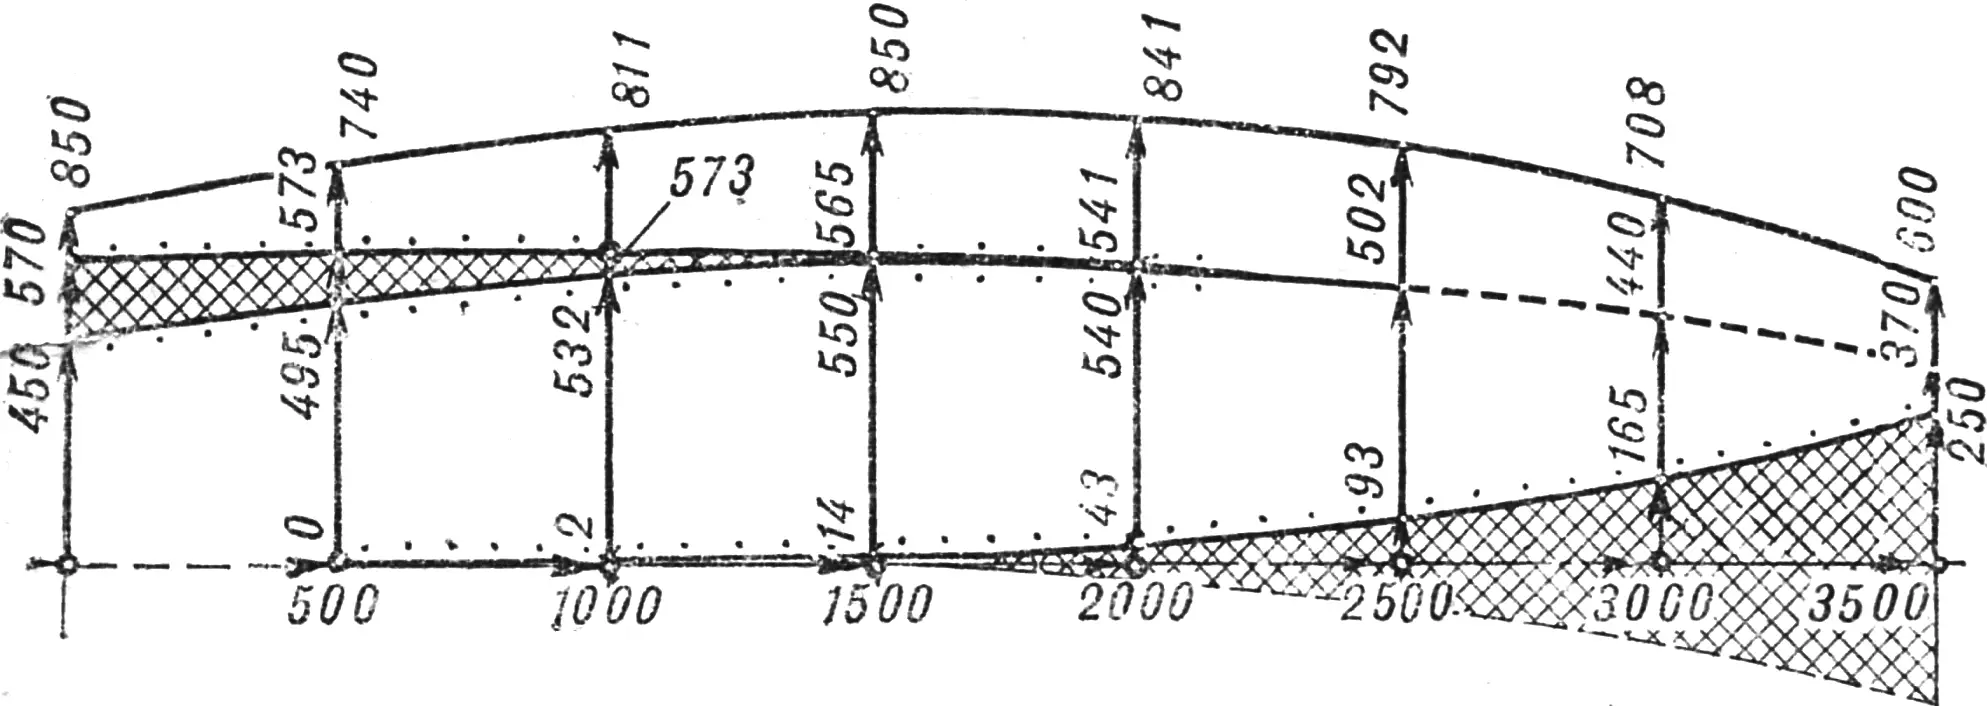
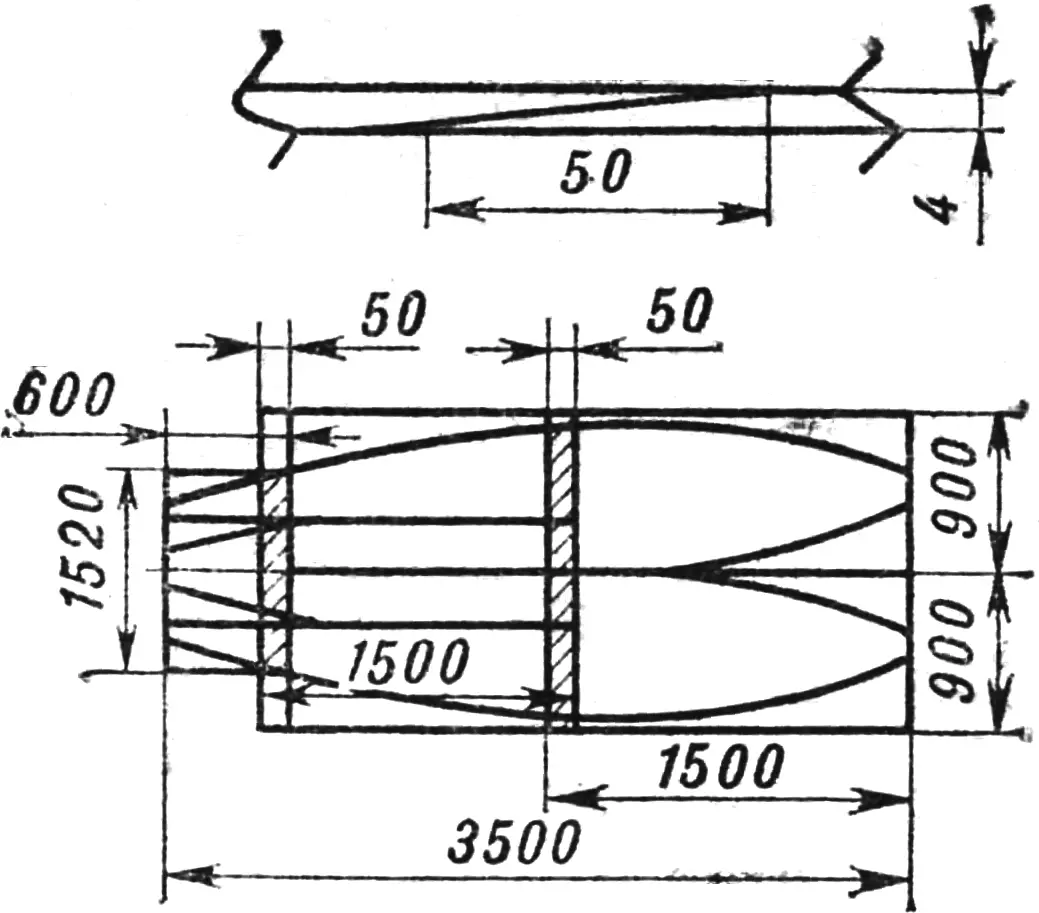
The hull is cut from a sheet of hardboard or waterproof plywood 4—5 mm thick, measuring 1800X3500 mm. It is also possible to join elements from several smaller sheets (fig. 5). A scarf joint will provide entirely satisfactory strength if the blank is glued with epoxy resin and cured under a press.
The blank is marked out as shown in figure 3, with layout lines traced in marker pen. Then the “excess” material is removed, and along the dotted lines a cut is made with a sharp knife (such as a shoemaker’s knife) to approximately one third of the sheet thickness. To avoid cutting deeper into the skin than necessary, it makes sense to fit a simple depth stop to the blade or, as a last resort, mark the blade and control the depth of the cut by that mark.
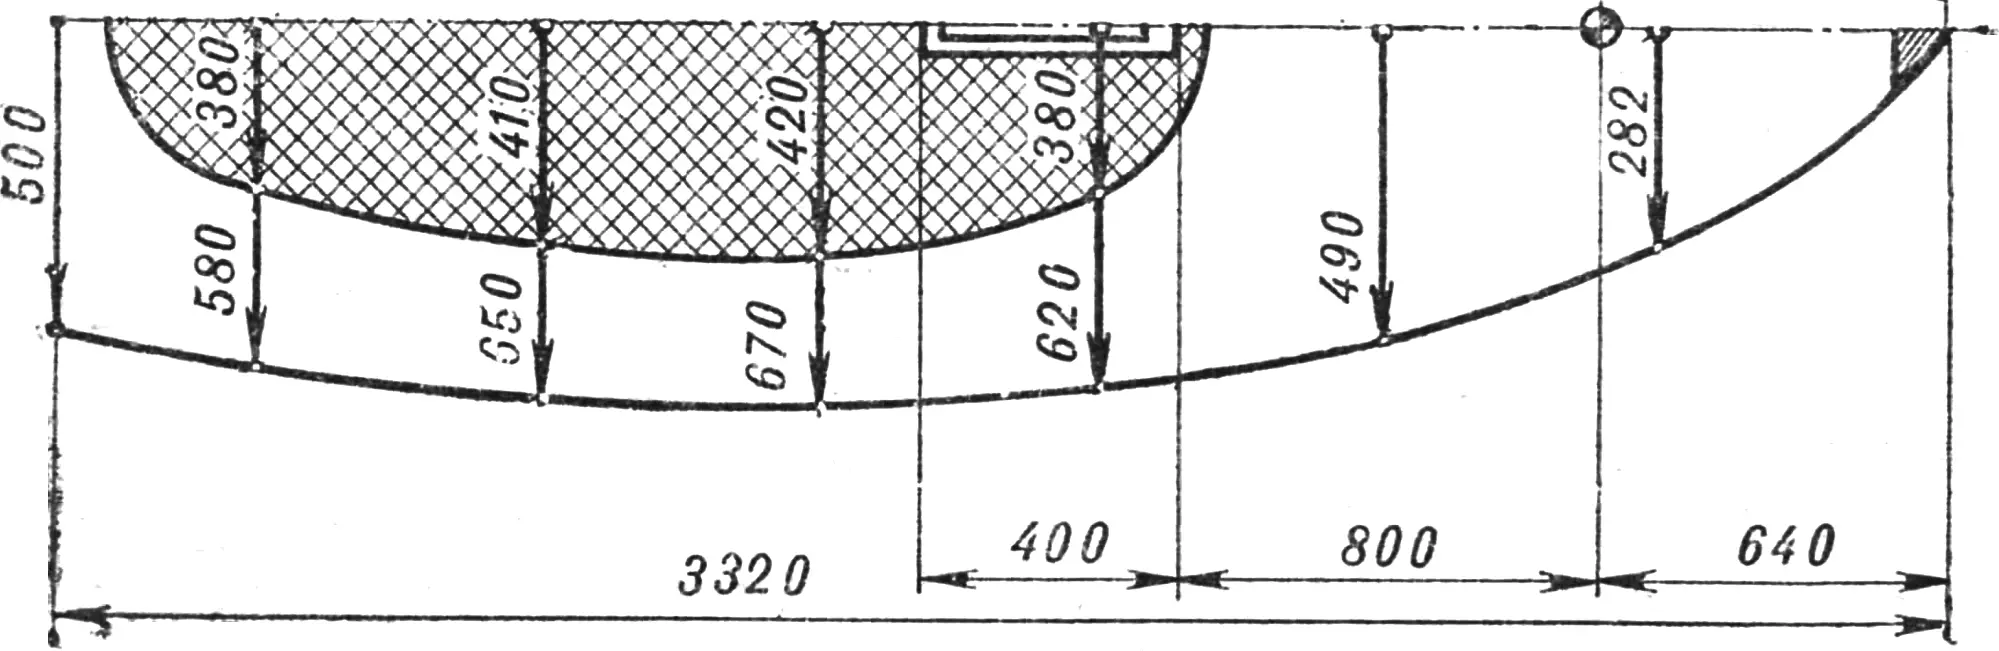
In the edges of the skin that are to be joined together, drill holes Ø 2—3 mm — they will be needed later to stitch the hull together, using soft lock wire as “thread.” The spacing between holes is 100 mm; they are located 20 mm from the edge (fig. 6).
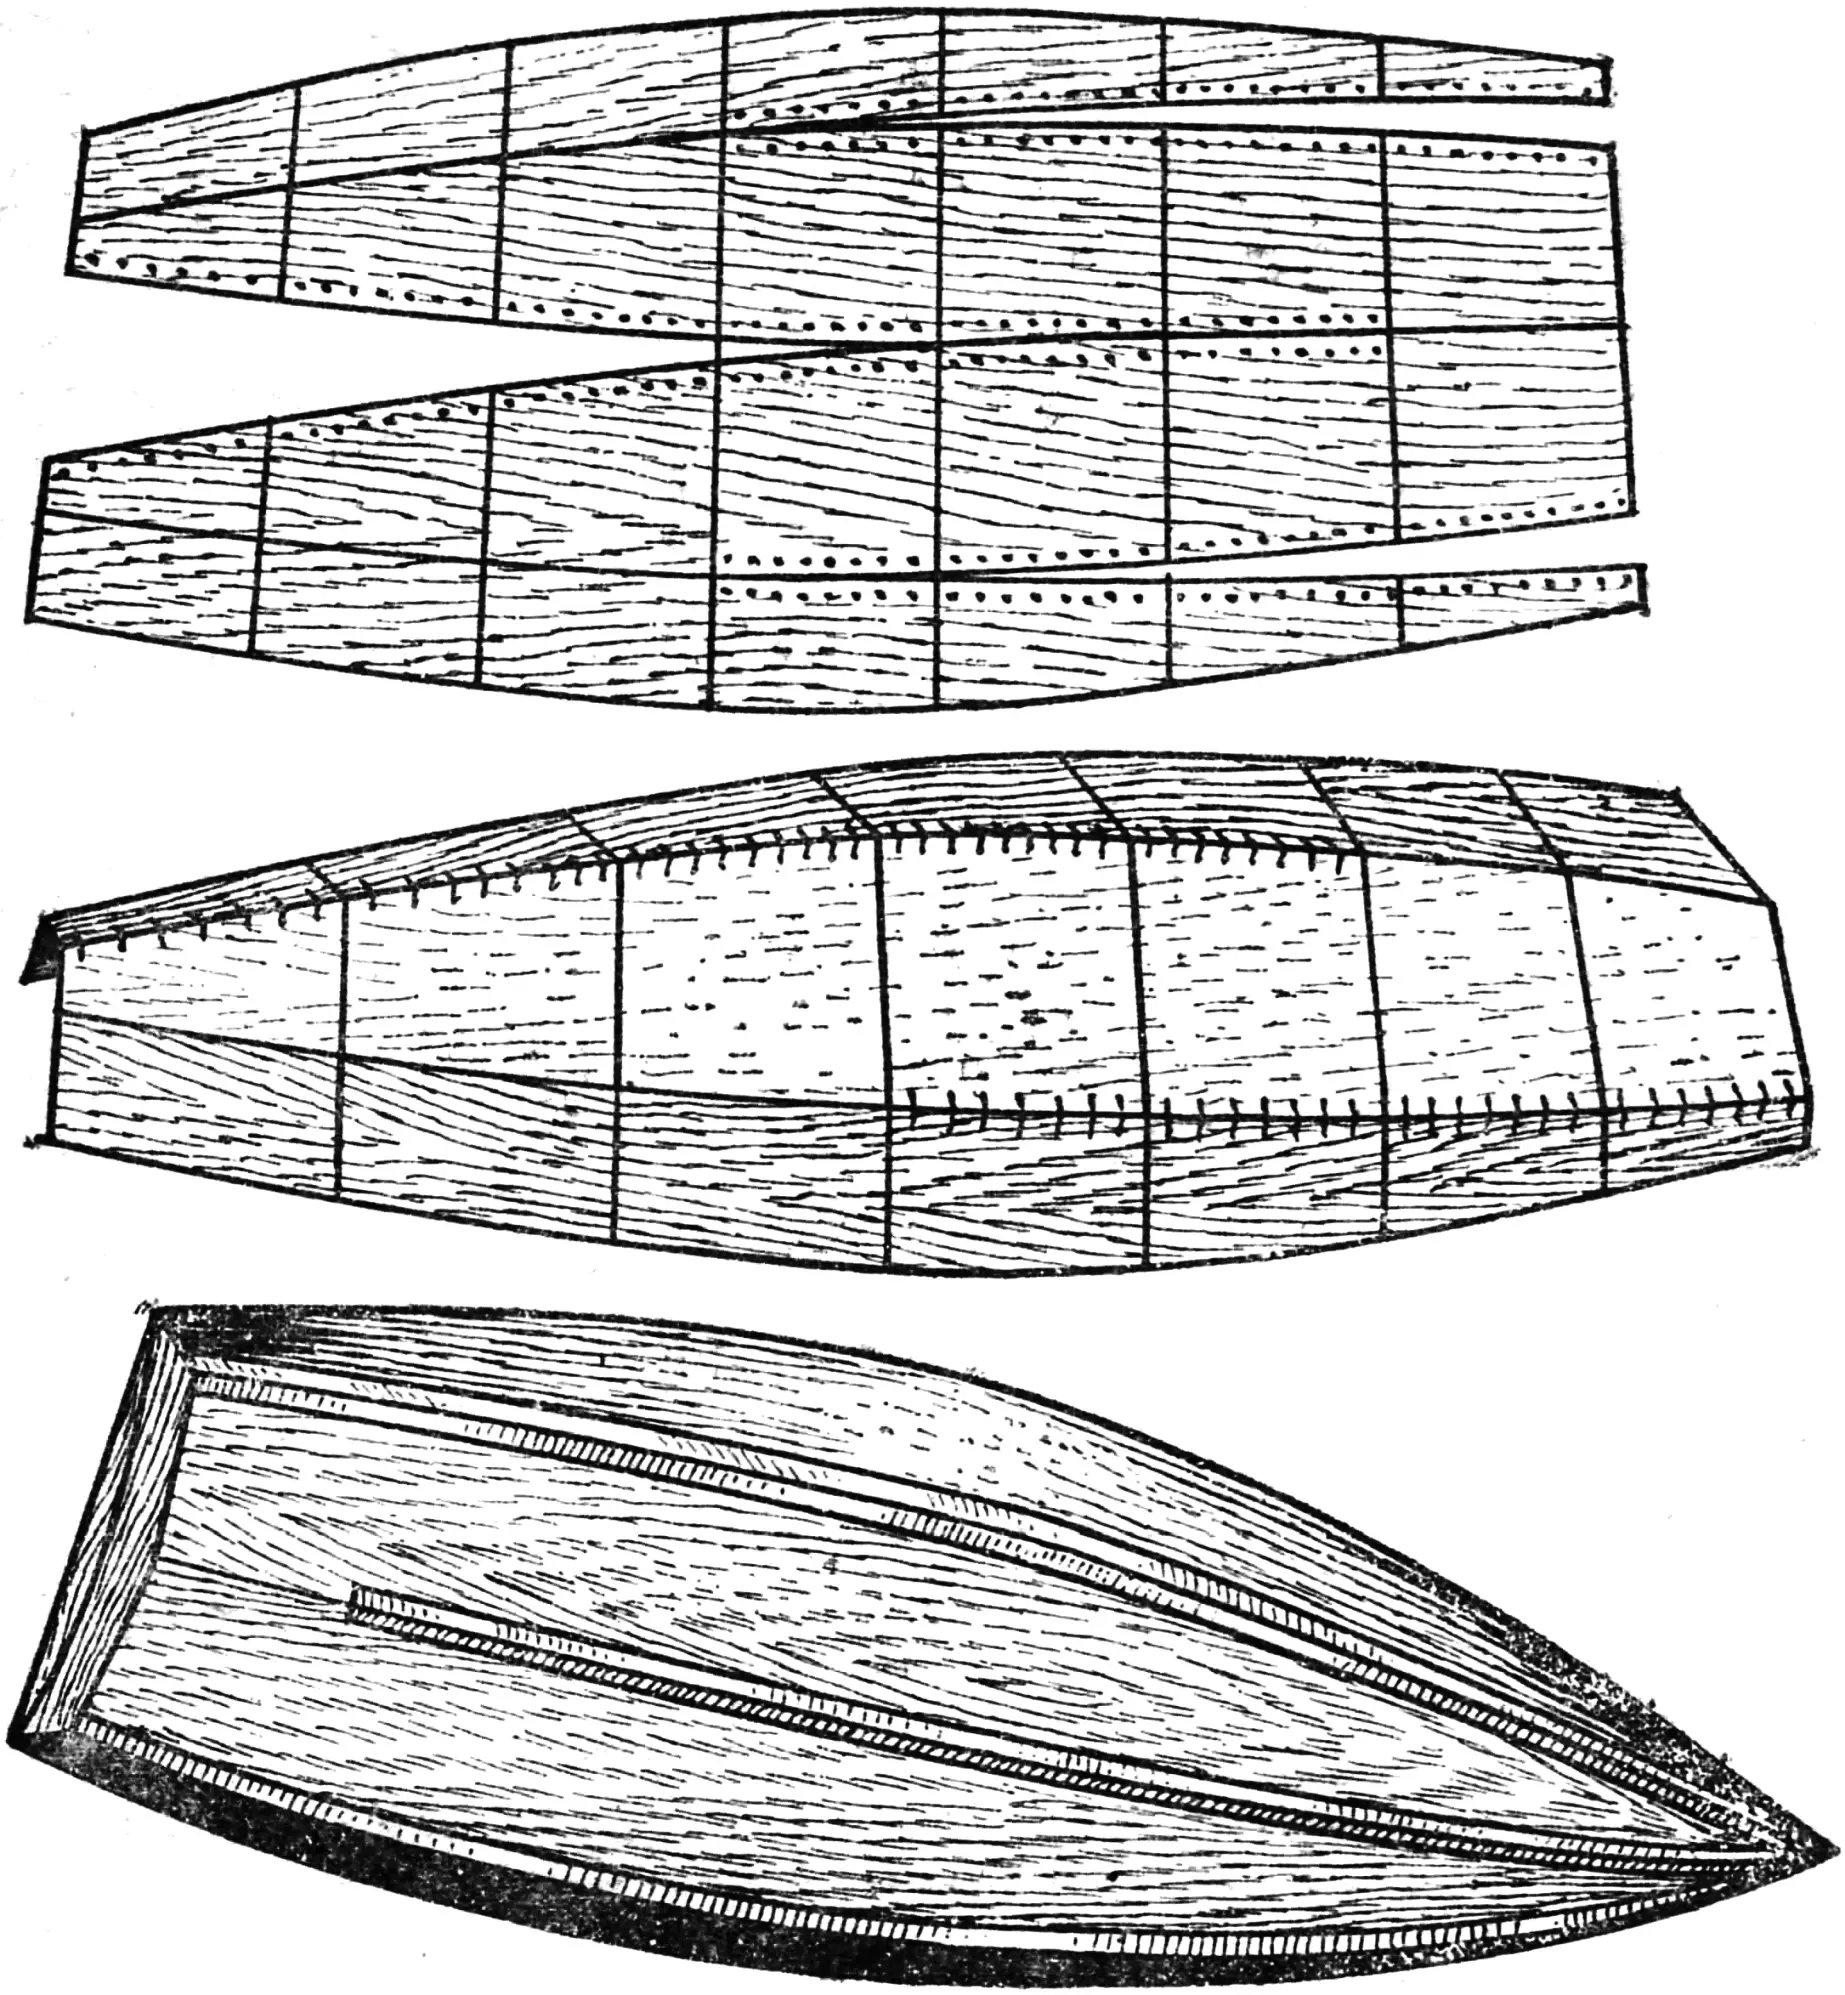
Carefully bend the skin sheet along the cut lines and sequentially join the hull elements together with twists of soft wire.
Cut the transom from plywood 12—15 mm thick (fig. 7) and reinforce it in the hull with strips of fiberglass cloth bonded with epoxy adhesive. The stem timber is installed in the same way. The resulting hull subassembly must be reinforced. Cut strips of fiberglass cloth about 100 mm wide, impregnate them with epoxy adhesive, and tape the internal seams. Three or four layers of fiberglass cloth are sufficient to ensure hull stiffness and watertightness.
After the epoxy adhesive has cured, the wire ends protruding on the outside are cut off and the seams are taped over with strips of fiberglass cloth.
The next operation is assembly of the centerboard trunk. For it you will need two plywood sheets 5—6 mm thick and two wooden battens — their width, which determines the size of the trunk, is 40 mm. The parts of this unit are fastened with screws and epoxy adhesive. The trunk is attached to the hull bottom with the same strips of fiberglass cloth and epoxy adhesive. After the resin has cured, a slot for the centerboard is cut in the bottom.
The Moth dinghy has a so-called self-bailing cockpit with a sole located above the waterline, so water freely drains from it through transom openings — scuppers. Thanks to this design, the boat is easy to raise onto an even keel even if the cockpit is completely flooded.
The sole of the self-bailing cockpit is cut from waterproof plywood 8—10 mm thick and secured with strips of fiberglass cloth and epoxy adhesive.
The dinghy deck is easiest to cut from a whole sheet of hardboard or plywood, but it can also be glued using the methods described here. On the inside, the deck is reinforced with longitudinal curved battens (see figure 2), their cross section being 10X20 mm. The cockpit opening should preferably be edged with a bent batten. Since bending a batten of fairly large cross section is difficult, you can use a simplified method. Cut several plywood strips (the cut should run across the grain) and sequentially glue them to the cockpit edge, securing them with small nails and temporary spacers. After the epoxy adhesive has cured, finish the edging with a plane, rasp, and sandpaper.
After completing hull assembly, cut in two reinforcing frames of waterproof plywood 5 mm thick in the mast step area. The frames are fixed with strips of fiberglass cloth and epoxy adhesive. Try to make the forepeak (bow compartment) watertight — this will give the dinghy additional buoyancy.
Another watertight bulkhead is located directly in front of the centerboard trunk. It can be cut from 4 mm plywood and secured in the hull by the standard method — with strips of fiberglass cloth.
To make the centerboard, select several pine or spruce boards 30 mm thick, edge them together, and glue them so that you obtain a blank measuring 30X300X1000 mm. Reinforce the upper part of the centerboard with two cheeks of 4 mm plywood, and plane the lower part so that the cross section resembles a double-convex symmetrical aircraft wing profile. Lighten the upper part of the part — cut a triangular opening in it, as shown in figure 2. All that remains is to fair the centerboard surface with epoxy filler, cover it with one layer of fiberglass cloth, fill again, sand with emery paper, and paint with synthetic enamel.
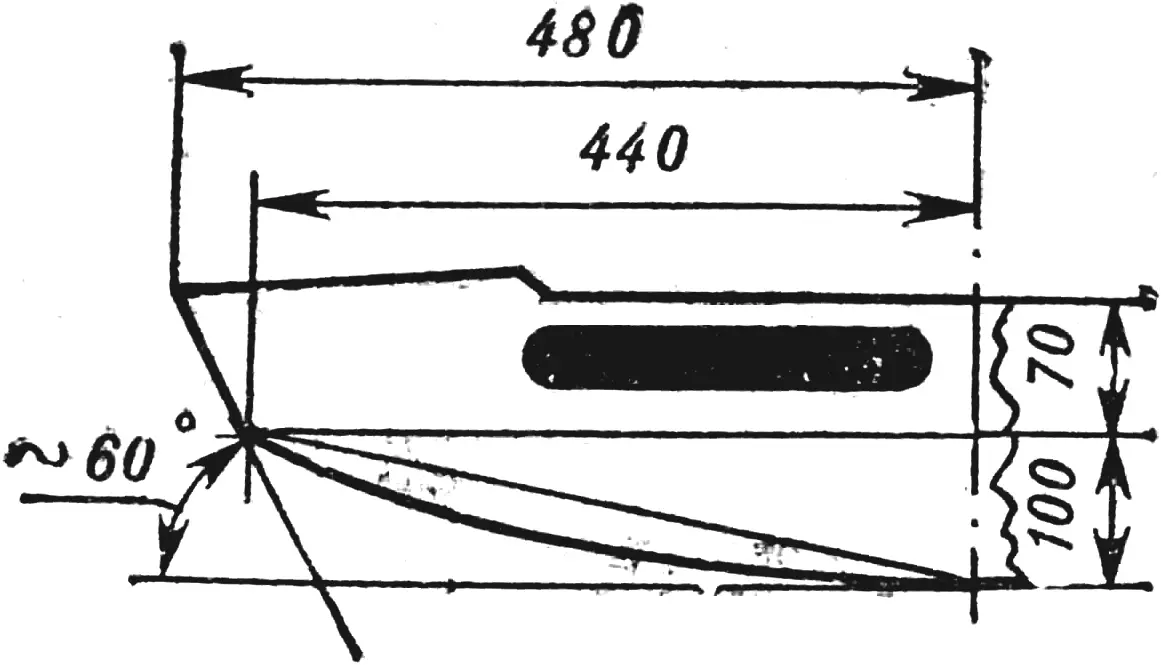
The technology for making the rudder blade is identical to that described above. The only difference is that a plywood sheet about 15 mm thick is used as the blank.
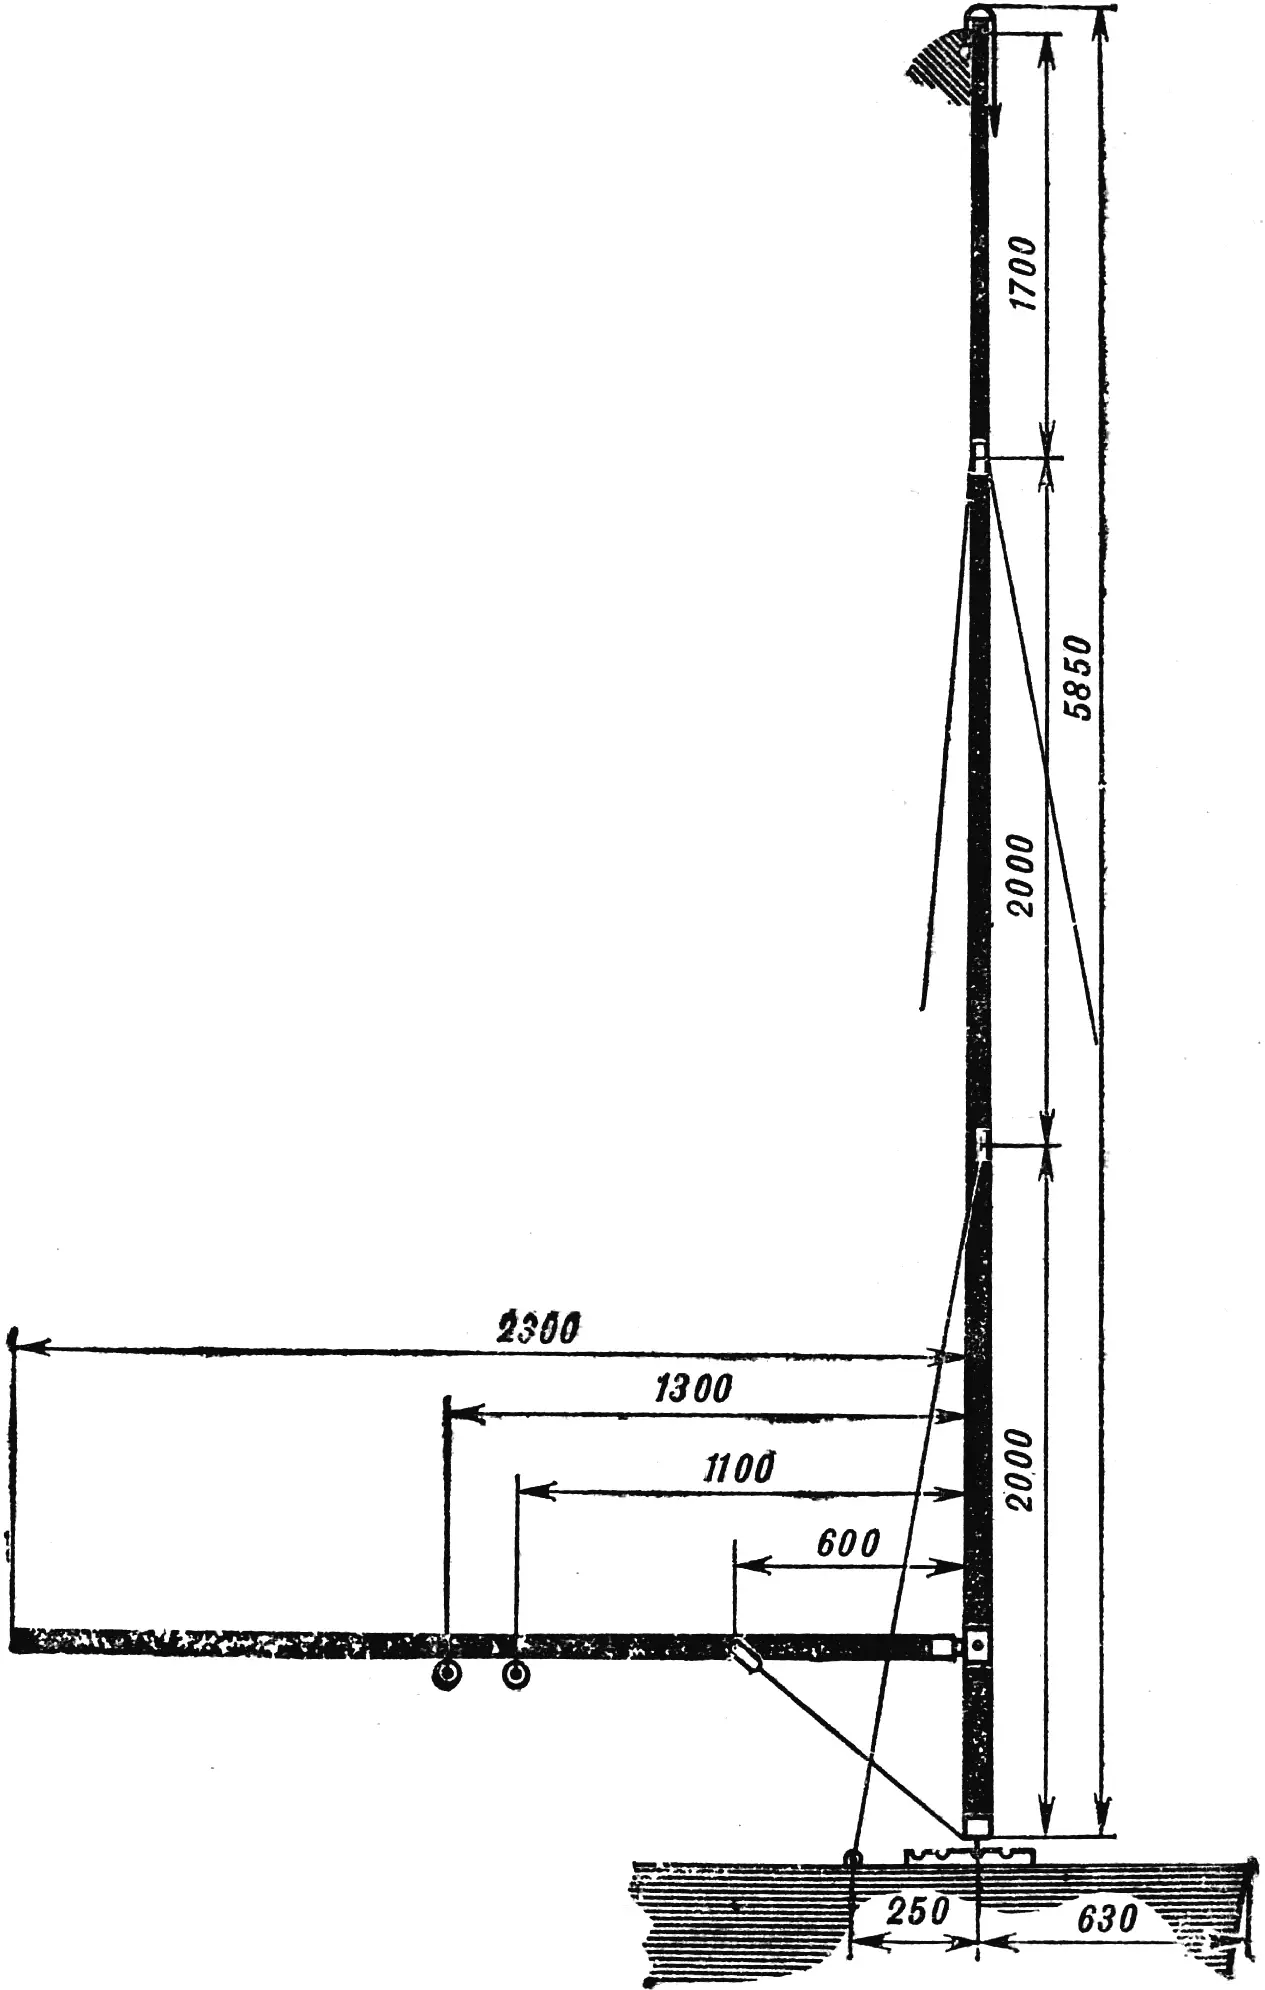
The mast work (fig. 9) deserves special attention. Try to follow our recommendations exactly. First, select two boards about 6 m long (preferably spruce). Inspect them carefully and make sure there are no knots, cracks, or wild grain. Do not be discouraged if lumber of such length is not available — the blank can be glued from several boards, joining them with a scarf joint using epoxy adhesive. Bear in mind only that the scarf itself must be at least 350 mm long.
Plane the blanks so that you obtain two timbers with a cross section of 35 X 70 mm each. The next operation is cutting the mast groove. It is done with semicircular chisels or a grooving plane — a small plane with an iron ground to the shape of the future groove. Treat the groove with emery paper and then sand it thoroughly. Make sure that its cross section remains constant along the entire length of the mast. Glue the timbers with epoxy resin, clamping the mast blank along its entire length with clamps — you will need at least two dozen of them. While the resin is curing, the blank must be placed strictly horizontally on identical supports or simply on wooden blocks set on a level floor. Failure to follow this recommendation may result in the blank becoming permanently curved and the work having to be started over.
After the adhesive has cured, plane the mast: the diameter at the base should be 65—70 mm, and at the top about 40 mm. The thoroughly sanded part is coated twice with hot (preferably natural) linseed oil, and then with two coats of oil varnish. Do not forget to treat the inner surface of the mast groove in the same way.
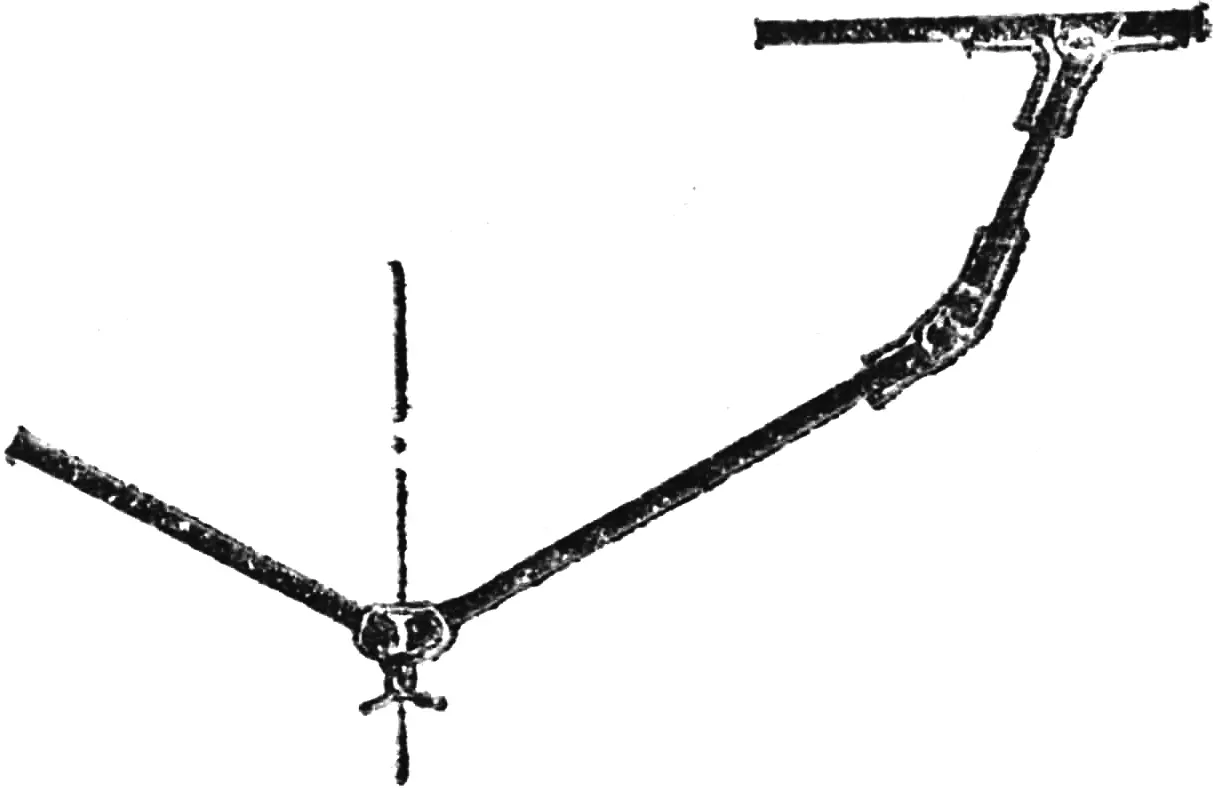
A fitting is pressed onto the lower part of the mast — a section of thin-walled steel tube, and onto the upper part — a masthead fitting with an embedded sheave for the mainsail halyard.
The mast is secured on the dinghy with two pairs of shrouds and a forestay. All of them are made of steel wire rope Ø 4 mm. The ends of the ropes are secured in thimbles or in soft copper tubing. Use turnbuckles to tension the shrouds and forestay. You can learn about their construction, as well as many other useful details of the sailboat, by looking into issue No. 9 of “M-K” for 1979.
The boom is made in exactly the same way as the mast, except that the blanks are selected with a cross section of 20 X 50 mm and a length of 2400 mm.
The final operations in building the Moth dinghy hull are covering the hull with one layer of fiberglass cloth, fairing the surfaces with epoxy filler, sanding, and painting with synthetic enamels.
The sail can be sewn from thin tent fabric, ripstop nylon, or pillow ticking. The luff and foot of the sail are reinforced with vegetable or nylon rope Ø 10—12 mm. Reinforcing patches of material thicker than the sail cloth are sewn into the clew and tack.
The dinghy sail has full-length battens, for which through batten pockets 50 mm wide each are sewn in. The battens are of variable thickness — about 5 mm at the mast and 3 mm on the opposite side. A transparent window of polyester film 0.1 mm thick is sewn in between the first and second battens.
That is essentially all. Launch your dinghy and, having verified the watertightness of the hull, proceed to sea trials. Make your first outing in light wind. When you have sufficiently mastered dinghy handling technique, it will demonstrate all its virtues — speed and controllability — even in a fresh breeze.
«M-K» 7’80, based on materials from the magazine “Praktik”, GDR
Recommend to read
 FOR BUSINESS AND TRAINING…
This bike has unusual pattern and drive: two steering wheels, instead of rotating the pedal — levers. The force on the chain is transmitted when a cyclist privste from the saddle. And of... TRUCK FOR YOURSELF
Many people would like to have a small truck for personal use. First of all, of course, rural residents, as well as owners of dachas and garden plots. However, their desire in most cases...
