 What should be the car for summer camp? Some not without reason consider that the creation of autoconstructor mug here is futile, since class time is extremely limited. But this, we think, is wrong: you only need to choose an object to design.
Obviously, the design of mini-cars should be as simple and at the same time not reduced to the primitive. The machine should attract boys by their appearance and driving characteristics. The prototypes of the “camp” of the car, as it seems to us, can be either a minicar like “Friend” (“M-K”, 1974, No. 5) built in our group — laboratory of experimental modelling CUT USSR Academy of Sciences, or type “Cheburashka” (“M-K”, 1975, No. 3), developed on ZCUT Georgia. The only thing you need to change the design “Cheburashka” — to replace the glued exterior metal panel. Of course, there are options.
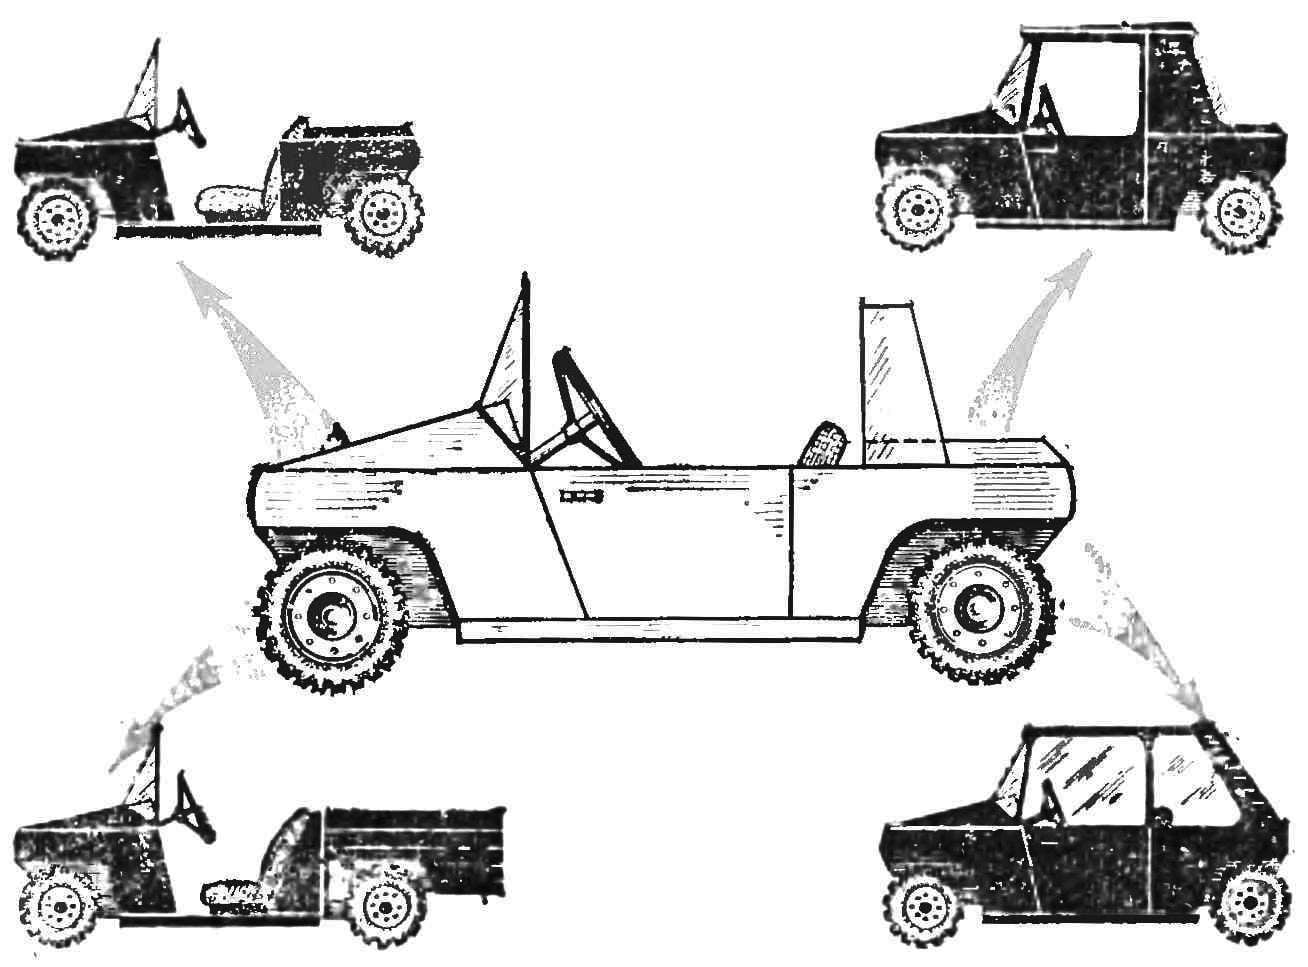
For autoconstructor circle summer camp required a kind of “avtokonstruktor”, a set of parts from which to collect the micro cars of several types. The creation of such a set of quite capable members avtoinstruktory laboratories. Offer in turn, a very rough set of DETA drink and nodes blocky car in advance suggesting that those who undertake such work, will find dozens of original design solutions. This simple machine will build even in early autoconstruction circle. It does not require any substantial material costs, and it can be done relatively quickly.

The frame of the little micro-car. Note the telescopic connection of the front and rear axles, allowing you to change the base of the machine.
In conclusion, we offer a sample syllabus.
LESSON 1-e and 2-e (3 hours)
1. Familiarization with the proposed design, layout, basic units and units, body panels. The explanation of the sequence and methods of Assembly. The announcement of a competition for the best car collected from the panels.
2. The circle is split into groups of five or six people.
1st group
The chassis Assembly of separate units and assemblies, setting levers and control pedals. The installation of the engine, power system and electrical equipment.
2-I group
The body Assembly of separate panels. Selection and arrangement of the panels in the places they dock. Installing lighting and alarm systems.

These are some of the options of the little micro-car.
CLASS 3-e and 4-e (2 hours)
1. The connection of chassis and body.
2. Install the driver’s seat.
3. Debugging and adjustment of the engine, steering, checking the reliability of the engine control and brakes.
LESSON 5-e and 6-e (2 hours)
1. Instructing driving a car.
2. Conversation on safety.
3. Practical riding.
CLASSES 7th and 8th
Competitions in figure driving.


