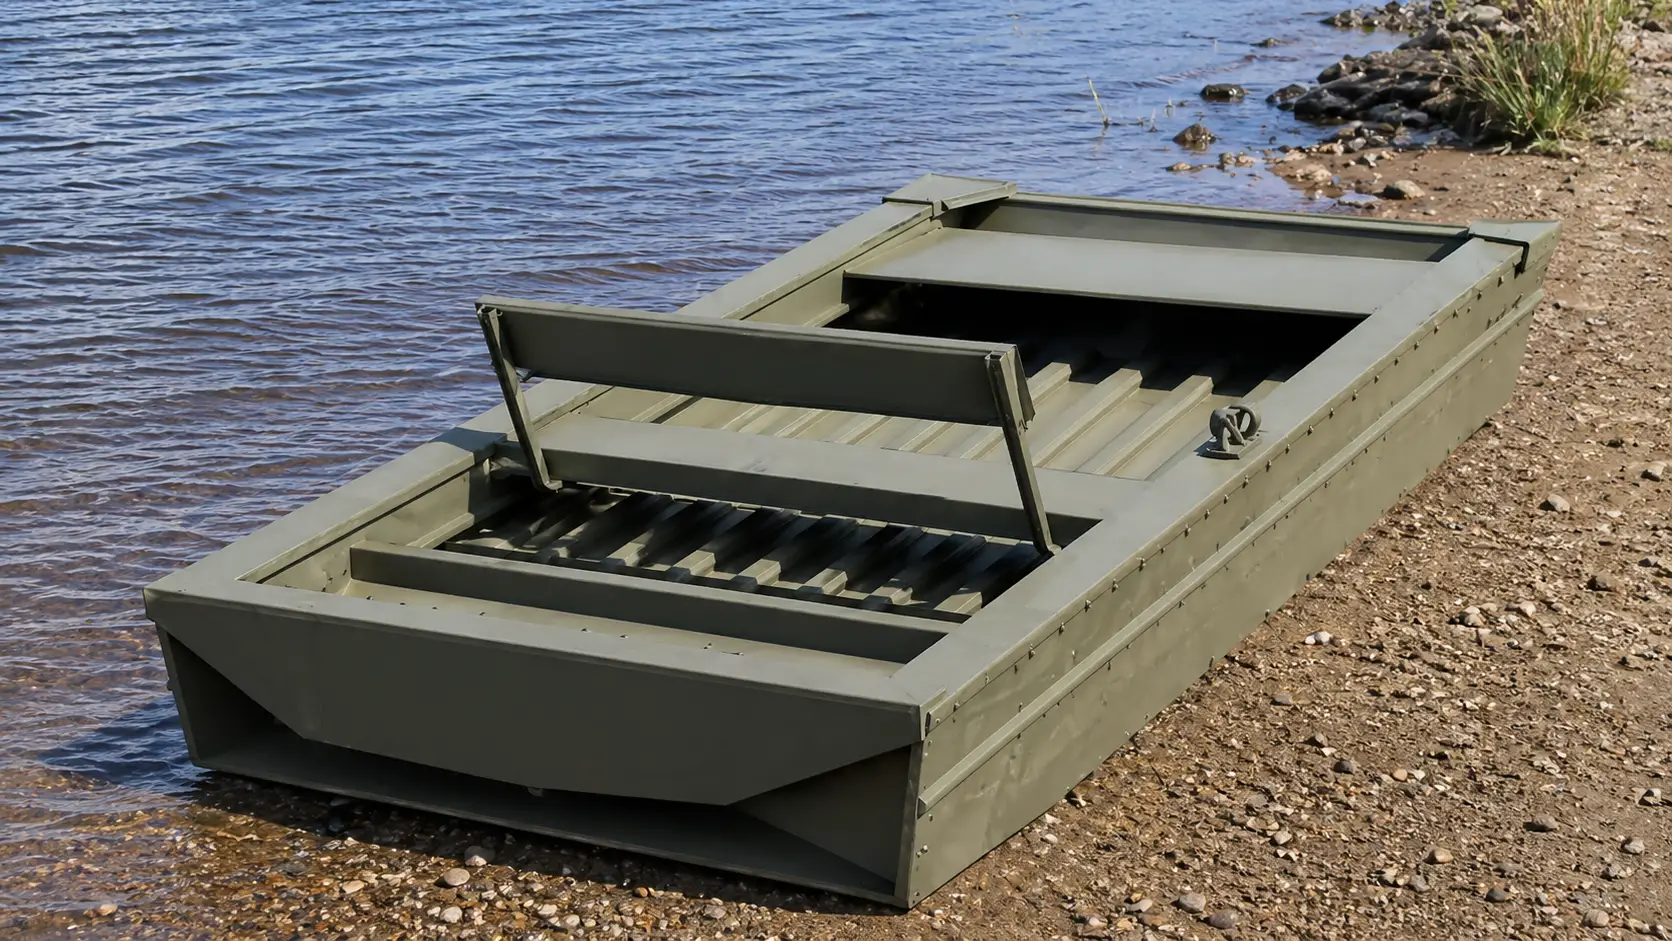
I decided to make this boat specifically for fishing in quiet lake backwaters — small and maneuverable. And, of course, lightweight, so I could handle it alone. The right material was already available: for several years, under the garage roof, there had been a large duralumin sheet 2700x1800x2 mm stored there, and cutting it into parts simply wouldn’t let my hands. In fact, it largely determined the boat’s design, dimensions, and lines (hull shape). As a prototype I took a “jonboat”, which somewhat resembles a two-transom Chinese junk. They are very stable and have significant load capacity, which I needed first of all.
I designed it based on the dimensions of the available metal sheet. I set the side height to 350 mm and the length of the front transom to 600 mm, which corresponds to a tilt angle of about 35° relative to the water mirror. I sketched preliminary drafts and, so as not to make mistakes when cutting the material, made a scaled mock-up of the future boat from rigid cardboard.
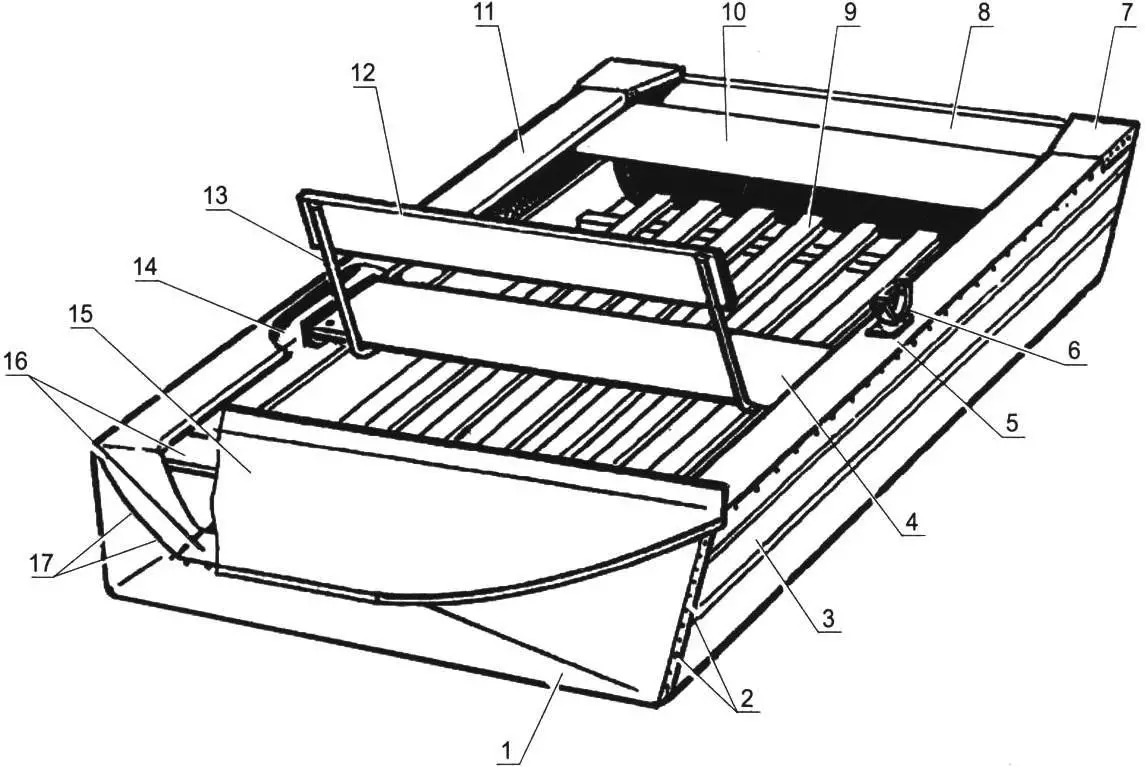
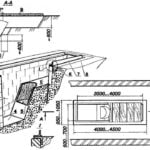
1 – front transom; 2 – rivets (aluminum Ø3 mm); 3 – side (hull); 4 – rower’s bench (hardwood board s20 mm); 5 – overlay (St3, plate s2 mm, 2 pcs); 6 – oarlock (St3, plate s4 mm, rod Ø10 mm, 2 pcs); 7 – knee bracket (duralumin, plate s1,5 mm, 2 pcs); 8 – rear transom (duralumin, plate s5 mm); 9 – floor panel (block 40×20 mm); 10 – passenger’s bench (board s20 mm); 11 – gunwale (board s15 mm, 2 pcs); 12 – bench backrest (board s20 mm); 13 – backrest support (duralumin, pipe Ø22 mm, 2 pcs); 14 – seat mounting bracket (duralumin, angle 40×25 mm, 4 pcs); 15 – deck sheathing (duralumin, plate s1,5 mm); 16 – beams (board s15 mm); 17 – galvanized nails
Rigid sides and the bottom serve as the load-bearing elements of the frame, since there is no conventional structural set here of frames and stringers. Only partially this role is played by two benches (seats) and the gunwale. The boat has no usual stem, and there is no keel as such either. The structure is practically flat-bottomed, and at the bow the sides do not meet at the stem; instead they transition into an angled trapezoidal transom. Some doubts only arose when choosing the transverse dimensions: whether to make the sides higher and the width smaller, or vice versa. I chose the second option. In the waters where I was going to operate this small craft — calm streams and small lakes — there is no strong current and no big waves, so high sides are not really necessary. But sufficient width is exactly what you need, because during fishing you sometimes have to stand up in the boat to your full height.
After making the mock-up I marked the metal sheet and started cutting it in several stages. The principle “measure seven times, cut once” seemed inappropriate for this job, so I used the opposite approach. After measuring and marking once, I began cutting the metal with large allowances first, without cutting all the way through. Gradually bending and fitting the mating parts to each other, I trimmed the allowances little by little, cutting along the layout lines. I should note that it’s better to do this operation with an assistant.

1 – side line; 2 – chine line; 3 – keel line; 4 – transom line
I made the lap-joint connections (the allowances to the sheet) with aluminum rivets with a semi-circular head and a 3 mm rod diameter. The corresponding holes for them were drilled simultaneously in both parts being joined and in the aft details on site, arranged in a chess pattern (in two rows). Before riveting, the mating surfaces were coated with thickened (rubbed-in) paint.
I also made the transom from duralumin, but from another sheet (5 mm thick) to save the main material. This slightly increased the amount of riveting work, but the boat’s length turned out to be the maximum possible, and now two people with the necessary gear can comfortably sit in it.
At first the vessel was conceived in a very simple form: a body shaped like a rectangular parallelepiped with vertical sides and a bow in front as a prism. However, already during assembly, even before installing the transom, it became clear that the boat’s sides “were coming apart” (moving outward) under their own weight, and the bottom at the stern would flex when lifting the hull. At the same time, the bow rose and the top edges of the sides in the bow part became rounded. I had to do “designing on site”. In any case, none of this upset me, because the changes gave the boat an even more attractive look. As a result, the transom became not rectangular, but shaped. The boat acquired slightly splayed sides, a raised bow, and a small deadrise. By the way, the latter improved its stability on course.
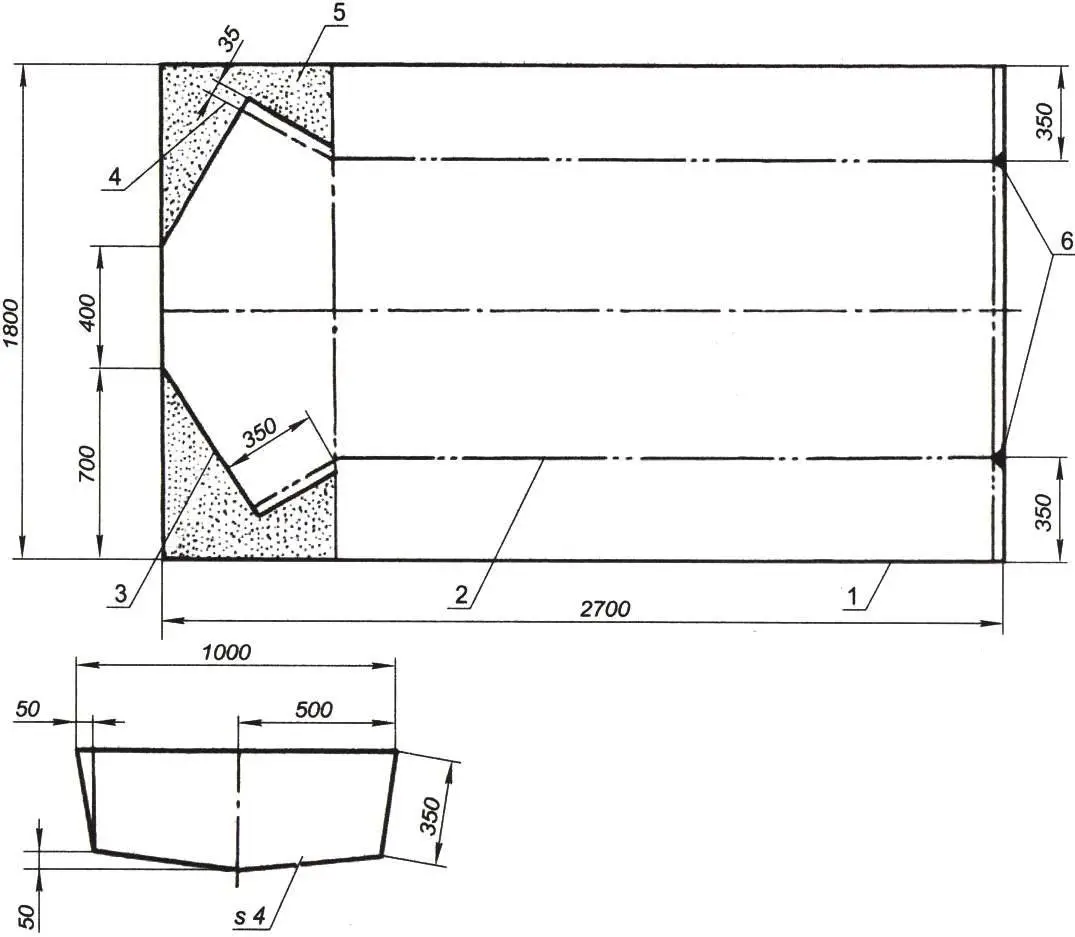
1 – sheet outline lines; 2 – fold lines; 3 – cut lines; 4 – auxiliary layout lines; 5 – sheet parts to remove (gray); 6 – sheet parts to remove in place (black); 7 – rear transom (duralumin, plate s4 mm)
Along the top edge of the sides I mounted gunwales from spruce boards, cross-section 100×15 mm — they serve both as stringers and as bearing (support) bars. At the bow on the front transom they are connected by a beam — a transverse member that supports the deck. In the bow section, due to the high curvature, the gunwale is made composite, and under the joints I installed and attached pads made from the same board. Along the entire length of the side, the gunwale is nailed with galvanized nails (unfortunately I couldn’t find suitable “self-tapping screws”). Another beam is mounted between the gunwales near the aft edge of the deck sheathing made from a 1.5 mm duralumin sheet. The deck edge itself is bent so that water that lands on the sheathing drains overboard. At the stern, with sides and transoms, the gunwales are connected with gussets (corner brackets) bent from the same 1.5 mm duralumin sheet. Here, on angle brackets riveted to the sides, the passenger’s bench is installed. Similarly, but only in the middle part of the hull, the rower’s bench is installed. For all the simplicity of the boat’s equipment, it has a backrest. It is foldable (hinges forward) and is attached with its rear side flush with the bench surface. The backrest is raised when the rower rests or fishes.
The oars are homemade, although the blades were taken from the oars of the “Kazanka” boat. The oar looms are made from duralumin tubes, 22 mm diameter. In the lower part they are cut lengthwise in half, and the ends are flattened. The blades are inserted into the slots and riveted. The oarlocks are ordinary double-pronged forks with pins welded to them. The pins are inserted into bushings riveted to the sides under the gunwales. To prevent the holes in the gunwales from being worn out, steel liners are attached to them at this spot. The oars in the oarlocks are held with M5 bolts inserted into through holes, drilled simultaneously in the fork horns and in the looms’ tubes.
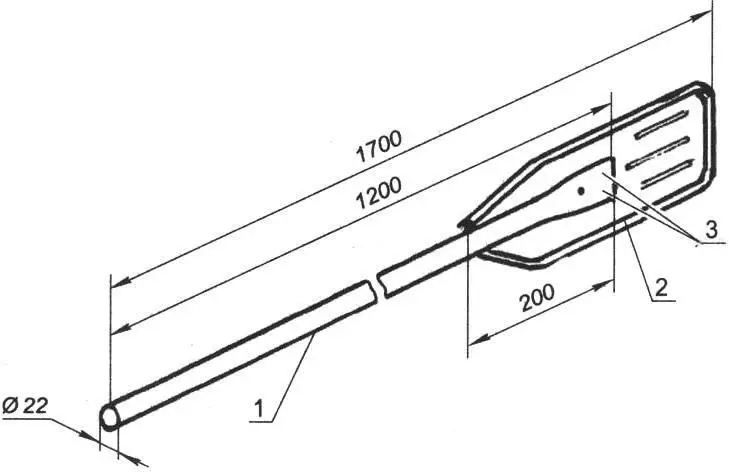
1 – loom (duralumin, Ø22 mm tube); 2 – blade (duralumin, plate s2 mm); 3 – rivets (3 pcs)
All the wooden parts of the boat were soaked with hot drying oil twice, and the hull on the outside was painted in a “protective” color. For unsinkability, the forepeak (a niche under the deck sheathing) is packed with foam.
To sum up. The advantages of boats with a duralumin skin are well known and show already on the shore: lightness, strength, durability. And although at first I didn’t take this last factor into account (I planned to buy a good inflatable boat), everything turned out according to the saying: “Nothing is more permanent than temporary”. The homemade craft has been serving for several years, and I’m not planning to give it up yet — it turned out to be very practical. For transporting it, it’s enough to have a passenger car roof rack. You can load the boat onto it even alone. There are no worries about maintenance and preservation for storage: I set it on its side or on the rear transom, move it against the shed wall at the dacha, and let it overwinter under a cover until the next navigation season, occupying a very small area. On the water, other positive qualities show up as well — good stability, large displacement, maneuverability, and easy rowing.
And of course, about safety. Don’t forget that when going out onto the water on such a small vessel, you must wear a personal flotation device: a life jacket or a chest harness.
“Modelist-Konstruktor” No. 6’2025, Evgeny SEVOSTYANOV
Recommend to read
 REPAIR COMFORTABLY
Motorists asked to get a shallow pit that allows you to perform repair of machines sitting. Energy and materials it takes much less than in the arrangement of any ie "polnost...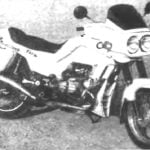 “STREET” – UNIVERSAL MOTORCYCLE
The desire to make a motorcycle of his own design came to me long ago. From the school years through my hands passed almost all manufactured and domestic models as well as Czech "Java"...
