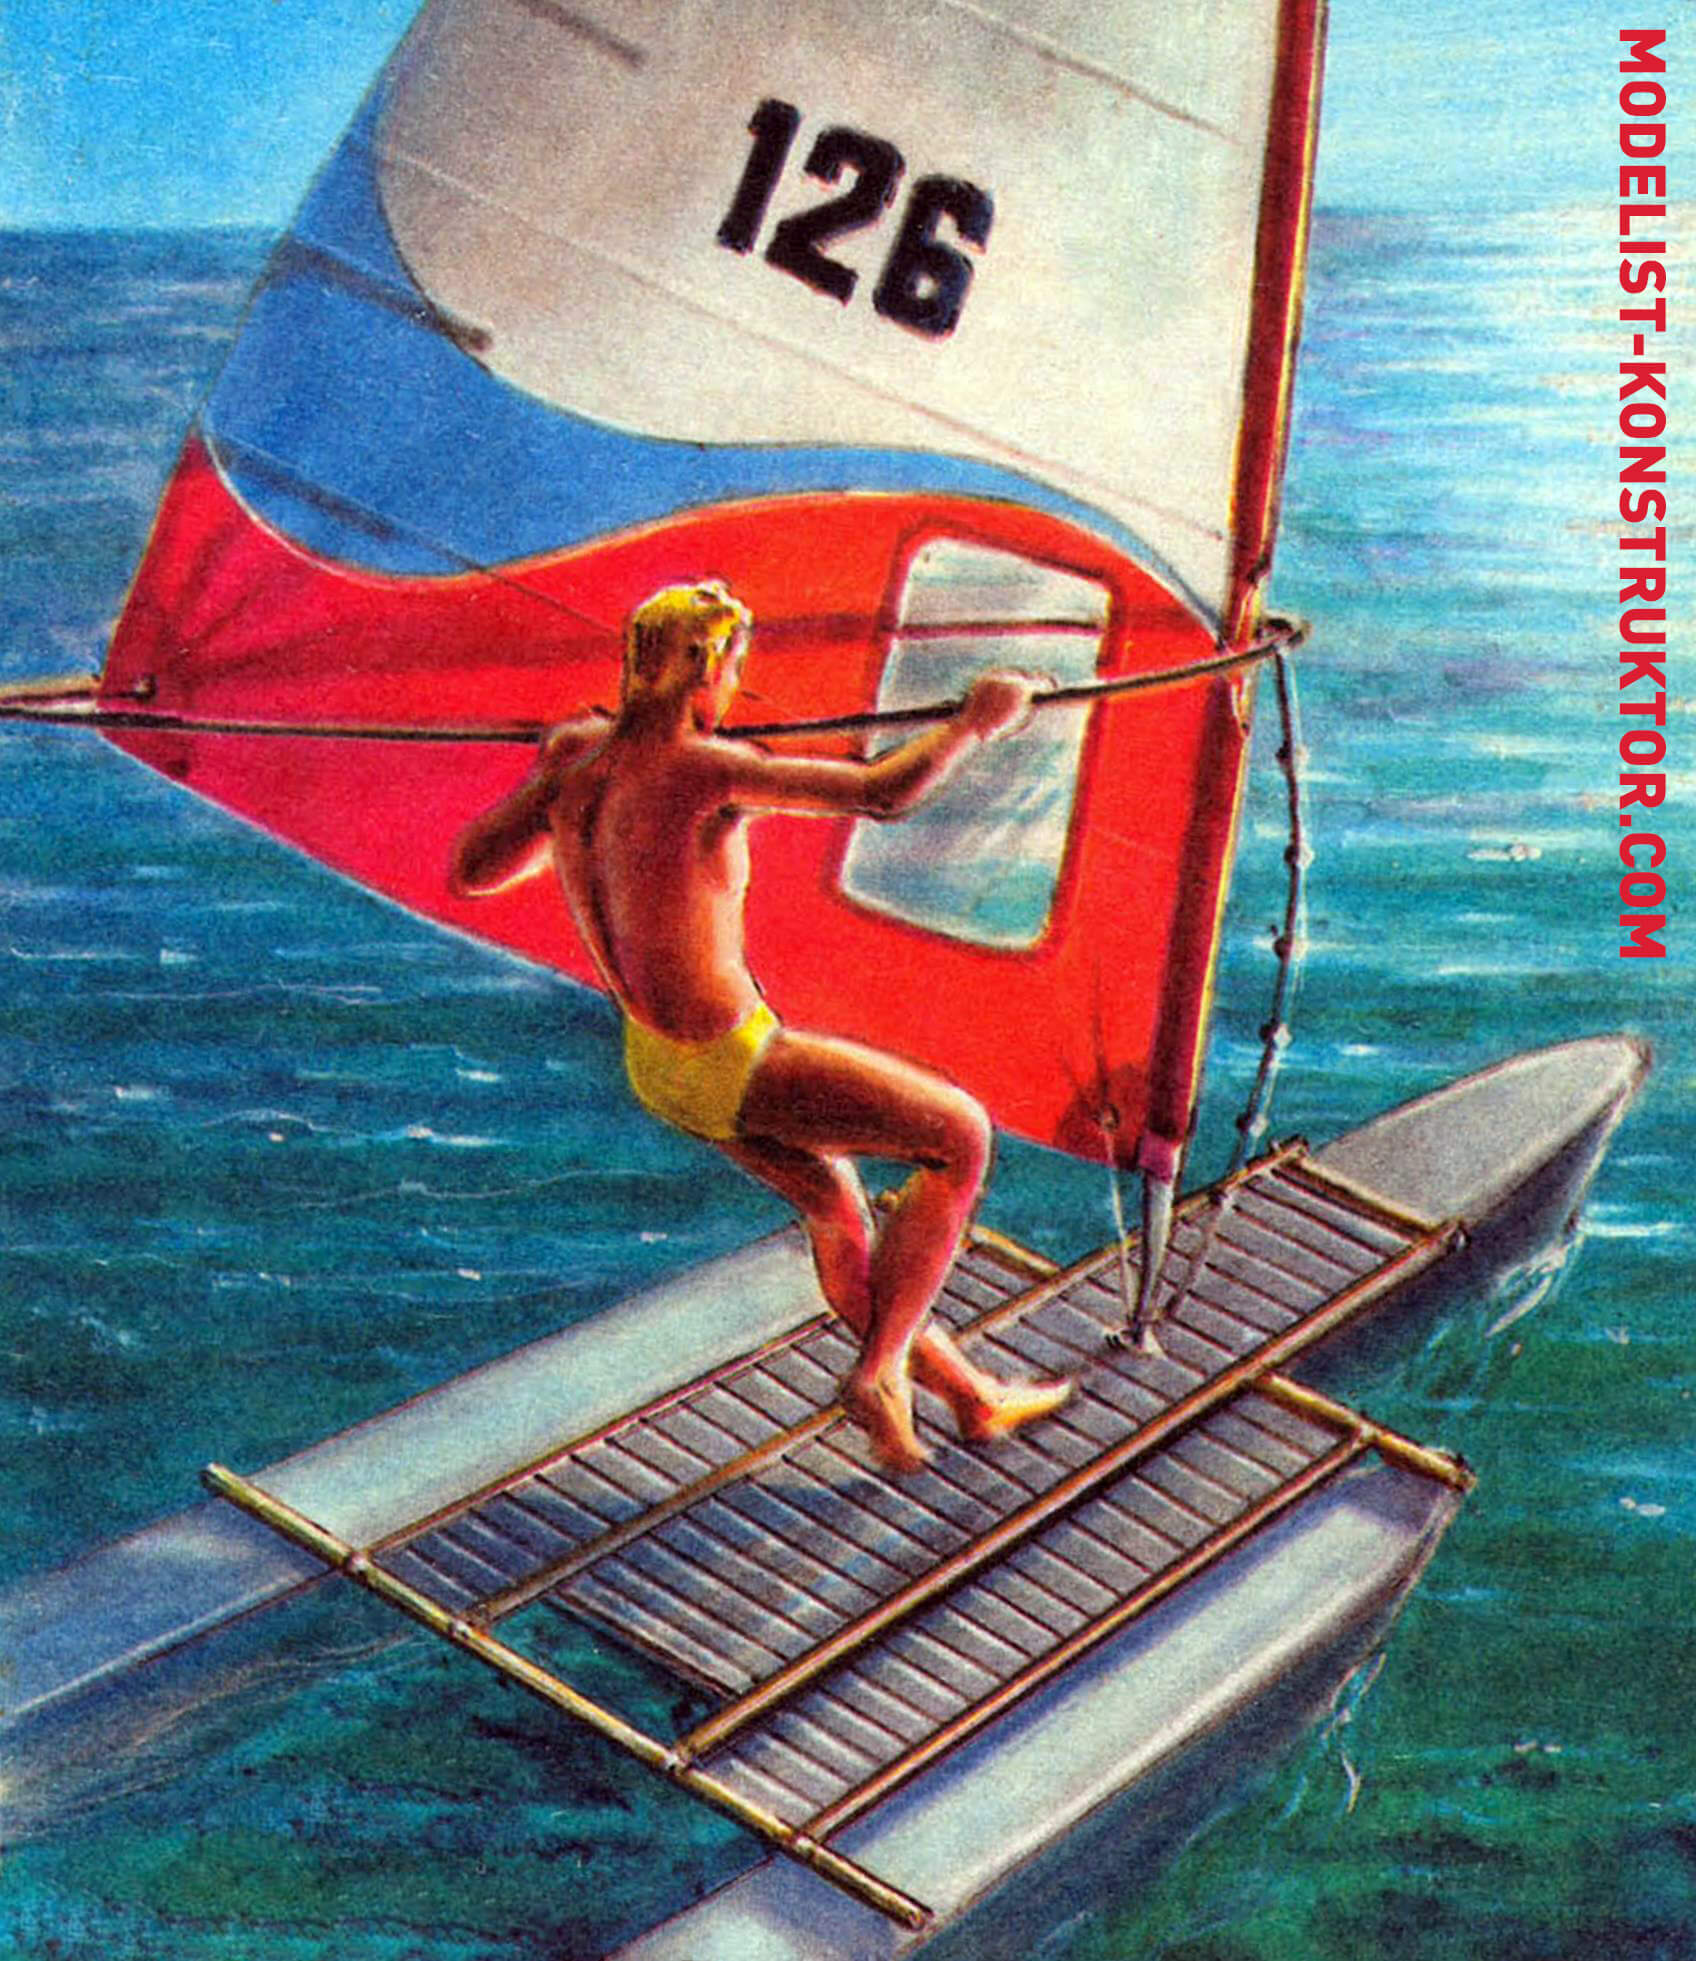
You will probably agree that it is difficult to imagine more accessible and healthy stadiums than small and large rivers, lakes and reservoirs scattered throughout our country. But today, unfortunately, they are mostly deserted. In recent years, the expanses of water have slightly enlivened the sails of windsurfers, but this wonderful sport has not yet become widespread. Obstacles include the rather high cost of equipment and the small scale of its production.
The author set out to “revive” our small bodies of water and developed the design of a universal float, using which you can assemble many interesting equipment for exciting sports activities on the water.
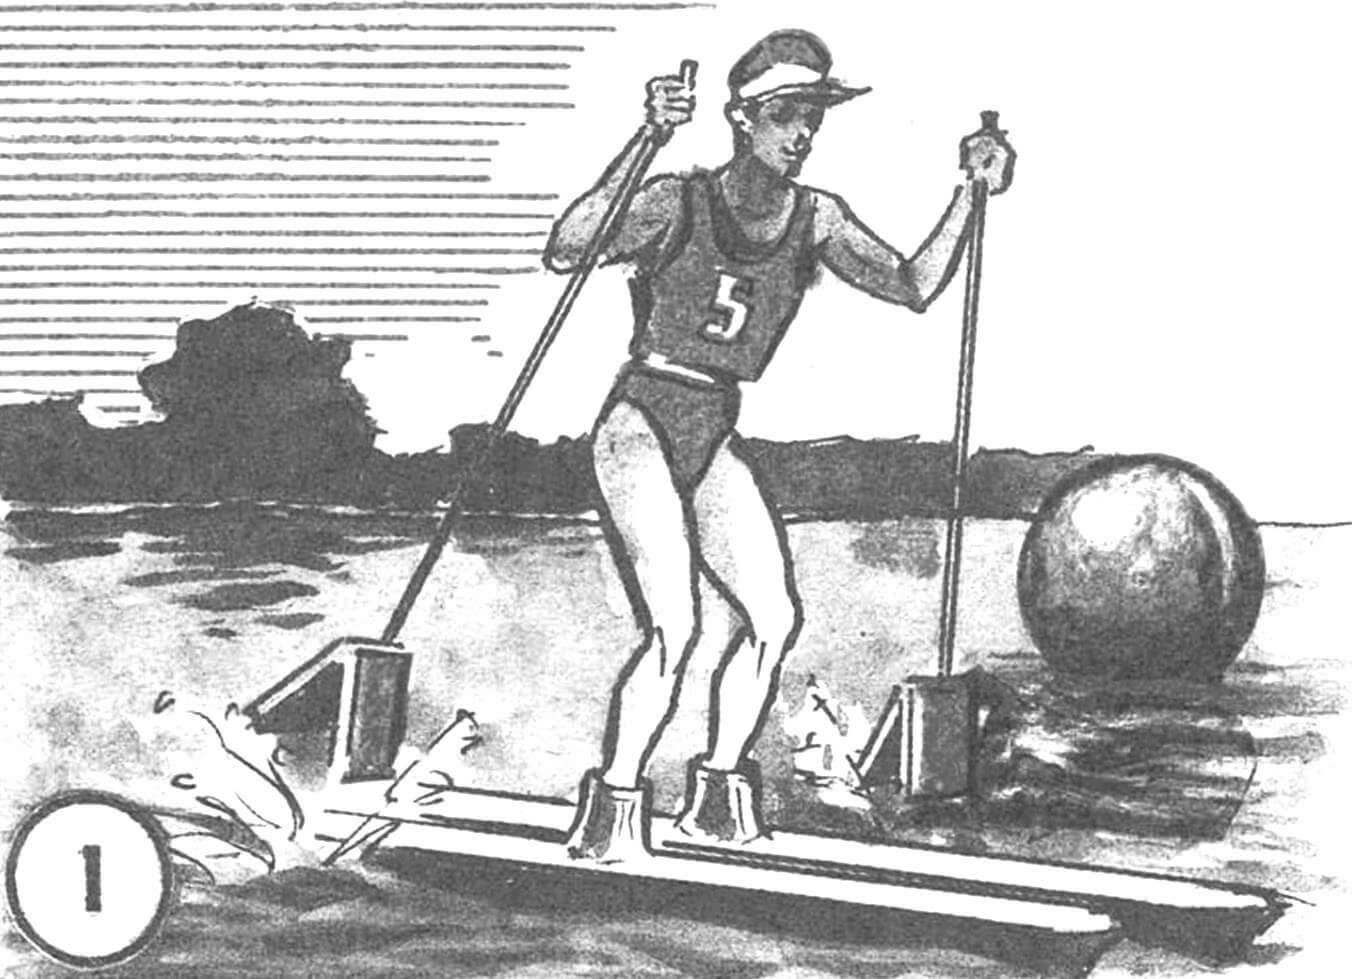
These are also float skis for “hiking” on the water or under sail. Special standardized fastening elements allow you to quickly and reliably attach components and parts of other homemade products to the floats, and many elements of previous designs can be used in subsequent ones. The basis of more complex collapsible vessels are the same floats, easy to transport and store.
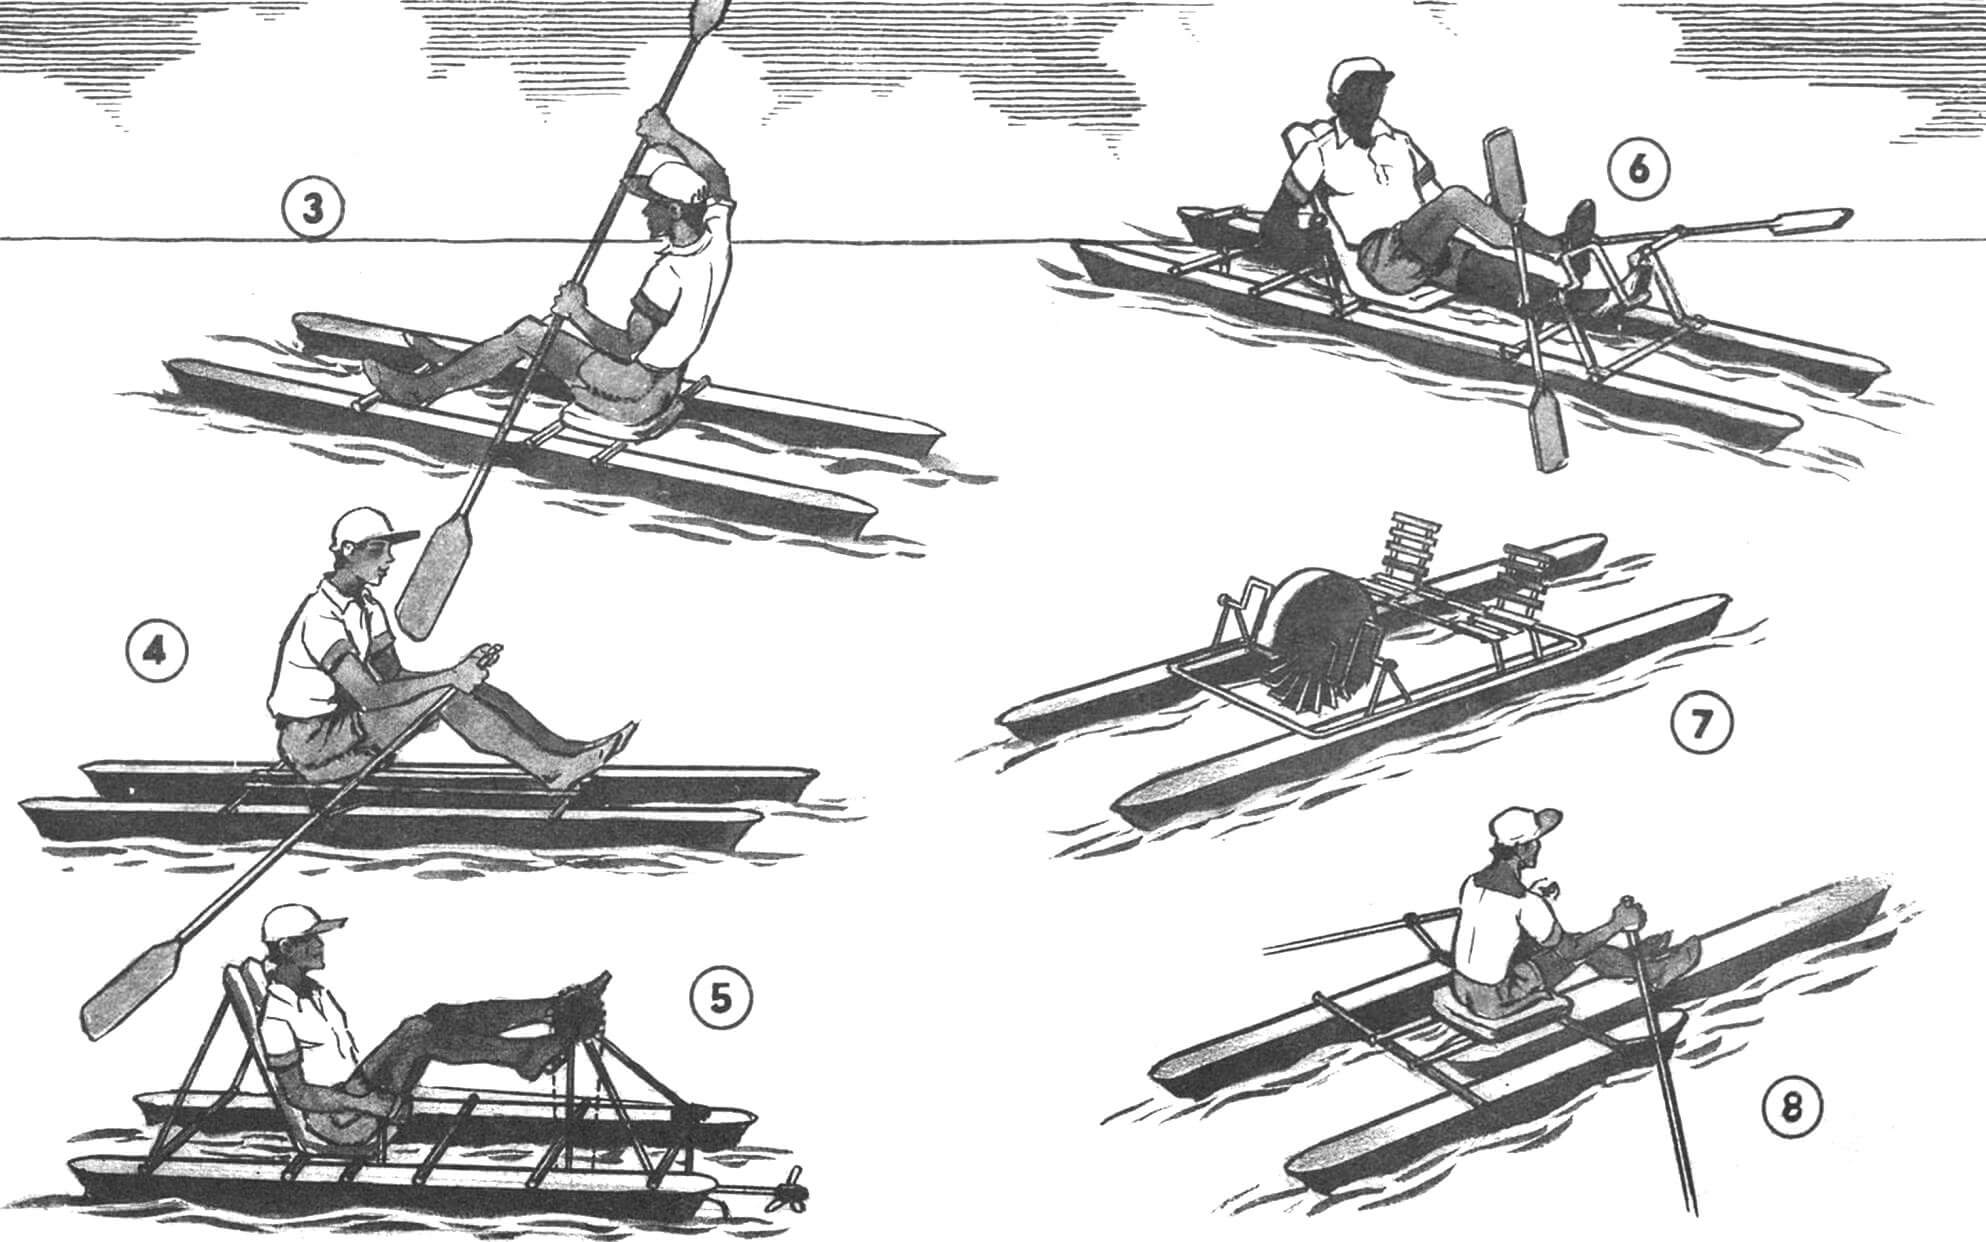
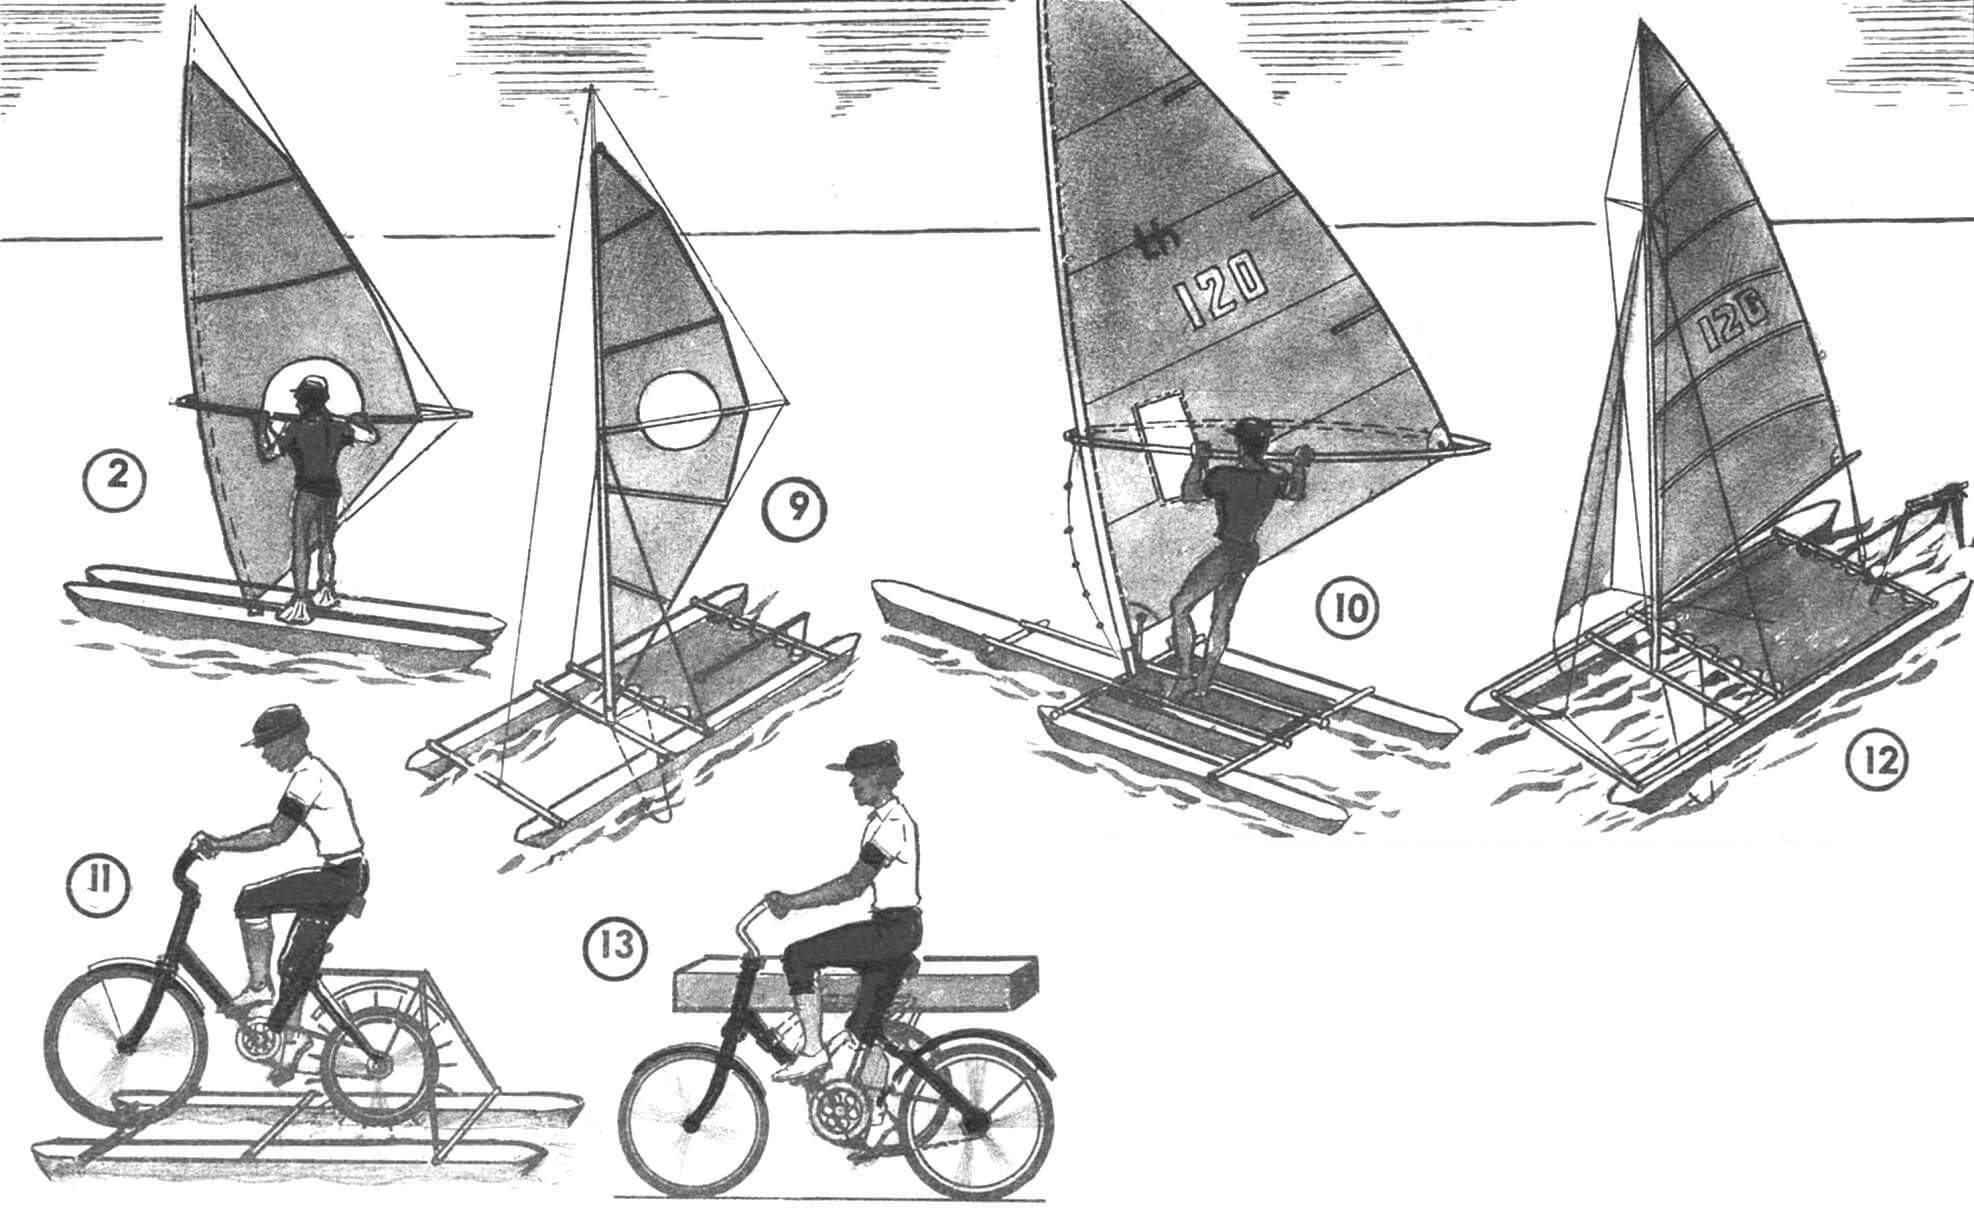
1 — ski-skis, 2 — skis-floats, complemented by a sail, 3 — kayak-catamaran, 4 — rowing catamaran with oars, 5 — “bicycle catamaran”, 6 — catamaran with pedal-oar drive, 7 — double catamaran – “bicycle”, 8 — rowing trimaran, 9 — catamaran with an “elliptical wing” sail, 10 — windsurfer trimaran, 11 — amphibious catamaran, 12 — double sailing trimaran for travel, 13 — bicycle with a side trailer for transporting the structure on base of universal floats.
When assembled, they represent an unsinkable structure, hermetically sealed with a polyethylene apron. Inflatable containers (children’s plastic inflatable balls) or foam inserts are placed in the floats, separating sealed compartments.
In this way, it is possible to make a rowing catamaran kayak that can be converted into a canoe; rowing catamaran with double oars; catamaran with bicycle drive and screw propulsion; catamaran with pedal-oar drive; two-seater pedal-driven catamaran with paddle wheel; a single catamaran under an “elliptical wing” sail (see “M-K” No. 11 for 1992); rowing trimaran; trimaran windsurfer; trimaran-veloamphibian; sailing trimaran “deuce” (designed for two athletes). A bicycle with a cargo side trailer can be used to transport structures.
The float body, made of fiberglass, has a shape that provides the necessary strength with minimal weight (4.5-5 kg) and minimal hydrodynamic resistance (this is especially important when using housings in high-speed structures). The strength of the hull is given by the bottom and sides made along the radii, as well as the flanging in the upper part. Additional rigidity is provided by buoyancy blocks inserted during assembly.
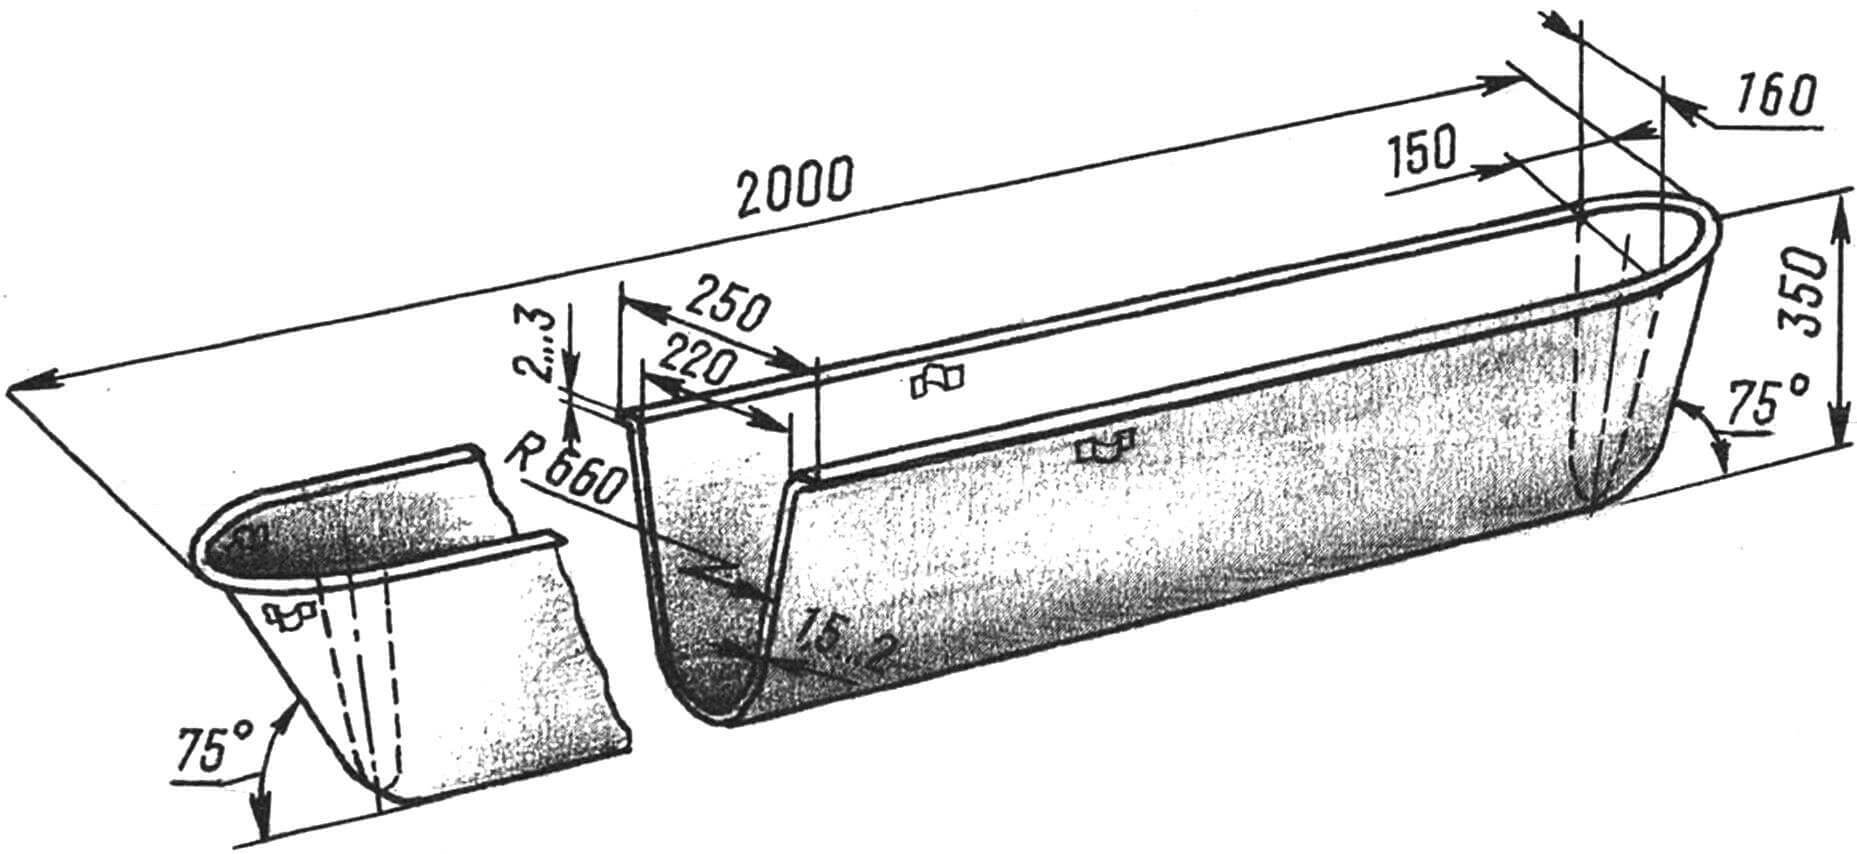
The carrying capacity of each float body with a draft of 10 cm is 35 kg, and with a draft of 15 cm – 100 kg.
When gluing ski bodies, their walls can be made approximately 1-1.5 mm thick – they will be light, and there will be enough strength. If you expect to use housings for more solid projectiles, then the walls need to be made thicker, up to 2-2.5 mm.
The selected housing shape allows several housings to be inserted into each other without a noticeable increase in volume during transportation. And, perhaps, the most important feature of the structures will be the ability to place them (each separately, of course) in a case measuring approximately 2000X450X300 mm, suitable for transportation by any type of public transport.
The weight of two-float structures (depending on the care of manufacture) lies in the range of 12-15 kg, three-float ones – up to 25 kg.
Those who love to craft, using such universal floats, will be able to come up with many other options for watercraft for recreation on the water, driven by both muscle power, wind energy, and small engines, for example, from mopeds or bicycles.
FLOAT CASE MANUFACTURING TECHNOLOGY
Now that you have an idea of what can be done using float modules, let’s talk about manufacturing technology.
Carefully examine the drawing of the float body again and begin manufacturing this most important part.
Construction of a punch , or, as it is also called in mechanical engineering, “master model”. The punch is used for gluing the matrix, from which the housings themselves will be made in the future.
To begin with, you need to cut out templates from plywood or hardboard: five pieces according to the cross-sectional dimensions of the middle part of the float and two according to the cross-sectional dimensions at the narrowing point (in the bow and stern parts). Next, grooves for the longitudinal slats are cut out in the templates, as shown in the figure.
Then we prepare wooden slats with a cross section of 20X20 mm, 30X30 mm. Their length must be at least 2.5 m. You will also need two strips of 5 mm plywood 40 mm wide and 1400 mm long and two pieces of the same plywood measuring 250X300 mm in order to cut out the shaped parts of the sides for the bow and stern of the punch.
It’s time to assemble the punch. A keel with bow and stern beams is assembled from slats with a cross section of 30X30 mm. All templates are installed using glue on the keel. On the latter, also with glue, the top and side slats are mounted sequentially, while strictly maintaining the distance between them. After the glue has completely hardened, the ends of the slats are bent to the stern and bow beams and the places of their contact are marked, showing the required length of the slats themselves. After cutting the ends of the slats to the required length, grooves are made in the beams for them to a depth of 8-10 mm. The final fastening of the slats is done with glue and screws.
Now you can cut the bow and stern beams along the radius along with the ends of the slats and fasten the plywood side, again with screws and glue, along the upper slats of the punch.
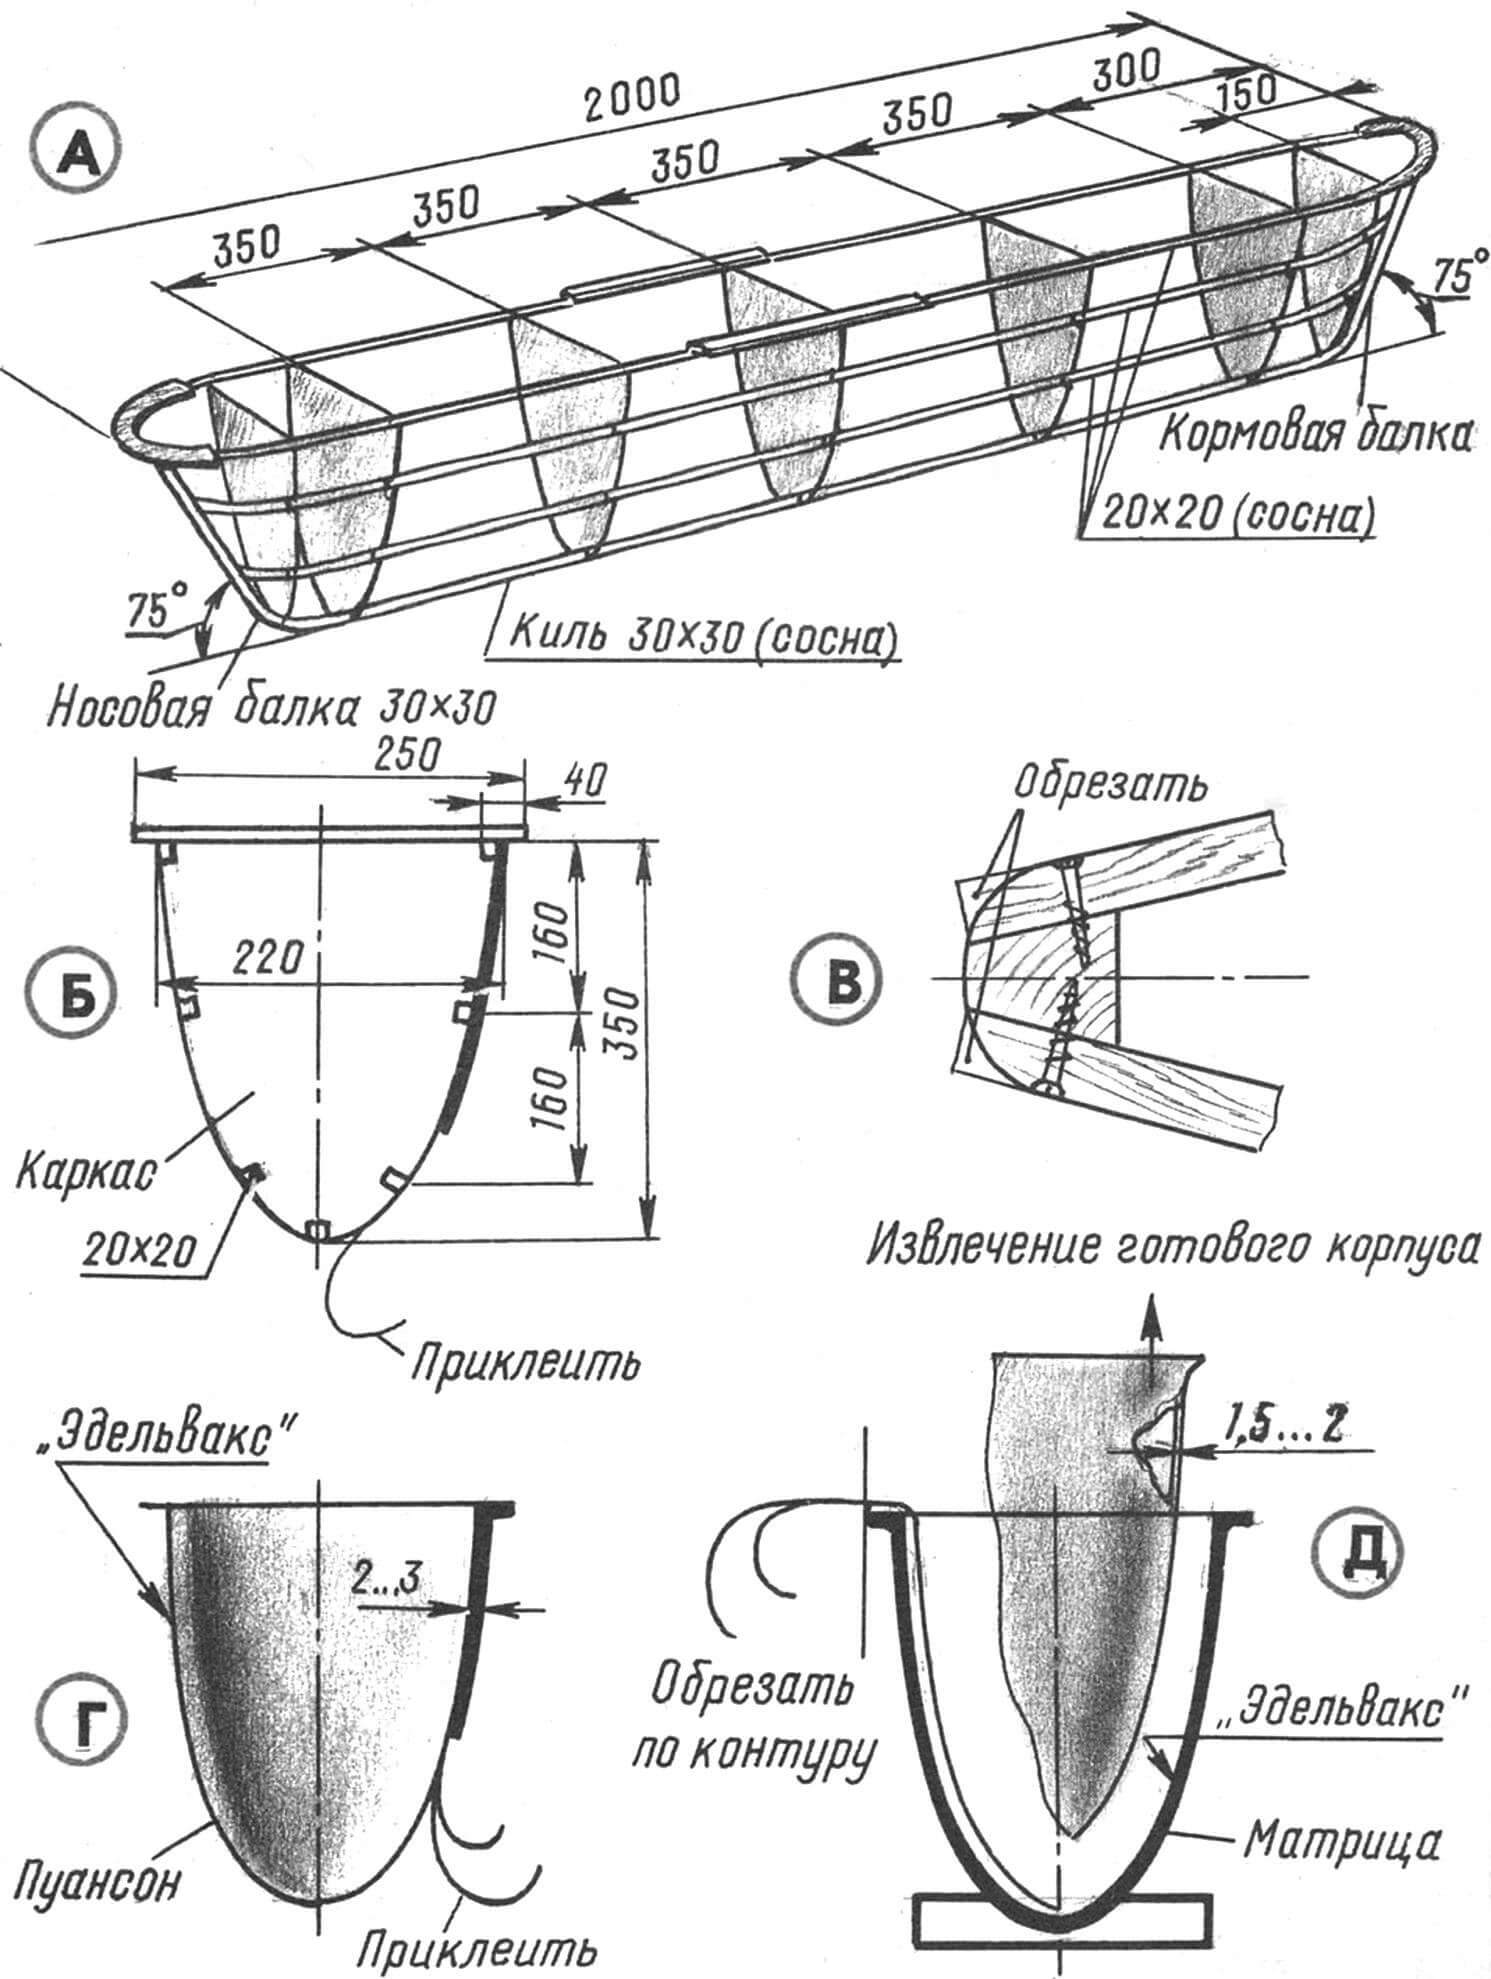
A – assembling the frame of the master model, B – pasting the frame of the master model with whatman paper, C – processing the bow and stern beams, D – gluing the matrix, E – gluing the float body on the matrix.
We proceed to pasting the punch frame with whatman paper. The first layer of paper with glue and buttons is attached to the slats, keel and beams. Then the buttons are removed and two more layers of whatman paper or thick paper are glued on, shifting the joints and seams of the blank sheets. The next operation will be sanding all seams and uneven surfaces of the punch and leveling it with waterproof putty PF-002 or nitro putty. Having completed this stage of work, you need to carefully treat the surface of the block again with sandpaper and paint it with nitro enamel. In order to obtain a mirror-like surface of the cases in the future, it is a good idea to finally polish the surface of the block with micron sandpaper and finish with VAZ-1 or VAZ-2 pastes.
Gluing the matrix . First, you need to apply a separating layer (Edelvax parquet wax mastic) to the surface of the block and polish it with a woolen cloth. Repeat this operation one or two more times. Applying a release layer will prevent the die material from sticking to the punch surface and will facilitate die removal.
The fiberglass fabric should be prepared based on so many layers that they give a matrix wall thickness of 2-3 mm. First, make small test samples from existing fiberglass. When gluing, the weight of epoxy resin is usually taken to be equal to the weight of the fiberglass used. The resin and hardener are diluted in a ratio of 10:1 and mixed thoroughly.
Attention! It is necessary to glue fiberglass in a well-ventilated area, dry and warm. It is even better to work outdoors, but at a temperature not lower than 18°C. Work only with rubber gloves. When you perform mechanical processing of fiberglass (filing, drilling, etc.), be sure to cover your respiratory system with a gauze bandage or petal respirator. If the resin accidentally gets on your skin, remove it with a swab moistened with a table solution of acetic acid and wash your hands with soap.
First, the first layer of binder is applied to the punch with a brush, which is evenly distributed over the entire surface. When it is partially polymerized (this can be determined externally by the jelly-like appearance of the resin), another layer of resin is applied and dry fiberglass is laid. Make sure that the fabric lies flat, without wrinkles or folds. It is best to roll it with a roller; you can also trim it with a hard brush or slam it with your palms (wearing rubber gloves!). Any compaction method should result in a homogeneous structure without bubbles or unimpregnated areas. A uniform layer of resin is again applied on top of the laid one, and fiberglass fabric is applied on top of it – and the required number of layers.
After the resin has completely cured, the excess fiberglass is cut off with a hacksaw along the contour of the edge, and the matrix shell is carefully removed from the punch. The matrix should separate with a slight crack, without significant effort. If there are difficulties in removing the matrix from the punch, the latter may be destroyed, since it will no longer be needed.
For the convenience of further work, the matrix can be installed on two wooden stands, gluing its bottom to them.
Manufacturing of the body . Gluing the body is done in the same way as gluing the matrix, only the amount of fiberglass and resin is taken based on the shell thickness of 1.5-2 mm. Do not forget to apply a separating layer to the working surface of the matrix. Then – the first layer of binder, which needs to be painted. As a pigment, you can use oil paints in tubes (1-2% by weight of the resin). The first layer is decorative – it serves only to give the case a good appearance and seals the shell.
After the binder has partially cured, proceed to laying the fiberglass fabric, first applying another layer of resin. Further operations are carried out as when gluing the matrix. After the final curing of the resin (24-36 hours), the shell of the body is removed from the matrix, and excess fiberglass is filed along the contour of the side of the float and the inner surface of the body is cleaned of resin drips and burrs. The float is checked for leaks. It is now ready for the assembly of floating structures.
N. SHERSHAKOV
Recommend to read
 ALL FOR THE CAR
Every year produced more cars. Today while driving to meet a man of almost any profession - the engineer, doctor, architect and worker, farmer and teacher. On how to properly operate the...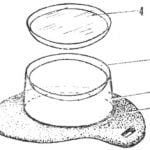 ANTI-FOG GLASSES
Who has been swimming in the pool, know about the unpleasant effects of disinfected water on the mucous membrane of the eye: an unpleasant stinging, eyes red. Therefore, swimmers usually...
