To the feed tube of the Central beam narrow fiberglass tape on epoxy glue taped focus. It is designed to hold the crossbar of a motor truck when you install it on a catamaran. The emphasis of twisted strips of stainless steel with a length 114, a width 15 and a thickness of 3 mm.
The bridge deck is worn (Fig. 6) — a large rectangular cloth with dense and durable synthetic fabric, better rubberized. The front and rear edge of the cloth, rolled, glued and stitched with nylon thread so that they form pockets for the bow and stern transverse beams. The pockets have end-to-end screw holes-the”sheep”, slotted in place and reinforced on both sides with botami — glued and stitched circular pads made of rubberized fabric. The same botami edged holes for the screws to”the lambs” (except for four sides) and under the float valves.
The lateral edges of the cloth are reinforced with double stitched and taped pads of rubberized fabric. From above they have sewn 18 clamps for tensioning the deck to the stringers. The staples are bent from strips of aluminum 3 mm thick and are sewn to the cloth of thick copper wire. To wire not frayed, holes in the countersink staples and sharp edges rounded with a file.
Deck taut is a vast area, sufficient to accommodate a whole family (two adults, two children and a dog) and a rather voluminous Luggage.
Despite its size, floats, bridge and deck in Packed (transport) able to fit in quite limited amounts: the bridge fits in a cloth case about the size of 1150x150x150 mm with a suitcase handle, and floats, deck and pump on a cart, akin to that with which elderly people go shopping. In addition, the truck is still and the engine of a catamaran — boat motor “salute”.
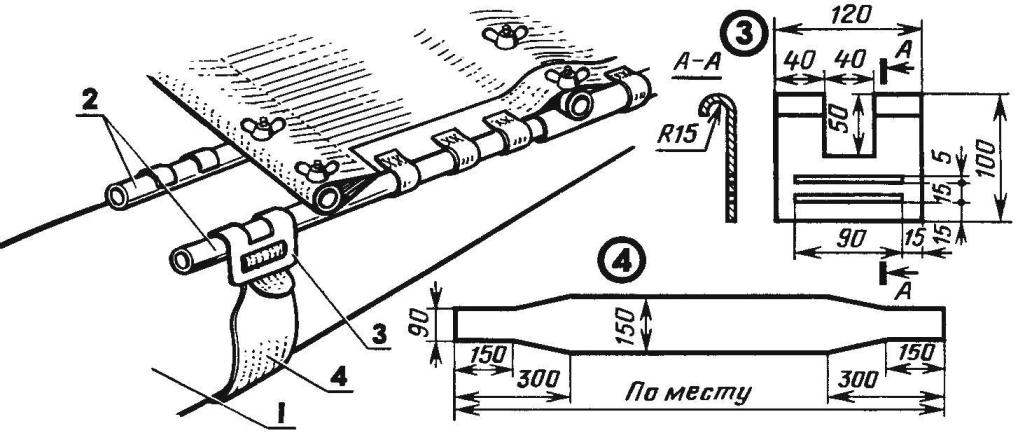
Fig. 7. Axle mounting one of the six bands:
1 — float, 2 stringers, 3 — holder, 4 — band.
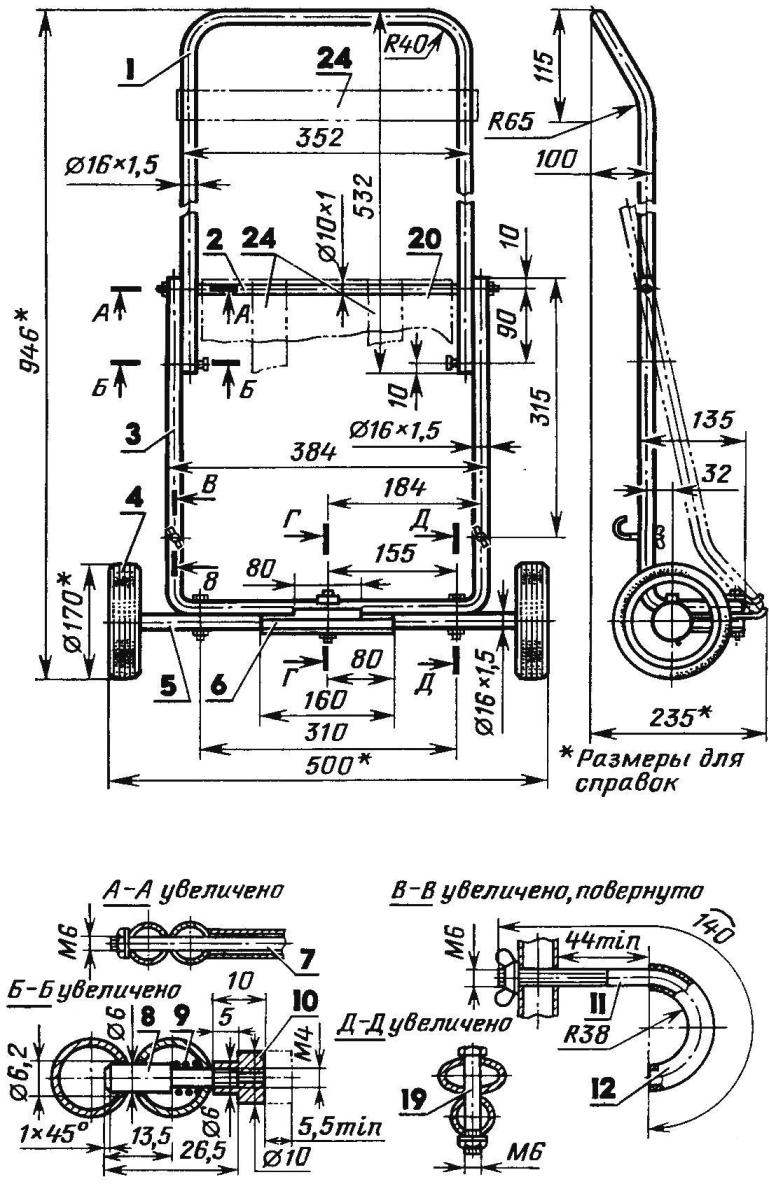
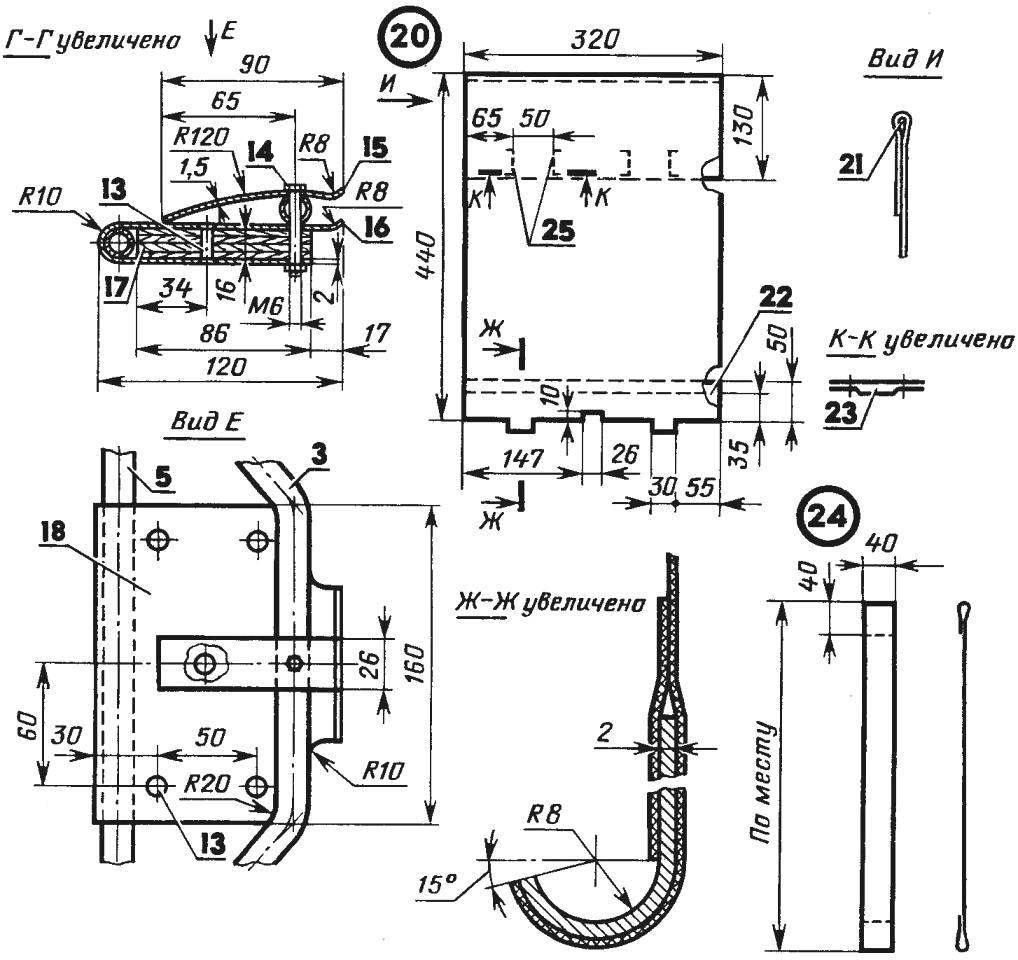
Fig. 8. Truck:
1 — handle,
2 — the bar
3 — frame,
4 — wheel,
5 — axis wheels,
6 — transom,
7 — rod coupling,
8 — retainer,
9 — spring
10 — head of the striker,
11 — clip,
12 —tube protective (rubber),
13 — rivets diameter 5 mm (5 PCs.)
14,19 —bolts M6,
15 —latch,
16 —cradle,
17 — liner,
18 — piping,
20 — bump,
21 — pocket for the crossbar truck,
22 — insert with hooks,
23 — opening to a cargo belt,
24 — cargo straps (3 pieces)
25 the seams of the opening.
Truck (Fig. 8) — improvised (except for the wheels on the stroller) because it serves not only for transportation of parts of the catamaran, but for the engine mounts. It is made of chromed steel tubes with a diameter 16×1,5 and 10×1 mm. Instead of the cargo area it is a powerful transom to which its clamp is attached the engine in position.
The transom is a package insert from plywood and aluminum edging, the United five rivets. One end of a transom mounted on the axis of the wheels, the other is attached to the lower bend of the frame (bolt M6). Part of the border goes beyond the dimensions of the liner and forms a cradle in which is placed the trolley handle when raspolirovki and its rotation around the axis of the crossbar. This is done in the preparation of truck for installation on the catamaran.
In addition, the truck has the bumper to protect the engine against water jets the movement of a catamaran. It is made of rubberized fabric. The upper edge of it folded, forming a pocket for the crossbar of the truck, glued and stitched by thread, but not completely: two places left openings for cargo straps. In the lower edge of the baffle glued dural insert with hooks.
In the working position when the truck placed on the bridge of the catamaran and its handle rotated and rests in the cradle, the bump is stretched between the crossbar and the handle and geared to the last hooks. In the transport position when the truck is loaded to the brim, bump uncoupled and resting on the straps, serving as a bed for cargo.
The belts (three of them) made of rubberized fabric and stitched with capron threads. When assembling the truck one stays on the handle, the other two skipped through the openings of the bumper, and then along with it the upper ends are placed on the crossbar, and the lower one to the axis of the wheels.
Thus, the catamaran meets the specified requirements: it is structurally simple, easy (it easily takes one person), compact (takes up little space in the apartment and in the car), quickly assembled and disassembled.
Sequence Assembly the next.
First, inflated the floats. Then going to the bridge: connect all of its elements, except the fore and aft cross beams, and the bridge is covered with a deck. Are pulled through the pockets of the transverse beam are screwed “lambs” first to the stringers and then to the Central beam. Now the deck is slightly stretched. Staples cling to the stringers, and the deck is permanently stretched so that it resembled batod. The bridge to the floats pulled by six wide tapes-bandages (Fig. 7), the ends of which are passed through slits home made aluminum holders. The bandages are cut from the same material as the shell floats.
Then released the clips on the cart, it folds, inserts the crossbar in the emphasis on the Central beam, and the clamps are placed on the transverse tube poop. The nuts on the terminals are tightened, and the truck is securely fastened to the bridge.
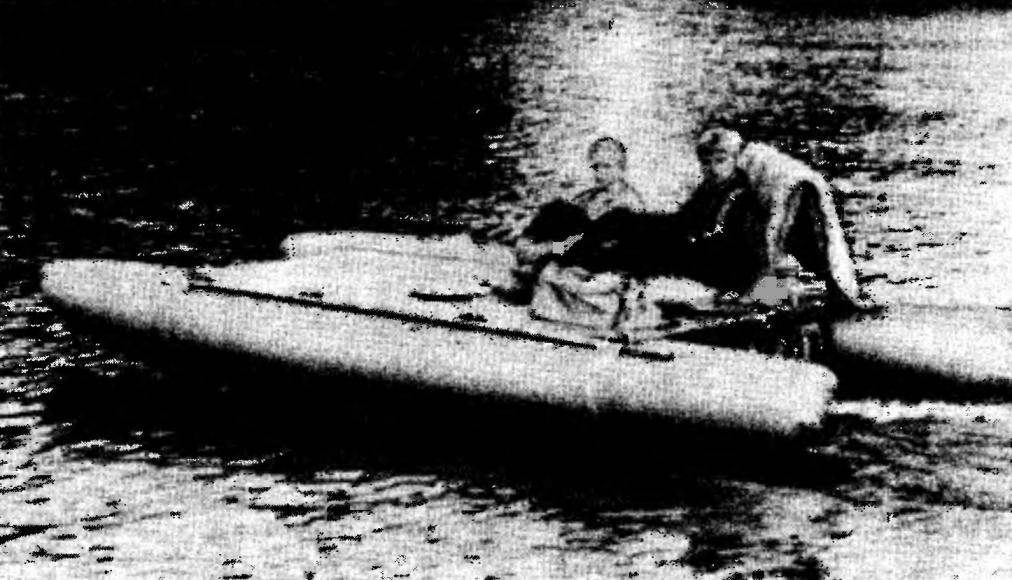
All catamaran assembled, you can take it to the beach. Already on the water, on comes the engine and to it is attached a five-gallon gas tank, soldered from sheet brass.
G. SMIRNOV, Moscow
Recommend to read
 AND “THE KID” CUT.
I'm a longtime admirer of the magazine "modelist-Konstruktor". In the publications of improvised technique find many useful, and most importantly — increased creativity and a desire to... CHANGE ROUND TO OVAL
A letter from our reader V. Zasyadko prompted the idea to go back to the old idea of replacing the round sprocket of the bike Ellipso, which leads to the alignment torque generated by...

 There are few in Russia, popular publications, which members are loyal for… thirty years! The magazine are subscribers there. Muscovite Gennady Mikhailovich SMIRNOV — one of those who keeps the house binder “Modeller-designer”, as far back as 1966! By profession he is a driver. In his spare time he likes tinkering. A catamaran with a motor — his latest development, which he offers to all who wish to spend a holiday on the water.