I started skateboarding during my college years. And then I didn’t forget about my hobby: it’s nice to ride along the beach along the embankment somewhere in Gelendzhik, for example, during vacation… Over time, the wheels on all my boards fell apart or wore out. It was not possible to find them for the oldest, still Soviet, one – we had to purchase wheels along with suspensions. In the process of searching for the necessary parts on the Internet, I constantly came across devices for electric skateboards: gears with straps and motors, motor wheels of different sizes, single and double suspensions, electronics for control. That’s when the obsessive thought about a board with a motor appeared in my head. After all, judging by the same YouTube, many craftsmen have long been equipping bicycles, scooters and motorcycles with electric propulsion, and even building large electric cars. Why not make your own “electric skateboard”?
Again I went deeper into the Internet and found at a very attractive price a set of two suspensions (one of them with two motor wheels with a diameter of 90 mm) plus a controller. Weight is about 4 kg – quite suitable. According to Chinese sellers, the power of each wheel was 600 W. This was, of course, doubtful! Nevertheless, I reasoned this way. Since the power of the M365 electric scooter from Xiaomi is about 350 W and it rides very well, then even if the declared 600 W is the total power of two wheels, then that will be very cool! In general, I took a risk and placed an order. And in addition to it, I purchased 10 18650 batteries (Litocala, 3 Ah, 20 A) and a BMS 40A 10S board.
I couldn’t find ready-made information on assembling the “dream device” on the Internet, so I did everything from there on my own.
The Hall sensor wires turned out to be without a connector, and the seller could not explain anything. In scooters, as I found out, the controller without Hall sensors refuses to work at all. What should I do? I tried connecting only the motors to the controller and supplied power from a 22 V laboratory unit – everything worked! True, the remote control indicated a low battery charge (10%), which is understandable. The Chinese have “cool” (and expensive!) remote controls that have a display that provides a bunch of useful information, but they won’t work without Hall sensors. Maybe over time I will buy one, so I found suitable housings for the connectors of the Hall sensors and started phasing the latter, that is, selecting their correct location relative to the windings. I had to rearrange the sensor wires, but the result was that the wheels spun normally, both in the forward and reverse directions.
Next question: where to place the battery pack? Just at this moment, an electrical cable channel with a cross section of 16×16 mm accidentally caught my eye. Great idea! I took two pieces of cable channel of the required length so that each could hold five batteries, soldered them quickly, and fixed the unit on the deck of an old skateboard – I couldn’t wait to see how it went.
And it went very well! Start from a place at any power, you don’t even need to push, it’s so cheerful – at least, as far as one could understand when testing a board with an electric drive in an apartment. The conclusion was this: the design is workable and can be brought to perfection. Therefore, I immediately ordered ten more batteries, since 3 A*h would probably not be enough, and there are batteries with a larger capacity on the company boards.
Now you need a good deck, that is, the board itself. I didn’t buy a ready-made one, because I wanted to make it myself. And after discussing this topic with a work colleague, the Apple watch, having heard enough of our loud conversations, suddenly began to display contextual advertising for cool American boards. Just a sight to see how they are made! Why not use one of these as a prototype? Do you need sketches with dimensions and configuration? I did it much simpler. I downloaded a picture of a suitable board from the Internet from the desired angle and displayed it in life-size on the screen of a flat-screen TV. Then I attached paper tape to the screen and traced the outline of the image. The 1:1 scale drawing is ready!
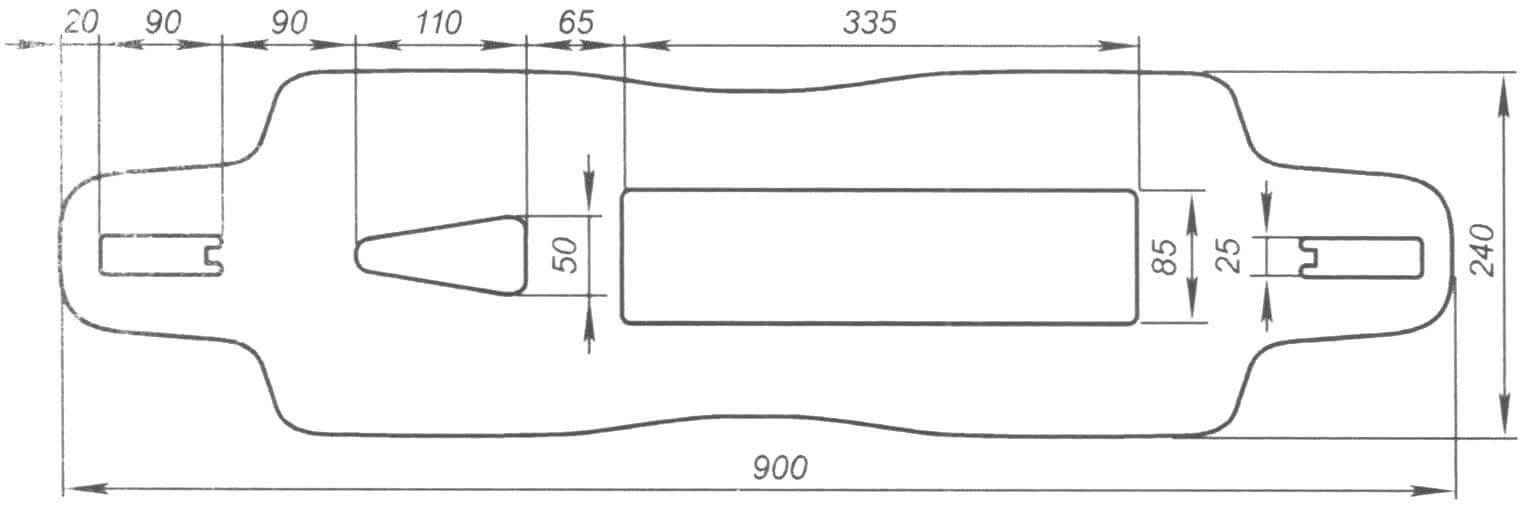
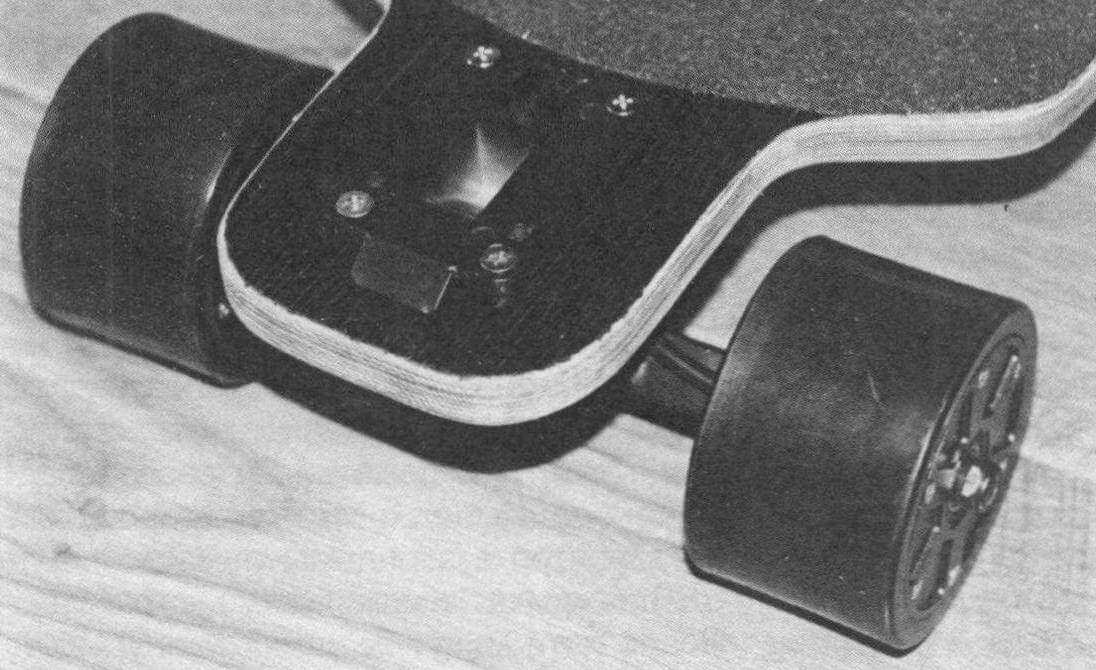
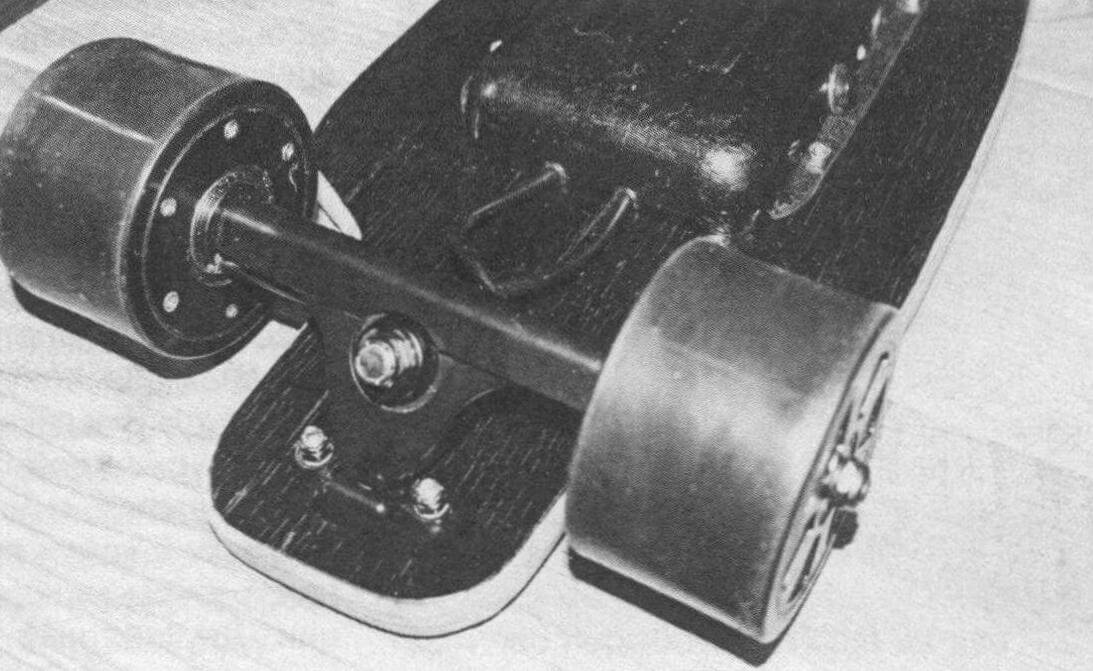
Unfortunately, I didn’t have the Canadian maple plywood used in the original, but I did have a piece of 22-layer bakelite plywood 16 mm thick. It is not new, but it has plenty of strength and is the right thickness. I sawed out the deck, sanded it, and went through the edges with an edge radius cutter. I milled holes for the suspension platforms, which I secured on top – this lowers the center of gravity of the structure by 20 mm, and the device looks more stylish in appearance.
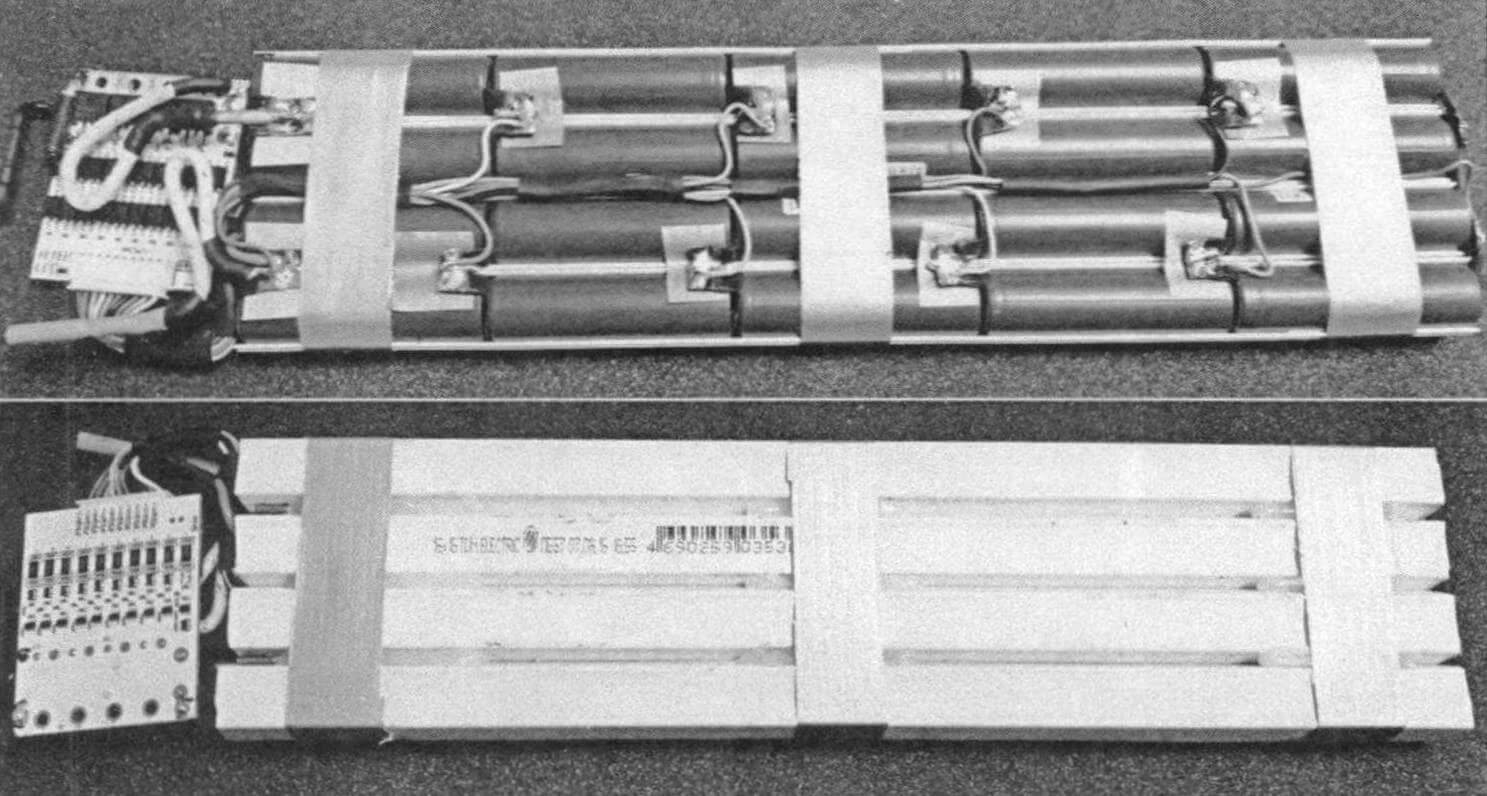
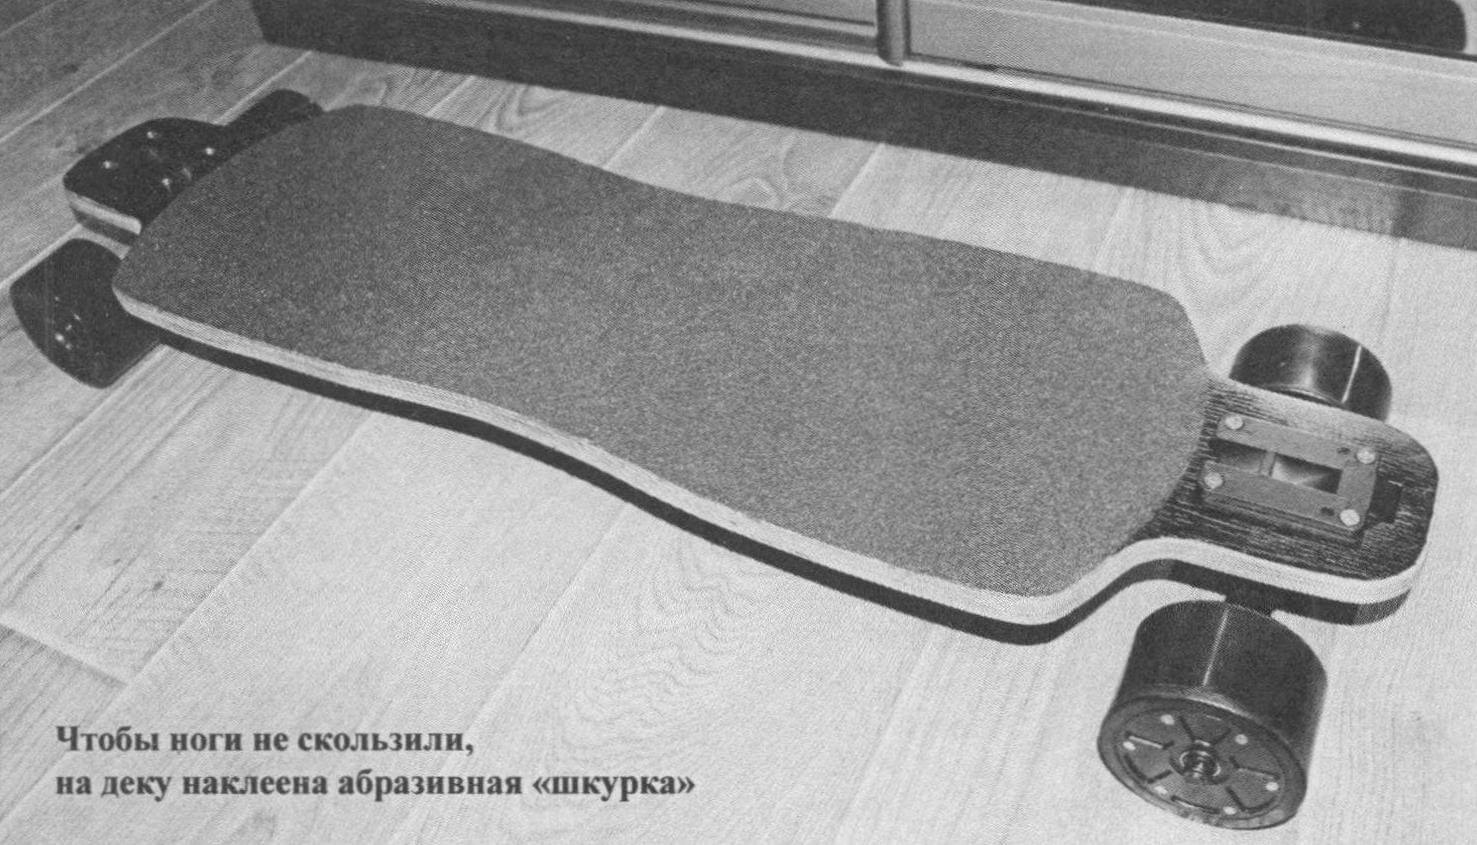
I figured out the placement of batteries and control units. I decided to make everything the same height, although this required milling a 5mm recess for the battery and making a groove for the motor wires to place them under the controller. I attached four sections of cable channels, accommodating 20 batteries, to the deck with clamps secured with screws. The layout turned out to be quite successful, nothing got in the way, and the weight of the deck after making all the holes and cuts was 2.8 kg with dimensions of 900×240 mm. I glued a large abrasive piece of sandpaper on top of it to prevent my feet from slipping.
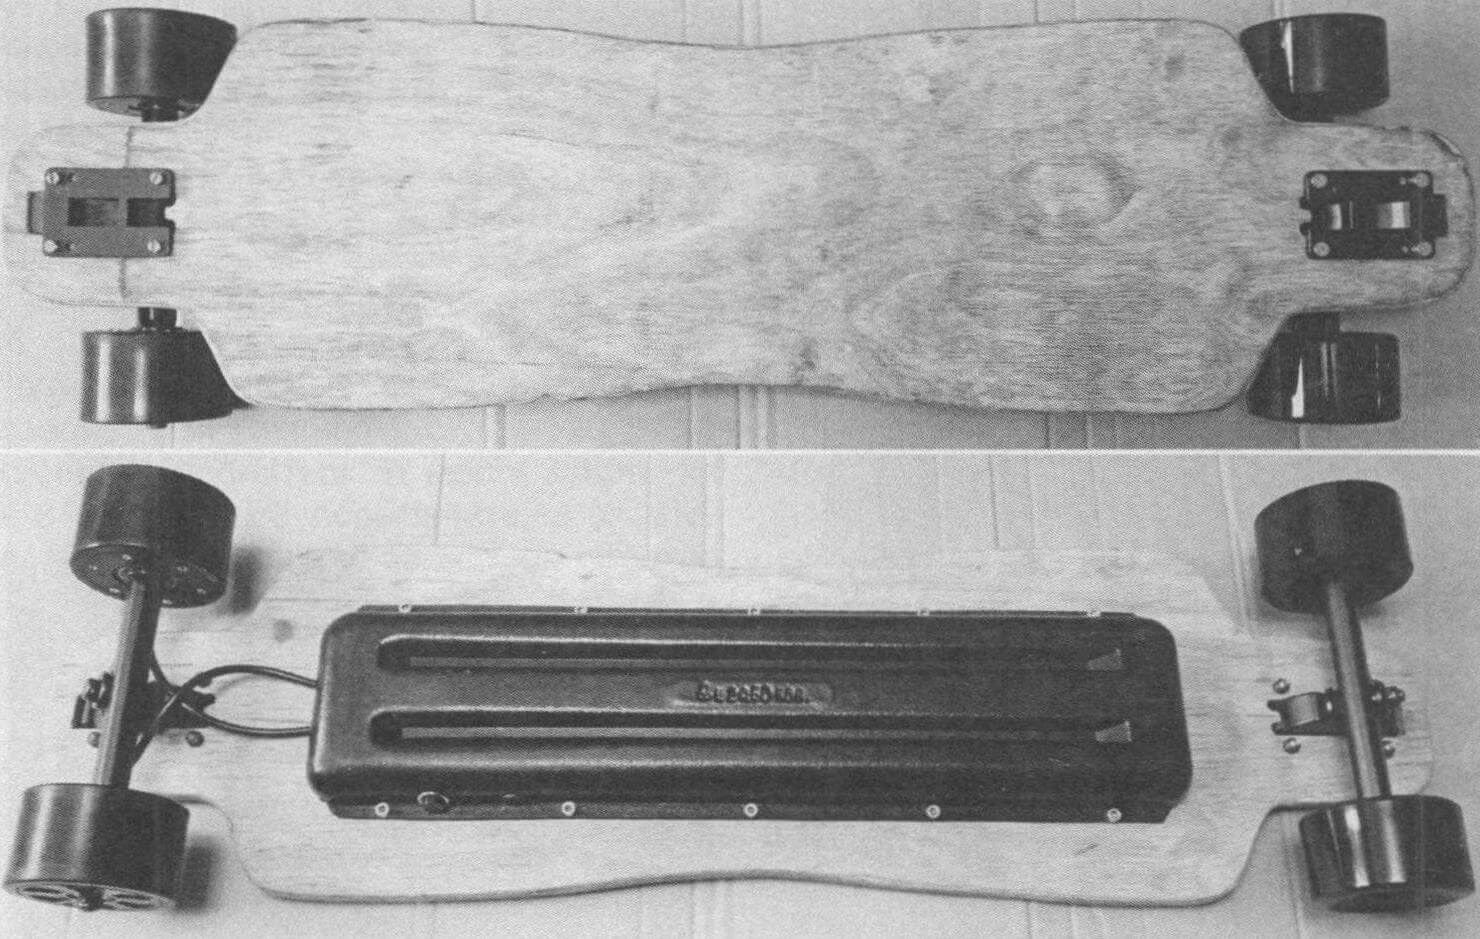
The additional batteries that came in the new order were soldered and combined with the BMS (Battery Management System) board. The output contacts were soldered to copper plates inserted between the cradle (cable channels) with the batteries. The weight of a 36 V power supply with a capacity of 6 Ah is 1.12 kg. At first, I charged it with a scooter device borrowed from a colleague. Then I adapted a “charger” from a screwdriver, but in the end I still ordered a branded one for 42 V/2 A.
I secured the components to the deck and began to think about a protective casing for them.
There were many different options, but in the end it was made from… a Soviet flower box! The simplest plastic one, the price is even stamped on the bottom – 2 rubles. 50 kopecks It fit perfectly in size. True, the stiffening ribs at the bottom reduced the ground clearance by 10 mm, but they also added strength. I simply cut the box to height and added edgings along the long sides. Using the resulting shelves, I attached the casing to the deck with ten M5 screws, five on each side. It turned out nice, in my opinion.
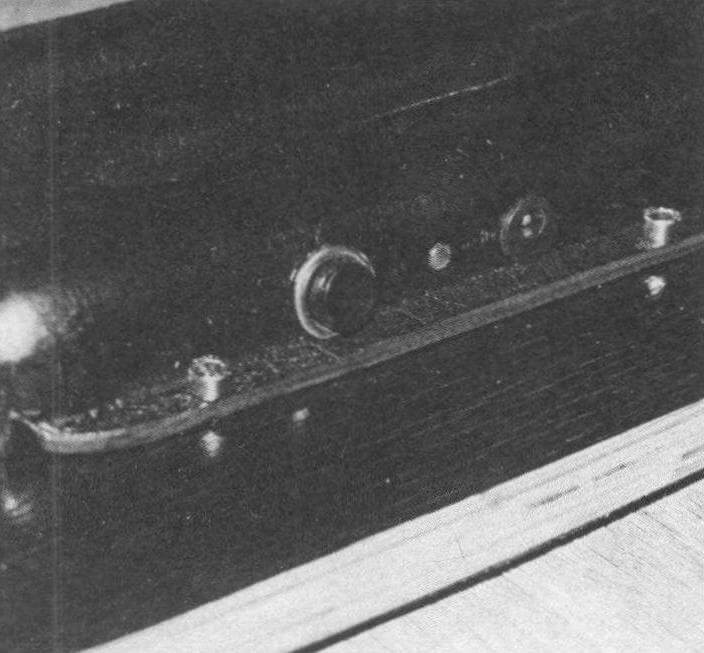
On the side of the casing I embedded a power button, a charging connector and an indication light guide. The two-color LED is located inside the housing. It blinks red and blue until the control panel is activated. As soon as you turn it on, the blinking color turns red. It should be noted that I got this “traffic light” quite by accident. Everyone probably knows that when ordering various components from China, you need to keep your eyes open. There are deceptions in the characteristics of the elements and incompleteness. So I didn’t have the required diode in the kit – only two wires for it. I started looking for a replacement in my own supplies. I chose a two-color one, and suddenly it worked so beautifully, blinking differently depending on the operating mode. But all this was, I repeat, unpredictable, since I did not know how the board was programmed – I was just lucky, apparently.
The electric skate automatically turns off after five minutes of inactivity and turns on with a button or by rotating one of the wheels. The ground clearance is 50 mm, the weight of the device is 8.2 kg. Even smaller shells weigh about 7 kg, so for my rather large design I consider this weight to be normal.
The control panel has power and reverse buttons, a battery charge indicator (10% – 60% – 100%), a Bluetooth indicator and a three-position power switch. When you press the trigger from yourself, there is a smooth increase in power, when you press yourself, there is braking. There is also a built-in battery with a micro-USB charging socket and a hidden device search button. After five minutes of inactivity, the remote control turns off.
Now about the driving characteristics of my vehicle. The speed at maximum power according to Yandex Navigator is 35 km/h – in my opinion, more than enough. It’s even a little scary to rush at full speed. Due to their large size, the wheels absorb small bumps and stones well. So far I have not been able to test the electric skateboard for maximum range, although it is clear that it will greatly depend on the selected power. According to the results of the first races, within an hour of riding, the voltage on the battery decreased from 42 to 36 volts, and the approximate mileage was 10 km. This range suits me.
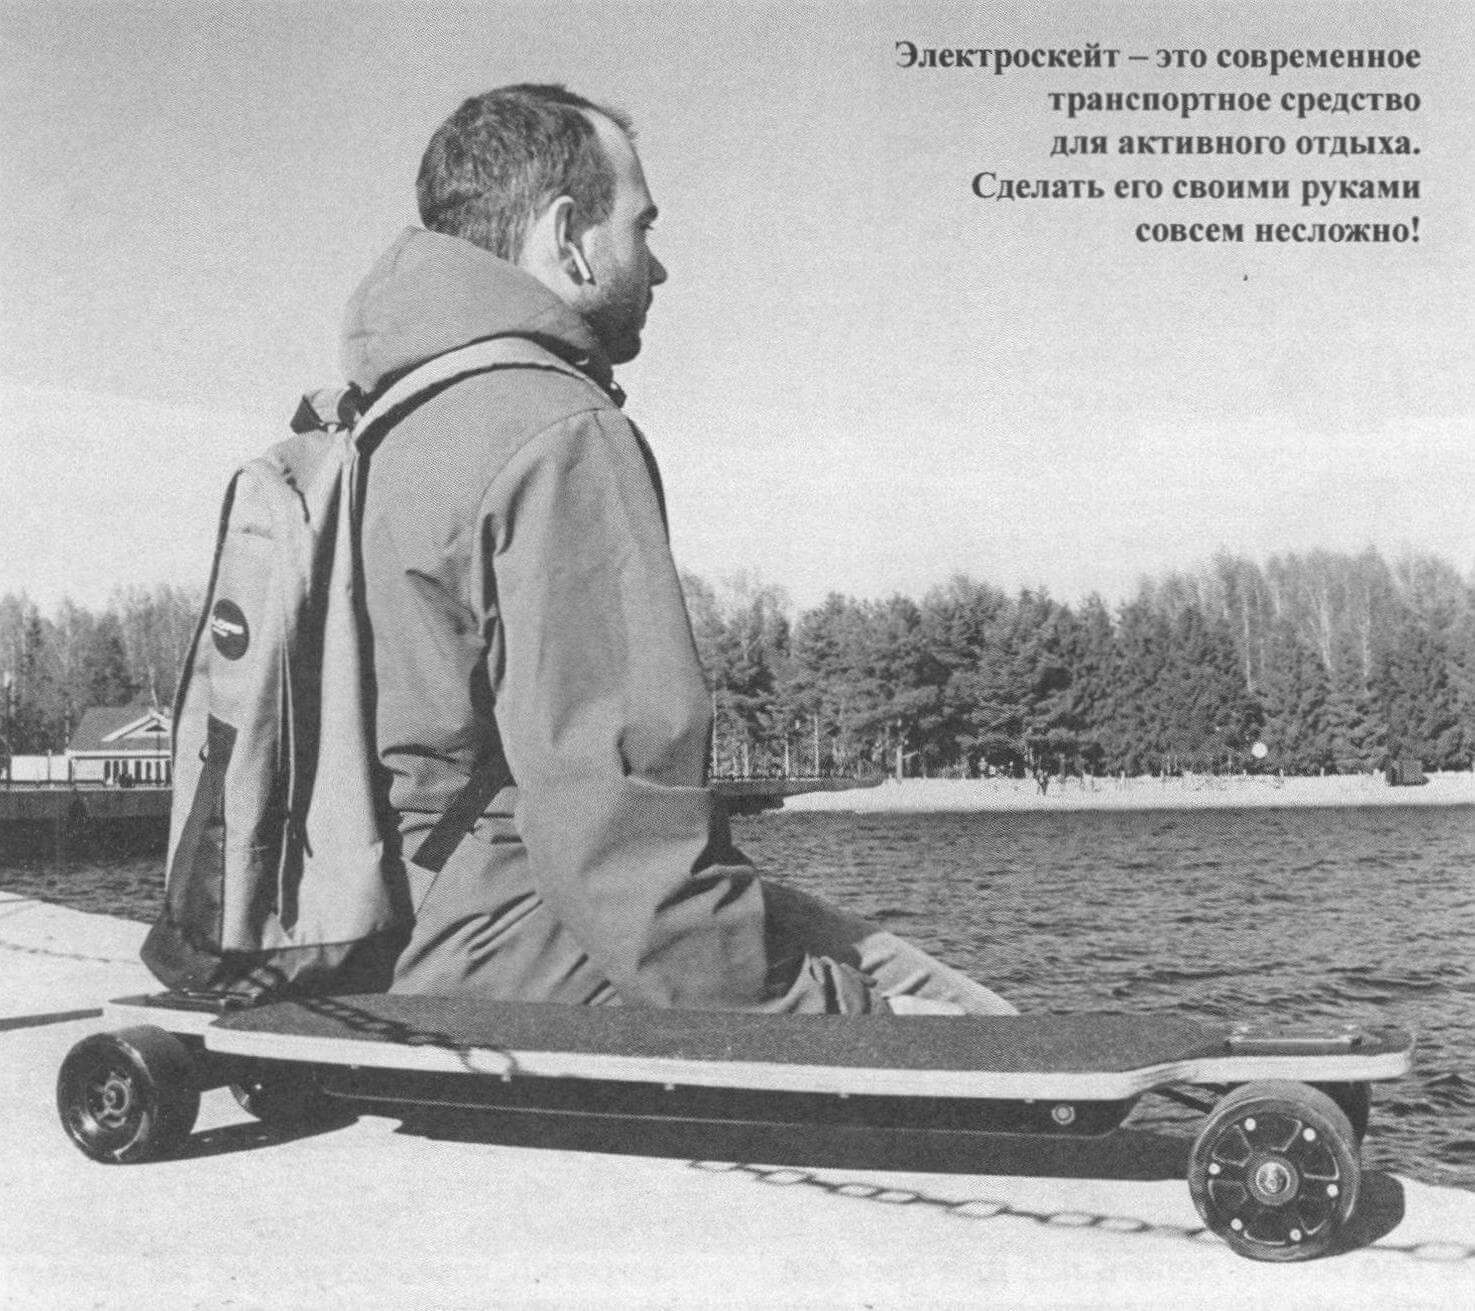
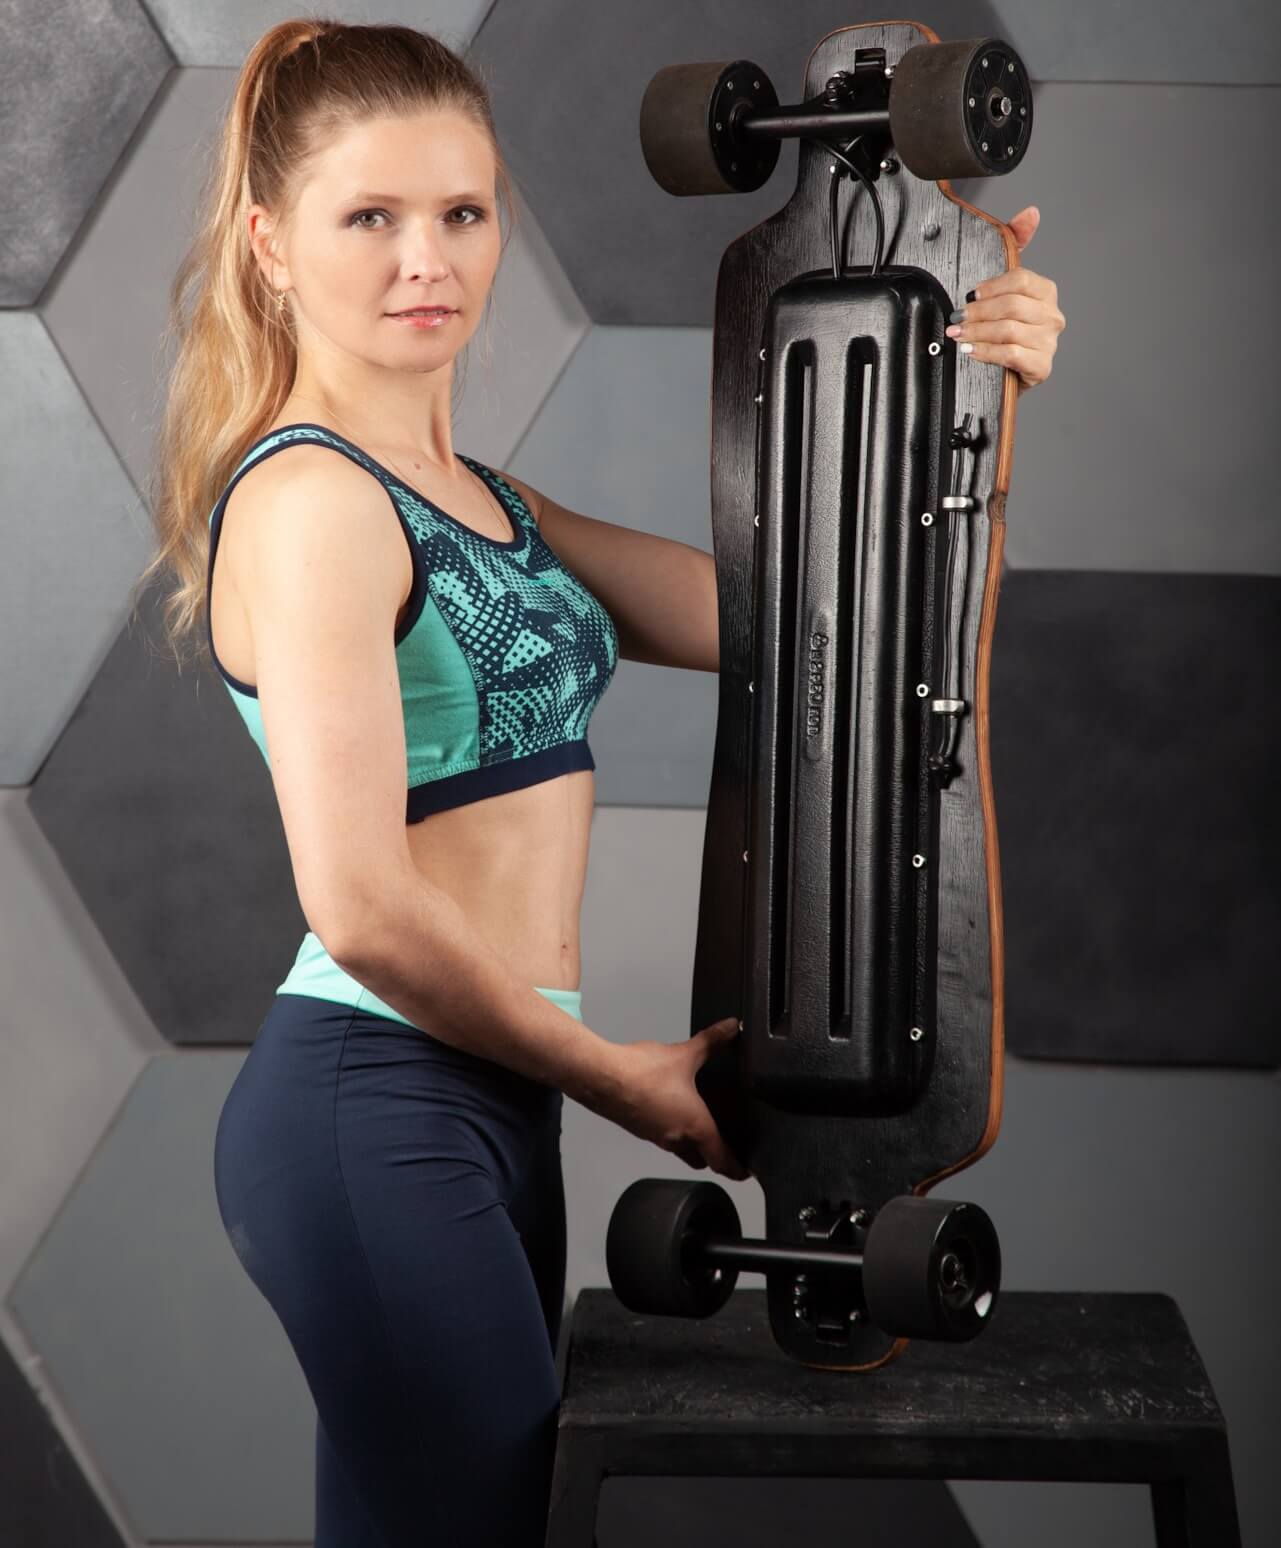
Loved the feeling of riding a powered longboard! Everything is much more thorough than on a small skateboard. Standing is also comfortable, despite the flat deck. And it makes me incredibly happy, of course, that you are riding on a device made with your own hands!
Well, about financial costs. At current prices at the time of production of this homemade product (March 2020), it cost me 180$, which is noticeably cheaper than the cost of a finished product with similar characteristics
Alexander SKRYNNIK, Rybinsk
Recommend to read
 CASE-UNIVERSAL
There are several classes of ship modeling, in which the apparatuses have very small external differences. So, very similar model classes F1V-15, FSR-3,5, FSR-6,5, F1V-5 and F1-E. "Why... MATT? EASY
To get out of the ordinary frosted glass, have it for a long time to handle with sandpaper or other abrasive. But there are less time consuming and easier way to achieve the same result....
