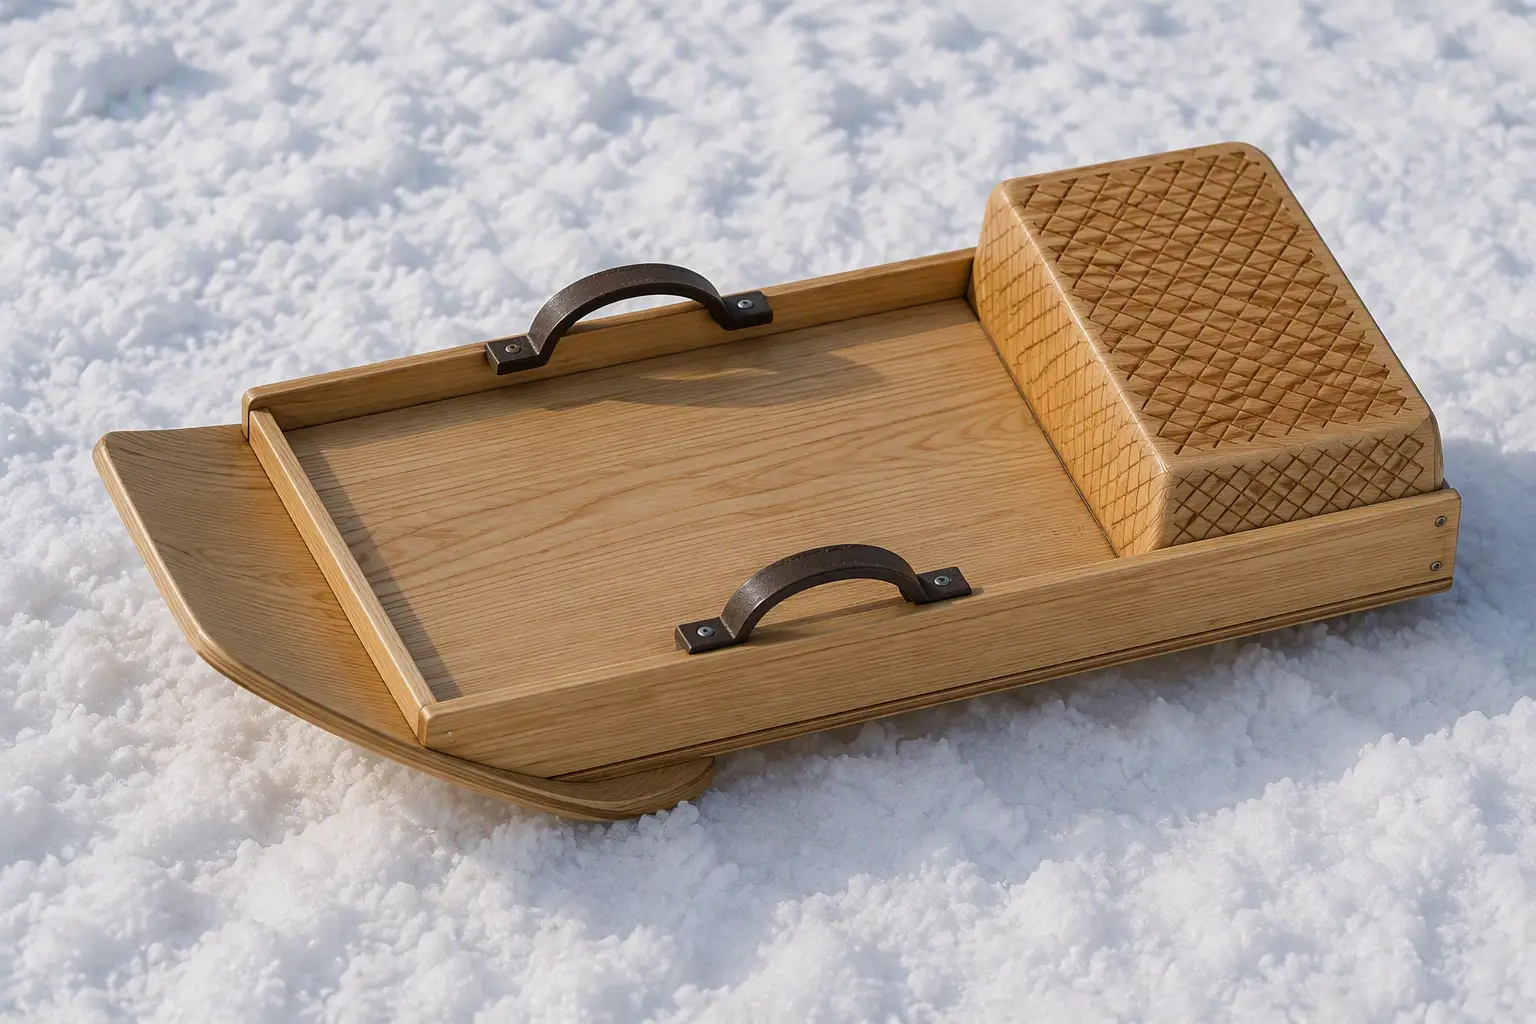
If you recall that cross-country racing skis are designed mainly for travel on a prepared track, while wide hunting skis handle any snow, it becomes clear how the proposed homemade sled design differs substantially from store-bought ones: above all, it does not require packed snow slopes. Even the fairly popular three-ski snow scooters “Chuck and Huck” will fail on a hill with deep snow, while these will easily race downhill, leaving behind only a white cloud and a wide track. That track will highlight the main feature of the design that gives it such “all-terrain” capability.
The main difference
Indeed, if ordinary children’s sleds leave two thin lines from their narrow runners, and “Chuck and Huck” leave three wide ones, the proposed sleds leave only one wide strip, because the runner is the body itself in the form of a single flat ski. And just as a real ski has a longitudinal groove on the sliding surface to keep its direction, so this sled variant has two longitudinal snow cutters (in the form of battens) attached underneath the body. They add two more narrow grooves down the middle of the wide track, thanks to which this winter vehicle holds a steady course even on a packed section of a slope or on hard crust.
Materials and method
Making these “all-terrain” sleds does not require any special materials or techniques: ordinary boards, plywood, and the usual minimum of simple woodworking tools — a handsaw, a plane, a gimlet or awl, and a screwdriver with screws.
As the drawing shows, the sleds consist of practically two main elements: a box-like frame and a bottom runner. Let us look in more detail at how they are made and assembled.
For the frame, boards about 20 mm thick that are not too wide will do. The main frame parts are the side pieces, because they give the sleds the necessary ski-like shape. To achieve this, the front of each side piece is slightly bent upward with a saw and a plane — at a small arbitrary angle — so that with the plywood bottom nailed to them the sleds, when moving, do not dig into the snow but ride up onto it and pack it under themselves.
At the rear, the side pieces are joined by a rectangular piece of the same board as the sides themselves; at the front they are fastened with a narrower batten that closes the frame outline. Soft handles — made from suitable plastic or a belt strap — are attached on top of the side pieces.
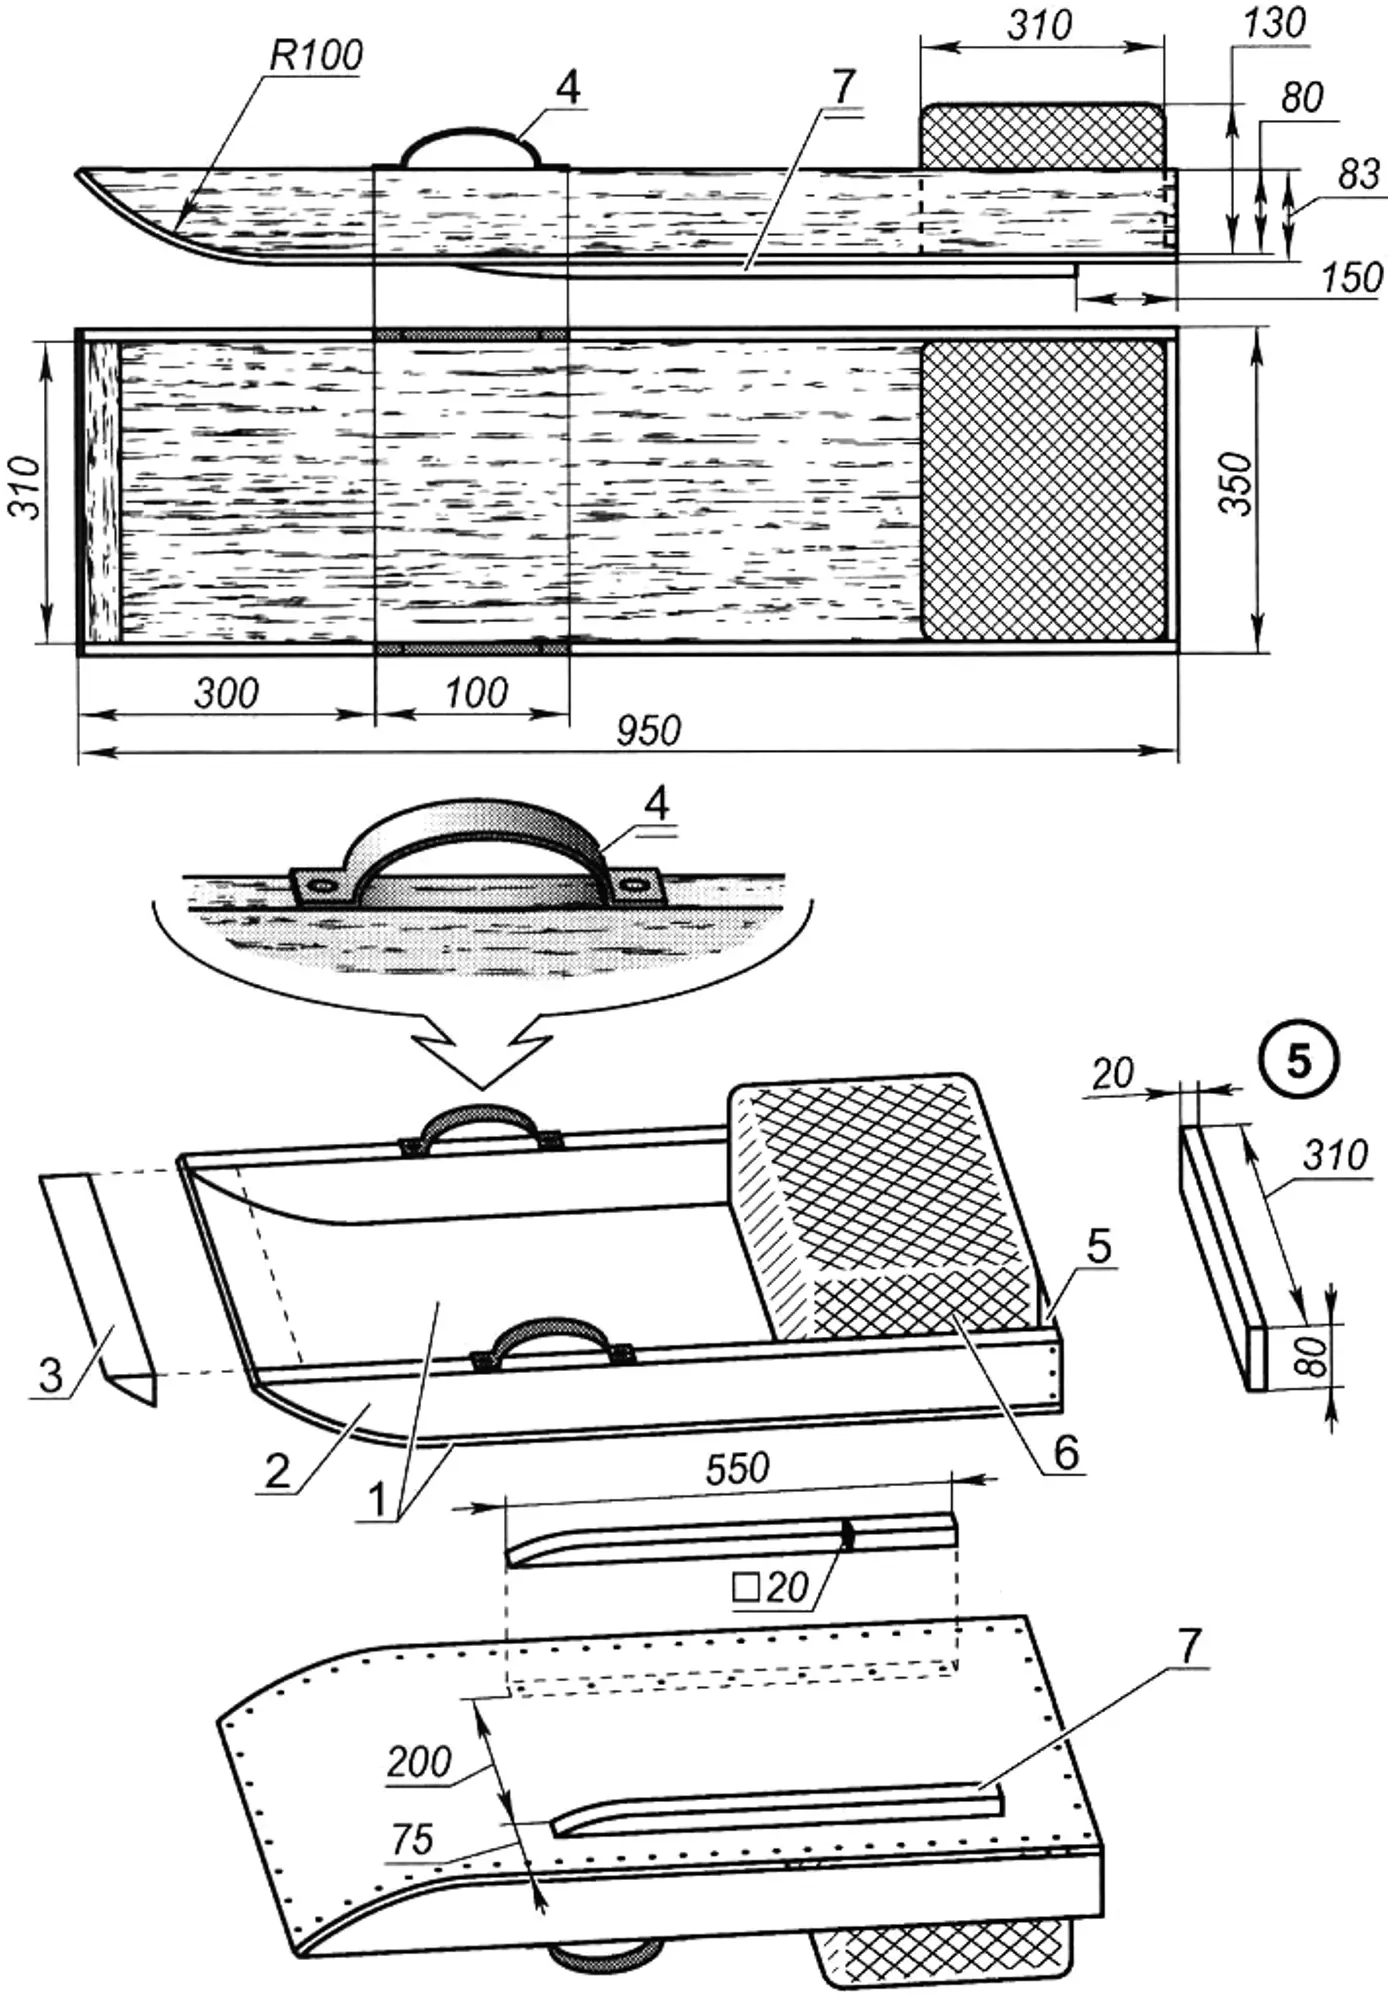
1 — bottom runner; 2 — frame side piece (s20, 2 pcs); 3 — front frame batten (fit to place); 4 — handle (2 pcs); 5 — rear frame batten; 6 — seat cushion; 7 — snow cutter (2 pcs)
A rectangular sheet of plywood is fastened underneath the frame, forming the second main element of the sleds: the bottom runner. Following the upward-bent front shape of the side pieces, the bottom forms a rising runner tip here, completing the required sled shape of the assembly. Only the finishing step remains: install guide battens — snow cutters — on the sliding surface of the bottom runner. They have the necessary bevel at the front; the battens are fastened from the inside of the bottom.
All joints are made with countersunk screws, and glue (wood glue, PVA, or “Moment”) may be used for reinforcement.
At the rear of the sleds, for greater comfort, a soft seat is fitted — a cushion based on foam rubber or latex: a block of it is covered with nylon or canvas fabric that does not clog with snow. To keep its shape, plywood can be placed under the top layer of the cushion. The cushion thickness should be greater than the height of the sled frame.
Finish
Since the sleds are wooden, and wood gets along well with frost, the design does not really need any special finish. Still, given spring thaws when the snow becomes wet, and the fact that these are children’s sleds, some recommendations are worth giving. The simplest and most effective option is to paint the sleds with bright oil paints: the frame one color, the bottom runner from the inside another — practical and attractive.
Naturally, before that (and even regardless of painting), all parts must be carefully cleaned so that no splinters or burrs remain, then sanded with sandpaper. It is most convenient to do this before assembly.
For the sliding surface of the sleds, a special treatment of its own is possible — a bit more involved, but effective. This means a paraffin coating, which will not only protect the plywood from moisture in thawing snow but also reduce the sleds’ friction coefficient. Several candles are carefully melted in a can over a low flame and applied with a brush in several layers to the bottom, trying to soak it thoroughly, each time carefully rubbing the cooled layer with a cork, as skiers do when applying wax.
Sleds finished this way will race downhill like a bright “rocket” on a snowy slope.
“Modelist-Konstruktor” No. 11’2011, B. VLADIMIROV
Recommend to read
 ATLANTA ELECTRICAL CIRCUITS
Who used a portable transistor radio, know how, over time, decrease the sensitivity and loudness of the radio, begins to "float" the rate of advance of the tape in the music player... ... BENTLEY STATE LIMOUSINE
Your first car with 4-cylinder motor a working volume of 3.0 liters Walter Owen Bentley, the owner of the company, demonstrated at the London motor show in the autumn of 1919, and after...
