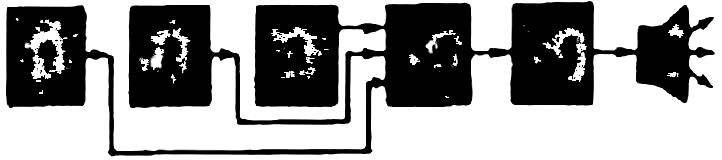
Unit 1. As can be seen from the diagram (Fig. 2), base-emitter transition of transistor VT1 operates in the breakdown and creates a continuous “white” noise (spike). This signal is amplified by the transistor VT2, operating near the threshold of closing. The timer DA1 generates pulses with a frequency determined by the capacitance of the capacitor C1 and the resistor R3. By changing the resistance R3, it is possible to slow down or speed up the “chug” of the engine within wide limits. The pulses output from the timer is sent via the key VT3. When the switch is open S1 open VT3, the resistor R9 shunts the lower half of R10, and we hear a single “poof”. If you locked the keys S1 and S2, then heard a continuous hiss of released steam. Capacitors C4 — C6 improve the naturalness of the sound. Chain R1C2 protects the other components from penetration into them of impulses from DA1.
R and S. 2. Schematic diagram of the unit “pairs”.
Unit 2. Transistors VT1 and VT2 (Fig. 3) work in the scheme of RC-generator with double T-bridge. The first frequency can be changed by the variable resistor R5. The addition of their frequencies on R12, you can obtain new frequencies from zero to frequencies similar to the sound of the diesel. In intermediate positions of the engine R12 get different sounds, including the whistle of the locomotive.
Transistors VТЗ and VТ4 form a generator of “white” noise, similar to the scheme in figure 2. The outputs of all these generators for mixing is connected to resistor R18. The final amplification provides VТ5. When the SV1 button (“whistle”) is open, the resistors R22, R24 hold the emitter VТ5 under more stress than base and it is closed. When SV1 is closed, the resistor R21 and R24 shunts to ground, thereby opening transistor VТ5. Capacitors C16, C18 eliminate clicks on and off whistle.
Fig. 3. Schematic diagram of the unit “whistle”.
Unit 3. Here (Fig. 4) again, used RC oscillator with double T-bridge, however, resistor R14 is installed on the threshold of self-excitation so that the sound of the bell was the most natural. DА1 timer generates pulses with a frequency of about 1 Hz, it is too large the output voltage is reduced divisors of RZ, R4, then rectified by diode VD1 and differentialsa chain C3, R4 in short sharp triggering pulses. Opening the button, include the bell, giving one stroke per second. If you reduce the resistance R2, the strikes of the bell will increase.
Fig. 4. Schematic diagram of the unit the “bell”.
Unit 4. The outputs of all three sources of sound are mixed in the mixer (Fig. 5). Each input has its own regulator (R1—RZ). The signals are summed at the gate of the field effect transistor VT1. The total signal is fed to an external amplifier AF loudspeaker and through a matching emitter follower VT2.
Fig. 5. Schematic diagram of the mixer.
In this design you can use the timer КР1006ВИ1 domestic or foreign R555D. The transistors in the RC-generators should have h21Э ≥400, for example КТ3102 index G, T or КТ342В. The transistor noise generators should be selected according to the maximum noise voltage from the KT315 with any index. A field-effect transistor in the mixer — type КТ303 with any index. Other transistors may be such as, for example, КТ306, КТ312, KT315, etc. Diode VD1 (Fig. 4) — any low-power silicon. All constant resistors of MLT capacity of 0.125 or 0.25 watts. The variable resistors may be of any type with the characteristic A (Fig. 2.4) and In (Fig. 5). Electrolytic capacitors of the type K50-6 25 V. Constant capacitors in circuits RC-generators metalloboranes with a tolerance of 5%, the rest — any. Start button — any, for example, П2К etc.
Most conveniently, each block can execute on a separate Board. Installation may be mounted, and printed. Location details in the blocks is not critical. Each block after Assembly, check and adjust, using a high impedance head phone (headset).
Supply voltage +15 V (maximum + 12). The noise generators set at the collectors of transistors a voltage of +7.5 V by the selection of resistances of the base resistors (marked with asterisks). Paired resistors and capacitors in bridges should be selected as accurately as possible, otherwise the generation will not occur. A voltage of +7.5 V at the drain VT1 (Fig. 5) establish the selection of the resistance R8. For connecting all the blocks with a mixer, use a short shielded ends of the cable. The same cable is required for connection of the mixer with an external amplifier AF.
The power supply can be any low-power 15 V. All of the blocks it is advisable to install on the chassis with the help of connectors. The basic controls output on the front panel of the chassis. The size and shape of the housing is arbitrary.
Connect the output of the mixer with the AF amplifier and speaker, apply power. Now in the block 3 (“bell”) adjust resistor R14 for optimal sound when the button is pressed SV1, this should not be clicks and other extraneous sounds.
In block 1 it is desirable that the three main management body was located on the front panel next. This pen is a resistor RZ (“frequency”), button S1 (activation of “poof”) and S2 (output “pair”). Then they can be controlled by the fingers of one hand. The block 2 has only one operational button is SV1. Bodies adjust R5, R12 and RІ8 located on the card, configure them when setting up and do not display on the front panel.
If your model train is equipped with an electronic speed regulator movement, then it makes sense to connect the controller R3 of unit 1 with speed control for more consistent management.
The audio additions to the model train, you can add the lighting design depending on the taste and abilities of the modeller.
Yuri PAKHOMOV
Recommend to read MULTI-SPEED BICYCLE AUTOMAT Many imported bicycles with a large number (over a dozen) of speeds have now appeared on our market. But such machines probably only fascinate young people. Experts understand that it is... CD PLAYER from old COMPUTER Recently there is a rapid displacement of the cassettes compact discs (CD). Among the reasons for this and the continuous increase of requirements to quality of sound reproduction and... 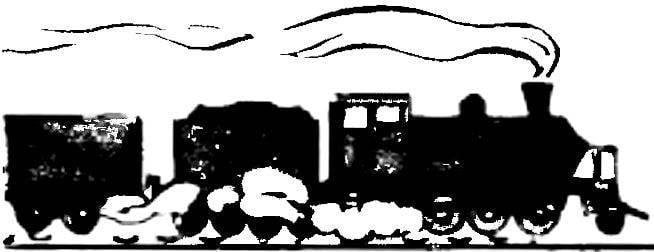
 Many readers of the magazine are building all kinds of model planes, ships, trains, cars and other equipment. However, for greater affinity with their prototypes it is desirable to “voice”, which will give them even greater appeal. Recall, for example, sounded like a train. First heard a gradually increasing noise of a train, then near the station he blows his whistle to his approximation, and stood, and noisily blowing off steam, making a sound like “poof poof poof”. Before leaving the station bell sounds, and the locomotive gives a farewell whistle before the journey.