WALL FOR EVERY TASTE

WALL FOR EVERY TASTEFor anybody not a secret: getting a new apartment, often have to finish something before the builders. All these little “improvements” sometimes outgrow almost overhaul. Of course, you can contact the office for the repair of apartments. But there is another way to do everything on their own. I hope that the proposed selections from the English magazines “Practical householder” practical help house masters.

Tiling


Tiles one of those jobs, which many do not dare to do themselves, and resort to professional assistance. Perhaps it is out of fear that any mistake will be noticeable long afterwards.
 
Meanwhile, the main secret of success is proper preparation and planning operations – understand this rule, and you have made veneer will be something that you can be proud of.
 
First, you need to luted wall: its surface must be perfectly smooth. You may even have to apply a layer of plaster to destroy irregularities. However, this operation can be replaced (depending on the nature of the premises) lined the walls with sheets of plywood or wood-fiber plates — they tiles lie evenly, and will stay worse. In this case, as the glue used is PVA.
 
If you just want to update the existing fascia of the premises, which itself is well kept, it is permissible to stick the new tiles over the old one, delete that — it is long and laborious. Put a new layer so that seams do not coincide with the seams of the old veneer.
 
When selecting tiles you should consider not only its color or figure, and size: the smaller the tile, the more laborious will be the facing.
 
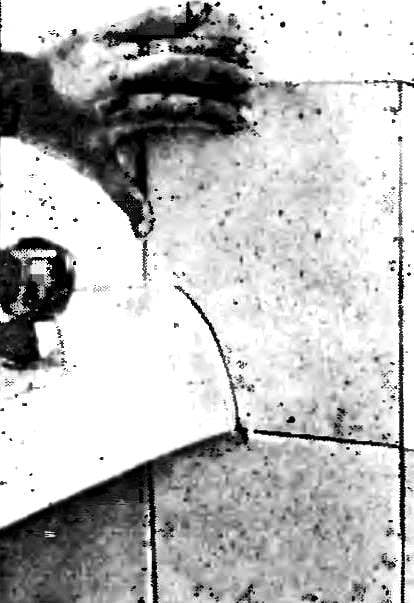
The preparatory operations applies the preliminary allocation of tiles on the plane of the walls to achieve the best decorative effect. On a blank wall, calculate the location of the tiles so that the extreme of them (edging) was the same. To facilitate this work, lay a row of tiles (with spacers between I them, imitating the seams) on the floor along the wall and stir until then, until you find the optimal location.
If you want to use tiles with a pattern or different colors, it is advisable to make a preliminary drawing on graph paper or lay them on the floor. Mark on the wall the position of the first (full, uncut) tiles; subsequent proper layout will ensure the use of Reiki with applied her risk, meaning the size of the tiles and the joints between them.
 
If the wall has a window recess which also need to lay tile, take its median vertical line over the axis of symmetry for the uniform arrangement of the cladding. On the wall with two Windows, this axis will be the middle between them; the tiles are distributed symmetrically about this line.
 
1. Preparation for wall tiles start by pinning on the wall straight rails so that its upper edge is defended from the floor to the height of the tiles. The horizontal slats check level. After the wall covering above the slats, glued leave to dry for 12 hours, then remove the rail and place the first row of tiles.
 
2. Spread adhesive on the wall surface with a trowel with grooves or notched trowel — wavy surface of the mastic will provide a more durable and reliable adhesion of the tiles. Do not apply mortar or mastic more than one square meter of the surface, otherwise they will start to seize before you lay the tile.
 
3. Sticker tiles start from the rail that you secured to the first row of full tiles. Lay tiles on a mortar, slightly turning them and it will provide a secure grip.
 
4. After laying two rows of full tiles, you need to go back and glue the edging insertion of the end of both series.
 
5. Stick the tiles around protruding elements (e.g., shell) is not easy. To transfer the curvature of this element on the tiles it is best to use a template from stiff cardboard or suitable mold. Sometimes the protruding object (e.g., wall Cabinet) can be slightly shifted from the wall, then, placing it on the tile, it's easy to mark it on the outline of the subject. Then incised along these lines with a glass cutter, break off the excess with wire cutters or pliers, gradually breaking off small pieces of pottery. Be sure to wear safety glasses to avoid injury from splinters.
5. Stick the tiles around protruding elements (e.g., shell) is not easy. To transfer the curvature of this element on the tiles it is best to use a template from stiff cardboard or suitable mold. Sometimes the protruding object (e.g., wall Cabinet) can be slightly shifted from the wall, then, placing it on the tile, it’s easy to mark it on the outline of the subject. Then incised along these lines with a glass cutter, break off the excess with wire cutters or pliers, gradually breaking off small pieces of pottery. Be sure to wear safety glasses to avoid injury from splinters. Finally, align the trimmed edge is better on the sharpening stone or sandpaper.
 
6. Gluing the cut tiles, continue laying whole, respecting the rows and the ratio of stitches.
6. Gluing the cut tiles, continue laying whole, respecting the rows and the correlation of seams.
 
7. Inside the window opening, place the tiles so that they overlap the ends of the tiles lining the walls. If the depth of the opening is larger than the width of one tile, add curry paste, putting them close to a window unit.
8. The most neat narrow insertions of regular tiles is not difficult to obtain with a hacksaw on metal. It is sufficient to make only marginal cuts and the rest of the fault line to scratch glass cutter — diamond or roller.
8. The most neat narrow insertions of regular tiles is not difficult to obtain with a hacksaw on metal. It is sufficient to make only marginal cuts and the rest of the fault line to scratch glass cutter — diamond or roller. You can also use “computers” drill bit or cutter.
 
9. When gluing the insert into the corner expand its cut edge to the adjacent wall, thus, the purity of the pairing and concealed slit.
 
10. After 24 hours, you can begin grouting grout with a spatula or sponge. Good decorative effect gives a preliminary toning of the solution gouache (with the addition of adhesive such as PVA).
 
11. Before the mortar has hardened, go over the joints with a jointing rod with a rounded end. This will give the seams a soft, rounded profile.
 
To clean the lining, remove the excess grout with a damp cloth or sponge.

Recommend to read

  • “SALAMANDER” CLASS FSR“SALAMANDER” CLASS FSR
    Today we offer RC modelers a high-speed hydroplane races for long, designed and built by famous Hungarian athlete Istvan of Salim. "Salamander" — the so-called new microtiter — has a...
  • RESCUE TUBERESCUE TUBE
    The photographers know that the development of film in photobucke quicker and more efficiently, if the snail with the film periodically scroll. However, looking out of the reservoir...