 Flexors metal sheets are devices specifically designed for bending thin metal into shapes that are used in various applications, such as cornices, air conditioners, etc. This article will help you to construct the bending machine of medium complexity work, if you are one of those who prefers to do things on their own.
Step 1

Select sufficiently durable materials that will satisfy your needs in the process. 0.6 cm steel plate with fixing will allow you to bend 14 steel plates with a length of about 0.9 m. It is the dimension for this device. Here is a list of some of the materials used to construct ostochertelo:
- ¼ Cold rolled steel sheet, one piece 7Х42, the other 14Х48;
- ¼ “X2” angle iron, two 14 inch, one piece 42 inch, other – 48;
- 0.6 cm steel pipe length of about 18 inches;
- 1/2″X1 1/2″ steel bolts with nuts and washers, 4 each;
- 1/2″X1 1/2″ steel smooth rods, you will need 2.
Step 2

Cut area iron and steel plate in sizes listed above, making sure edges are square and smooth. Put 14 inch wide sheet to a nail file or the workbench – so all parts will be fixed.
Step 3

Put the sheet (7 inches by 42 inches) on 14 inch sheet with front edges and the same distance at each end. Clamp the sheets, if you want to prevent their movement during subsequent steps.
Step 4

Align one of the 14 inch angles on each end of the 7 inch wide (upper) part of the plate so that it hangs over the front edge of somewhere 1 inch, and cook them with a 7 inch wide plate. They will act as a clamp loop, when the bending machine is assembled.
Step 5

Put a 42 inch plate with 2 inch angle iron at the top of the 7 inch wide plate, place it in the center between the two ends of the angle in the center of the sheet and cook in place a one-inch seam at a distance of 20.3 cm from each other. This will strain the plate when the metal part is squeezing.
Step 6

Prelim 2 holes in place of the two 14 inch parts: one near the front edge 14 inch wide plate, and the other near the rear edge. The location of these bolts is not accurate, but it would look better if they are placed in line with each other and at each end. Install 1.3 cm the bolts in each hole and loosely screw the angle to the plate.
Step 7

A notch at each end of 1.3 cm angle, a width of 1.3 cm and a depth of 2.5 cm, designed to accommodate her articulated fingers. Their exact location is determined by the alignment of the bending machine, as you will learn later, but you should be able to place their 2 rod in the center of the corner.
Step 8

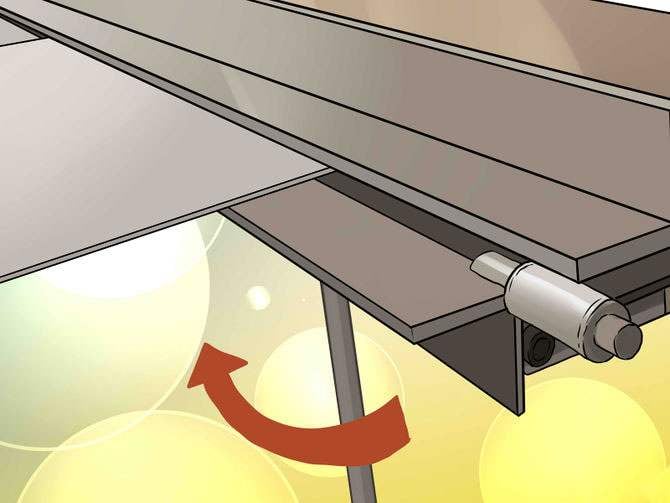
Prelim 1.3 cm hole beyond the front edges of the 7 inch plate, using a 14 inch coal where they overhang the front of the plate, directly over the lower flank of the iron angle. Here vpishutsya hinge bolts.
Step 9

Weld one of the smooth rods into one of the notches you have made in the area. This should extend to ¾ of an inch (or more) the end of the corner. Keep it as straight as possible to the corner of the iron corner – so he will be able to rotate freely after installation.
Step 10

Install the pin, simply preveiw it to the hole, which you jelili informed. Then make a line with a hole at the opposite end. Then weld this to an iron pin corner.
Step 11

Insert the steel pipe with a width of 5/16 inch by 2 inch deep so that it slid down the top corner creating a handle to control the angle you just installed. Place it in the center of the corner and weld into position.
Step 12

Turn on the machine (this will be hard) and place 1 1/2″ X 48″ corner near the front edge 14 inch steel sheet and cook in the same way as with a high degree of rigidity.
Step 13

Install the brake with your hands on the nail file or your workbench so that it hung down several inches. This will allow you to slow down and slide to pieces of sheet metal between the 7 and 14 inch plates, hold down bolts and rotating the guide tube to bend metal.

Yet another embodiment of the bending machine shown in the diagram.


