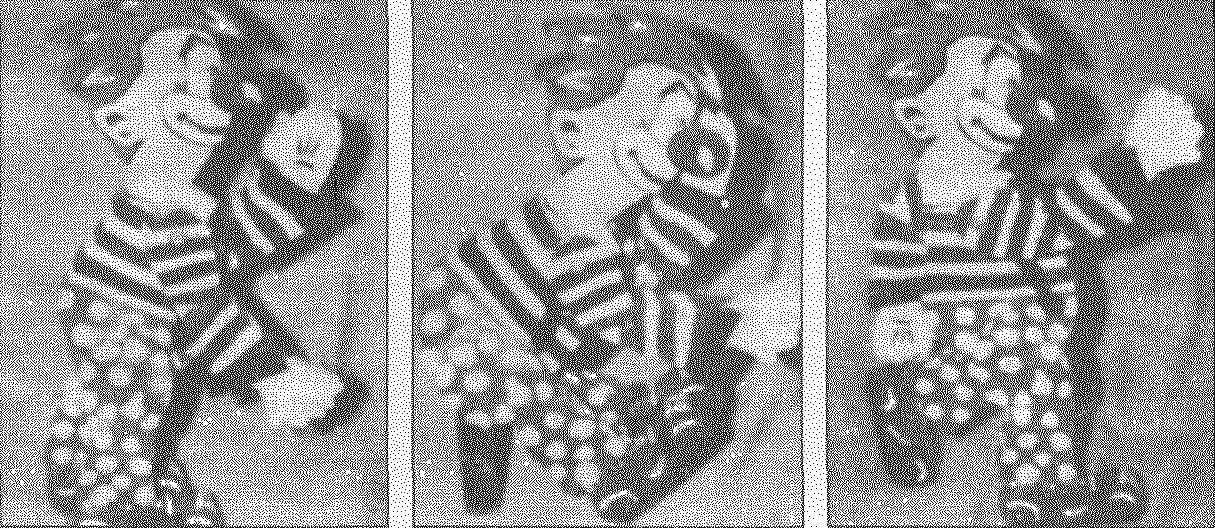
 Who in the circus like children? Of course, fun and funny clown. And a shaggy red wig, and bright baggy clothes with huge shoes, and tricks — all causes kids (and adults) happy laughter. Such a funny figure of the Croatian magazine “ABC technology” and offers parents do for their children, perhaps with their involvement because if you do not cut, then paint the bright colors of the clothing of a clown any boy.
Manufacturer
For the figures required Board thickness of 15 mm. Its surface is flatter first you need to process a plane, and then carefully with sandpaper, so that the work piece is smooth, without Shcherbatov and Burr, which is very important for children’s toys. This treatment will also facilitate the transfer of the prepared Board shown here the grid with the contours of the parts of the figure of the clown. To do this, first on the Board recertified the grid with square mesh of 5 mm, and then cells were looming elements of the figure of the clown.
Each element is cut with jig saw exactly caused the contour of the head and body — one detail, and all the others—doubles (despite the fact that on the grid, they are shown one at a time).

Fig. 1. Articulated figure of a clown:
1 — head, 2 — torso, 3 — shoulders, 4 —arm, 5 brush, 6 — femur, 7 — feet, 8 — feet

Fig. 2. Grid with the contours of the parts of figures of a clown (numbering corresponds to Fig. 1)
When all the elements are sawn —once again peer closely at the image you can discern that place subsequent connection details are prepared in different ways one is in the form of a projection (tenon), others — like groove, which would have to enter the spike of the corresponding element of figures this is and you need to be using a jigsaw and chisel to prepare before Assembly.
Assembly figures
After all parts are prepared, you can begin to assemble. We must start with the head and trunk. To blend the neck portion of the spike is inserted into the groove at the top of the trunk, but not to stop, to leave the Union a degree of freedom. Now both parts are drilled under the connecting bolt or rivet. The same is done with the rest of the paired parts of the hands and feet. When they are connected — they overlap their upper parts on the body in the appropriate places and also drilled the bolt or rivet for receiving the swivel.

Fig. 3. Diagram of the swivel elements of the figure of the clown
It is desirable that the hinges turned out dense — then all parts of the body will be able to keep attached them to the situation and the figure of the clown can stand, sit, “run”, “welcome”, and so on — as if “alive.”
Coloring
It is better to use artist oil paints easier to work with them, they are bright, have many shades — and this is important, as the figure of the clown is what to paint. Here, white face, red wig, red nose and yellow shoes and striped shirt, and spotted pants — is where carousing fantasy, and the parents and the child.
And the baby will have much fun with this beautiful jointed toy, which can give a variety of comical poses in a playful combination with other available child toys.


