COMFORT FOR THE BABY

COMFORT FOR THE BABYIt happens in every family: it accomplished the great mystery of nature, man is born, bringing much joy, happiness, excitement and hassle. And let it warm just a helpless lump, still there are family disputes, as it is called, but the apartment is already changes. Rendered in the other room the old sofa, moved the Cabinet for a newborn is released the coziest place to put a baby cot, the first subject of the whole “headset” needed for a new family member. It headset: the number of its components change with age of the child is dictated to and care about the convenience for the young mother. Here is the place for changing, and a separate locker or a barrel for clothes, a table under a lamp and bottles of baby food a low toilet, high chair, and later — to the table, a playpen with mesh or lattice-like walls for the first independent “walking”, and Walker — chair on wheels for the first faltering steps…

Not all of this list for the right moment to buy, but if you want all you can do with your hands, including something in the shops will not meet.
 
Today we offer home handyman several designs for the publications of the magazines “himself Throb”, pnrm., “TermStar”, Hungary, “Guide yourself”, UXO and “System D”, France, available on materials and methods for their manufacture. They are not only comfortable and practical, but also beautiful, fit well in a modern interior.
 
THE CRADLE-ROCKING
 
A quiet lullaby and slight swaying well lull even the most restless kids. However, store-bought crib not swing: it is usually provided only with wheels. Meanwhile, not even a very experienced home designers are quite able to produce a simple and convenient cradle.
It consists of double uprights with cross bar and pivotally suspended on them slatted Cribs — pitching. You’ll need a few sheets of plywood 12 mm thick, two round sticks (you can use a commercially available cuttings for shovels or sticks for brushes), Board, and thin rods or tubes, a few screws and furniture screws and nails. From the tool, hacksaw and bow saw (or a jigsaw), a drill and a hammer.
 
Made of plywood shown in the cells of the pattern are cut four notched racks and two pitching back and saw off a rectangular bottom for her. All of the details of drill bit through holes of appropriate diameter for connection with the other elements of the design: six racks, four in the back, and thirteen along the sides of the bottom. In addition, in the lower part of the uprights cuts are made to the Board-cross. In round sticks about half their diameter are also drilled under the Jack rail (or tube), with whom they form a lattice the sides of the bassinet. The ends of the sticks should have a slightly smaller diameter for receiving the shoulders abutting when assembled in the plane of the back.
 
Fig. 1. Wooden bed-cradle
 
Fig. 1. Wooden bed-cradle:
 
1 — the main front, 2 — back pitching 3 — predelna stick of sidewall 4. the sidewalls 5, 11 — wedges, 6 — hinge, 7 — fixing double-stand, 8 — fungus latch, 9 — the bottom of pitching, the 10 — cross-12 — cross-bar, 13 — bar.

 
If there is no suitable Board for the crossmember uprights, you can use the same sheets of plywood, cut from two rectangular blank size 120 X 922 mm and cementing them together with screws. Left to do on the ends of the notches, the width of which should correspond to the thickness of the fixing stand — the “wedge”.
 
The Assembly of the bassinets is not particularly difficult and is performed in two stages. First collect the very thing.
 
In her holes backrest insert the ends of the sticks and fasten them round with a wooden corks-wedges. In the nests of sticks are inserted carefully uskorennyi Reiki (or tube); the other their ends entered into the holes of the bottom, covered with a nailed bottom plate. Now carefully turn over the pitching, holding the bottom and the seat back and their joints nailed to transverse bars with a pre-baited with nails, spaced two to their faces so that they were in the bottom and in the back (on the ends of the push Usagi).
 
Now, jump behind the counter. Couple them with the bottom of the window, looming on the crossmember located grooves up to the stop stands in her wedges and Then apply a second, fixing a couple of racks-the”wedges”; sliding them down relative to the first pair, enter them in the slots of the crossmember until it stops. The thus obtained takes the furniture stands fasten bolts with rounded decorative cap, screws or nails wpoty usageb.
 
Left with hinged uz-vines, consisting of furniture bolts and wooden washers, spacers, hung on a rolling rack and cradle ready. On the one hand, it is possible (drilling rack and backrest pitching) to make the locking mechanism in the form of fungus-a finger of wood or metal stud; inserting it into the holes, fasten the legs in a fixed position.
 
After assembling all the parts of the bassinet finally can be smoothed using sandpaper and covered in several layers of light furniture Polish. If desired, the tree can be pre-tinted stain, which gives it a nice brown color and emphasize the pattern or enamel paint bright, cheerful colors.
in the ceiling to fix a reliable hook or mounted on the wall l-shaped metal or wooden bracket (of course, bothering to make it look nice), then the carrycot can do without the stands being suspended on four decorative painted or wrapped with colored tape, thick rope, its ends pass through the holes in the upper corners of the backrest and tie a knot.
 
TABLE, TO LAY
 
No, one crib is not limited to the appearance of a newborn in the house. Take his “closet”: young mothers are encouraged to prepare for him dozens of diapers and diapers; as well as vests, flannel shirts and even caps, sliders, bed sheet, blanket. Only perepelenat baby in the first week accounts for more than 20 times a day, and even to walk as often as possible, that every time you wrap-raskutti. In the crib to do it impossible, and usually prihoditsja to use “adult” furniture — a Desk, a couch, and it is both uncomfortable and unhygienic. Therefore it is better to have a dedicated changing table, but Such is no longer available.
 
One solution is to make a special “add-on” to the crib — slip shield, which at the time of dressing is mounted directly on the slatted sides of the crib, and then retracts and does not interfere, does not take place. It would suit a square piece of five – or seven-layer plywood the size of the width of the crib. On top of it, it is advisable to cover a yarn or flannel, covered children’s oilcloth or plastic wrap, securing the bottom shield with two bars on pre-customized for the size of the screws (make sure that they are not pierced through the shield!). Bars will perform the role of constraints abutting the sides of the crib and not being able to move to the overhead table.
 
Fig. 2. Invoice table
 
Fig. 2. Invoice table:
 
1 — rubber sheet or film, 2 — tissue, 3 — ply, 4 — bar.

 
R and p. 3. Universal bedside table
 
Fig. 3. Universal table-table:
 
1 — cushion folding table, 2 — front, 3 — plywood wall, 4 — plank wall, 5 — bottom 6 — bottom of the cushion 7 — polyurethane foam 8 — fabric (oilcloth), 9 — soft “loop”.

 
But if you have room, make a universal table, which will simultaneously serve as a changing table, and chest of drawers for linen and clothes of the child.
 
The design of it is solved is simple and clever: two stacks of boxes on the racks, having the ability to dvigatsya one another to form one compact and closed from all sides the bedside table. When they moved apart, from the top are arranged the paired pillows that serves as a table, and below tiers disclosed boxes, giving access to the diaper and vest m. as drafted, this nightstand is almost the same as a regular chair.
 
The primary element of the structure of the rack. Eight of them, each height — 900 mm, other sizes depend on the selected material: metal tube, square profile or wooden slats. The latter, of course, more affordable, easier to work; their cross section may be 20 X 35 mm. Racks are mounted directly to the boxes.
 
Drawer best suited plywood thickness of 5 mm and a Board thickness of 15 mm. to Saw all the parts out of plywood and 10 end walls of a size of 160 X 450 mm, five bottoms size 450 X 450 mm and two base cushions with size 490 X 490 mm, from boards — 10 sidewalls with a size of 160 X 140 mm. When you build the drawers plywood sides and bottoms impose (with sizing epoxy, carpenter’s glue or PVA emulsion) on the plank and attach a small (“parcel”) nails or small screws. To give greater stiffness and reliability in the corners of the boxes can be glued wedges of triangular cross-section. Thus we get five identical boxes, which are installed on racks in a checkerboard pattern so that when you shift the collected set of shelves each drawer left transient between the two boxes right.
The witty design lies in the fact that both move half of the tables are not the guide; their role is successfully carrying their own boxes, in combination with racks. Moreover, the inner pillar of the left wall units can end at the level of the bottom of the bottom drawer, right-or, at least, not to reach a floor, so as not to offend and not to scratch it when sliding. They serve stops at the splitting of whatnots. By the way, with this in mind, and they are fixed, and related racks right shelves, indented from the corner of the box to the width of the rack, which ensures full convergence of boxes vertically in the closed position. On the walls of the upper drawer right side sockets are drilled for studs (or screws) securing the cushion. Left pillow is not associated with racks, and is connected with the right soft “loop” from strips of fabric or leather sewn or when” glued to both cushions. How to make a pillow, can be seen from Fig. Plywood on the bottom of the base of each (right — with holes for the wooden spikes or screws) superimposed slightly larger square out of the foam and all is sheathed with decorative fabric, flannel, children’s oilcloth or leatherette. When the shelves are put together, the cushions rest on top of one another; in the working position the left leans back and rests on the steaks to your shelves, a little beyond the boxes.
 
The advantage of the tables in the fact that it will serve not only during infancy but also later, almost to the school — for storing clothes, toys, etc.
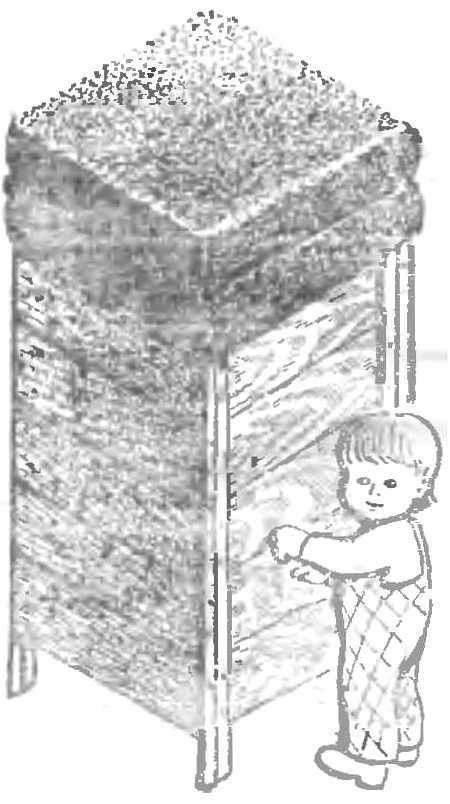
 
AND A TABLE TO SIT
 
The child grows quickly: it seems, only yesterday he was pleased that began to hold his head, and today sits independently. However, still not very confident, and look to capsize, so a regular highchair to put still early. And the toys drops — adapt to any table, no such.
 
But you have obviously paid attention to placed on the color tab, the baby’s unusual device, which is for him and Desk and chair. Indeed, it is a kind of furniture combine for the slider: it performs several functions, providing the kid some leeway and at the same time protecting it from loss of balance. Is the Desk-chair of five parts and can be assembled without a single nail, on the principle of tongue and groove connection.
 
Fig. 4.
 
Fig. 4. “Combine” kid:
 
1 — shield, backrest, 2 — side, 3 — table, 4 — seat.

 
For its production will need plywood with the thickness of 10-12 mm or chipboard with 20 mm thick Boards for the back, seat and table are cut with projections-spikes; billet sides and back have corresponding cracks. With proper adjustment of their design can be assembled even without glue provided dense, with the push of occurrences of the spikes into the slots-of the slot. However, you can use the glue — casein, carpenter, PVA. First dock billet backrest, seat and table, then serially — side, carefully aligning the spikes with their corresponding grooves, if necessary, easily tapping with a hammer auxiliary overhead block.
 
After Assembly, all edges and surfaces have been thoroughly cleaned and polished with sandpaper and covered with light or brown furniture Polish.
 
If the shields are made of chipboard, their edges will have a jagged surface that should be level the putty — ready or prepared independently (in emulsion PVA add fine sawdust or wood dust to a creamy thickness). After drying, the whole structure can be painted with latex paint with the addition of bright colors or enamels calm warm tones.

Recommend to read

  • BMW 645Ci CABRIOBMW 645Ci CABRIO
    In the spring of 2004 the German automobile Bayerische Motoren Werke (BMW) came out with a new ultra-luxury convertible BMW 645Ci CABRIO. The creators of the new machine paid great...
  • SUPERDATABASESUPERDATABASE
    Only laudatory conclusions on flight characteristics received from everyone who was able to make her acquaintance, new polupoltina RC car. A great combination of handling and...