Of course, it is not a safe: it does not need to be built into the wall and the spot disguised by hanging a painting, as often shown in films and what becomes fashionable in the homes of prosperous oligarchs.
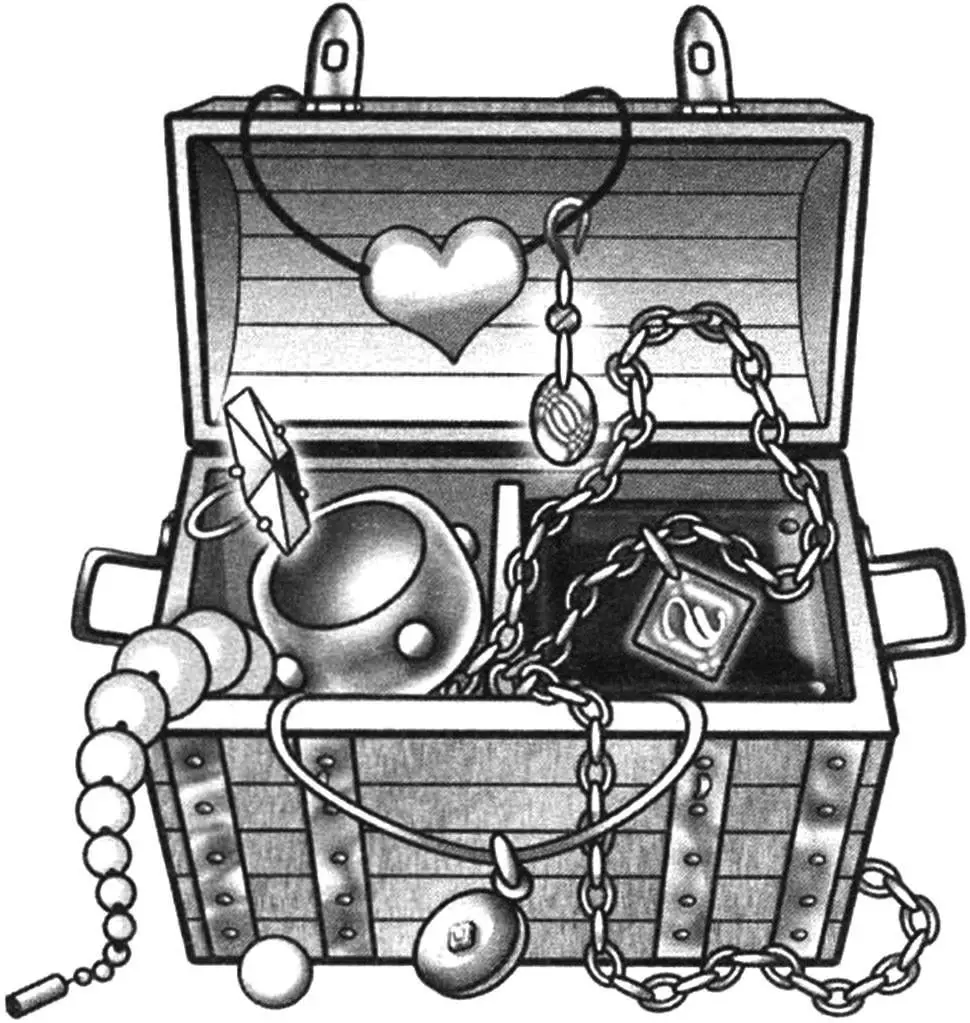
On the contrary: the proposed small chest is meant to be displayed, so it has decorative styling. But decorating the interior is not its only function. With two locks, the chest is intended to store at home perhaps not jewels, but for example the lady’s favourite jewellery and the master’s important documents. For this it is made sturdy enough, and moreover—handsome and even elegant.
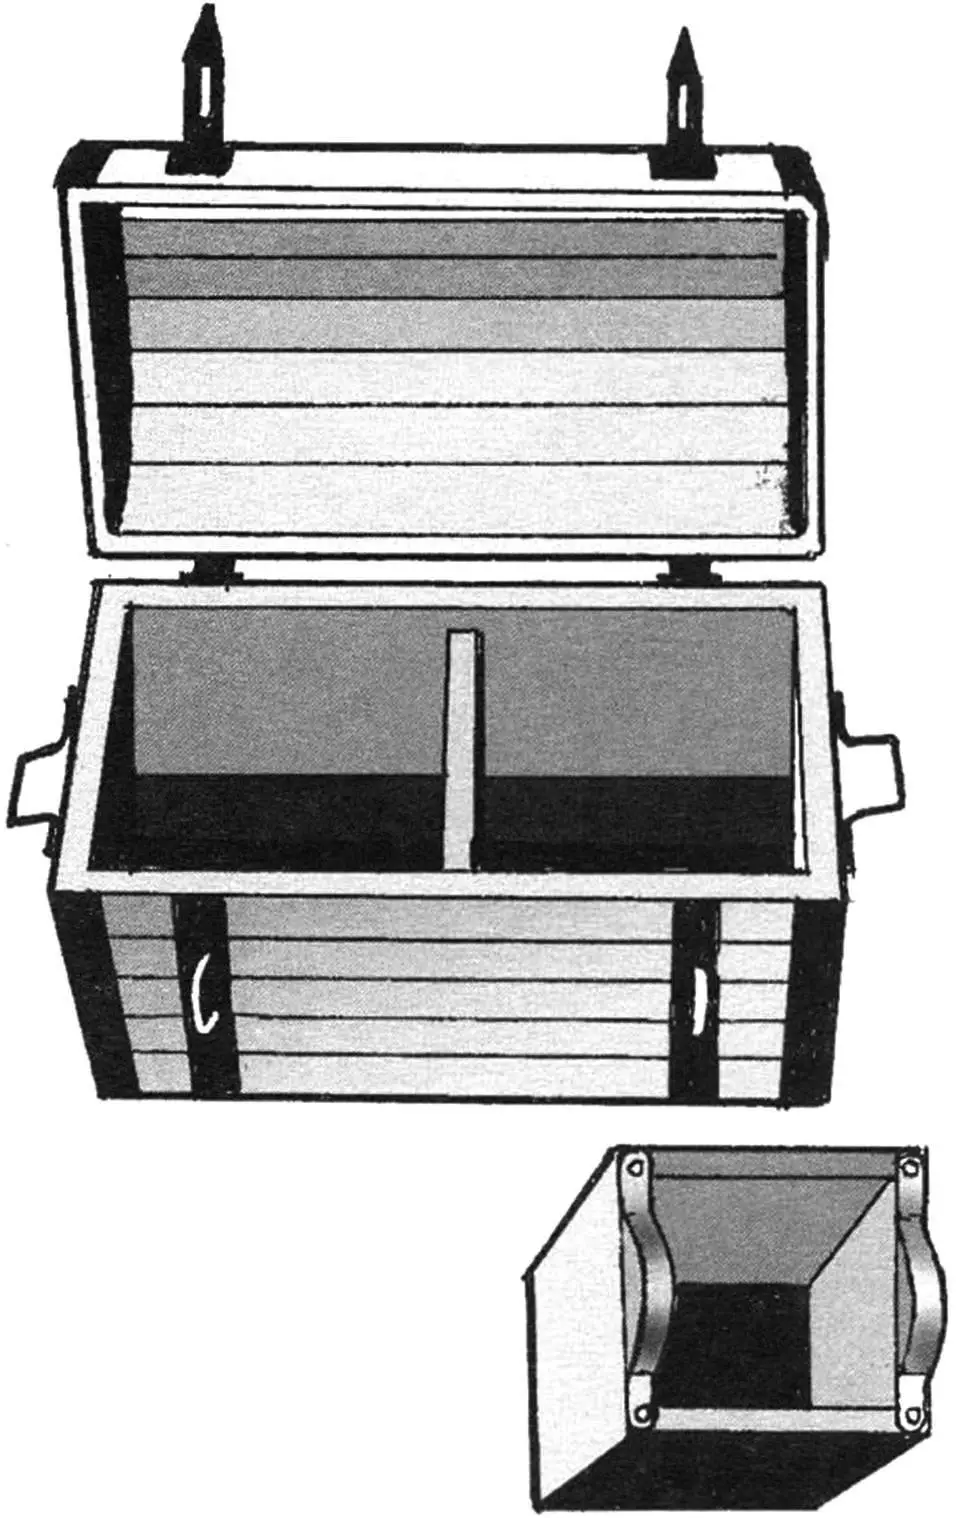
The chest consists of two compartments separated by a partition. One of these sections is for a small insert box—just right for jewellery. This casket is made without a lid and slides out freely, which is convenient and allows moving it closer to where jewellery is tried on—to the mirror or dressing table.
Main parts
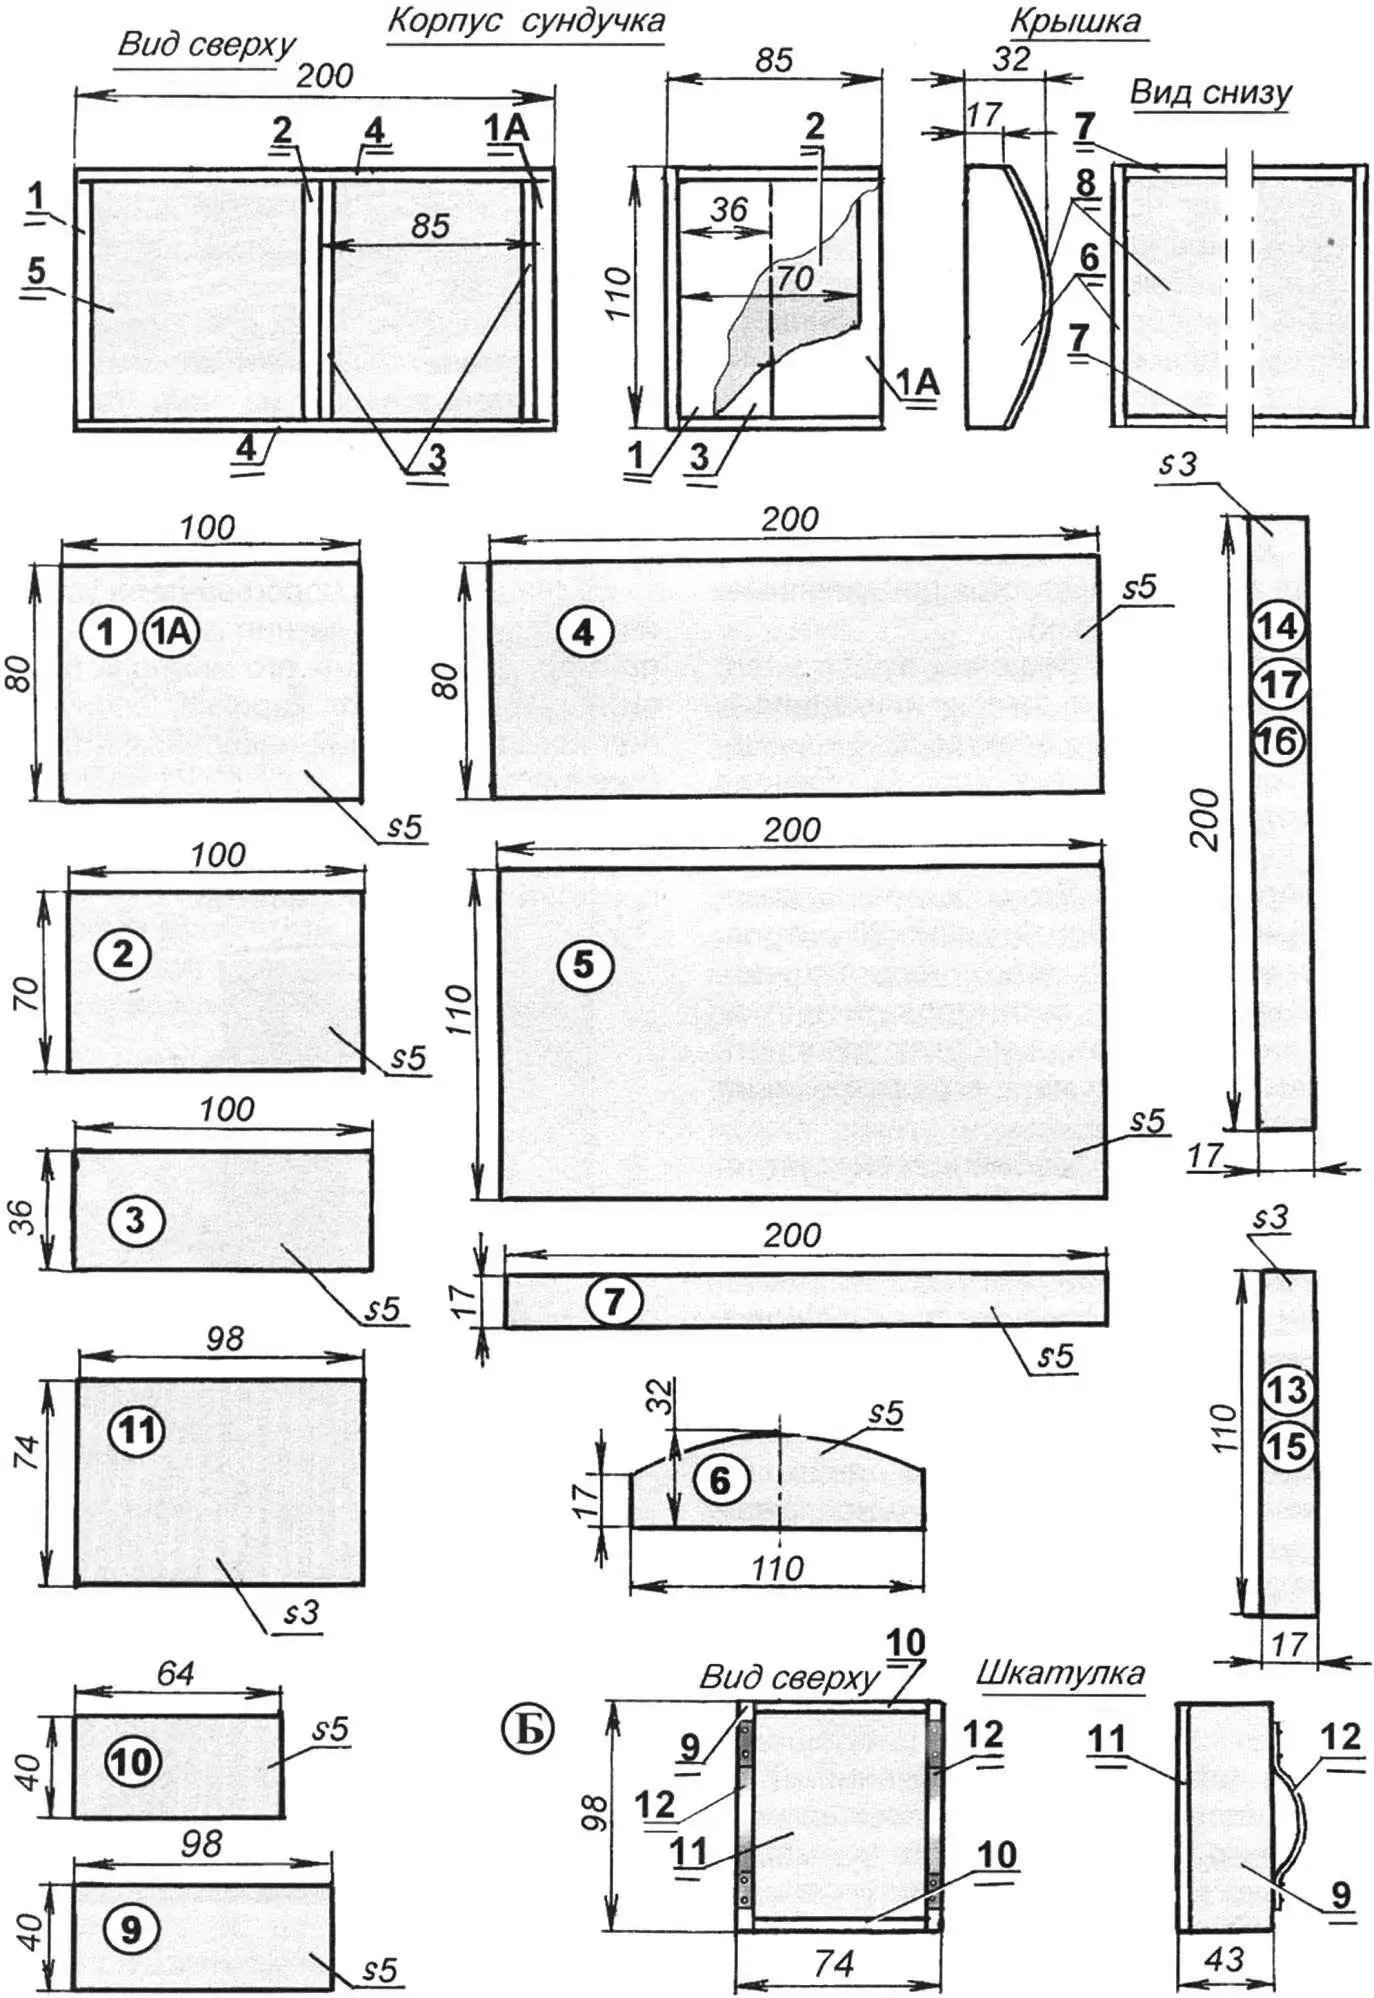
The material is 5th grade 8 mm plywood, from which the “inner” part of the chest—its body—is made (Fig. 1). These parts must be carefully worked; the success of the piece depends on it.
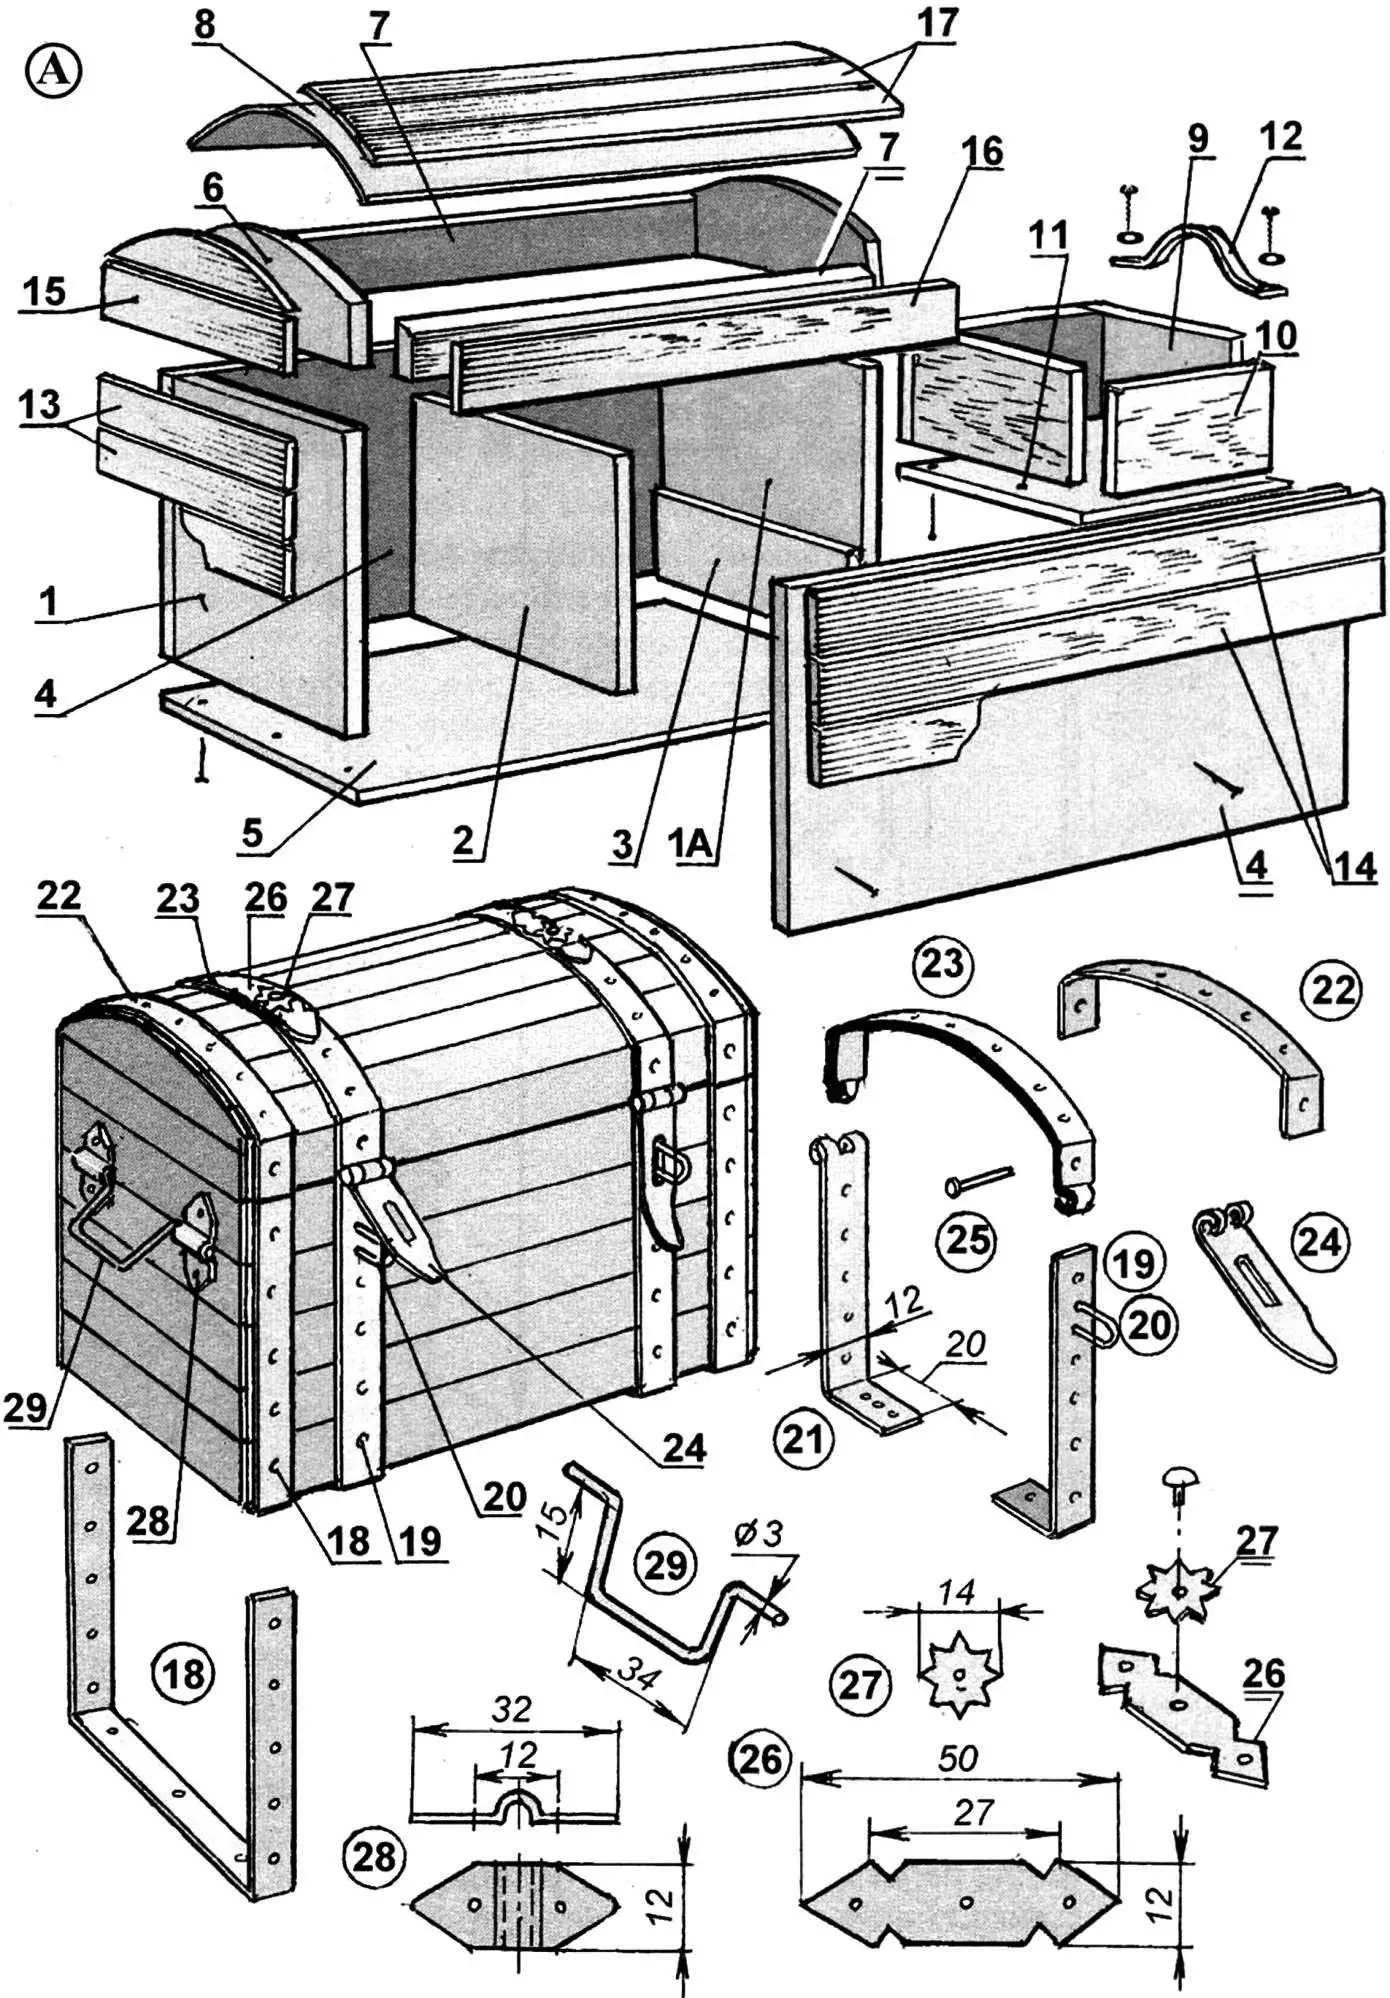
1, 1A — chest body sides; 2 — partition; 3 — box holder/support (2 pcs.); 4 — rear and front body walls; 5 — bottom; 6 — lid side (2 pcs.); 7 — lid front and rear walls; 8 — lid top; 9 — box side (2 pcs.); 10 — box front wall (rear identical); 11 — box bottom; 12 — box soft handle (2 pcs.); 13,14,15,16,17 — chest surface trim strips; 18,22 — edge clamp/trim parts (2 pairs); 19 — middle trim clamp front (2 pcs.); 20 — lock hasp (2 pcs.); 21 — middle trim clamp rear, with hinge top (2 pcs.); 23 — middle trim clamp top, with hinge ends (2 pcs.); 24 — lock latch (2 pcs.); 25 — pin/axis (4 pcs.); 26,27 — trim arrow and star ornament (2 pairs); 28 — handle hinge (4 pcs.); 29 — chest handle (2 pcs.)
The drawing shows the main dimensions of the body parts and the assembly sequence. First join the box-compartment side (1), partition (2), and second side (1A) with the removable casket supports (3) to the bottom (5). Use small nails and glue. Then both sides and the partition are joined to the rear and front walls (4).
While the glue dries, make the lid frame (identical pairs of parts 6, 7). The width of strips 7 should be slightly greater than the end faces of parts 6. After the glue dries, trim them at an angle. Bend and nail the plywood lid top (8) to match the curved parts.
Assemble the separate box in the same order. First join the sides (identical 9, 10), then fit the bottom (11), cut with allowance. After the glue dries, sand all protruding bottom edges flush.
How to trim the box
All parts of the casket except the bottom (5) must be clad with decorative strips resembling precious wood. They are 3 mm thick; each strip is fitted tightly and fixed flush to the previous one. Only the outer corners of these strips need to be rounded.
First fix strips 13 to the chest sides with glue, then, after sanding flush with the longer (front and rear) side, glue on strips 14.
The lid is trimmed in the same order. But the bottom of each strip for the curved part of the lid must be slightly cut along the chord—e.g. with a gouge—to form the curved surface made by strips 17. The convex part of the lid underneath (8) can be made not only from plywood but from cardboard reinforced with strips 17.
When building the chest it is advisable to use heated carpenter’s glue or PVA. Sand the resulting box thoroughly on all sides again.
The surface of the removable box is carefully finished for subsequent varnishing. Two handles (12) of leather or substitute are fixed on top of its end walls.
Hardware (clamps, handles, locks)
Proceed to “edging” the chest. The metal parts are of polished copper or steel strip 0.5–0.8 mm thick and 12 mm wide. The end plates (18, 22), bent accurately to the chest body, are nailed to the box (2 mm from the edge) with round-head nails.
The two middle clamps consist of several parts. First make the top pieces (23). At their ends form eyes that will serve as lid hinges and as hinges for the lock latches (24). Fix hasps 20 on the front of clamps 19 (by soldering or riveting). Fix the ornamental pieces (26, 27) to the top clamps 23 in the same way. All hinge joints are secured with pins 25 made from nails. Handles 29 with mounting clamps 28 are fixed on the casket side walls.
The finished box should be coated inside and out with clear nitrocellulose lacquer in several layers, preferably by spraying. The left section of the chest, its lid, and the box can optionally be lined inside with suede or velvet. To limit how far the open lid swings, attach a delicate chain on the inside.
So, having fitted the chest with two locks, we can confidently give this “unpickable” keeper of valuables to its future owner.
«Modelist-Konstruktor» No. 1’2011, (From the Hungarian magazine «Észermester»)
Recommend to read
 IN A WAY, ALONG WITH GIVING
The idea to make a transportable cottage I have matured more in those years, when the travellers dream on road service was just impossible. So I decided to provide it himself. I must say... CANNED FOOD FOR BIRDS
A simple feeder for small birds can be done literally in minutes, using a tin can and a stick of wood or a suitable diameter of the branch.
