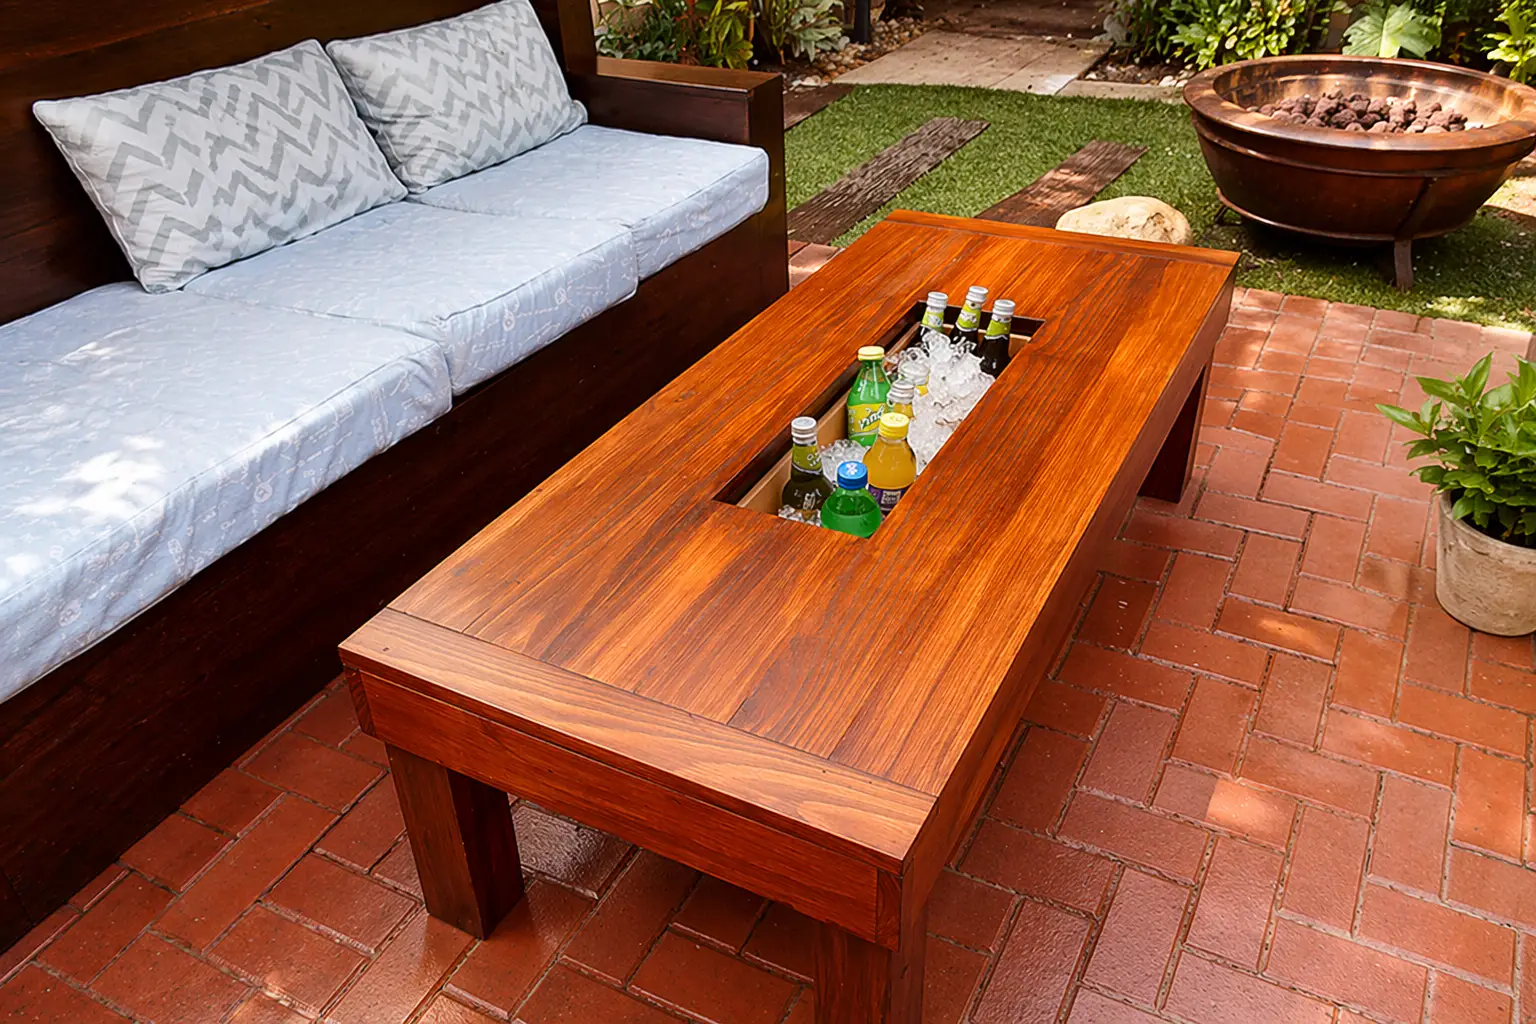
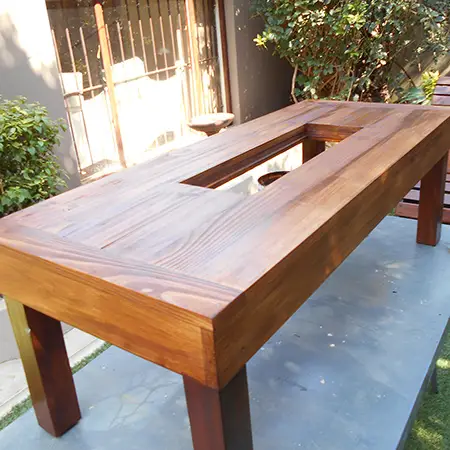
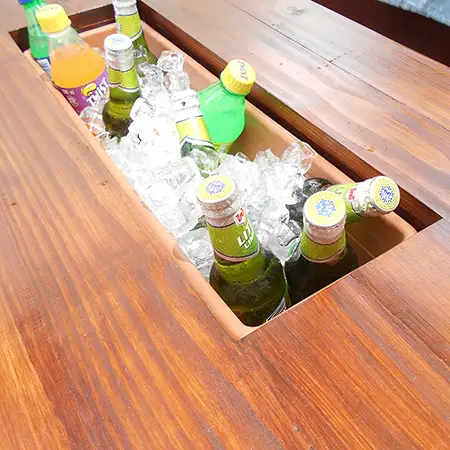
You know that feeling when the heat is crushing, the ice in the bucket melts faster than you can pour drinks, and your guests are already standing with empty glasses? That’s when an outdoor table with a built-in cooler takes the stage — the real hero of a summer party. This isn’t some complicated workshop project that needs a lathe. No, it’s simpler: in one weekend, with materials from a regular hardware store, you’ll build a table that keeps drinks cold all evening and looks like designer furniture for a terrace or poolside area.
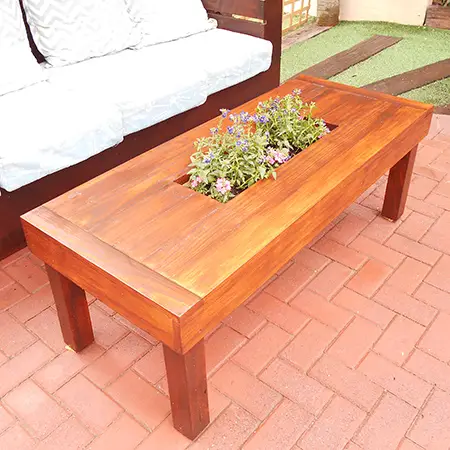
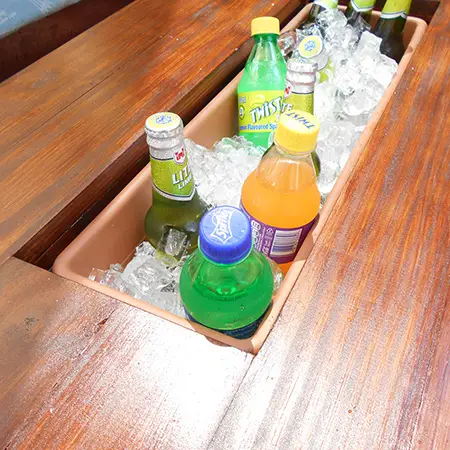
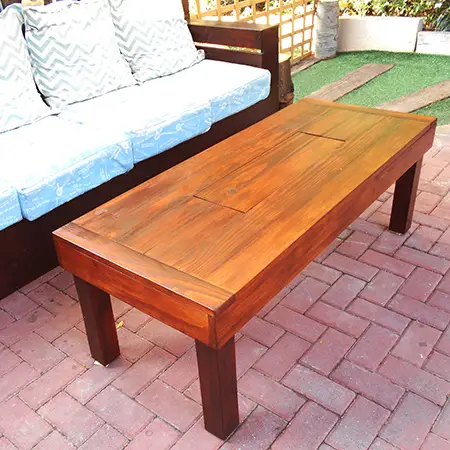
The secret is that instead of an expensive built-in refrigerator, we use rectangular plastic planters. They’re the right size, easy to clean, and cost pennies compared with specialized coolers. And when you don’t need ice — just cover the opening with a lid, set a second planter with bright flowers in place, and the table instantly becomes an ordinary garden piece. Two in one, like a Swiss Army knife for the yard.
What you’ll need for assembly
Before you grab the drill, gather everything in one place — that way you won’t be running around the garage at the most critical moment. Here’s the full list:
Lumber (pine)
- 8 boards 94 × 1800 mm, cut into:
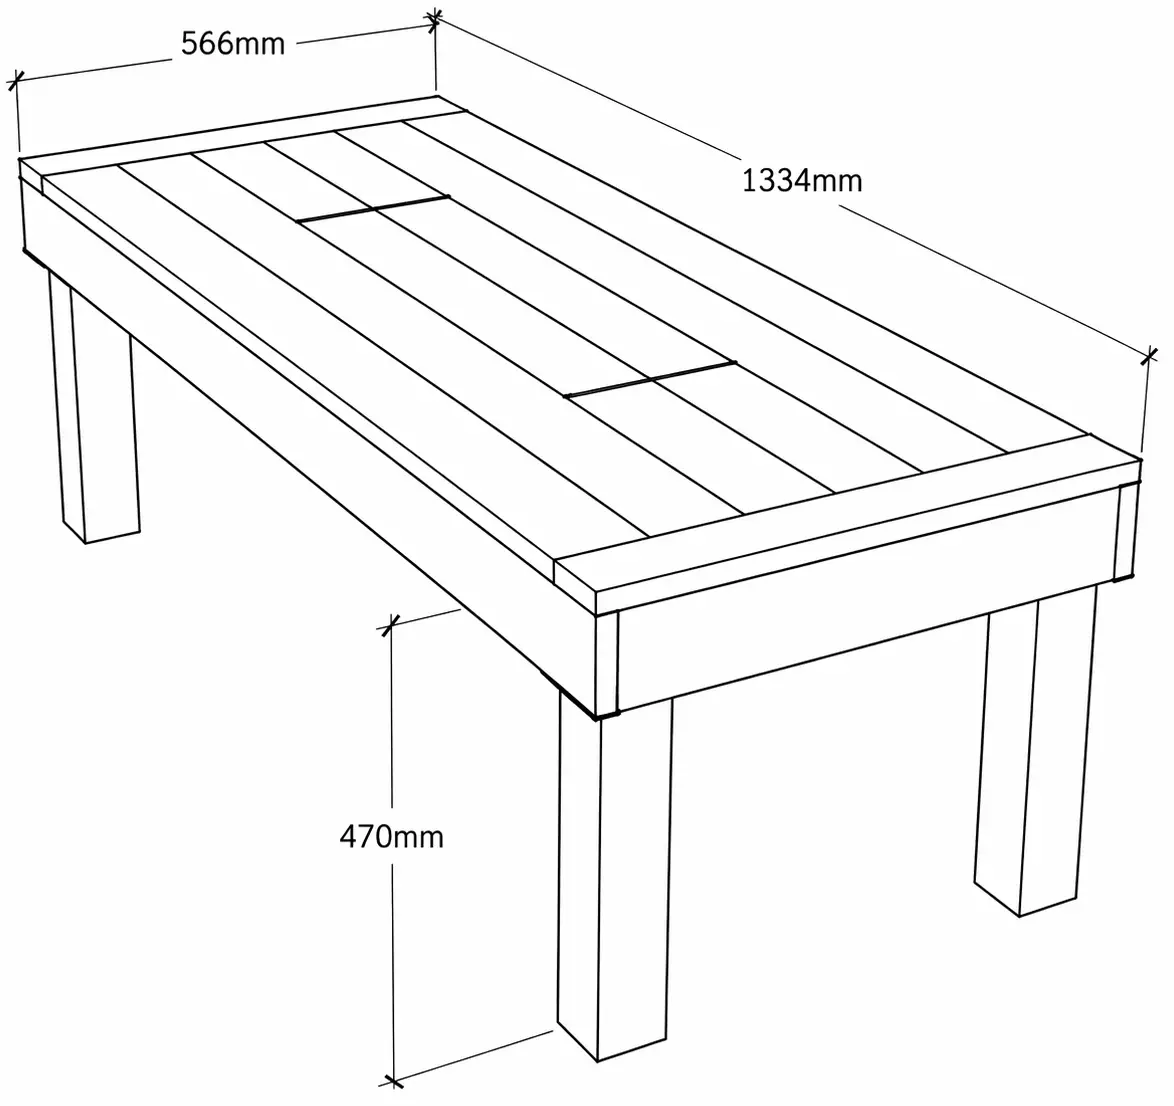
- 6 pcs. — 94 × 1200 mm (top tabletop slats)*
- 2 pcs. — 94 × 1334 mm (long side aprons)
- 2 pcs. — 94 × 530 mm (short aprons, trimmed to fit)
- 2 pcs. — 94 × 520 mm (cross supports under the slats)
- 2 boards 67 × 600 mm — end slats (trimmed to fit)
- 2 battens 32 × 32 × 1800 mm, from which you’ll get:
- 1 pc. — planter supports (trimmed to size)
- 8 pcs. — leg brackets
- 1 timber 67 × 67 × 1800 mm — cut into 4 legs
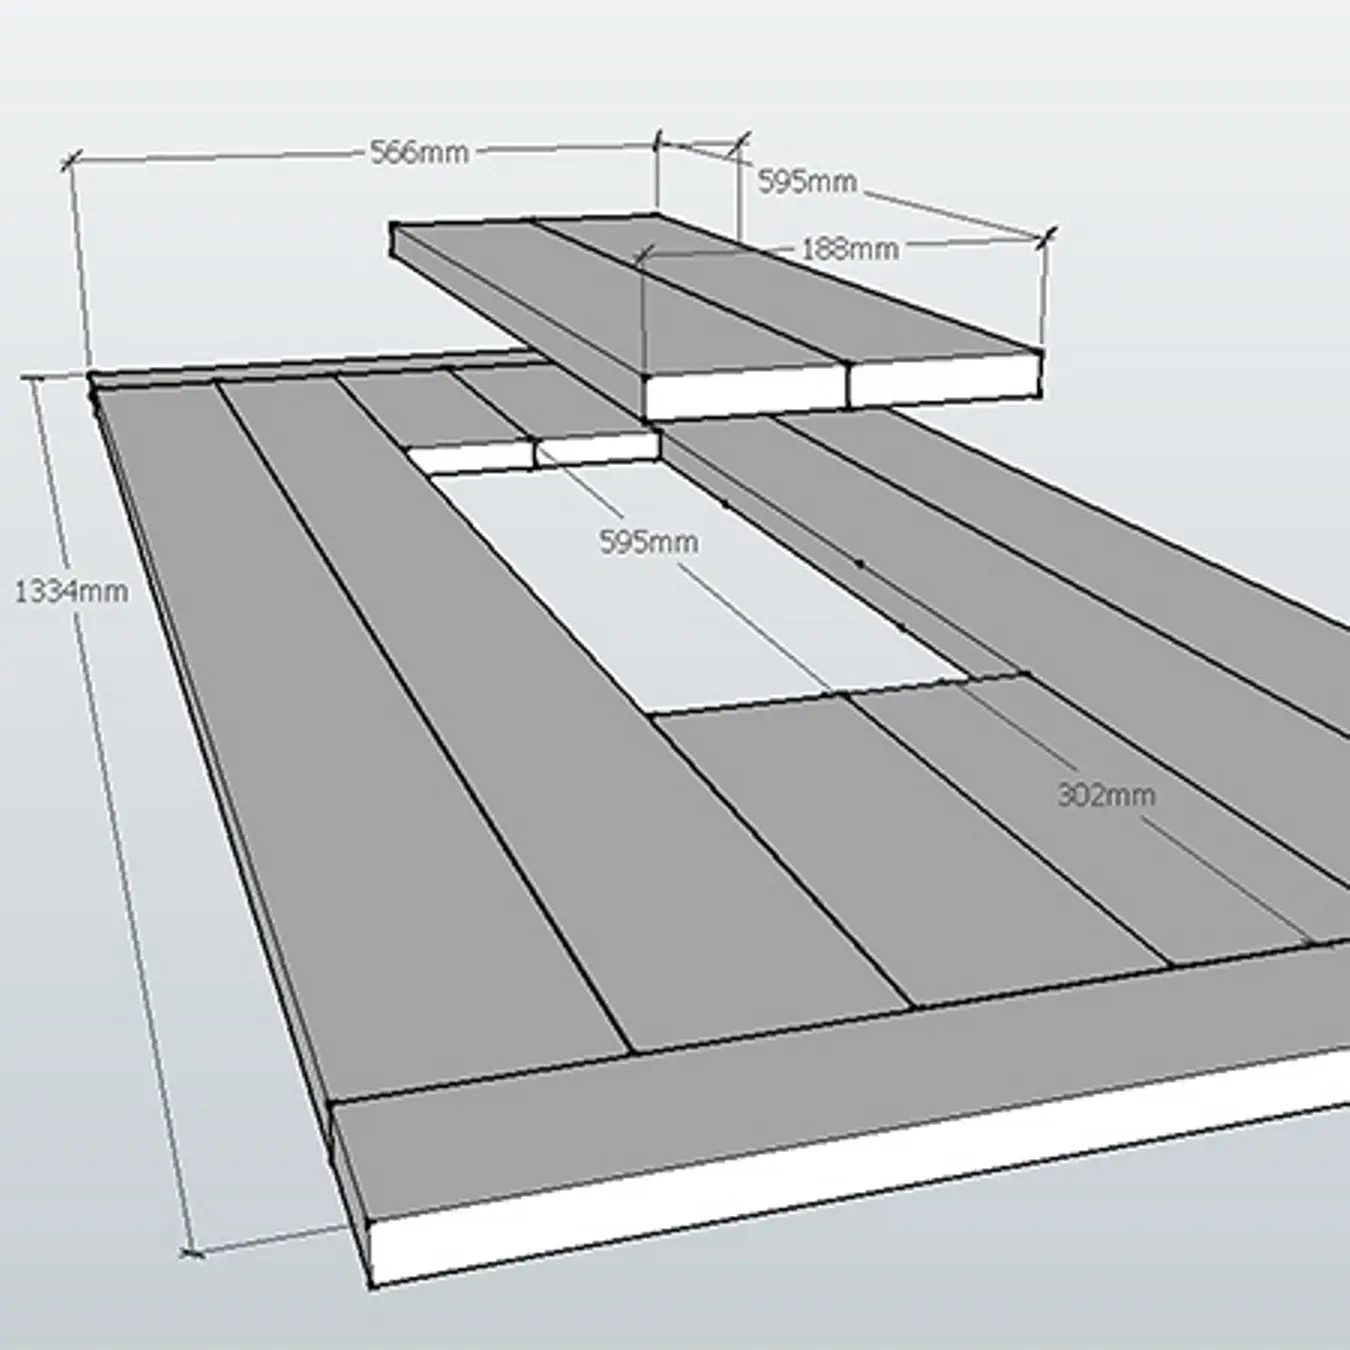
*Two center slats need to be shortened to fit the plastic planter. If you find a container of a different size — simply adjust the slat length. Flexibility is your friend.
Everything else
- 2 plastic planters 180 × 595 mm
- Wood glue
- Wood filler (matched to the future finish color)
- 35 mm and 40 mm screws
Tools you can’t do without
- Cordless drill-driver with a set of bits
- Jigsaw, circular saw, or table saw
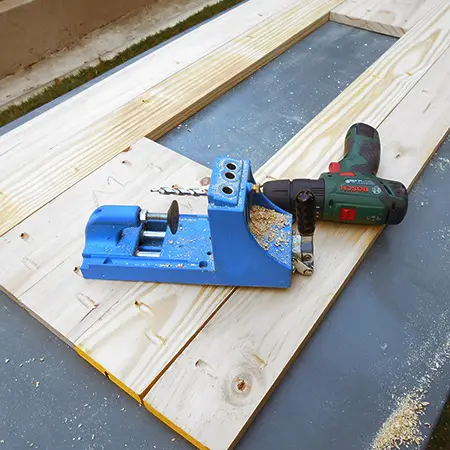
- Kreg pocket-hole jig
- Orbital sander with 120 and 240 grit discs
If you don’t have a Kreg pocket-hole jig yet — trust me, after this project you’ll understand why you need one. It’s like having a secret ingredient: joints come out strong, and the holes hide so well you can’t see them.
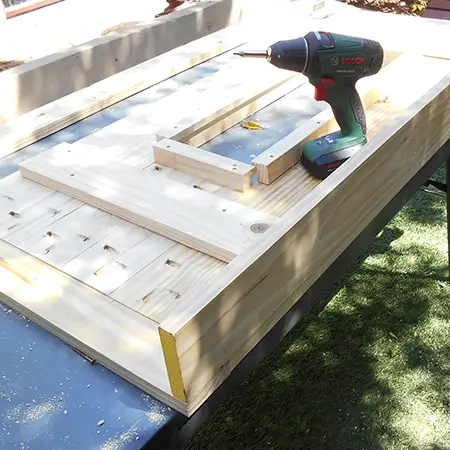
Step 1. Building the tabletop
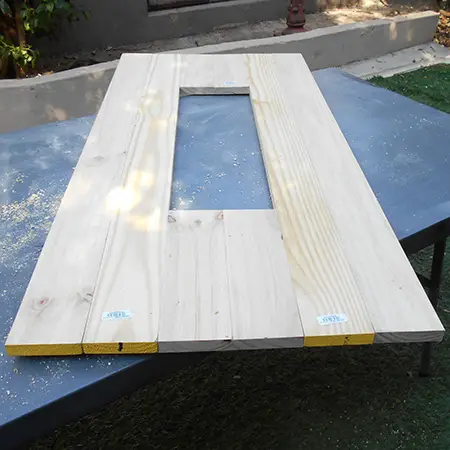

The tabletop is the face of the whole table. How neat the finished piece looks depends on it, so don’t rush.
- Join the slats with pocket holes. With a Kreg jig this is easier than it seems: drill about 6 holes in each slat, one roughly 50 mm from the edge. The wood goes together like a puzzle, only without visible nails.
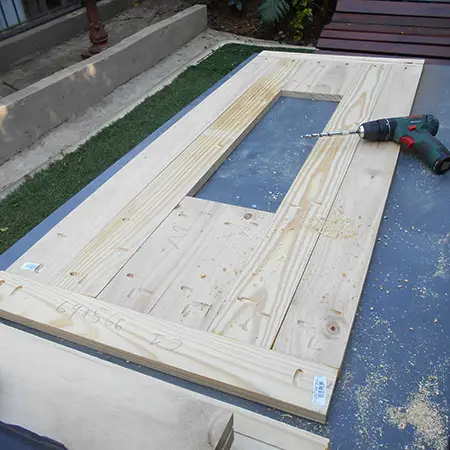
- Additional holes on the ends. Drill them along the edge of the slats and along one edge of the end boards — this joins all sections into a single plane.
- Fasten with 30 mm screws. Don’t overtighten: pine is soft and cracks easily. By the way, even without glue, pocket-screw joints are incredibly strong — proven in practice.
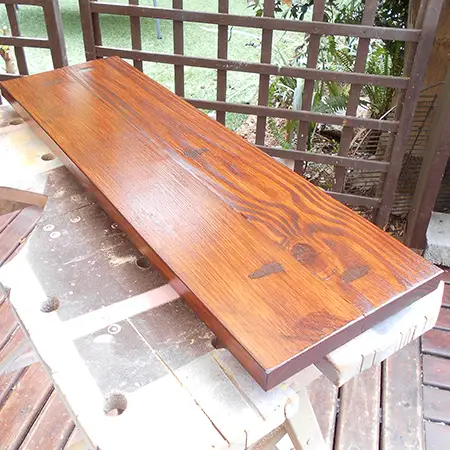
- Make the hatch lid. The two slats that cover the planter opening are also joined with Kreg. Fill the holes with filler matched to the future finish — and no one will guess there were ever holes there.
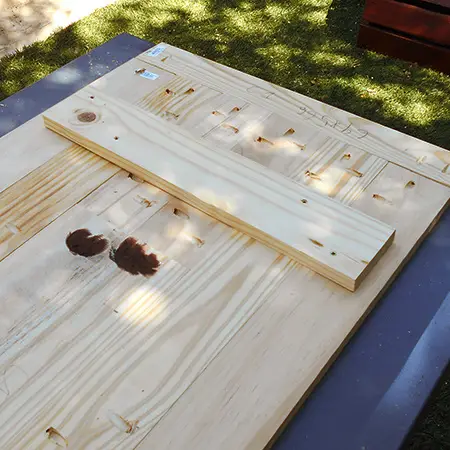
- Install the cross supports. Screw them on top of the joined slats with 30 mm screws. Technically optional, but why risk it? What if someone decides to sit on the table — you’ll be at ease.
Step 2. Frame, aprons, and legs
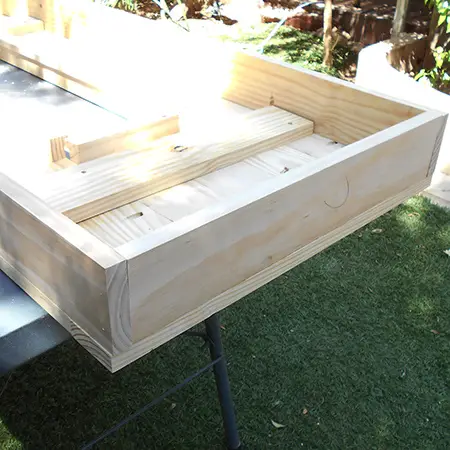


Now the tabletop is ready, and it’s time to give it a “skeleton” — supports that will hold the planter-ice bucket.
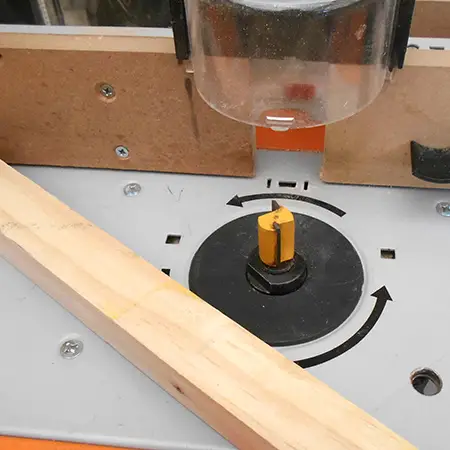
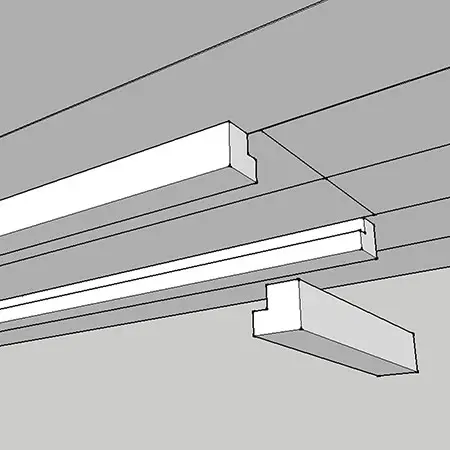
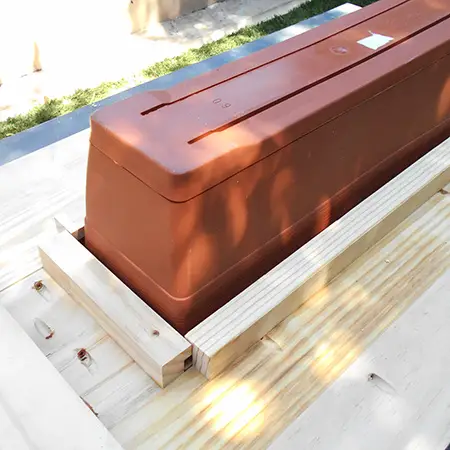
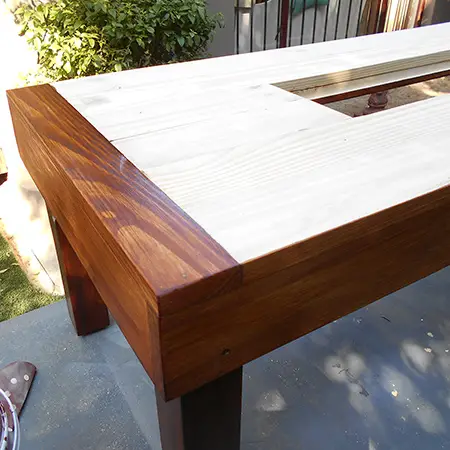
- Frame for the plastic planter. From 32 × 32 mm battens, make a frame with a rabbet (quarter) matching the height and width of the planter’s top edge. I cut the rabbet on a router table, but a handheld router works too. The idea is simple: the container sits below the tabletop surface, and the lid lies on top — flush, without gaps. Didn’t find a planter exactly 180 × 595 mm? Adjust the center slats or change the support size. The main thing is that the container fits snugly.
- Attach the frame from below. The frame overhangs into the opening and fastens to the underside of the tabletop. First dry-fit the planter, make sure everything goes in without force, and only then screw it on with 40 mm screws along the full length.
- Long and short aprons. Side boards sometimes arrive with slight bowing — one of mine was worse than the other. The fix? Add a couple more pocket holes along the board to pull it straight. First secure the end holes, ask a helper to press the bowed board flat, then you tighten the rest. Works like tire mounting, only with wood.
- Short aprons — trim to fit. Measure, cut, and screw them underneath to the slats and long aprons through pocket holes.
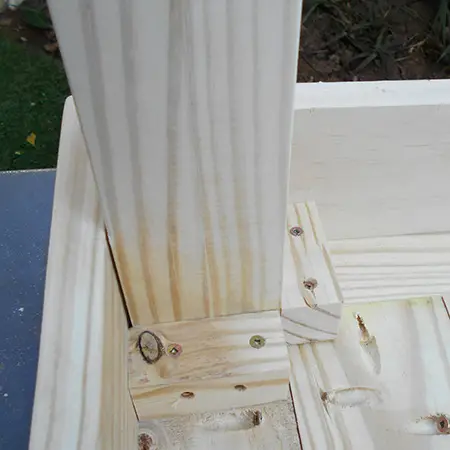
- Legs of equal length. Know the rule “measure seven times, cut once”? For table legs I’d say: measure twice, then once more. Evenly cut legs are the guarantee that the table won’t wobble like a ship in a storm. Attach them with small brackets: one end to the underside of the tabletop, the other to the leg.
Step 3. Sanding and finish coating
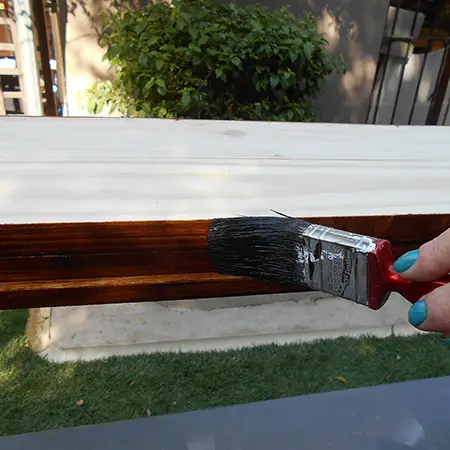
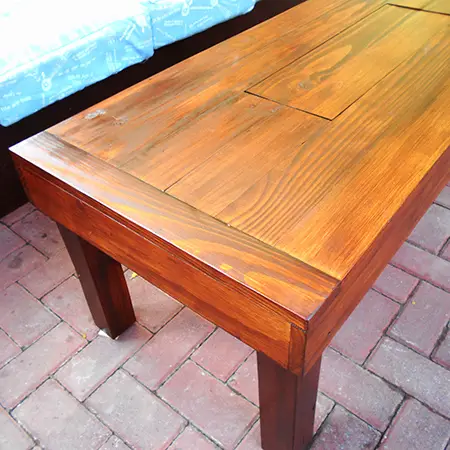
Assembly is done — now make the table not only work, but please the eye for years.
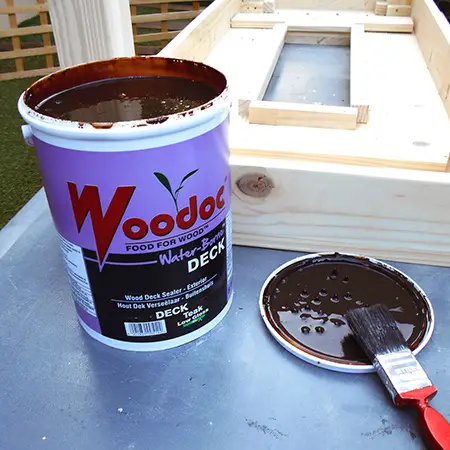
After sanding, I coated the table with Woodoc Water Borne Deck in Teak — and honestly, it’s my new favorite for outdoor furniture. It goes on easily, dries quickly, and it’s water-based rather than solvent-based, which is much nicer for you and the air. I’ve already used the same product on a garden bench and sofa — excellent results: easy application, simple cleanup, and you can apply several coats in one day.
How to apply the finish correctly
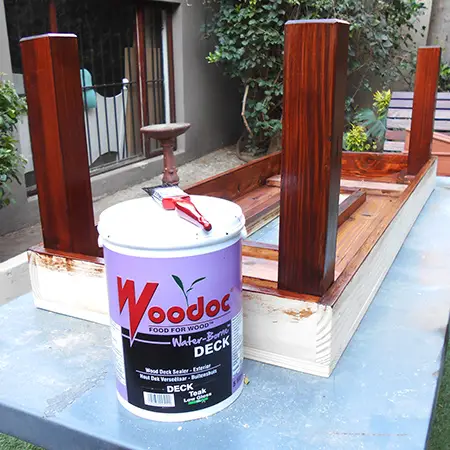
- Start with the underside of the tabletop and the legs. Coat the leg ends and cut edges especially generously — they “drink” finish the most.
- Follow the package instructions: three coats in total. Between the first and second — light sanding.
- Flip the table. Treat the aprons first, then the end slats.
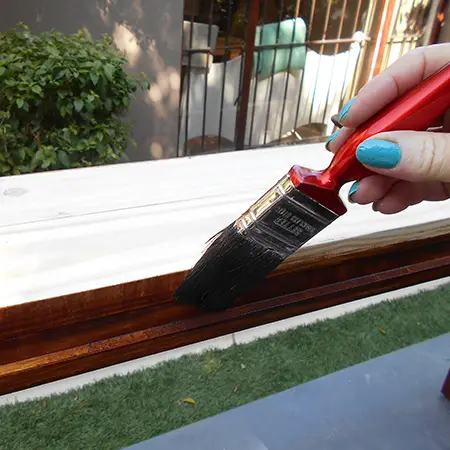
- On the planter frame, work carefully: along the edge — light brush strokes so you don’t hit the tabletop top. With the grain — spread evenly.
- After sanding filler on the hatch lid, apply Woodoc to it as well.
Helpful tips that will save your nerves
- Dry-fit before final fastening — the golden rule. Planter, lid, frame: everything should go in and out without improvised tools.
- Two planters — two modes. One for ice and drinks, the second with flowers when you don’t need a cooler. The table lives a double life.
- Don’t skimp on sanding. A coarse 120 grit disc removes scratches, 240 grit brings the surface to velvet. The difference shows right after the first coat of finish.
- Store the lid under a roof if the table stays outdoors year-round. Wood loves care just as much as you love cold beer in the heat.
Frequently asked questions
How long will the whole project take?
If the materials are already cut — you can realistically finish in one weekend. Tabletop assembly — a few hours, frame and legs — another half day, coating with drying — the second day.
Can I use a different wood?
Yes, but pine is the best balance of price and ease of work. For a more humid climate, consider thermally modified wood or larch — they resist rot longer.
What if the planter is a different size?
Adjust the width of the center opening in the tabletop and the support frame dimensions. The main thing is that the container sits flush and the lid lies in the same plane as the slats.
Do I need drainage in the planter?
For ice — no, but after the party pour out the water and rinse the planter. For flower mode — definitely drill drainage holes in the bottom.
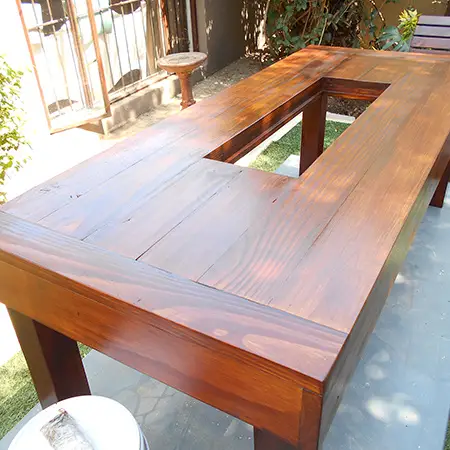
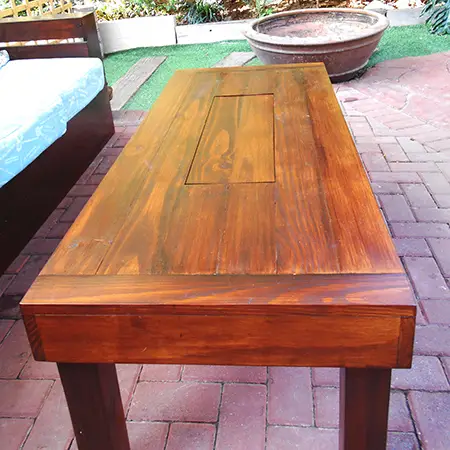
Bottom line: a table that works for your relaxation
That’s it — you now have an outdoor table with a built-in ice bucket that you made yourself. No magic, just wood, a couple of planters, and a weekend well spent. In summer it keeps drinks ice-cold, in spring and fall it decorates the terrace with flowers, and in winter it reminds you: hot weather is coming soon, and you’ll be ready.
If you build this table — share your result. And if you get stuck on a step, reread the tips section: most problems are solved with a simple dry-fit and a little more patience. Good luck, and may the ice melt slower than the stories you tell around this table!
Modelist-Konstruktor No. 6’2026, A. DANILENKO, Zhytomyr
Recommend to read
 EXTENSION CABLE-CARRYING
At home we often have to work with electrical tools and appliances (electric, eletronica, furnace, etc.) at a considerable distance from the outlet. And if the extension wire has a... ZAZ: FROM “TAVRII” TO “SLAVUTA”
Did you know that the first domestic car, which became the hero of a thousand jokes became legendary minicar, created at Zaporizhia automobile building plant? If a quick "flip through" a...
