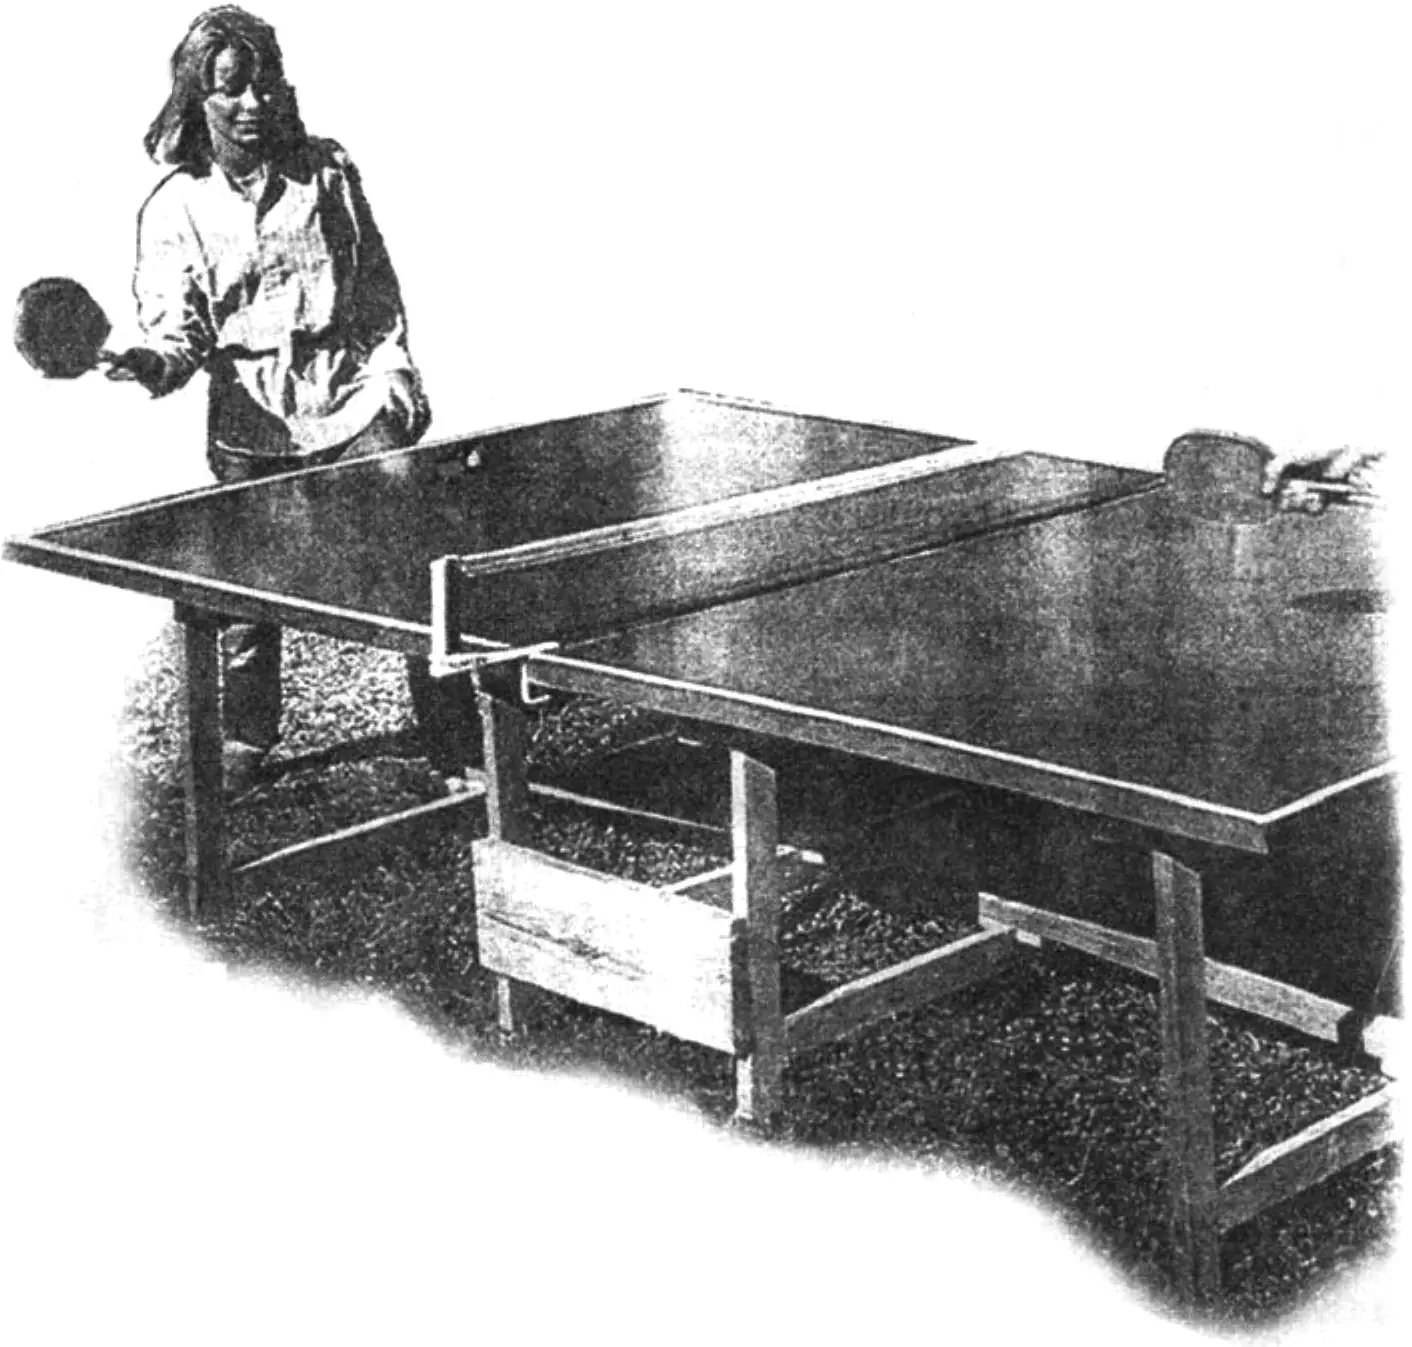
Homemade table tennis tables in a yard are usually made stationary: crude ones, from boards or even from concrete slabs — such structures can be called a table only conditionally. And they are not protected from precipitation, constantly remaining in the open air.
Imported folding tables have now appeared on sale; they “break” in the middle, turning into a compact flat package that does not take up much space, and they are also lightweight, which makes it possible, when necessary, to put them indoors for storage or shelter from bad weather.
The design proposed by the Hungarian magazine “Ezermester,” which can be made with your own hands, has the same advantages.
The table tennis table consists of simple elements for which no scarce materials will be required, and even teenagers — for whom it is, in fact, intended — can assemble them. Wooden beams, boards, and chipboard — that is all that will be needed for such a table, which can successfully be used both in a city yard and at a country plot.
Table base
The supporting part of the playing surface (or tabletop) is, in essence, three frame structures consisting of four identical (modular) elements in the form of an inverted “P.” Two of them are rigidly connected to each other, forming the main central support; the other two are, in effect, end legs for each half of the tabletop.
A modular element consists of two legs with a cross section of 40×30 mm and a height of 700 mm, connected in the lower part by a longitudinal crossbar of the same beam, 1360 mm long. And into the upper part of each beam a board bracket of the hinge platform is inset, which is attached directly to the lower surface of the tabletop.
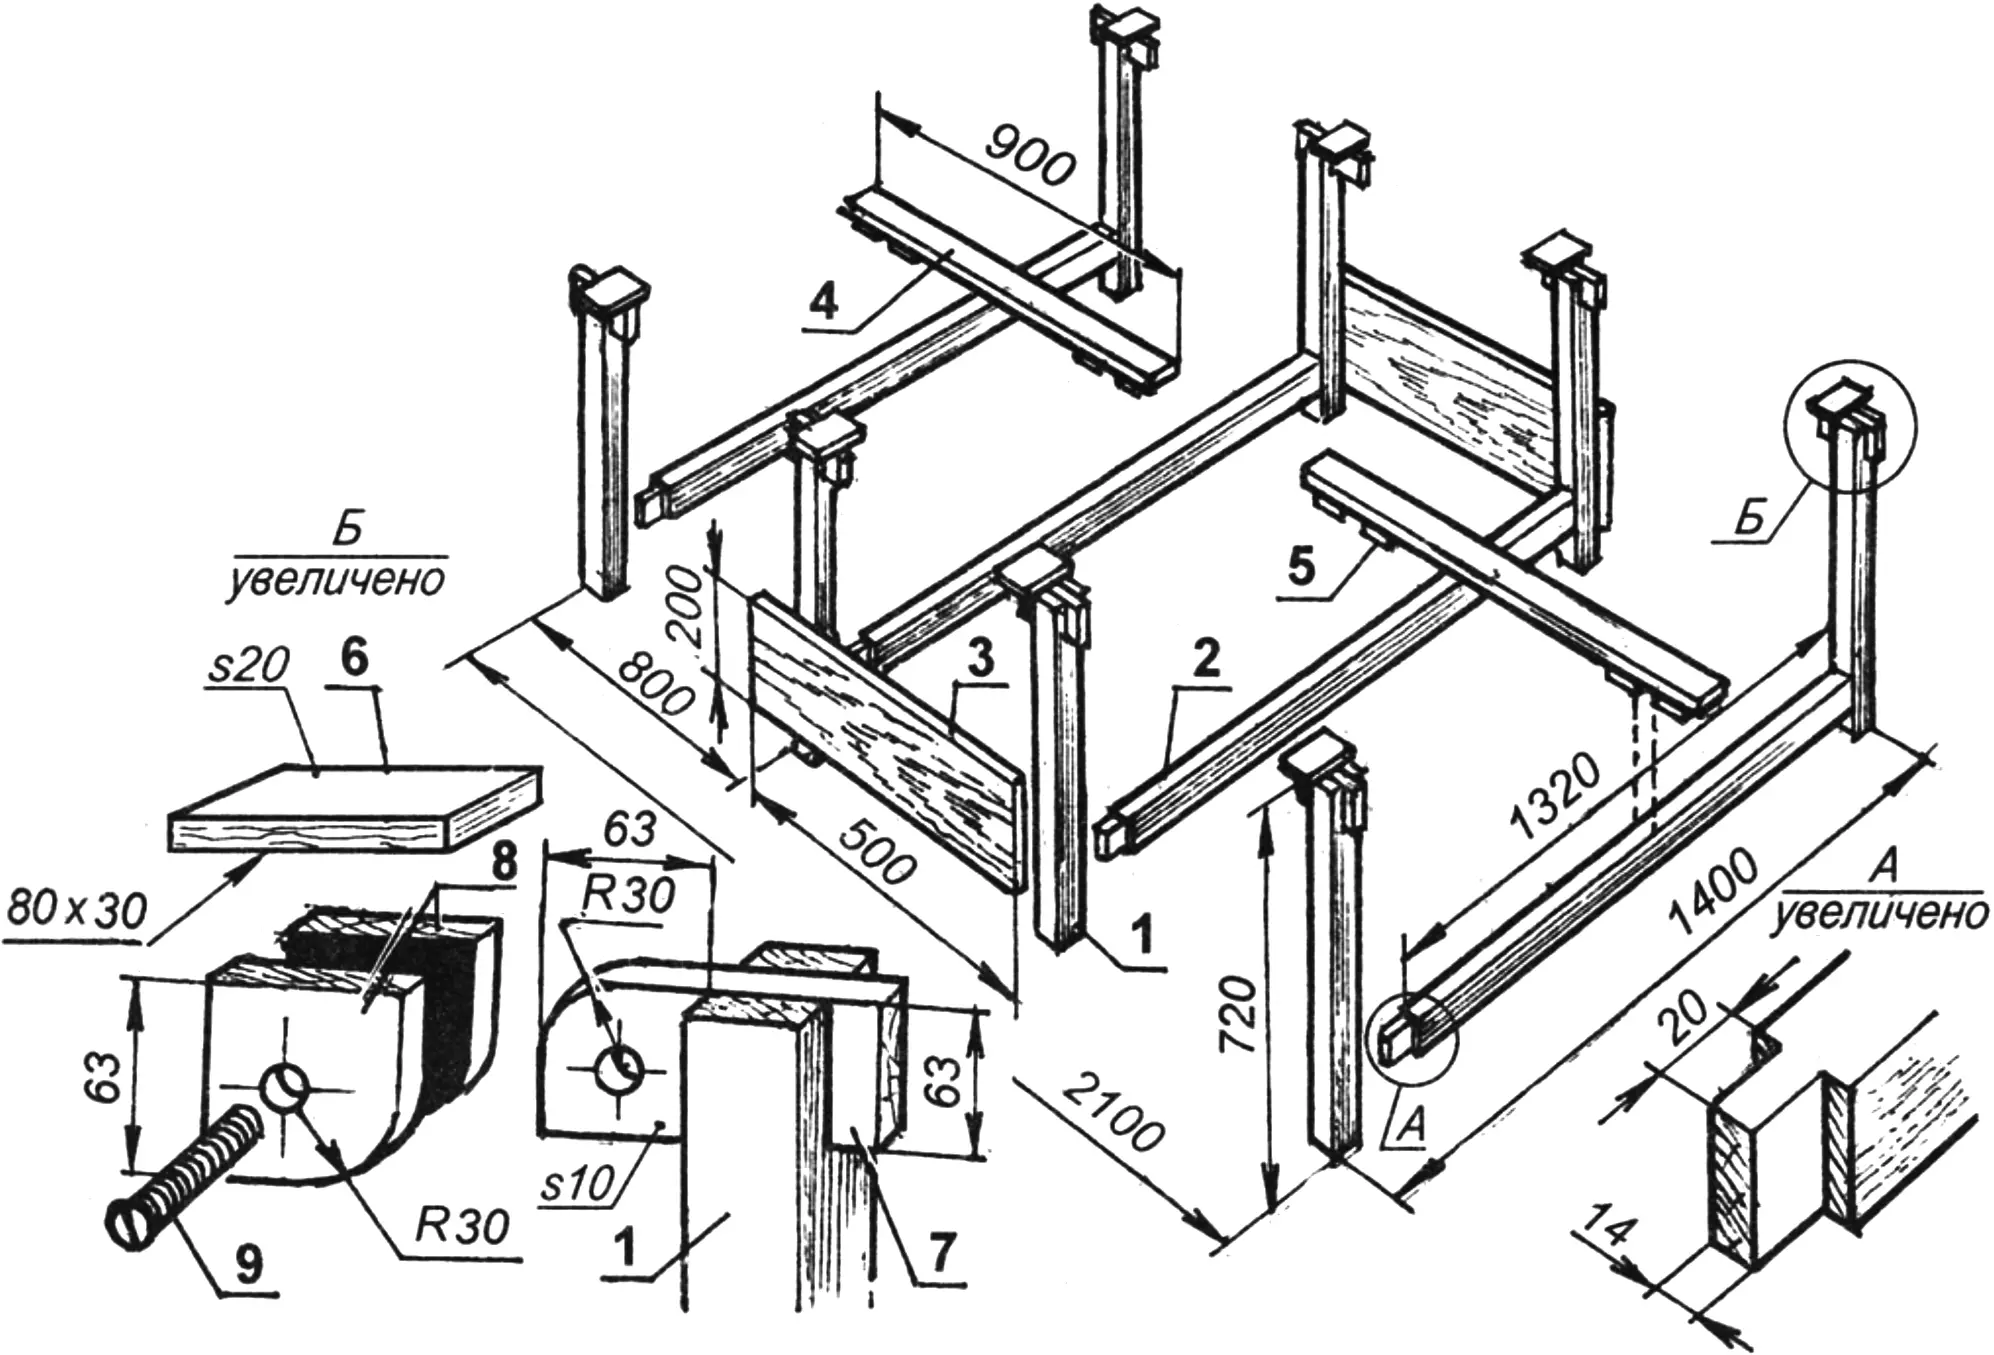
1 — leg (beam 30×40, L720, 8 pcs.); 2 — crossbar (beam 30×40, L1360, 4 pcs.); 3 — side tie (board 20×200, L500, 2 pcs.); 4 — brace (beam 30×40, L900, 2 pcs.); 5 — locking braces (beam 20×40, 8 pcs.); 6 — hinge platforms (board s20, 80×30, 8 pcs.); 7 — hinge platform bracket (board, plywood s10, 8 pcs.); 8 — hinge platform lug (board, plywood s10, 16 pcs.); 9 — hinge pin (M8 bolt with wing nut, 8 pcs.)
Two such modules are connected to each other by side crossbars made of boards measuring 500×200 mm and 20 mm thick, thanks to which a rigid frame structure is formed, serving as the central supporting part of the table.
Two more modules are spread from the center toward the edges and are also attached by their hinge platforms to the lower surface of each half of the tabletop — these are its legs. In the unfolded state of the table, they are secured by overlay braces made of beams; two locking plates are attached along the edges on the underside of these braces: with them the braces are laid on the crossbars of the central support and of the leg itself so that the latter cannot turn sideways.
Tabletop
It consists of two equal halves, the joint of which falls on the middle of the central support. Each half is a chipboard panel whose upper surface has a plastic coating. If there is none, then the tabletop is treated with linseed oil and, after drying, coated in several layers with oil paint (green, brown, or black). Along the edges of the outer perimeter, slat framing of the halves of the playing surface is made.
As already mentioned, hinge platforms of the supporting part of the playing surface are attached to the underside of the tabletop. For this, epoxy glue and screws of the appropriate length are used — such that they do not go all the way through and do not damage the playing surface.
Assembly
First, the supporting modules themselves are assembled with their crossbars and inset brackets; the braces are prepared. Then two supporting modules are connected by board crossbars into a rigid central support. According to preliminary markings, hinge platforms are installed on glue and screws on the underside of each half of the playing surface.
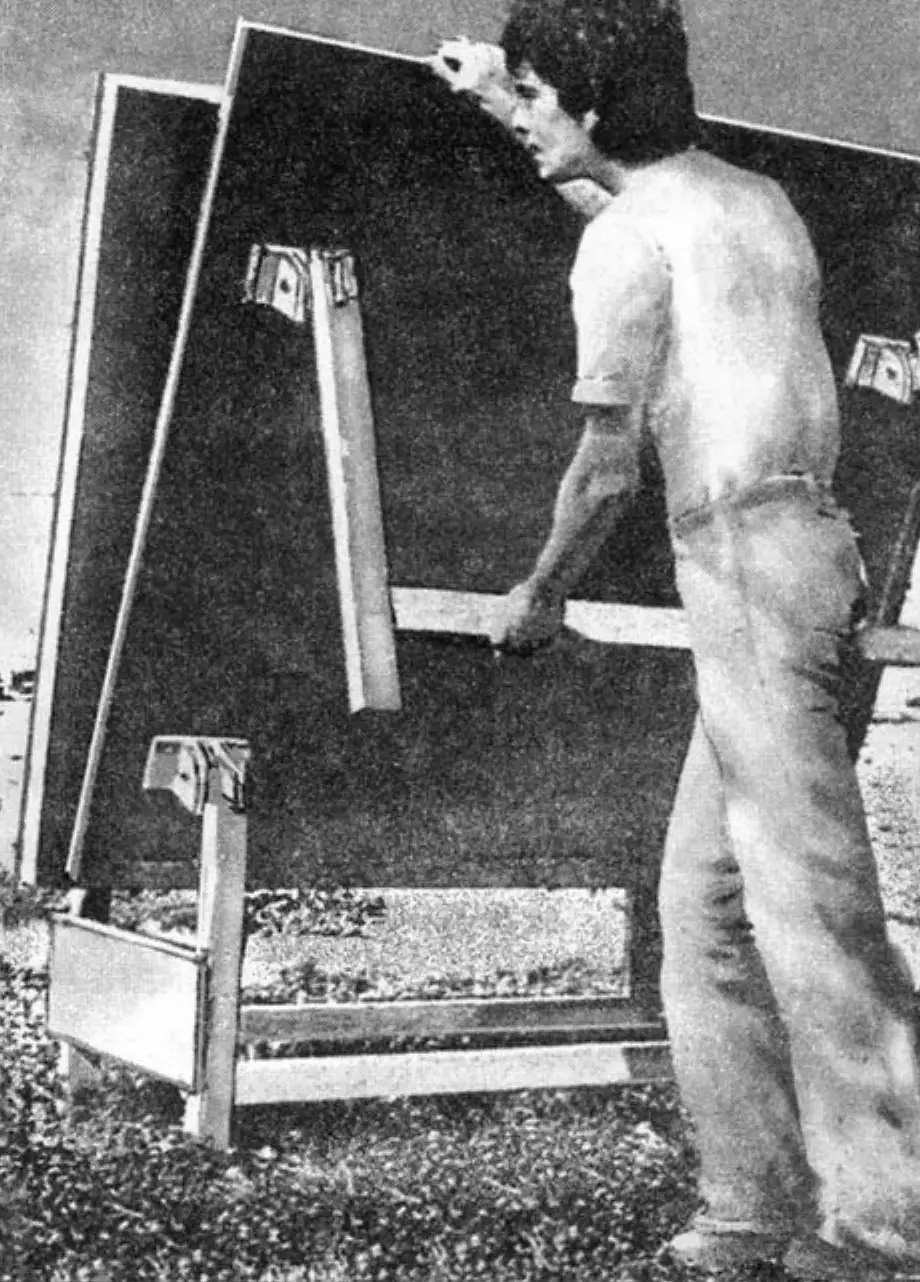
After the glue has hardened, you can proceed to the final assembly of the table: each half is connected by its hinge platforms to the corresponding brackets, and they are fastened with bolts (preferably with wing nuts for convenient assembly and disassembly). This is easier to do with the halves of the tabletop in a vertical position.
After assembly is complete, the halves of the tabletop are lowered onto their supports — the playing surface is ready. It remains to fix the overlays on the crossbars of the supports, and you can stretch the net for play.
«Modelist-Constructor» No. 6’2007
Recommend to read
 AN EXPENSIVE EXPERIMENT
Bomber XB-70 VALKYRIE. The first jet bomber the BOEING b-47 came to the command of the U.S. air force in late 1951. However, the aircraft with maximum payload of about 10 tons could... DURABLE INSOLE
In rubber boots in the cold season warm insoles my design is simply irreplaceable. They differ from the ordinary in that, first, layered; second, in covers. After the contamination...
