The biggest drawback of a shell garage is its price: with delivery and assembly it can reach $1000. The cost of all materials is about $400. There is a direct (and not insignificant) benefit to building the garage with your own hands! A financial plan emerged immediately: buy materials gradually, depending on available funds, and break the work into stages. At the same time, methodically cut the purchased material into blanks and weld frames for wall and gate panels. But such phased work required fairly detailed drawings, with the help of which both the garage design and the need for necessary materials were determined.
It was planned to purchase galvanized steel corrugated sheets and break-stem rivets last and clad the panel walls with them.
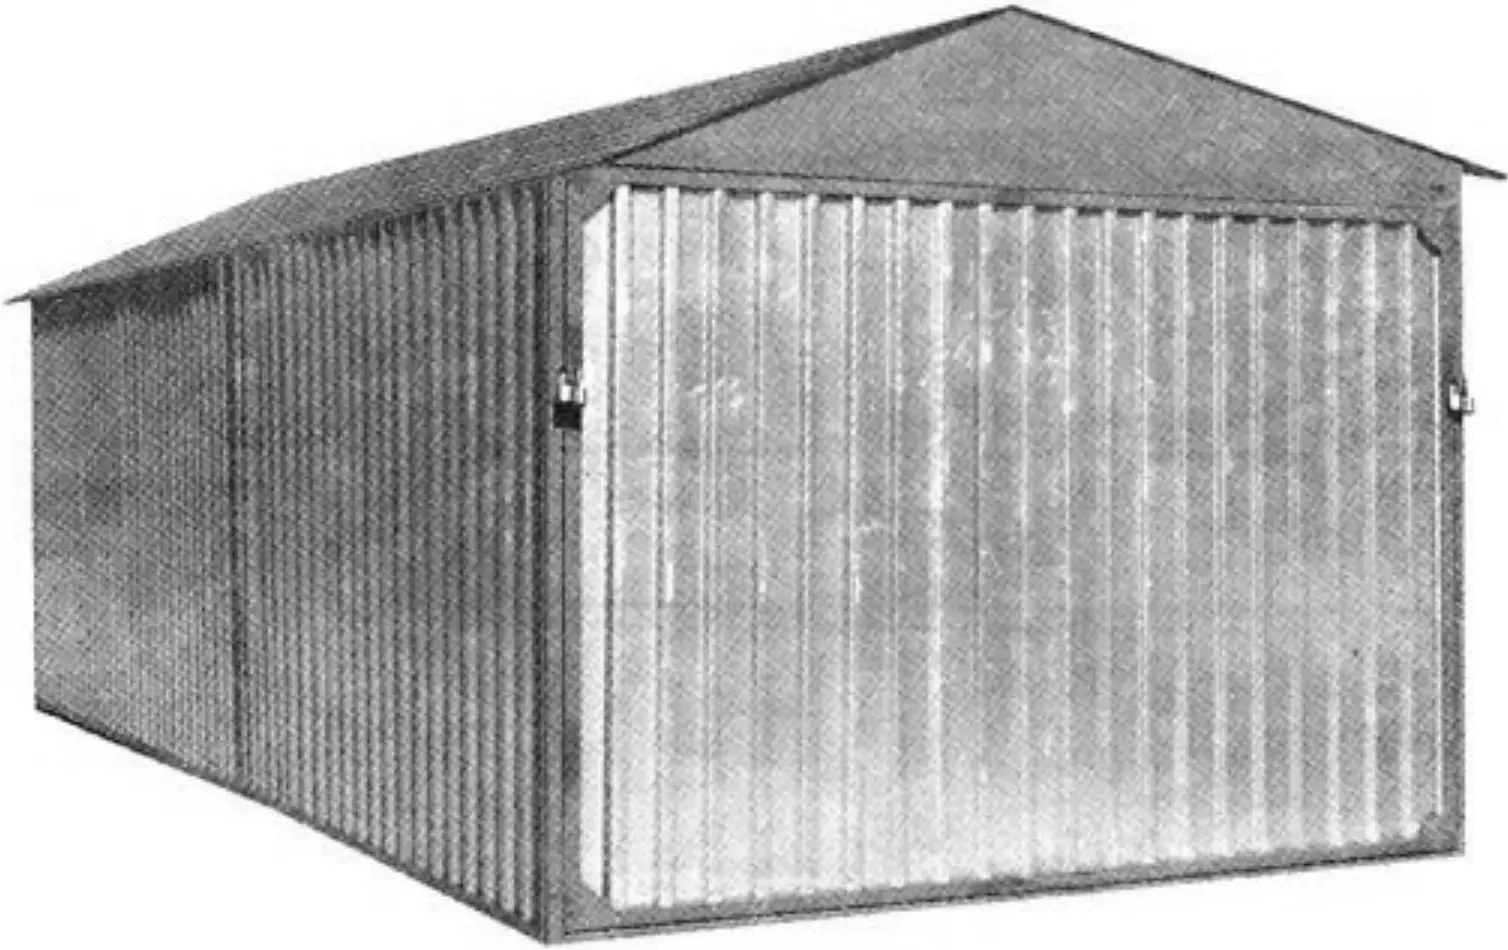
The most attractive feature of the proposed modular garage is the gate panel that rises upward with a light push of the hand!


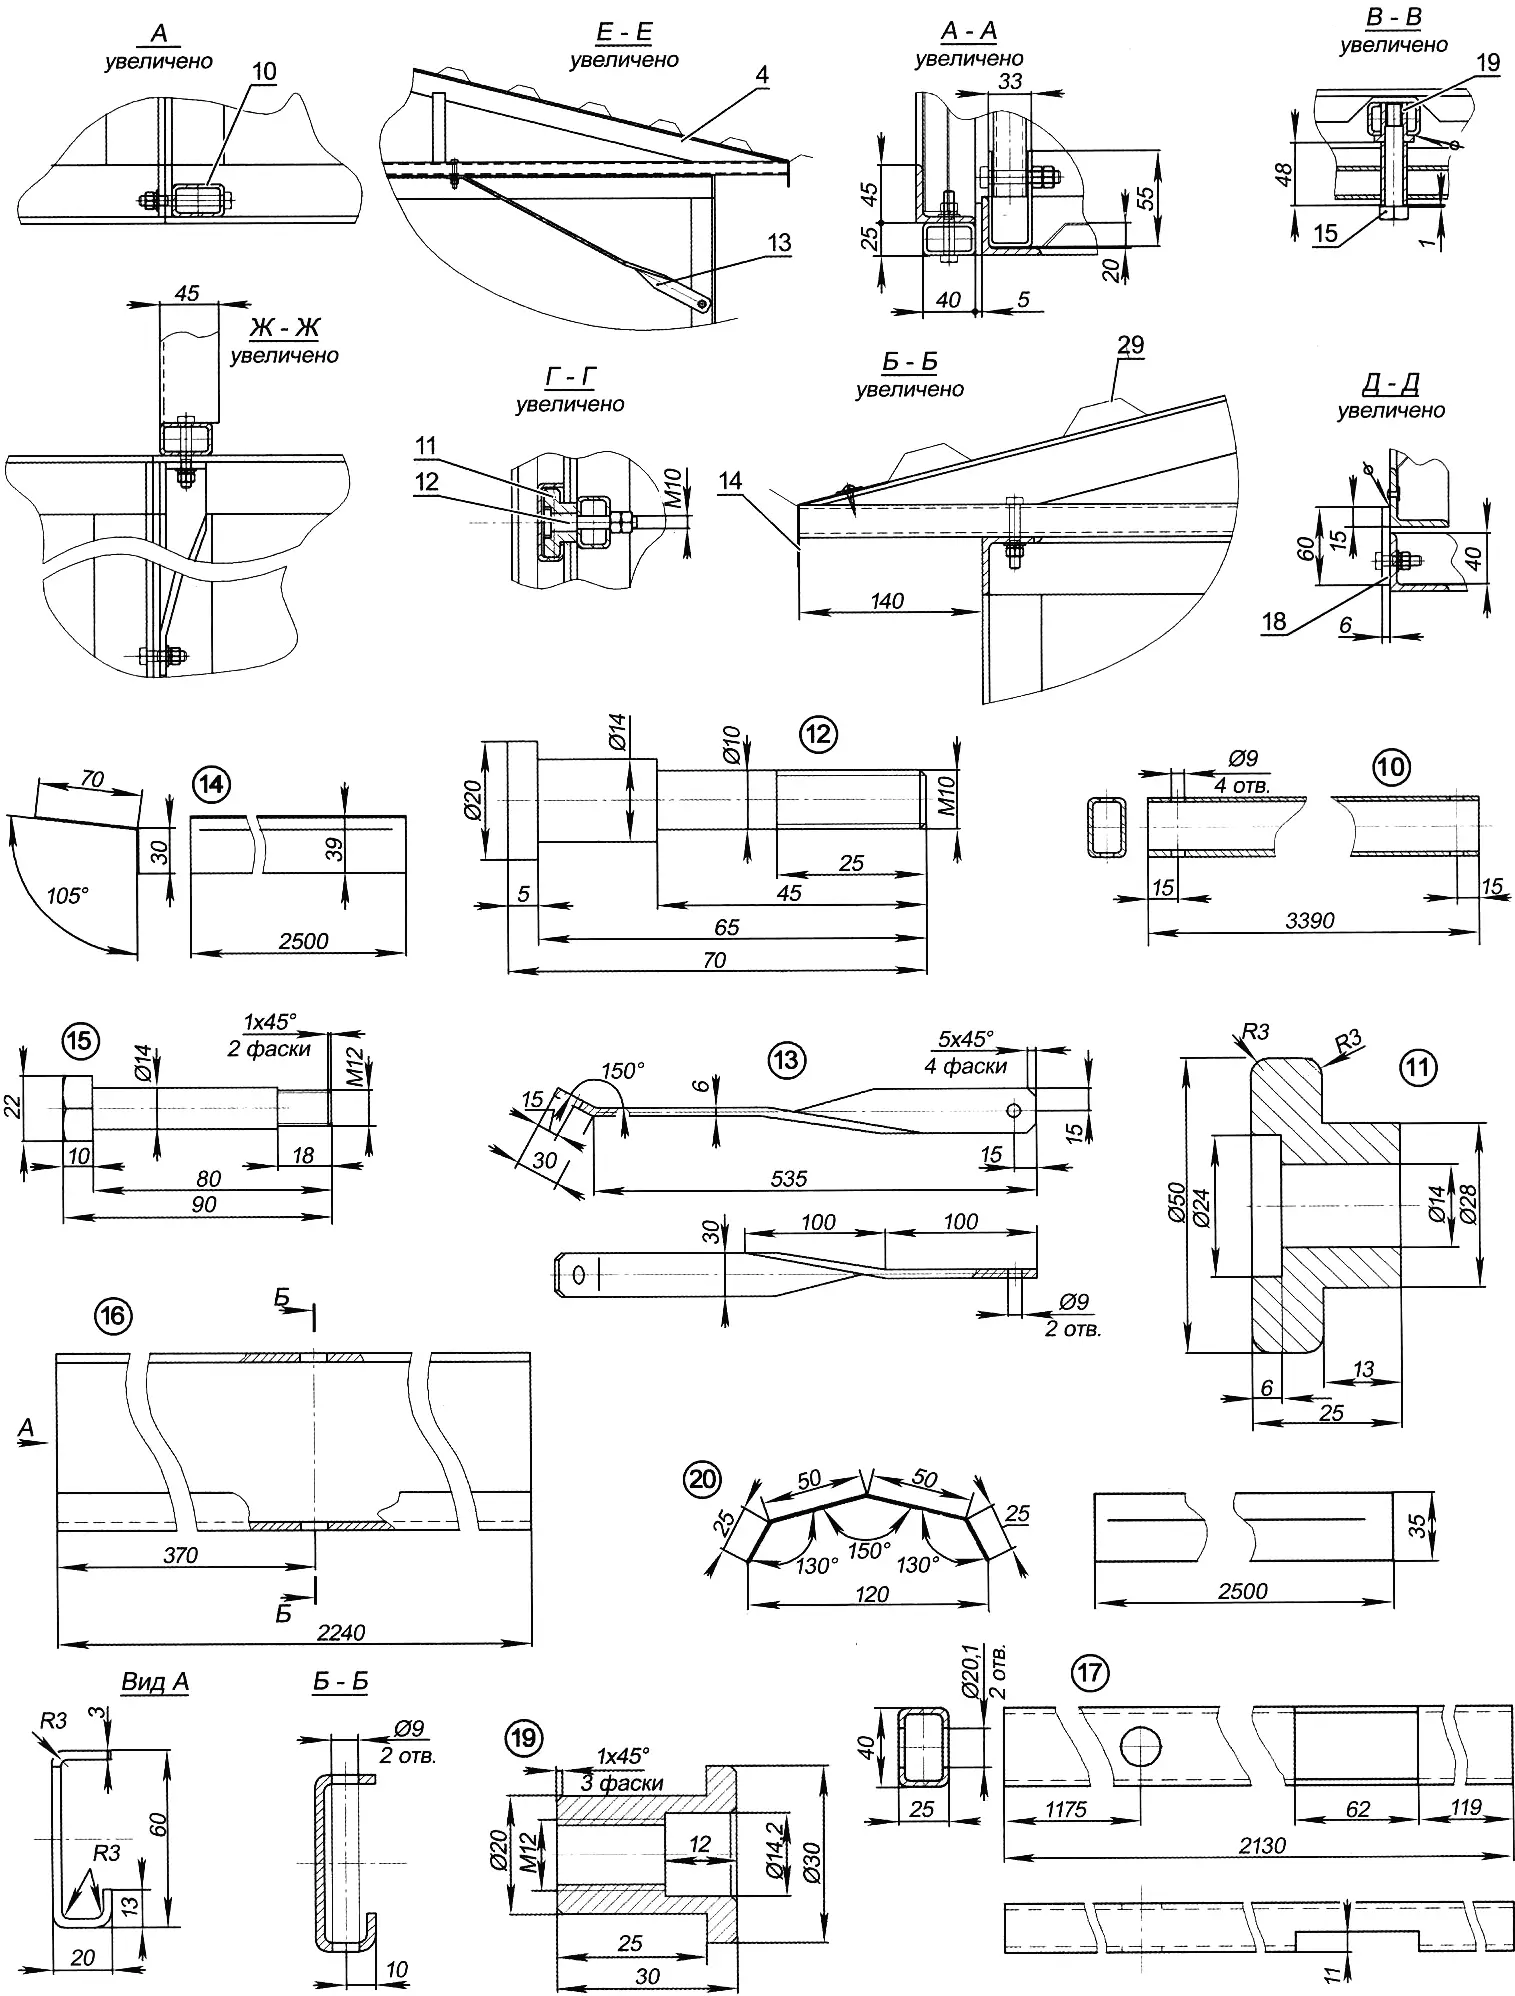
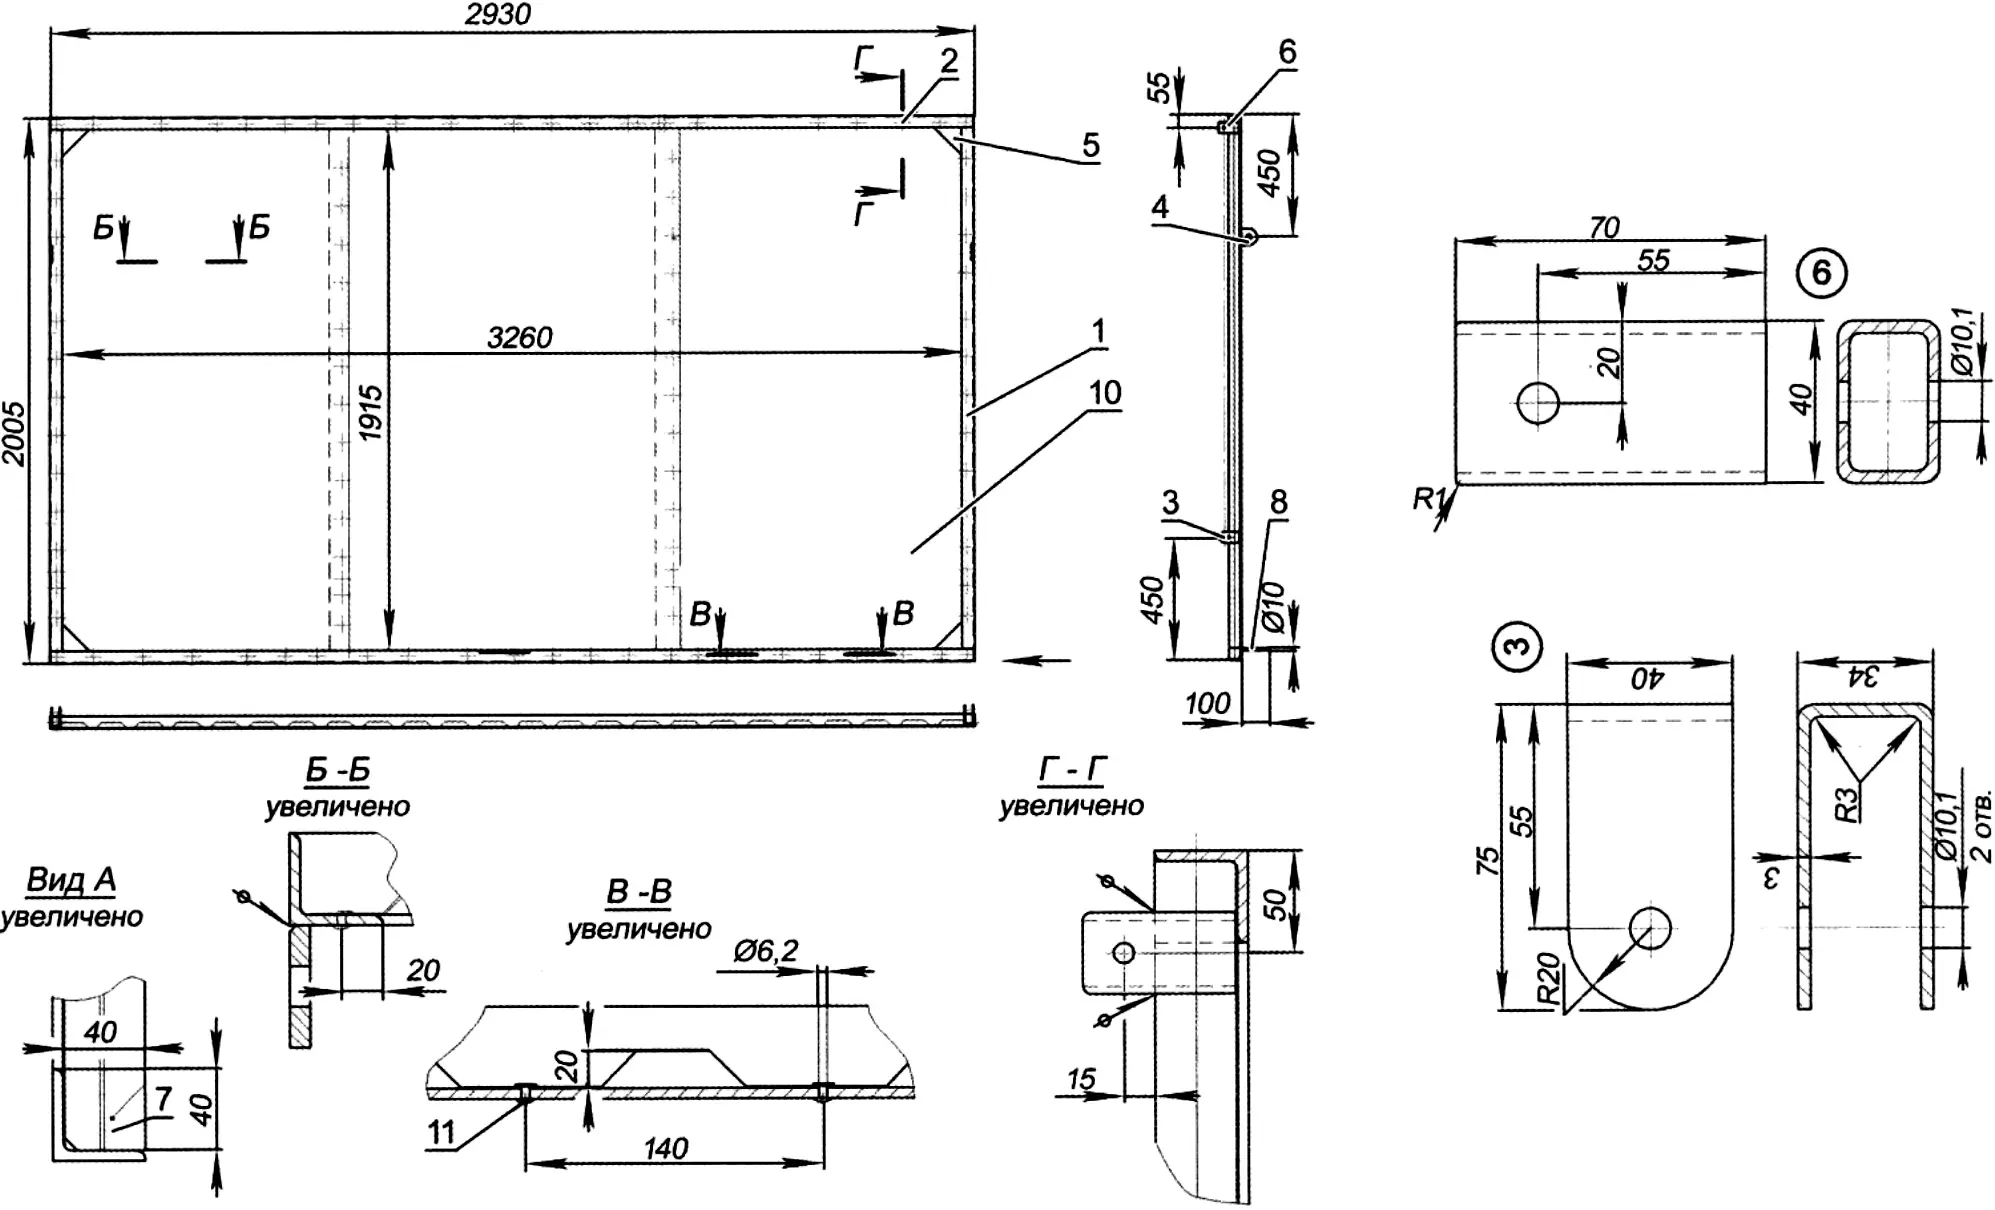
1 — panel (5 pcs.); 2 — front frame; 3 — lift-up gates; 4 — roof truss; 5 — lever; 6 — roller guide (2 pcs.); 7 — counterweight lever post (2 pcs.); 8 — strip covering the vertical joint (2 pcs.); 9 — lever axle bushing (2 pcs.); 10 — middle spacer; 11 — roller (2 pcs.); 12 — roller axle (2 pcs.); 13 — roof and side wall tie (2 pcs.); 14 — eaves (6 pcs.); 15 — lever axle (2 pcs.); 16 — guide (2 pcs.); 17 — roofing (L=7000); 18 — strip (2 pcs.); 19 — bushing (2 pcs.); 20 — ridge cap
Modularity lies in the fact that panels are manufactured in advance, and their dimensions (or quantity) can be used to adjust the length, width, and height of the garage.
A real project may also have a different roof shape — from flat to oval and mansard. The garage structure is not complicated, but it requires explanation. To build it you will need: angle 45x45x5 mm (94 m); rectangular tube 40x25x3 mm (57 m); strip 50×5 mm (10 m); and metal profile C1100x20x0.7 mm for 18 blanks — 2120 mm long and four — 7000 mm long.
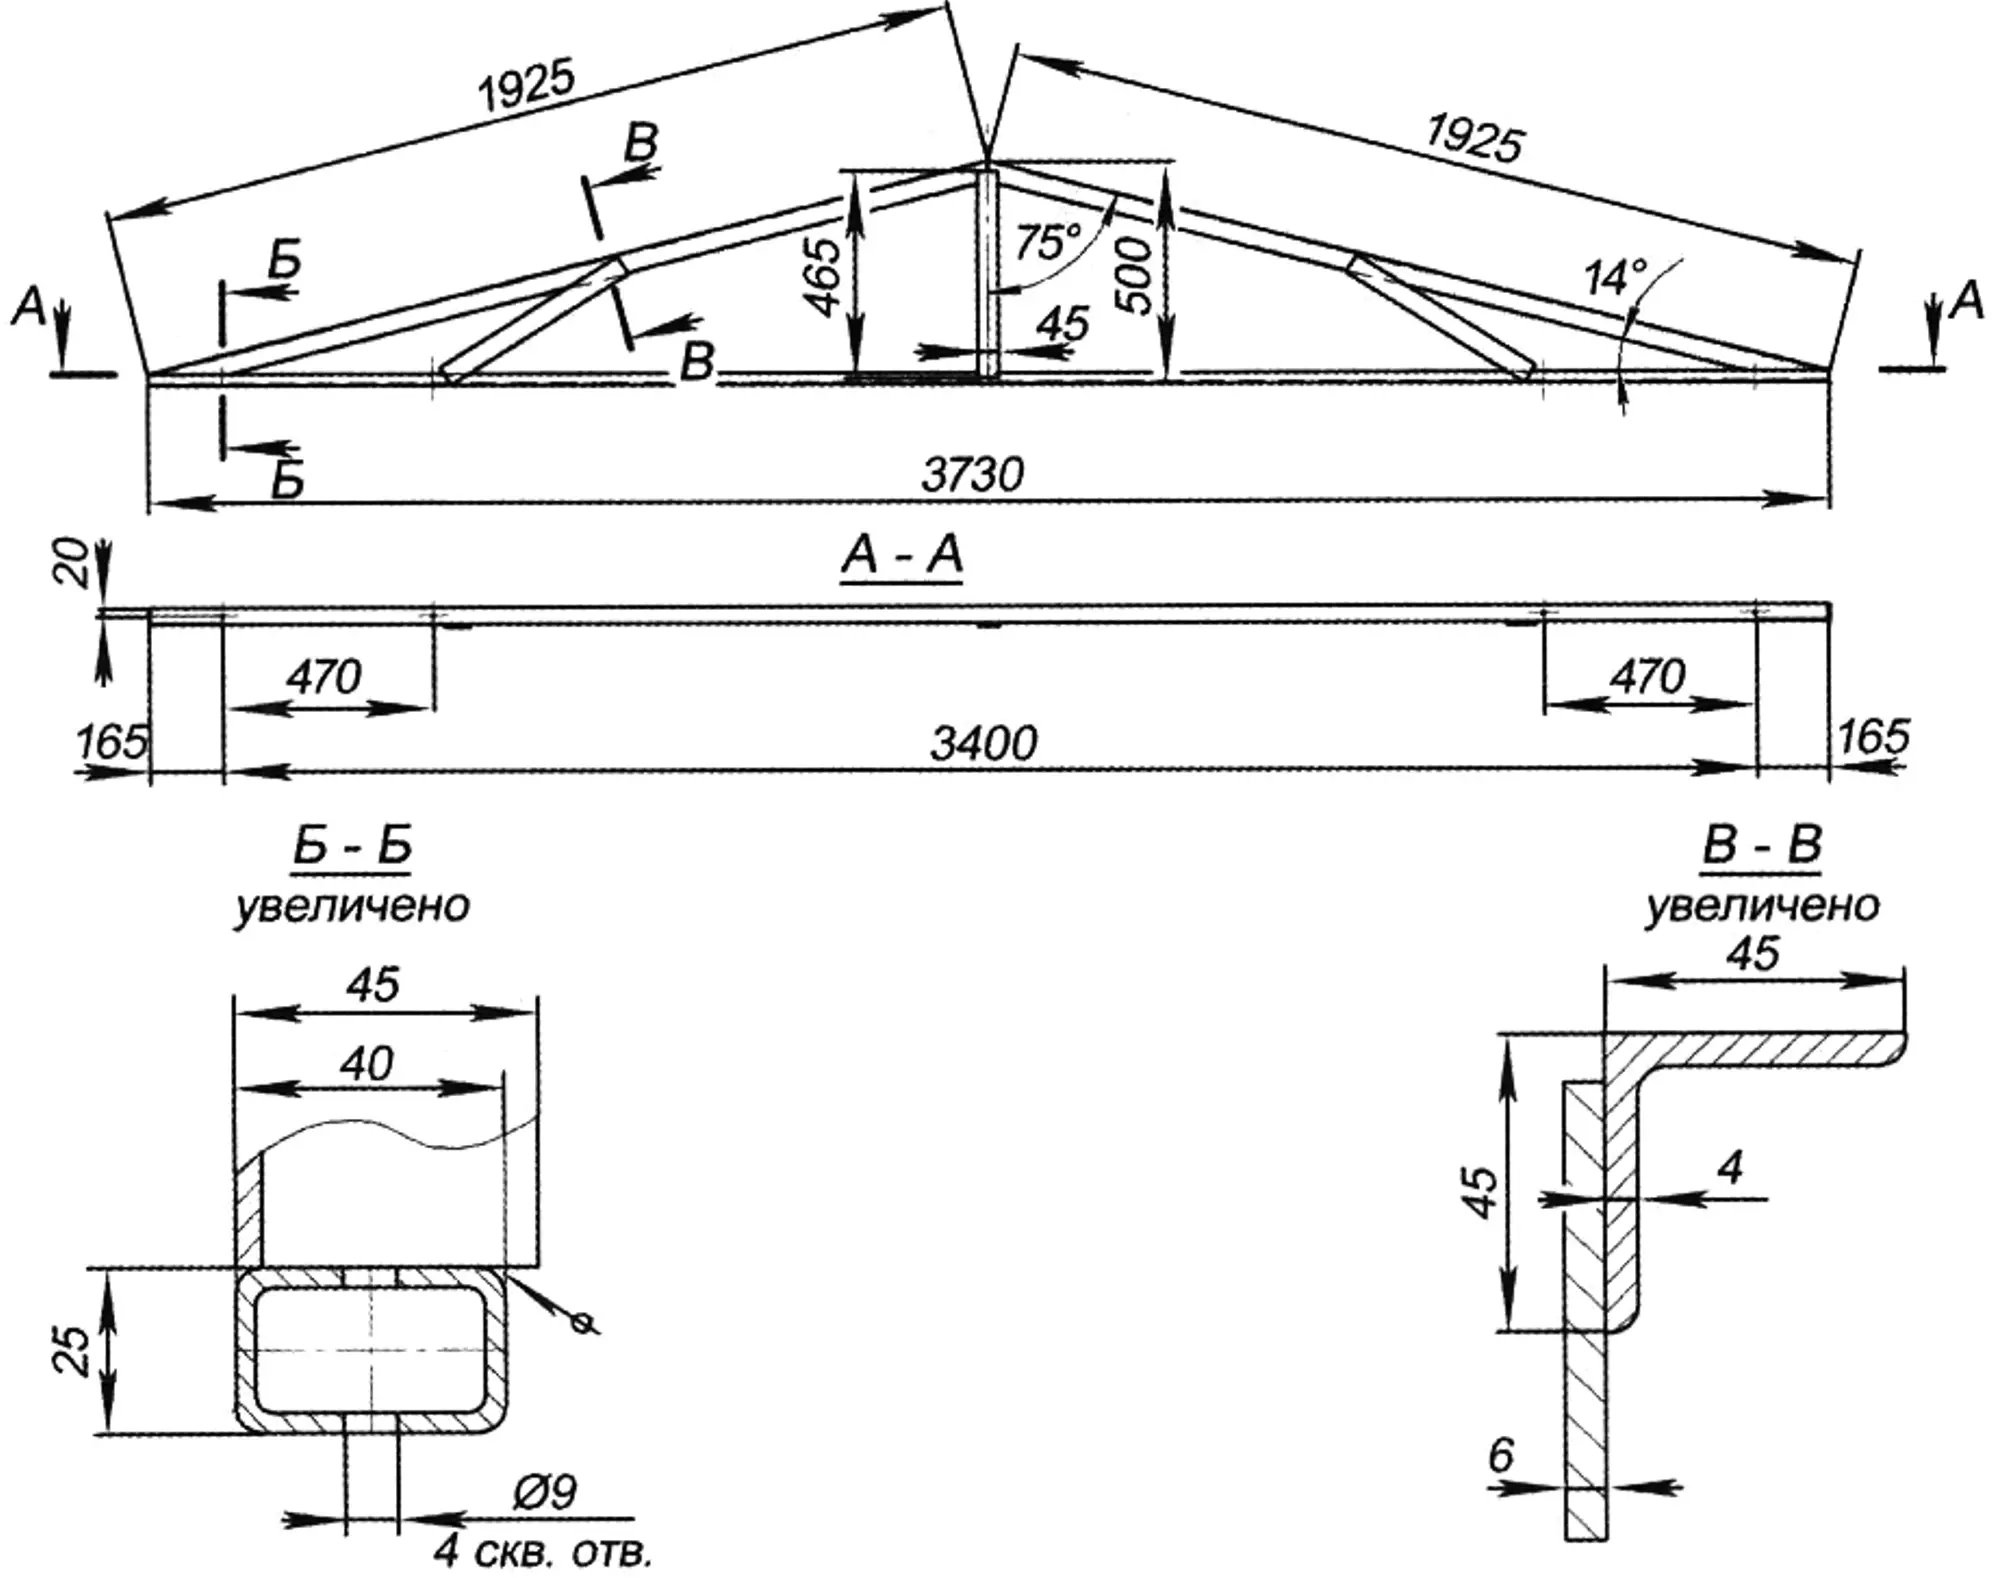
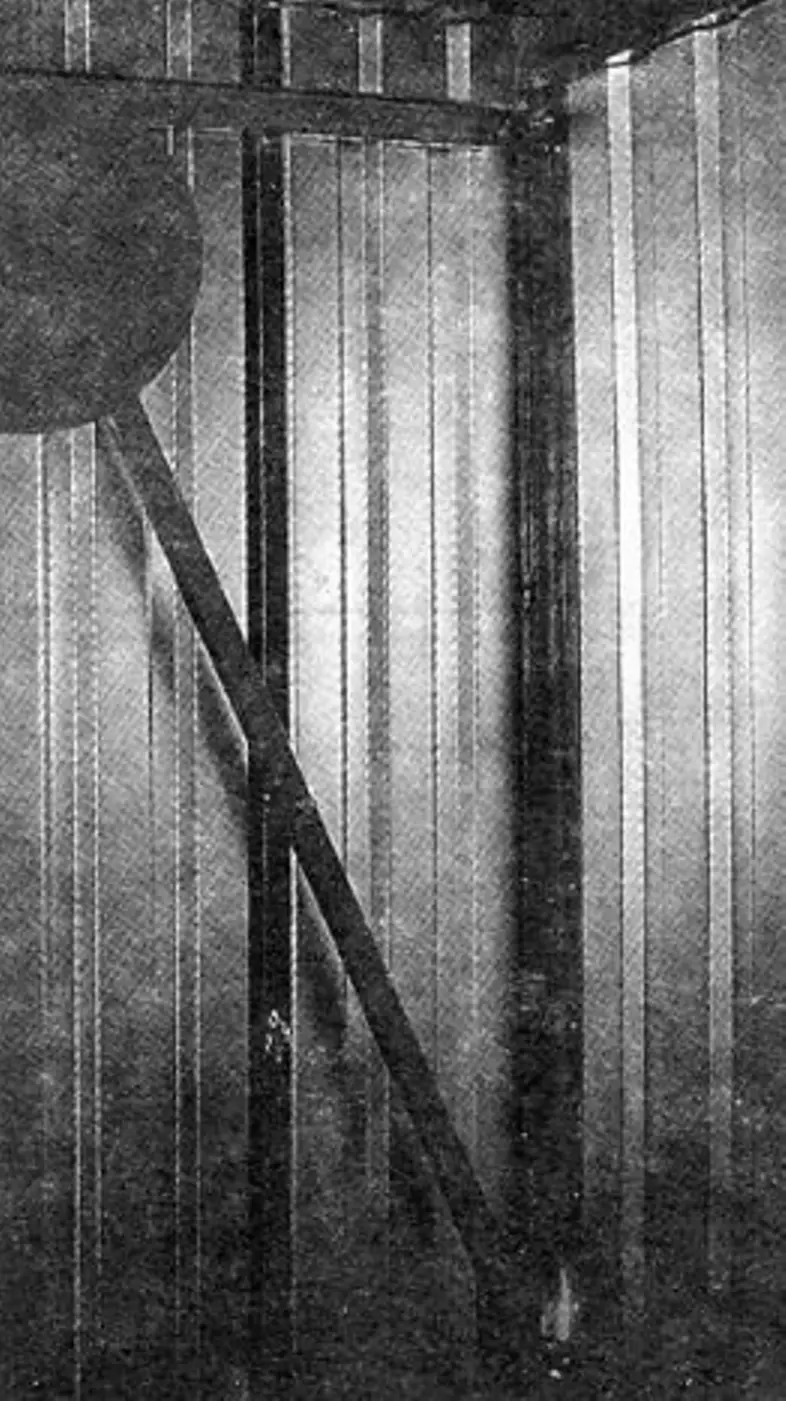
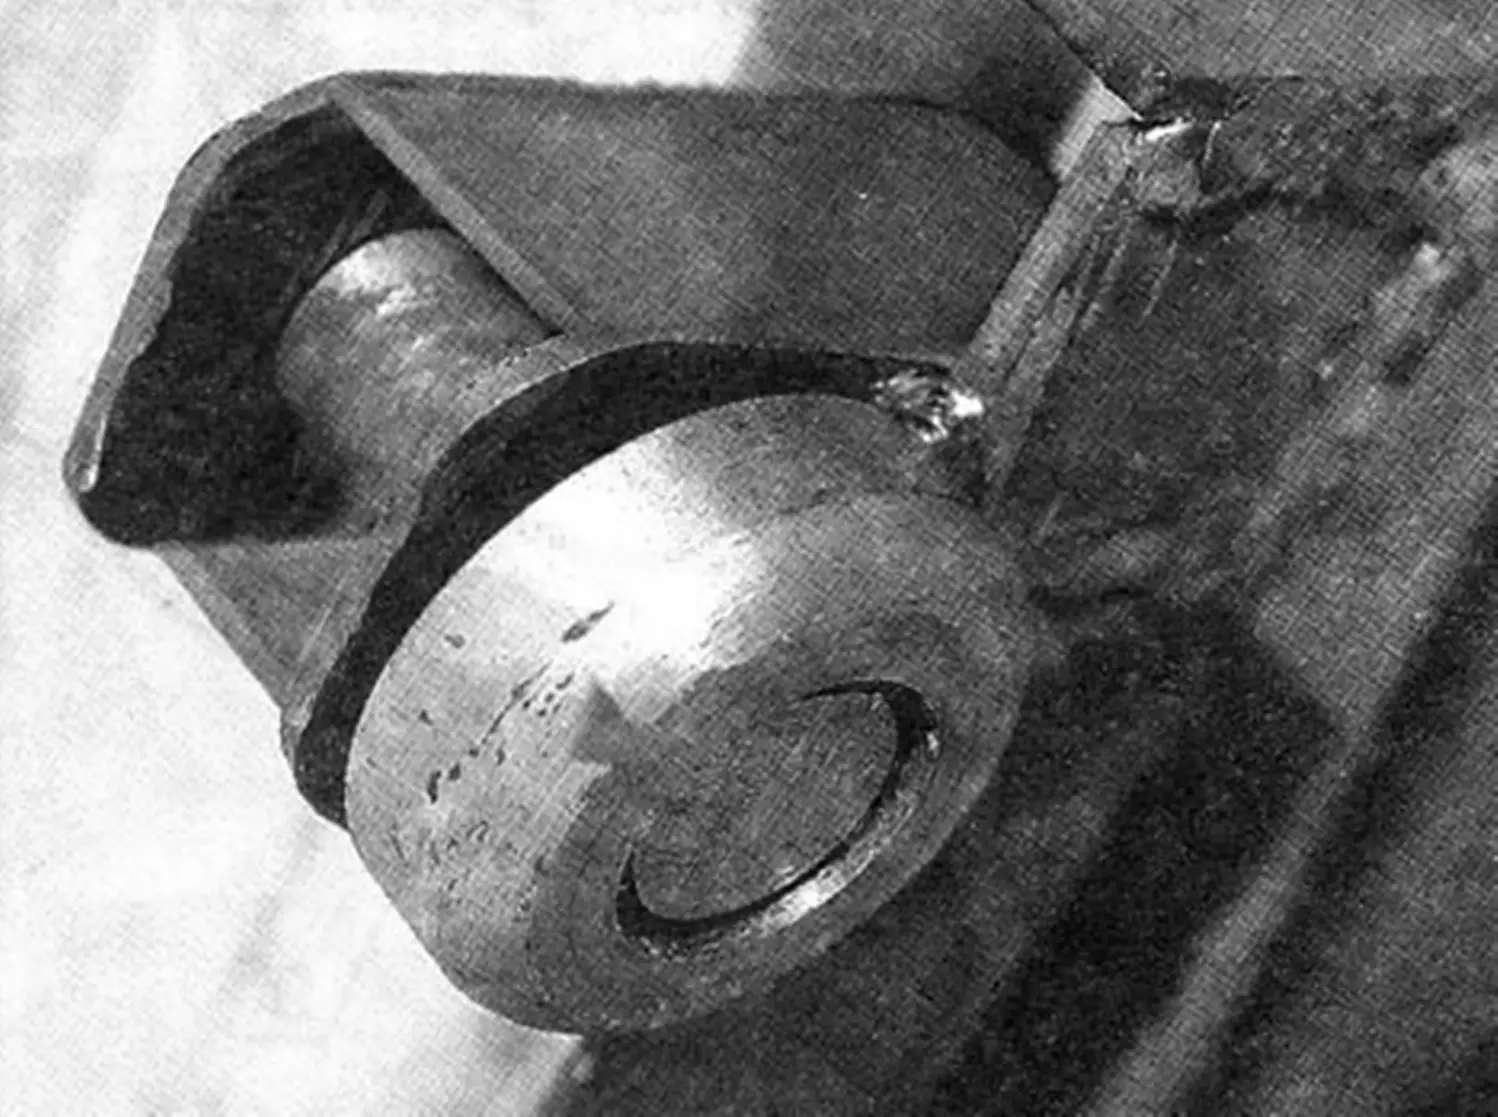
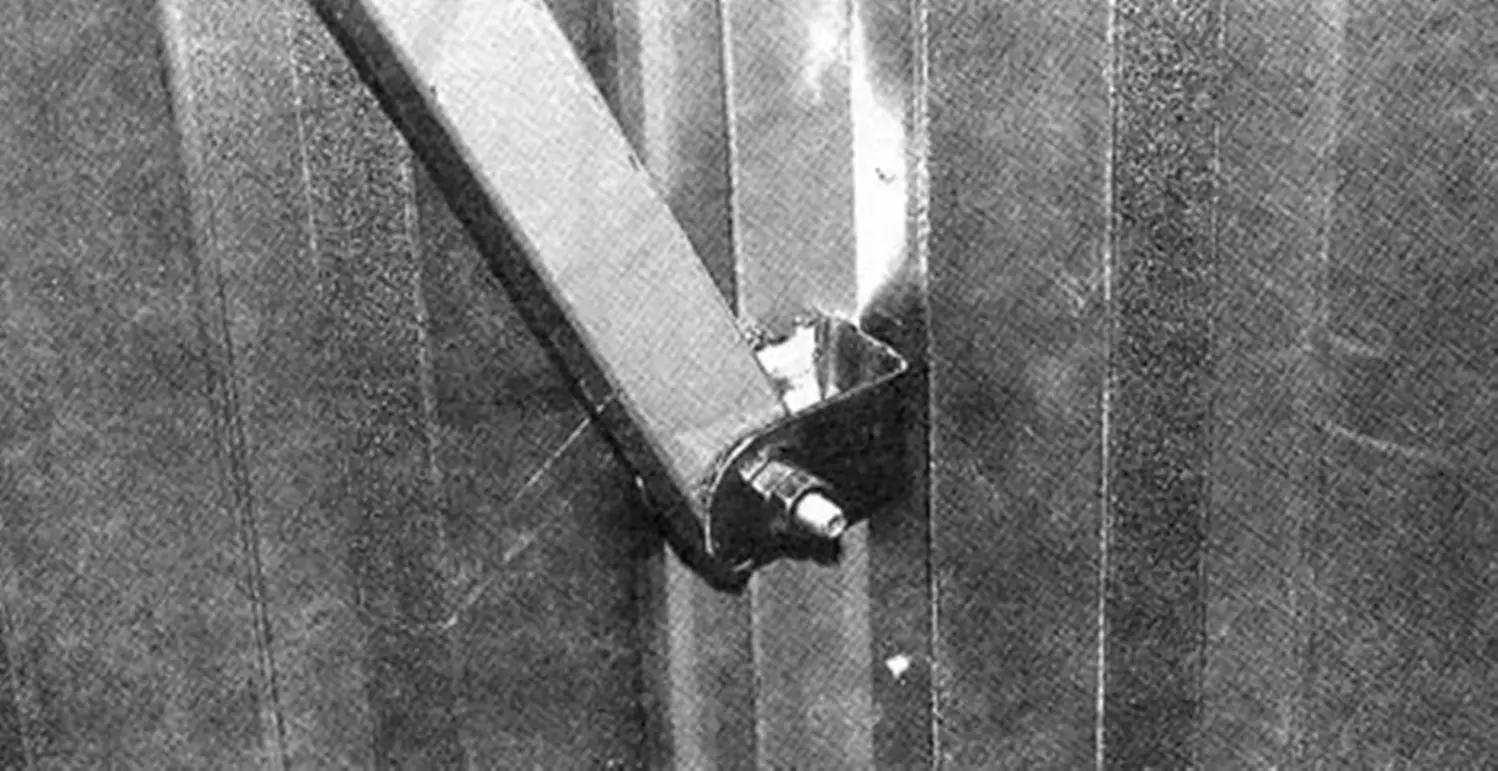
1 — rafter (angle 45×45, 2 pcs.); 2 — beam (tube 40×25); 3 — post (steel strip 45×6); 4 — brace (steel strip 45×6, 2 pcs.)
Front frame:
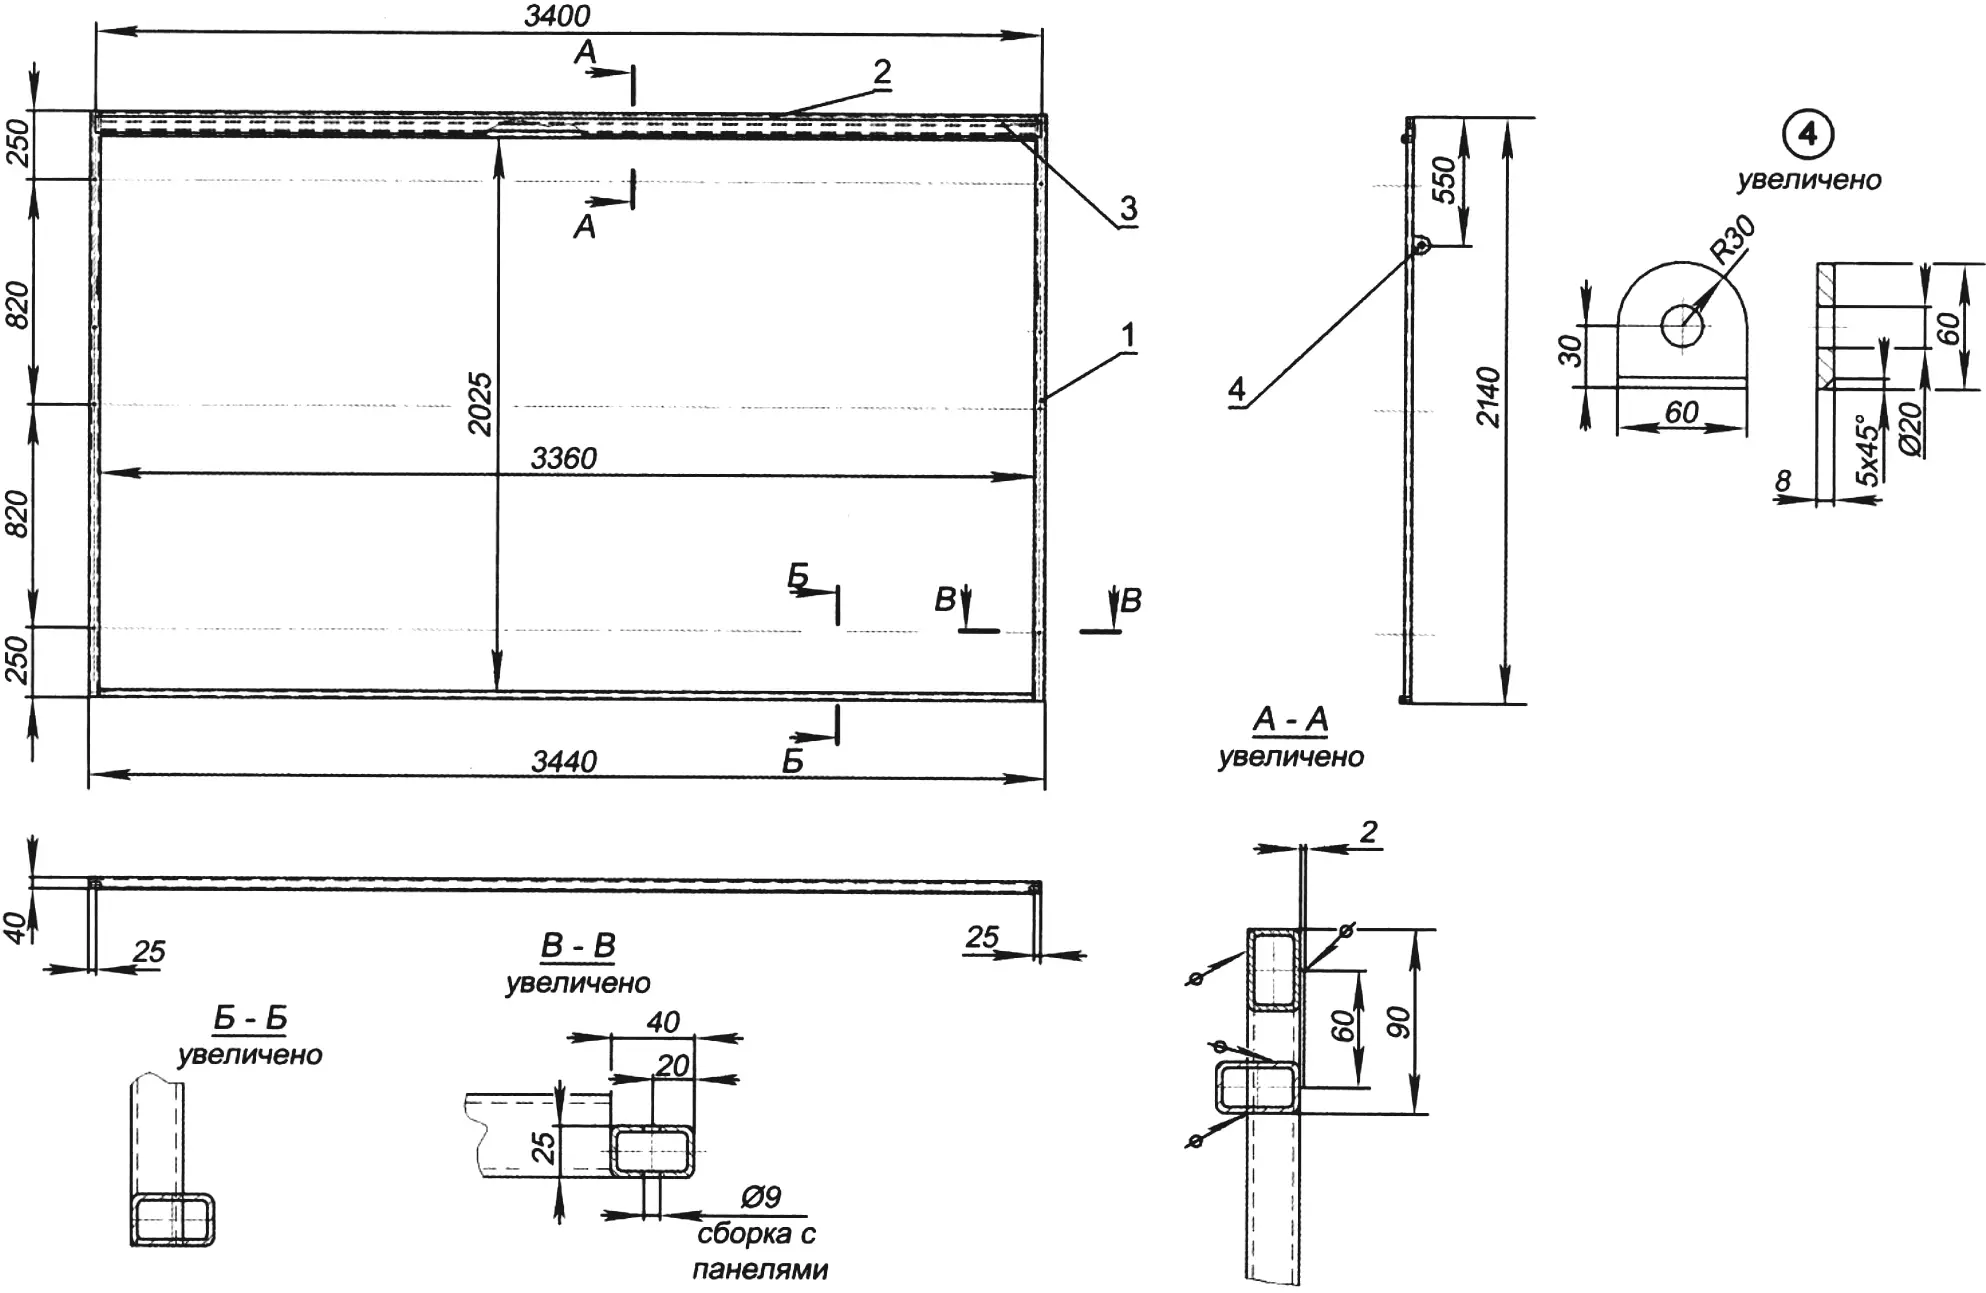
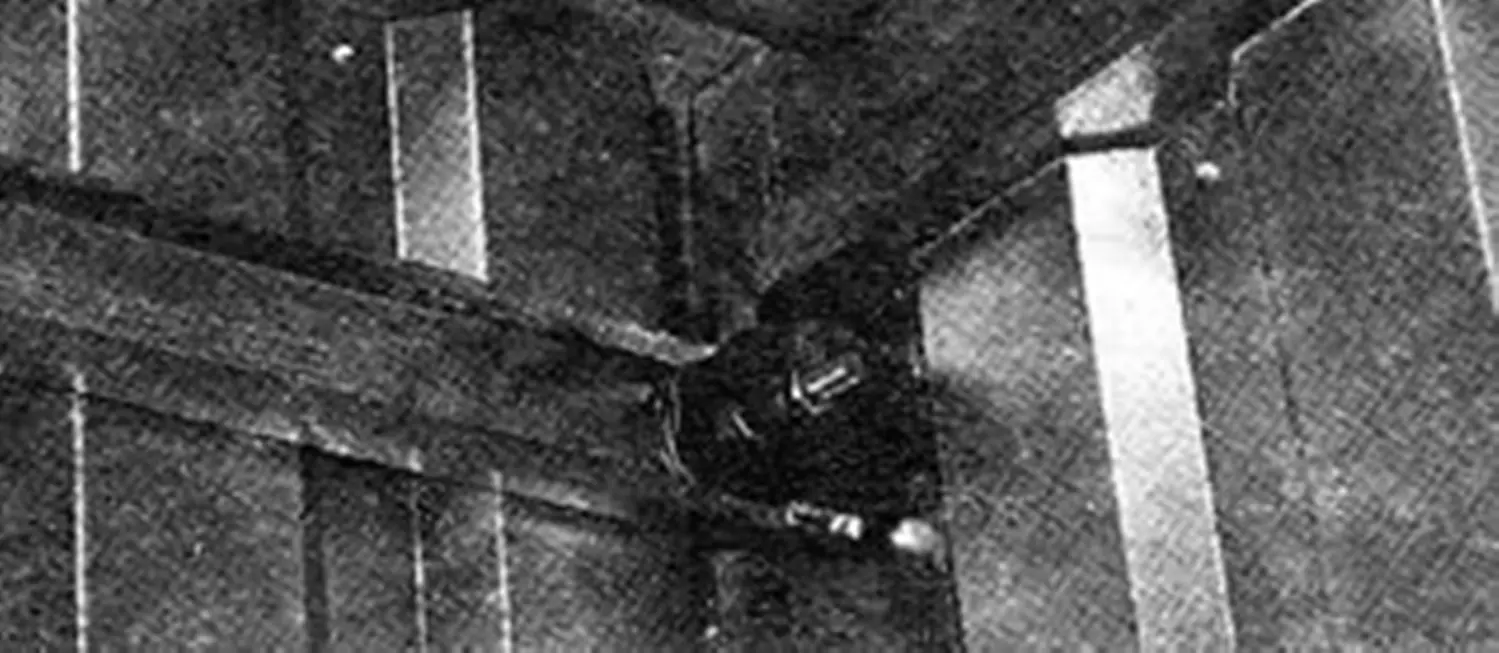
1 — post (tube 40×20, 2 pcs.); 2 — cross member (tube 40×20, 3 pcs.); 3 — horizontal overlay (steel strip s2); 4 — hinge (steel, sheet s8, 2 pcs.)

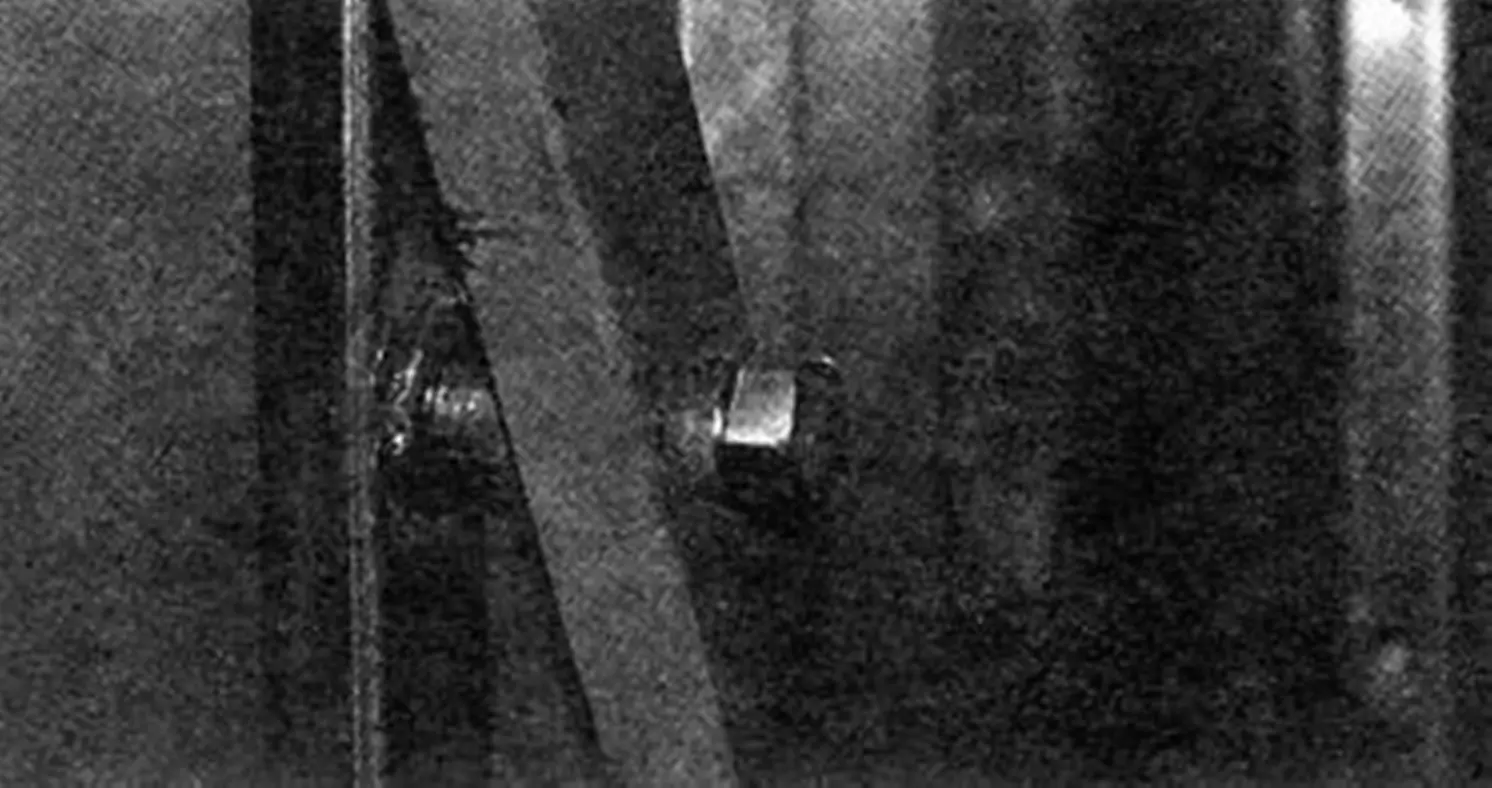
1 — post (angle 45×45, 2 pcs.); 2 — cross member (angle 45×45, 2 pcs.); 3 — corrugated sheet C20x1100x0.7 (3 pcs.); 4 — insert (steel sheet s3); 5 — break-stem rivet (set)
The manufacturing technology is roughly as follows:
– weld the first frame of the front wall panel, strictly maintaining all dimensions and right angles;
– using the first frame as a template jig, weld all other wall and gate frames;
– also, using the first completed one, weld all roof trusses;
– order and receive from the lathe operator all turned parts;
– prepare all lugs, brackets, profiles, counterweights, and levers;
– clad all panels with metal profile;
– weld on all lugs, brackets, profiles, and levers;
– assemble the walls with trusses;
– lay the roofing sheets and attach them with self-tapping screws or M6 bolts;
– hang the gates with rollers, levers, and counterweights.
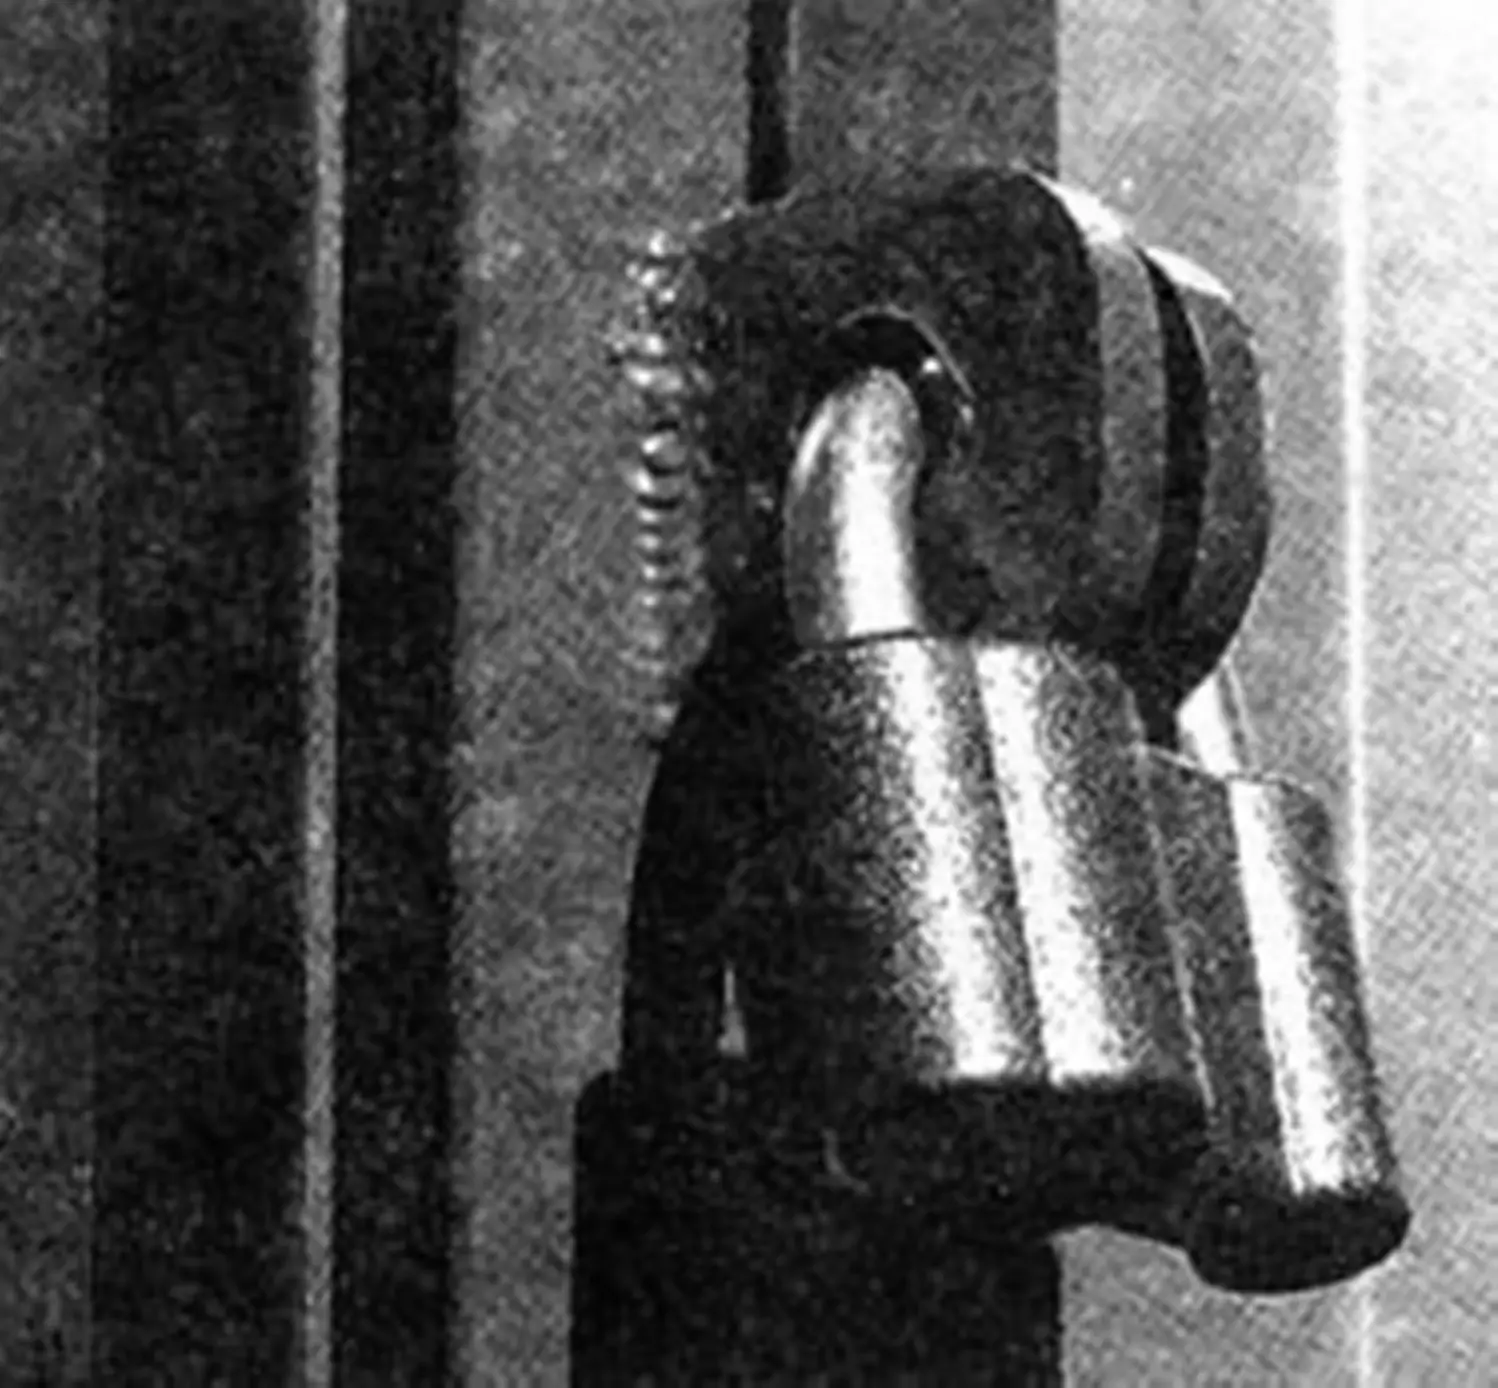
1 — post (angle 45×45, 2 pcs.); 2 — cross member (angle 45×45, 2 pcs.); 3 — lever bracket (steel, sheet s5, 2 pcs.); 4 — hinge (steel, sheet s5, 2 pcs.); 5 — gusset (steel, sheet s3, 4 pcs.); 6 — roller support; 7 — insert; 8 — handle
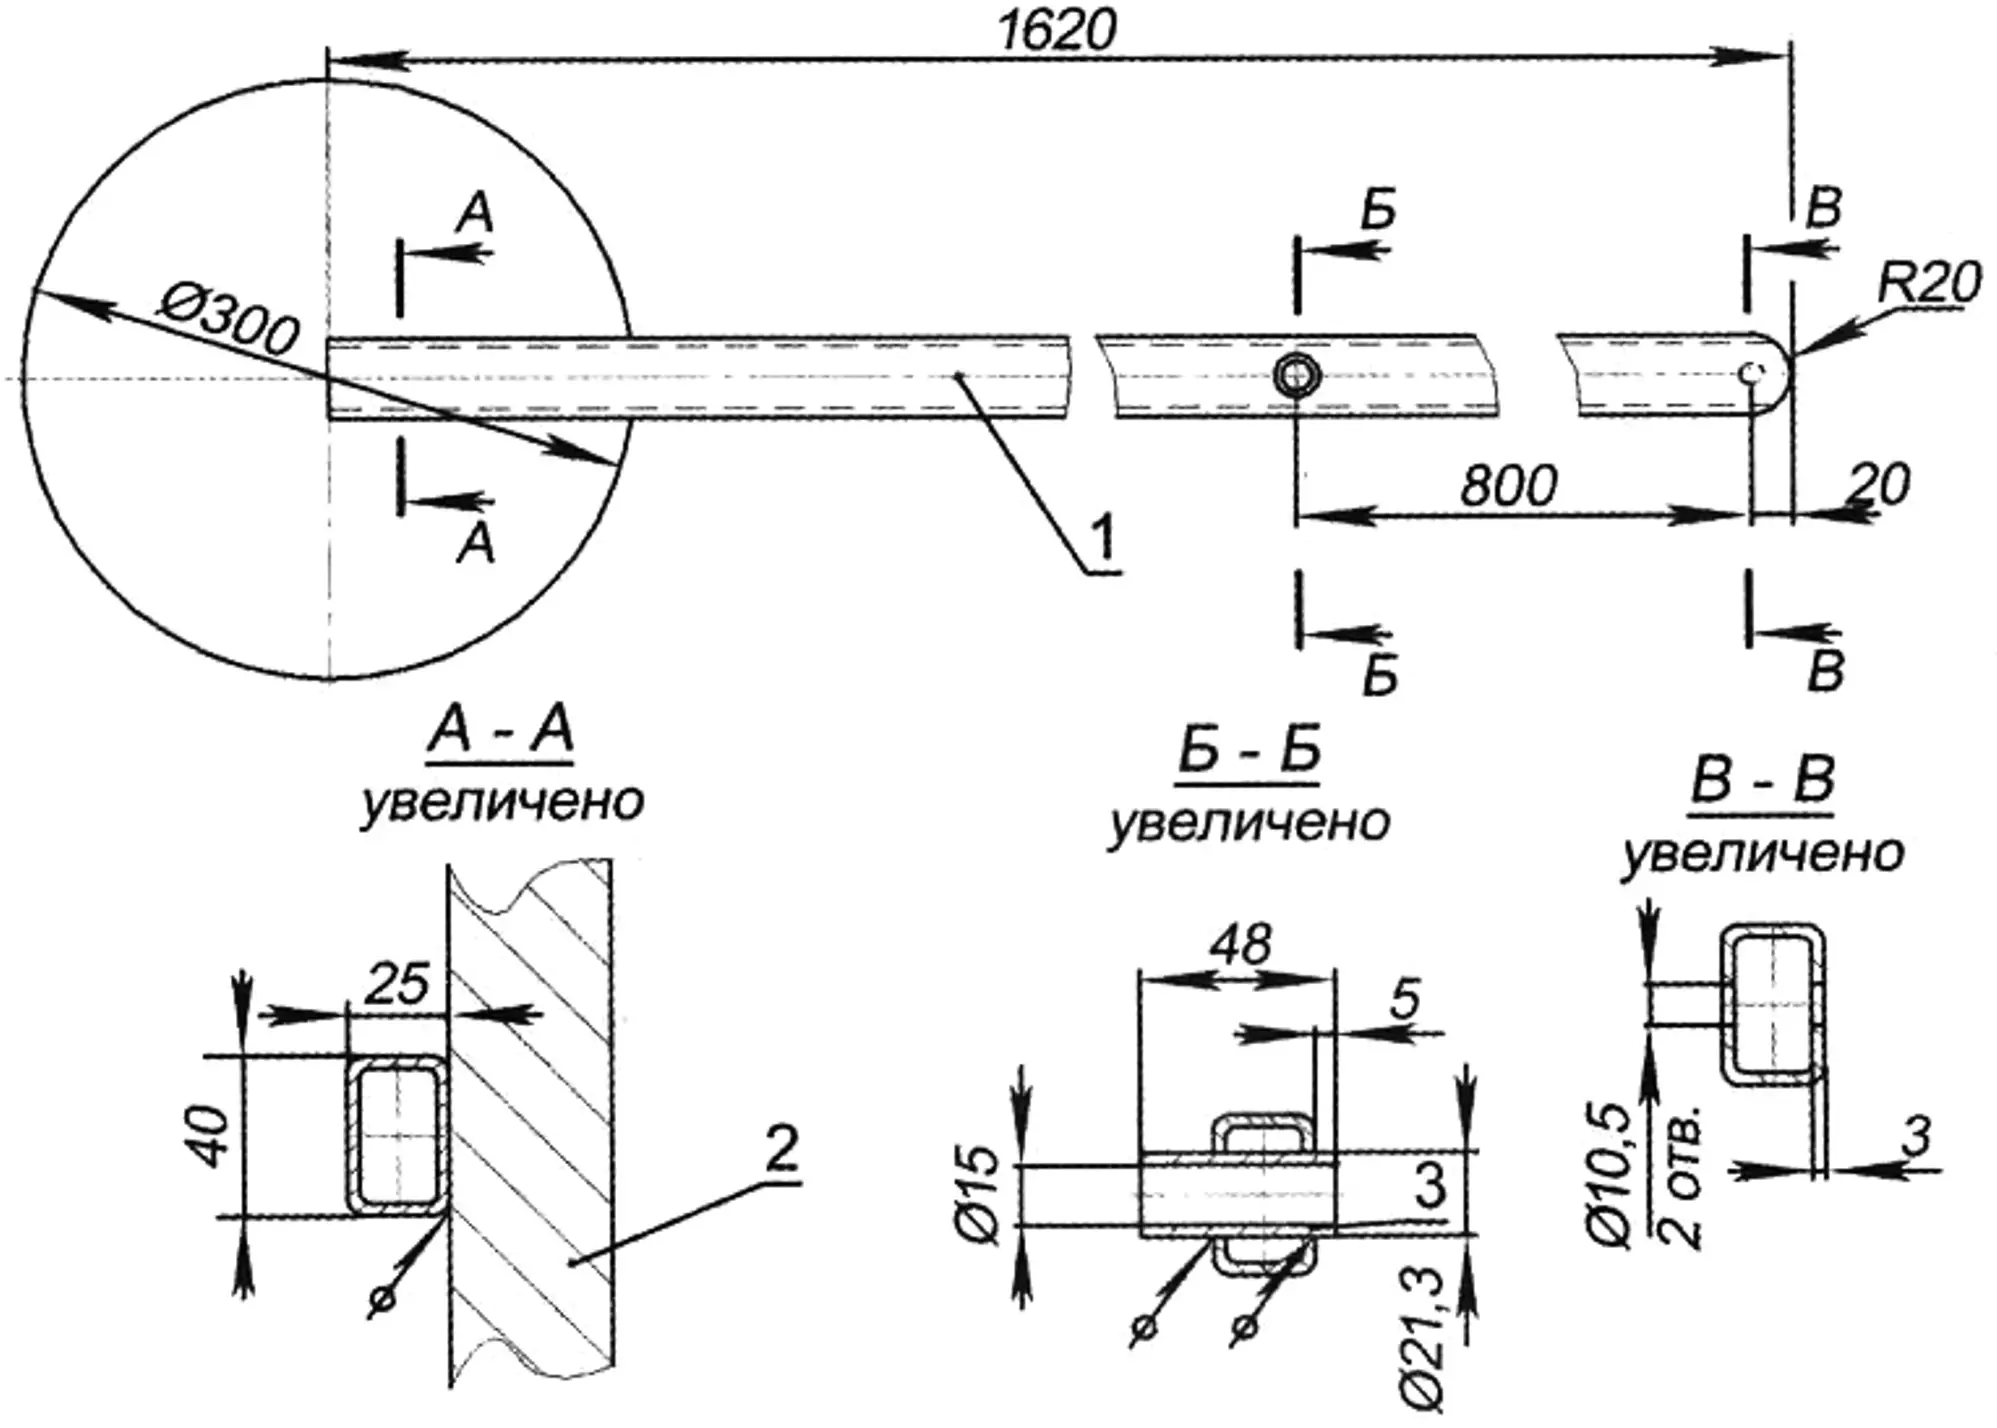
1 — lever (tube 40×25); 2 — counterweight (steel, sheet s10); 3 — bushing
The only difficulty in designing such a garage is calculating the attachment and pivot points of the gate panel.
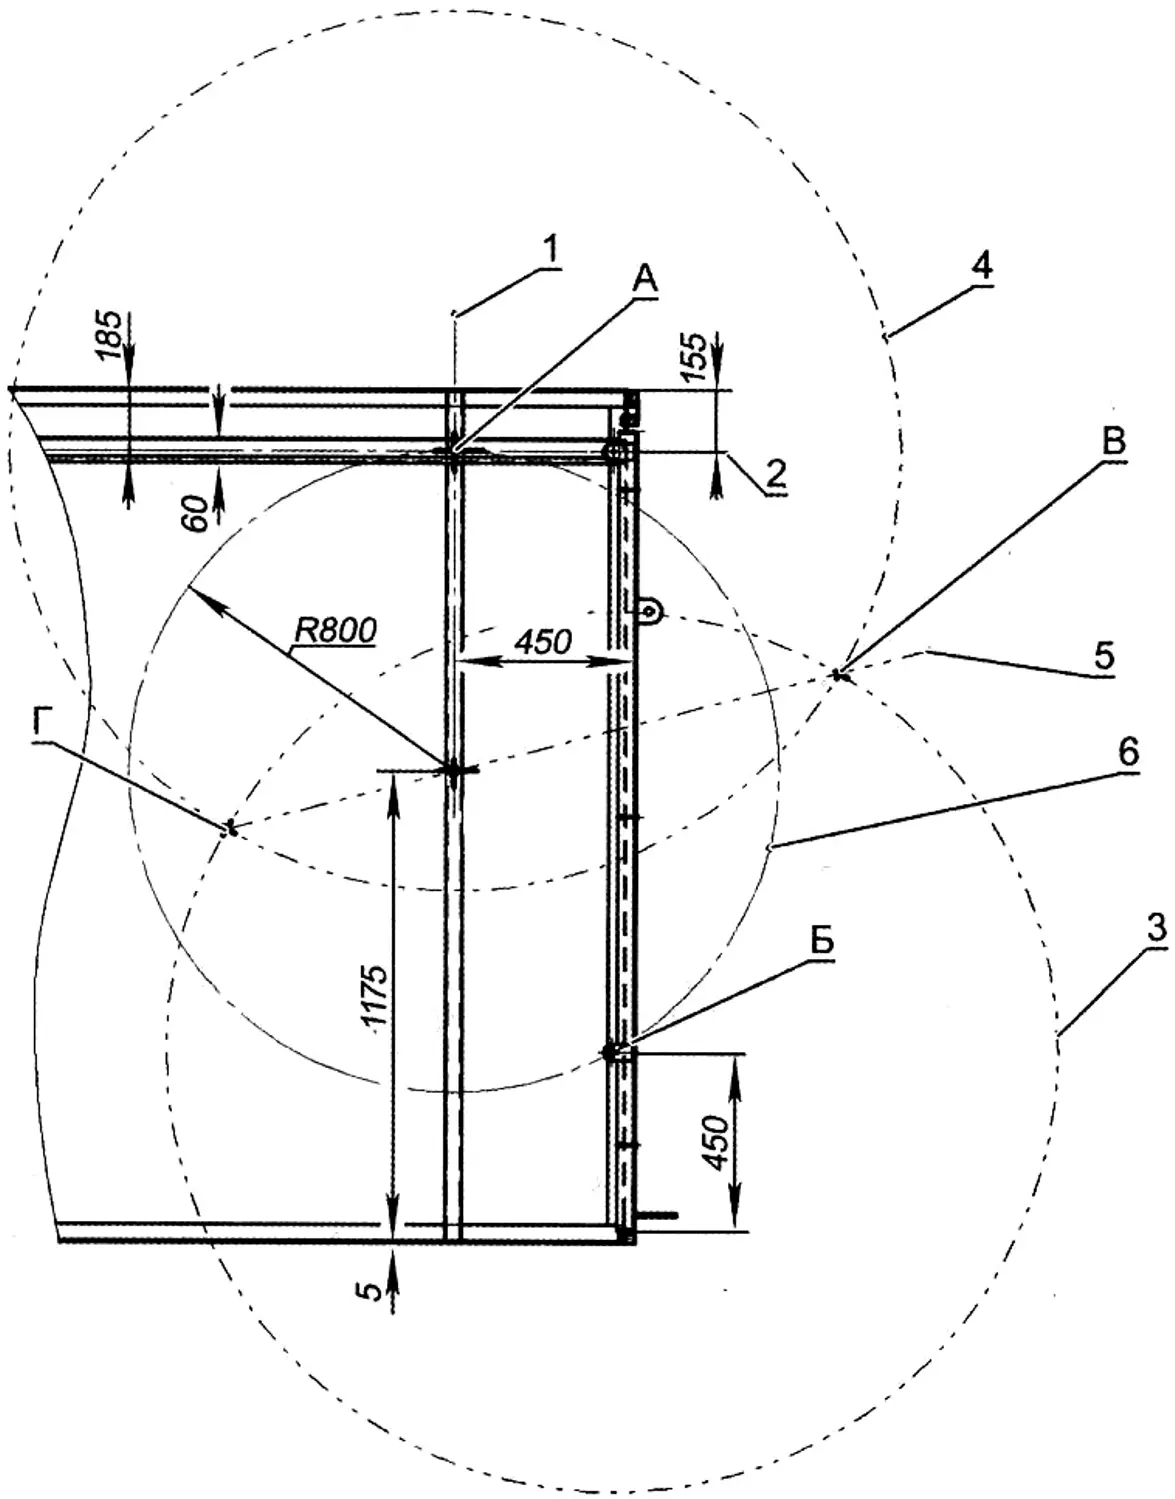
The attached diagram shows the geometric construction process in detail. Input data:
– height to the upper roller axis — 1880 mm;
– distance to the lever pivot point — 450 mm;
– distance to the lower gate bracket — 450 mm.
Geometric constructions should be carried out using drafting tools at a scale of 1:10 or on a computer in a graphics editor.
Draw lines 1 and 2. Line 1 runs along the lever post with an offset of 450 mm from the front edge of the garage. Line 2 is the rolling axis of the roller as it moves along the guide. Point A is the intersection of lines 1 and 2. Point B is the center of lever attachment to the gates. From points A and B, draw auxiliary circles 3 and 4 with a radius of about 1100 mm. Through the intersection points of these circles, draw straight line VG, which will intersect straight line 1 at the desired point D. To verify the construction, draw circle 6 with its center at point D. It should pass through points A and B. Recheck the dimensions.
By replacing the initial dimensions, you can similarly calculate the closing and opening trajectory of any counterbalanced gates.
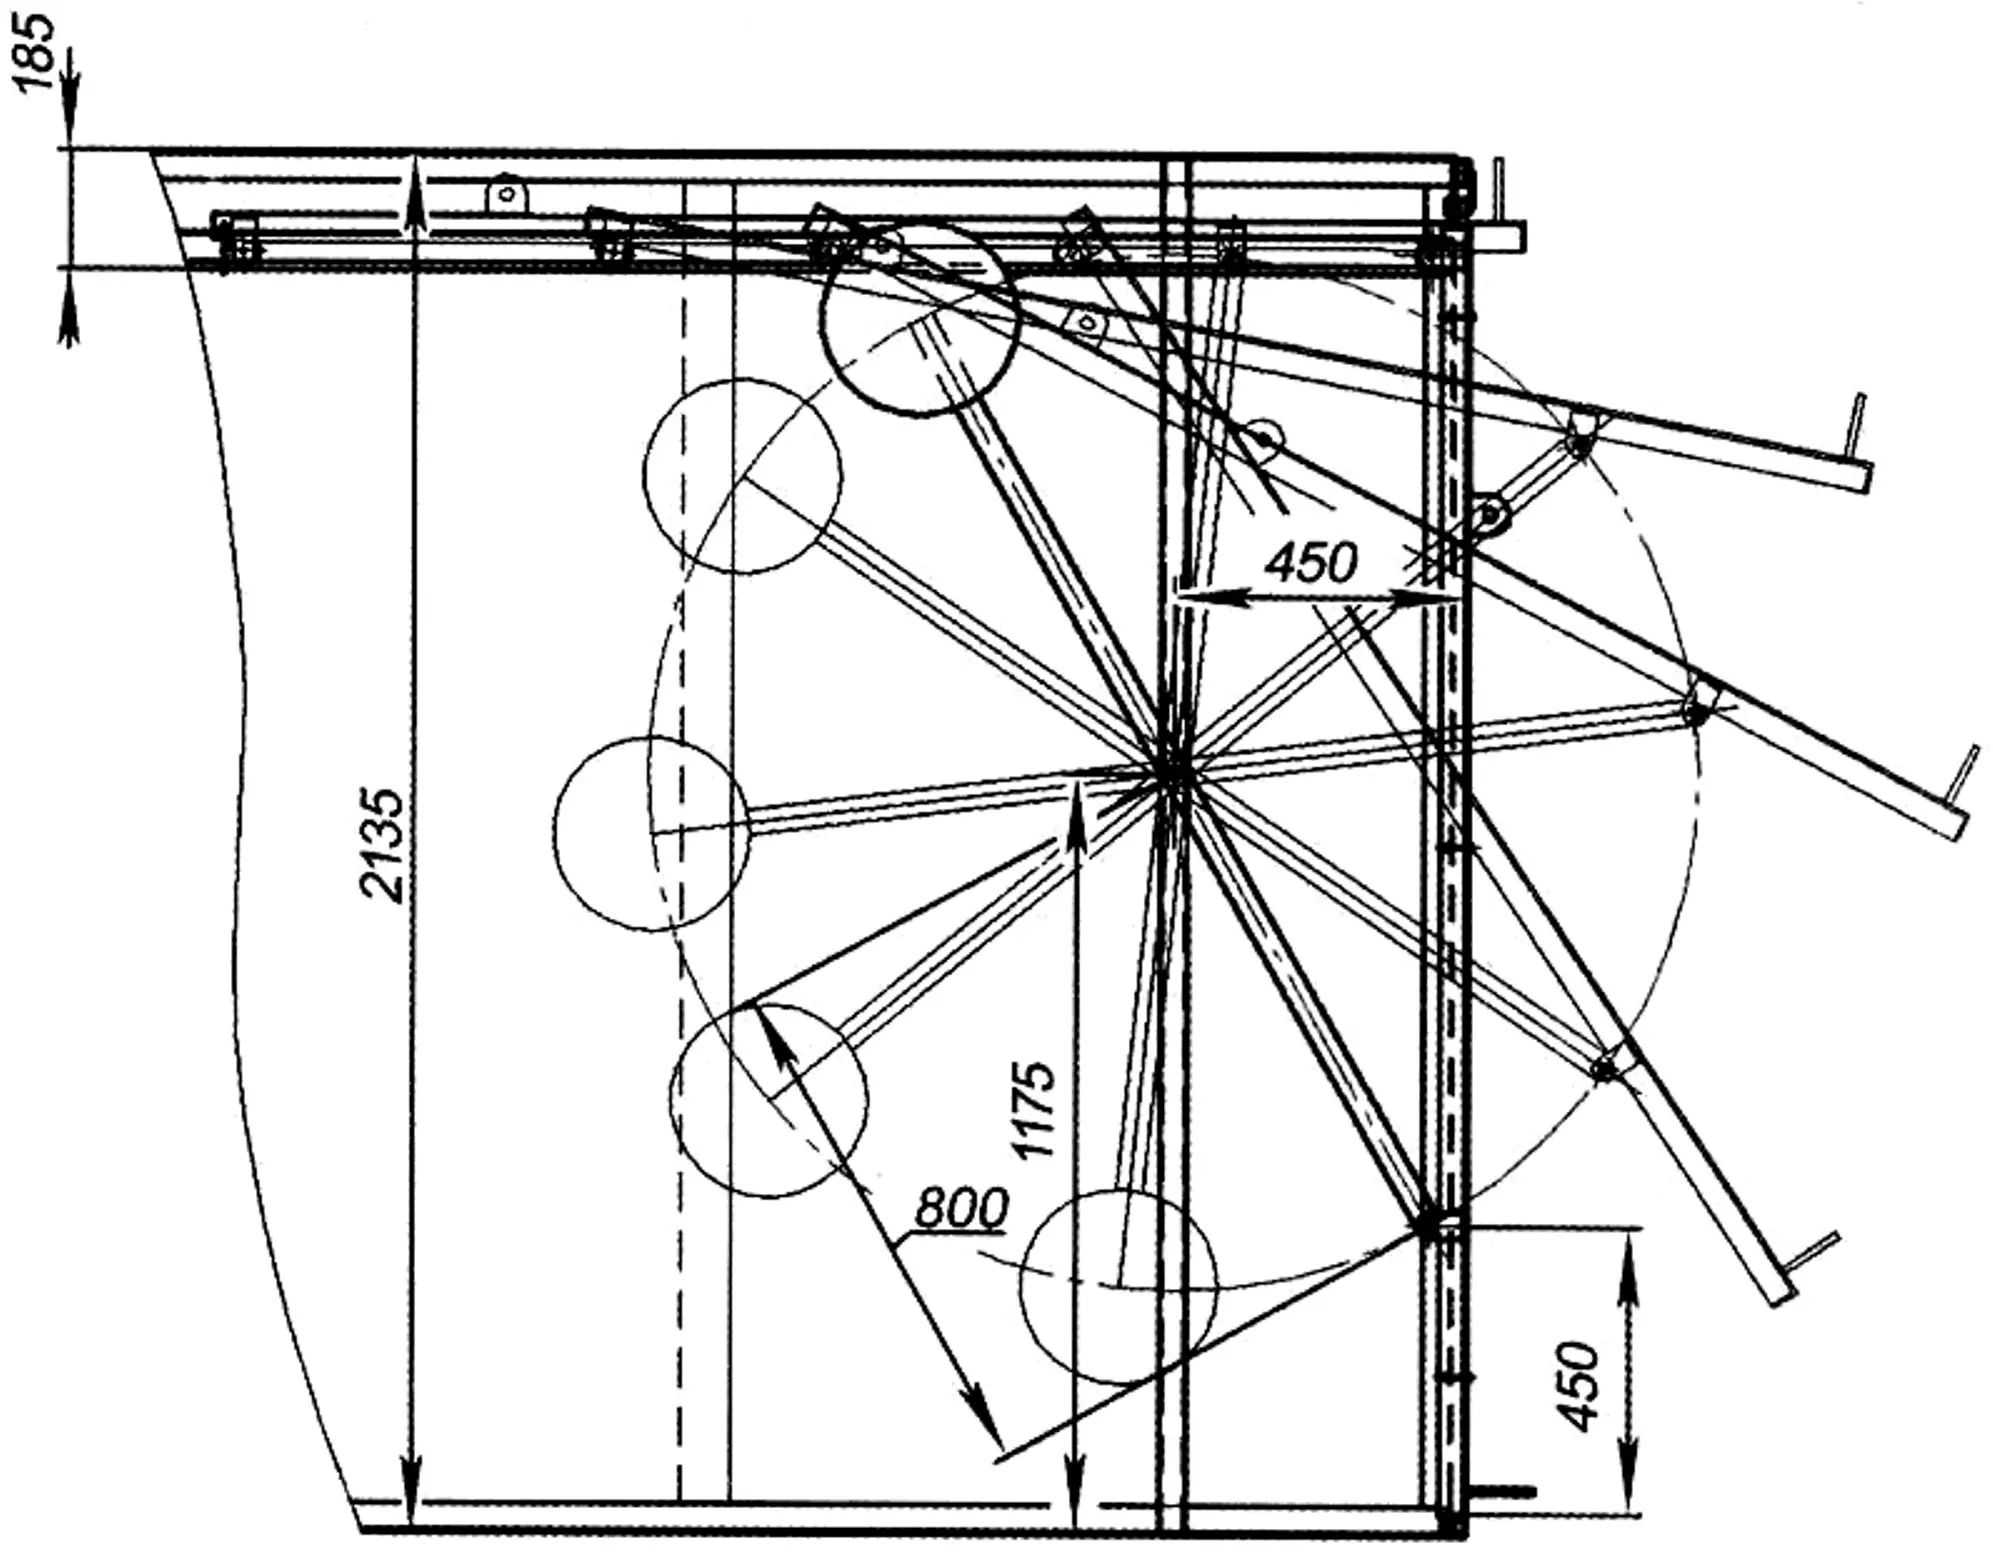
The motion trajectory of the proposed opening-closing mechanism is advantageous because it does not take up interior garage space and does not require clearing snow from the area near the gates.
The counterweight mass will have to be selected experimentally. The main criterion is that in the upper position the gates should be in equilibrium with slight pressure against the stop bolt.
Sheet and round steel, cast iron, concrete, or a spring can serve as counterweight material.
All frame parts, levers, and guides (outside only) are coated with GF-021 primer.
Such gates can confidently be recommended to owners of permanent (brick, concrete) garages.
There is still plenty of room for creativity: you can install a foundation, pour a concrete floor, insulate the walls with foam plastic, add an extra section, or aim for a two-story design…
«Modelist-Konstruktor» No. 7’2016, A. MATVEYCHUK
Recommend to read
 DRILL A WELL…
Villages without running water now, a little, but his presence in every rural home is rare: still dominated by collective hydrant. And of course I wanted to have water when not... WORKING WITH FOAM
Offer two method of cutting large sheets of foam. Nichrome filament is suspended vertically (Fig. 1) or stretched horizontally to the table surface (Fig. 2). Adjusting in the first case,...
