Fig. 1. The details of the table:
1 — slats Foundation (20Х50Х600 mm), 2 — cross base (20Х40Х820 mm) 3 — bar (20Х50Х760 mm), 4 — cross rails (20Х50Х860 mm) 5 — side rail tops (20Х50Х600 mm) 6 — bar (30Х40Х780 mm), 7 — part rail tops (20X30X780 mm).
Fig. 2. Parts of the chair:
1 rail base (20Х50Х500 mm), 2 — cross base (20Х50Х530 mm) 3 — bar (20X50X600 mm), 4 — crossbar crossbar (20Х50Х570 mm), 5 — rail seat (20X50X495 mm), 6 — rake of the backrest (20Х50Х350 mm), 7 — stud seats (Ø 30Х530 mm), 8 — seat (5X490X490 mm) 9 — back (3Х200Х490 mm) 10 — metal strip with a thickness of 2 mm.
Fig. 3. Brackets:
1 — table (2 PCs.), 2 — for chair.
A similar scheme can be assembled and a chair to the table, only two arms instead of brackets for him going full frame with axes in the middle of the sidewalls and corresponding holes in the inclined rails. Differently can be solved and the frame of the seat is transverse slats with the bars enough to put the round wooden rods; the ends of one of them, leaving the longitudinal slats, will play simultaneously the role of hinges for sloping crossbar. The remaining joints are used the same wooden tube or M5 bolts with two washers. Reiki chair backrest and seat contact vpoldereva, strengthening invoice plywood or metal gusset plate. As for the back and seat good five-seven-layer plywood; the top can be covered by furniture or decorative fabric with foam.
All the joints in the tongue of the wooden parts pre-promazyvaetsya carpentry or casein glue. Prior to Assembly of the workpiece are carefully processed coarse grinder or coarse sandpaper, to round the corners of the rails and edges of the countertop. Then the surface roughened and covered with furniture Polish or a bright enamel red, yellow, blue, orange.
The brackets are also processed an emery paper and painted with black paint or lacquer.
According to the magazine “Guide yourself”, Bulgaria
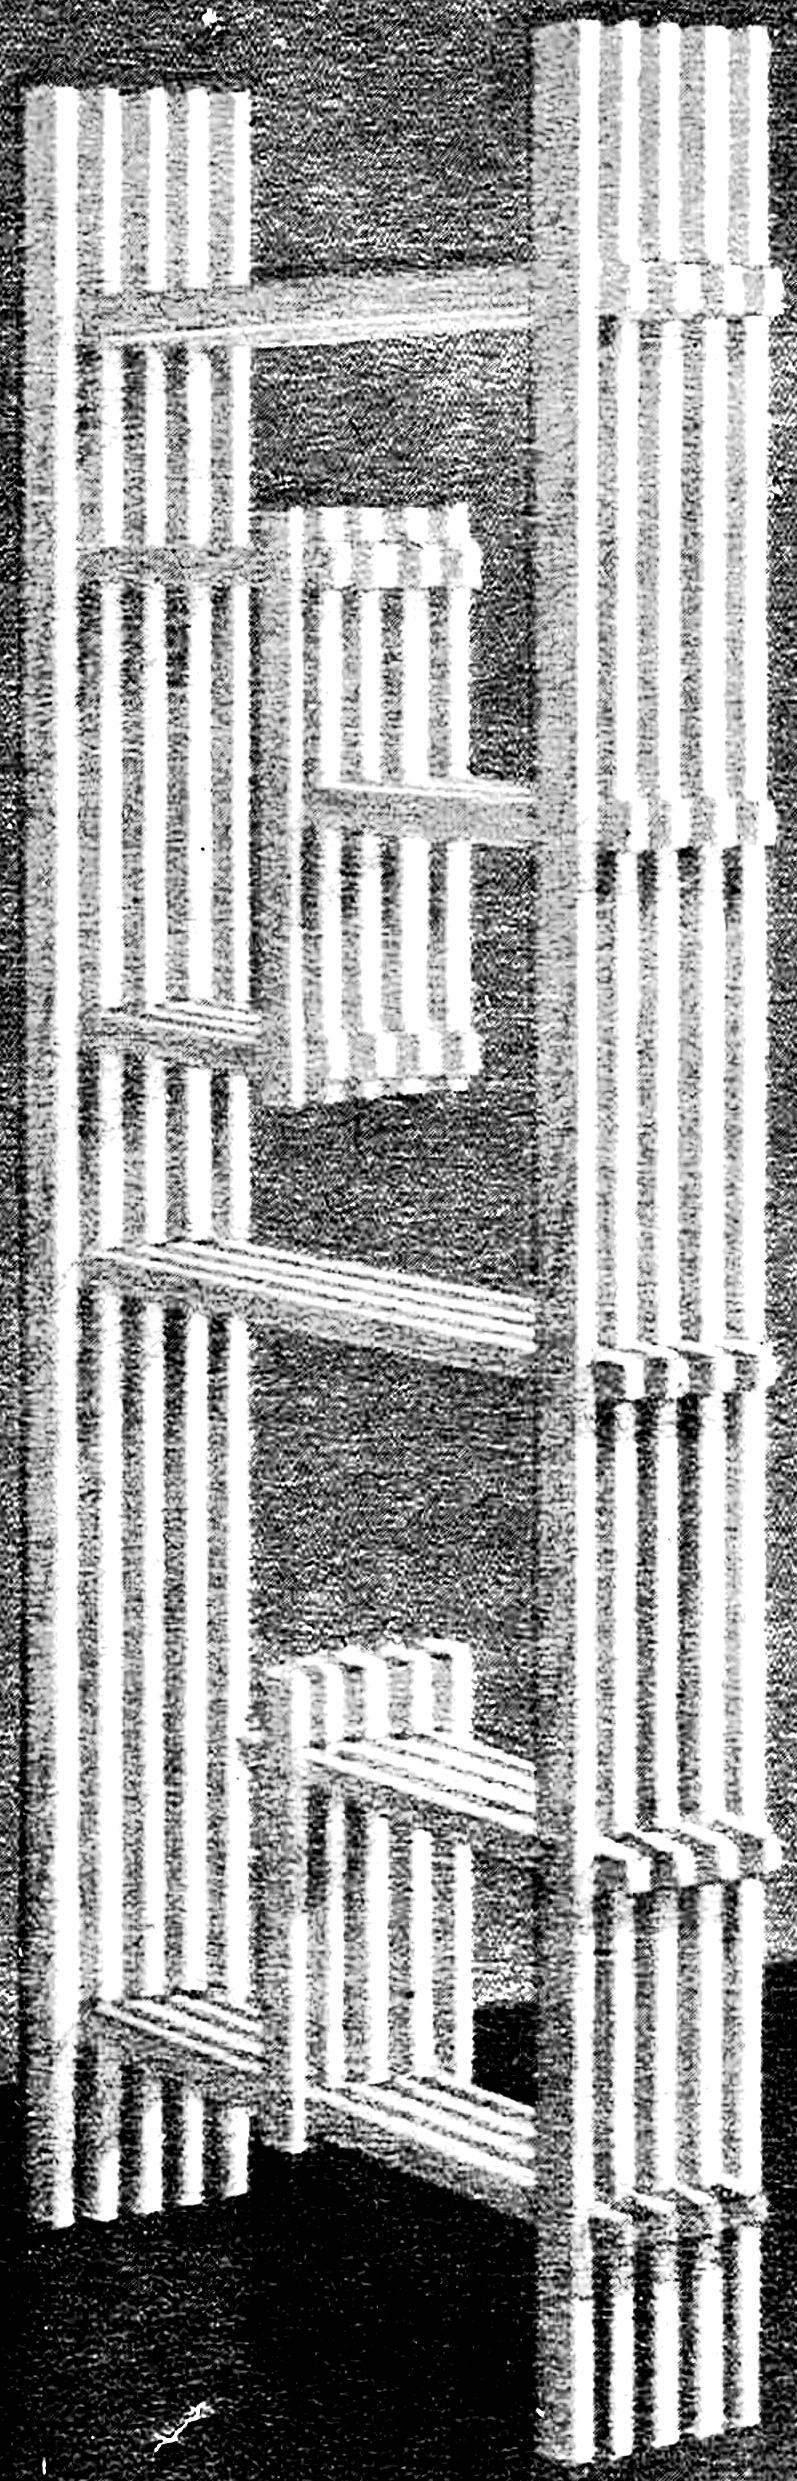
A chaise longue
It is unusual both in design and material: only wood without a single metal or structural fastener. Maybe that’s why this seat in particular attractive and elegant: it decorates a room, furnished in any style. There are three main nodes: two matched sides, performing the role and the base and legs, and armrests, and even magazine racks; and three-piece seat with swivel parts — the backrest, the actual seat and the foot.
A set of blanks to the chair is a stack of slats, boards, wooden rods and wooden washers. All of them except the hinge assemblies are connected by a joiner or casein glue. However, the chair may remain collapsible: disconnected sidewall of the seat and connecting them to the rods with washers.
The sides are glued together from individual plates — solid and with a rectangular cutout through which is formed outside pocket for Newspapers and magazines. In the bottom half of the pocket fit more narrow boards along with compensating them the width of the slats (the latter form a protection supporting nested in the pockets of items). In the upper half of each sidewall edges after Assembly, bore through holes for the rods of the hinges of the seat. In addition, on the inner side in the bottom half of the sidewalls are additional blind holes for the support rods of the backrest angle adjustment and foot.
Section seat assembled from slats, strung on wooden rods with strips of wooden pucks which are best made of a thick or glued together from several sheets of plywood. The rods of the hinges of the middle section the role of the washers will play themselves Reiki seat, strung between the slats of the back and the foot. In addition, between the outermost slats of the back and the foot, approximately in their middle part, the Assembly entered on its own hinges special support rails, having at the free end of the comb cuts under the diameter of the support rods. Thanks to them you can change the position of the back and the foot down to horizontal, turning the chair to the couch.
Chair slats:
1 — plank solid sides, 2 — lock washer hinge-seat, 3 — seat rail, 4 — rail backrest, 5 rail support backrest, 6, 8 — washers-spacers, 7 rail foot, 9 — foot rail support, 10 — support rod foot, 11, 17 — bars of the back and the foot, 12 — hinge pillars of the back, 13, 15 — jointed rod seat, 14 — support rod of the backrest, 16 — hinge support foot, 18 — cut plate of the sidewall 19 — rack-rail, the 20 narrow cutting Board.
If the outer washers of the hinge rods of the seat do not stick, but to limit them to a tight fit, the seat will remain dismountable, allowing it to fold into a fairly compact package, convenient for storage or transportation, for example, to the country.
All blanks before final Assembly roughened with sandpaper and then covered with a furniture varnish in several layers, with intermediate drying and polishing each layer — then deeper and more fully manifest the beauty of the natural texture of the wood. Edges and edges of the sidewalls and the seat in front of such a treatment is appropriate to round rasp and coarse sandpaper. It must be done carefully so as not to split the individual layers and does not damage the workpiece.
To give even more decorative a good idea to impregnate the workpiece with stain — all chair or certain areas: for example, pockets, washers or rods. But working with it requires skills and a certain taste, as well as another often applied method of decorating wood — burning stove. Therefore, resorting to them, it is best to first practice this technique on the remains of the used materials and only then go to the parts or product as a whole.
According to the magazine “Popular science”, USA
Recommend to read SCHEMATIC MODEL OF THE AIRFRAME Before starting work, carefully examine the drawing and description. Then prepare the tools: small plane, a sharpened knife, pliers or pliers and a jig saw with saws. Materials you will... WELL, BUNNY, THANK YOU! Books, of course, more convenient to use if they do not lie on each other, and stand side by side. But the stability they need to be. For example,with such a simple device: two rods... 
 Yes …another design ingenuity, a little artistic flair and diligent execution — and you have in the apartment will be original and comfortable furniture, it would seem, is not quite the right material — strips, planks, wedges.