A model housewife always has a supply of various spices in the kitchen, designed for preparing delicious, appetizing dishes — whether it’s first course, second course, baked goods, or dessert. And, of course, it’s good if you don’t have to search for all this in cabinets and shelves, but have it, as they say, always at hand.
A simple but very convenient rotating shelf, proposed by the Hungarian magazine “Észermester,” will help with this. It’s not difficult to make it yourself, as both the design and materials are accessible to any home craftsman.
Main Parts
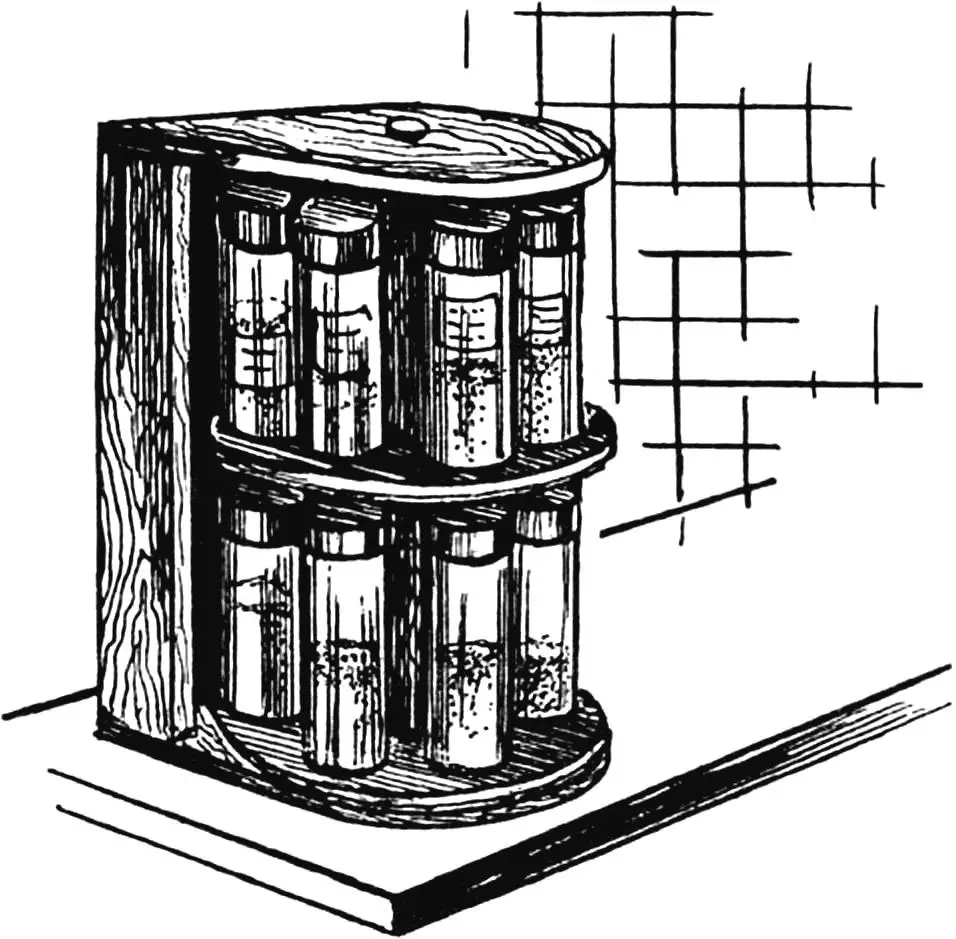
The shelf consists of an open-front box-shaped base with semicircular top and bottom panels and a two-story rotating carousel between them made of two cellular disks mounted on a vertical axis.
The base (made of chipboard) has a back wall and two narrow side panels adjacent to it, forming a rigid frame together with the top and bottom panels. Holes for mounting the vertical axis of the carousel are drilled in the axial centers of the latter. The axis itself is a round wooden rod (for example, a piece of a shovel handle). Two chipboard disks are mounted on it with glue, each of which has round socket-cells for spice jars. The sockets can be routed to half the thickness of the disk or, for simplification, drilled through, as shown in the figure. In this case, solid disks are attached to the bottom of the cellular disks, serving as bottoms.
To facilitate rotation of the carousel, a thrust bearing (sliding bearing) — a thin plastic circle — is installed at the bottom of its axis.
The given dimensions are approximate, as they depend on the spice jars.
Assembly
It begins with the shelf body: the top and bottom semicircular chipboard panels are attached to the ends of the wall on inserted round tenons with glue or simply nailed. To give greater rigidity to the connection, side posts are installed between the panels with fastening using nails and glue (carpenter’s glue, PVA).
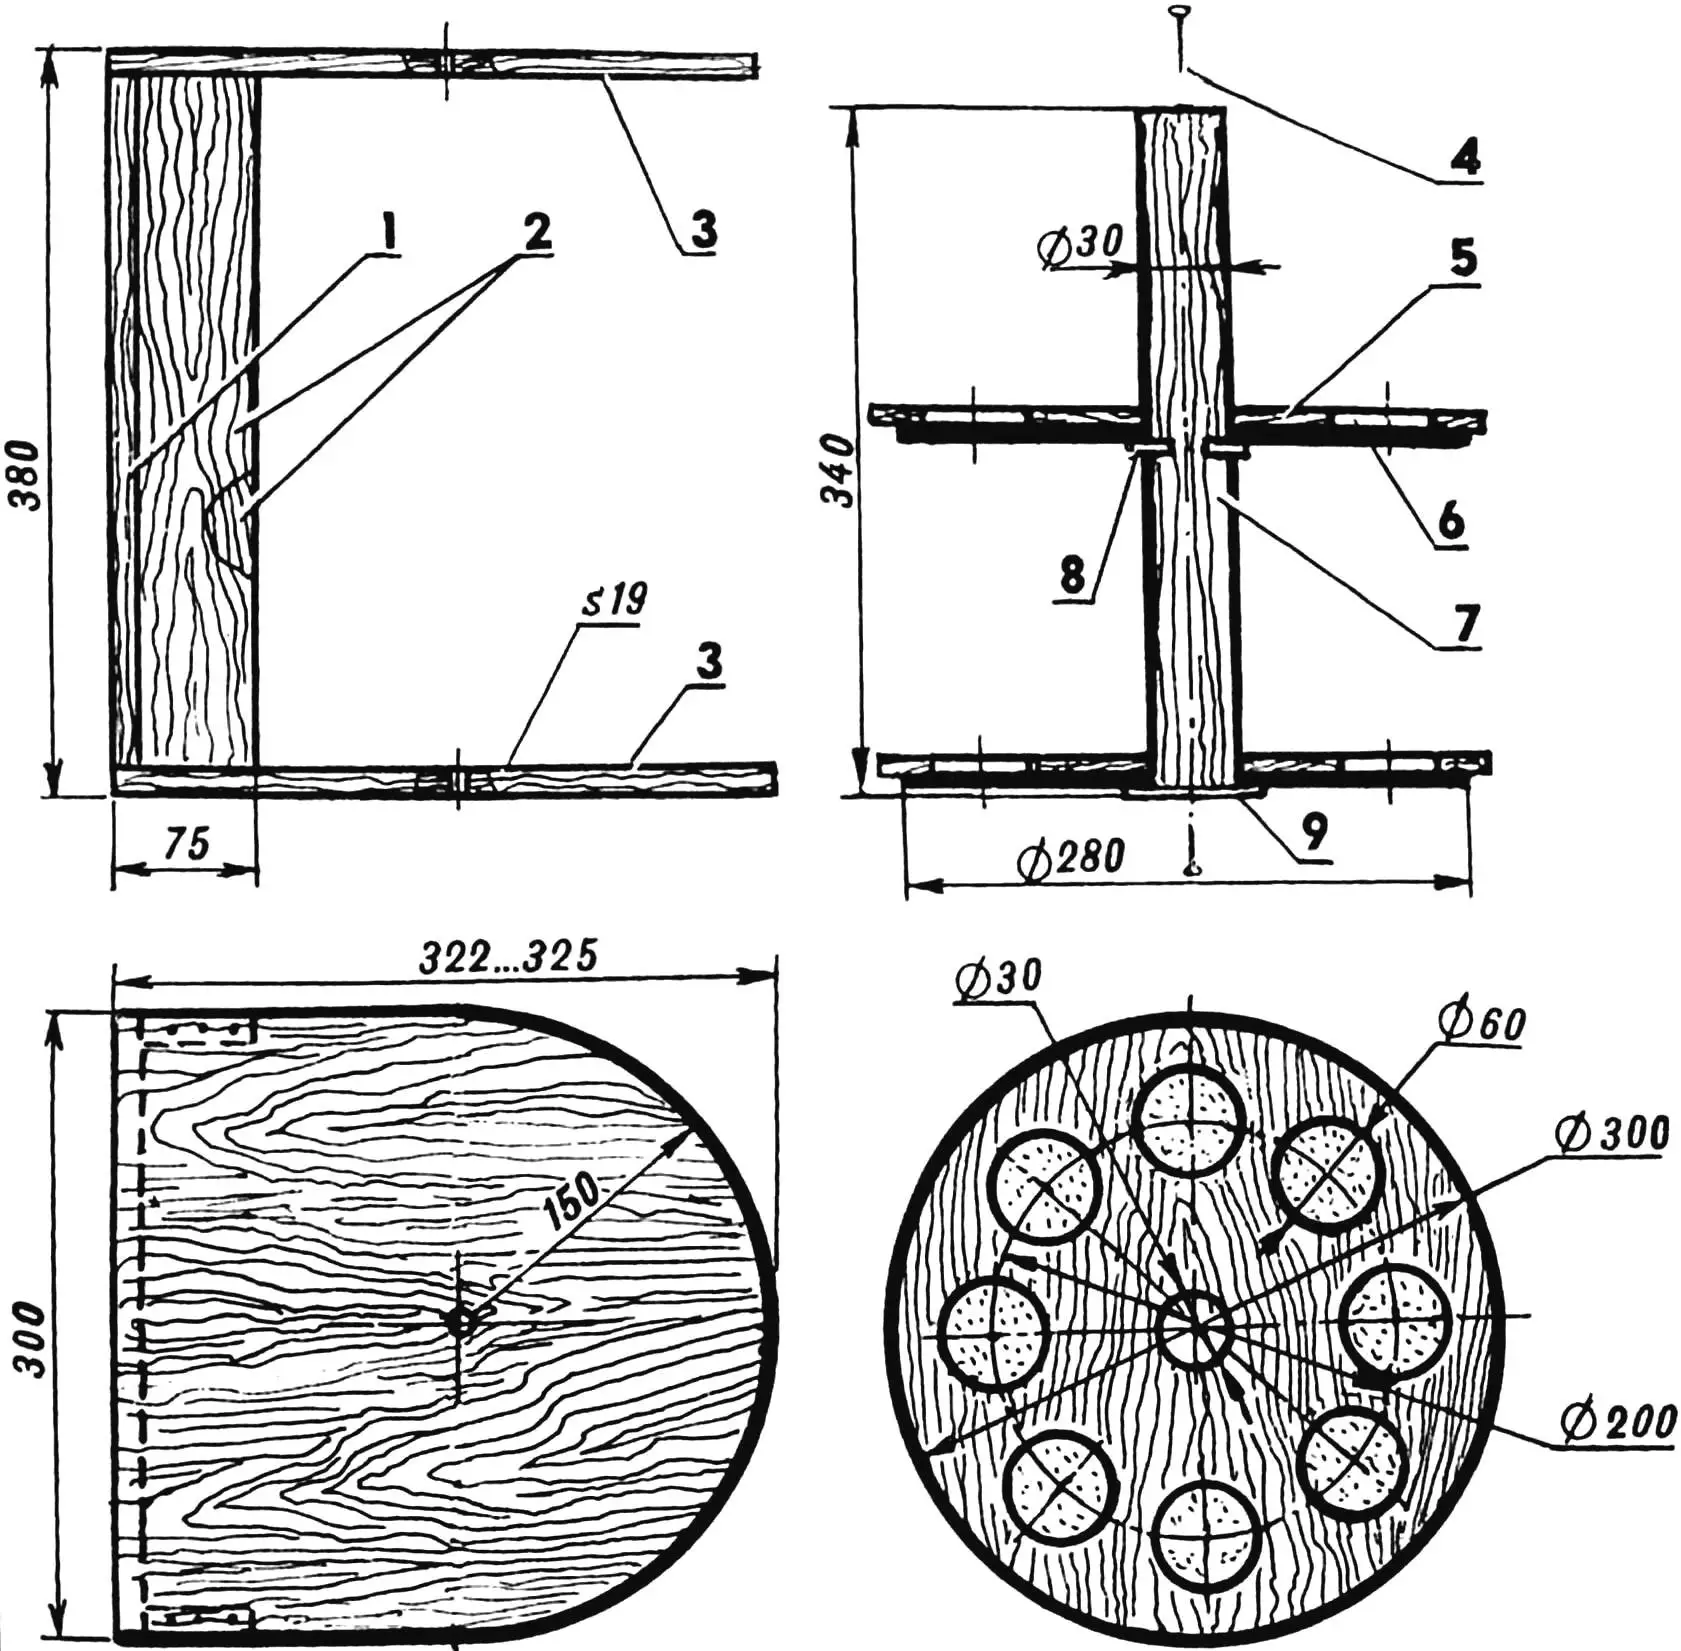
1 — wall; 2 — side panels; 3 — top and bottom panels; 4 — carousel fastening; 5 — cellular disk; 6 — solid disk-bottom; 7 — carousel axis; 8 — disk fastening reinforcement (nail); 9 — thrust bearing (plastic)
The carousel is assembled separately. For it, a rod — the vertical axis — is prepared, as well as both two-layer disks. The diameter of the cells and their number will be dictated by the size of the jars. The finished disks are mounted on the rod so that the lower one does not touch the base, and the upper one leaves the possibility of removing the jars underneath it from the cell-sockets. To reinforce the fastening of the upper disk, headless nails arranged crosswise are driven into the rod underneath it.
After securing the disks on the rod, a thrust bearing is glued under its lower end. Holes for fastening are marked with a nail at the axial centers at the ends of the rod.
The carousel prepared in this way is inserted into the shelf body and fixed through the prepared holes in the panels and rod with fasteners (made of nails).
Finishing
All elements of the rotating shelf are carefully sanded with sandpaper before final assembly, and then painted. This can be the currently popular “Penotex” in a preferred shade, or treatment with stain followed by coating with light furniture varnish in several layers, or painting over primer with oil or enamel paints in one or different colors.
Such a shelf looks good both on the kitchen table and on the wall. In the latter case, ordinary furniture hangers are attached to the back wall of the shelf for hanging.
«Modelist-Konstruktor» No. 1’2003
Recommend to read
 THE SHEATH FORK
Many piercing and cutting, cutting tools and tools have their own case or sheath (for safety). And worse than pitchfork? Often they are transported to the place of work, for example, on... ON THE WATER FASTER AIRCRAFT
What can you do — we have no way to get the materials, without which, it seems, is impossible to imagine modern models. A thin fiberglass (not to mention the carbon fabric), the specific...
