
 Camera “Polaroid-636” for Amateur filming — something not only good, but in some cases, simply preferred to all others of the kind. After all, it has one advantage, which is not even modern, advanced digital cameras — ready the it is issued immediately, on the spot and without delay.
But the design of the camera does not have either the self-timer, no tripod mount — so, the photographer is deprived of the opportunity to “capture” itself, and especially to be photographed in a circle of relatives or friends.
To partially compensate for these shortcomings of the camera to help the photographer at the time of shooting to be in front of the lens will help invented and made me a special device. The materials to produce the best available — the ones that always have on hand.
To repeat it (or similar) for any owner of the camera “Polaroid” because the design is quite simple.
The basis of the fixture — a platform of 12 mm plywood cut to form the lower part of the camera body In a drilled through hole and on top of in the direction of the rear edge of the selected groove depth slightly greater than the thickness of clamping the shelf clamp, as the latter in the hole and the groove and then inserted.
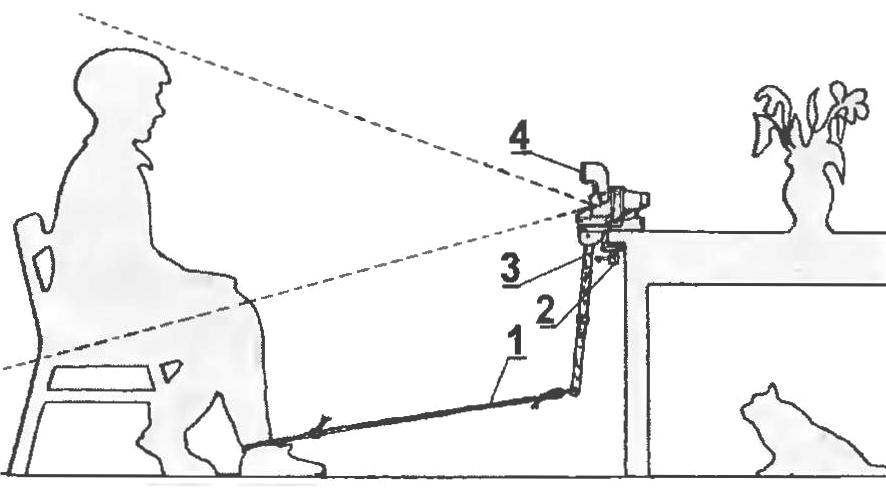
Camera “Polaroid” device for samopomoshchi:
1 — power; 2 — adaptation: 3 — camera; 4 — joint (table); 5 —clamp

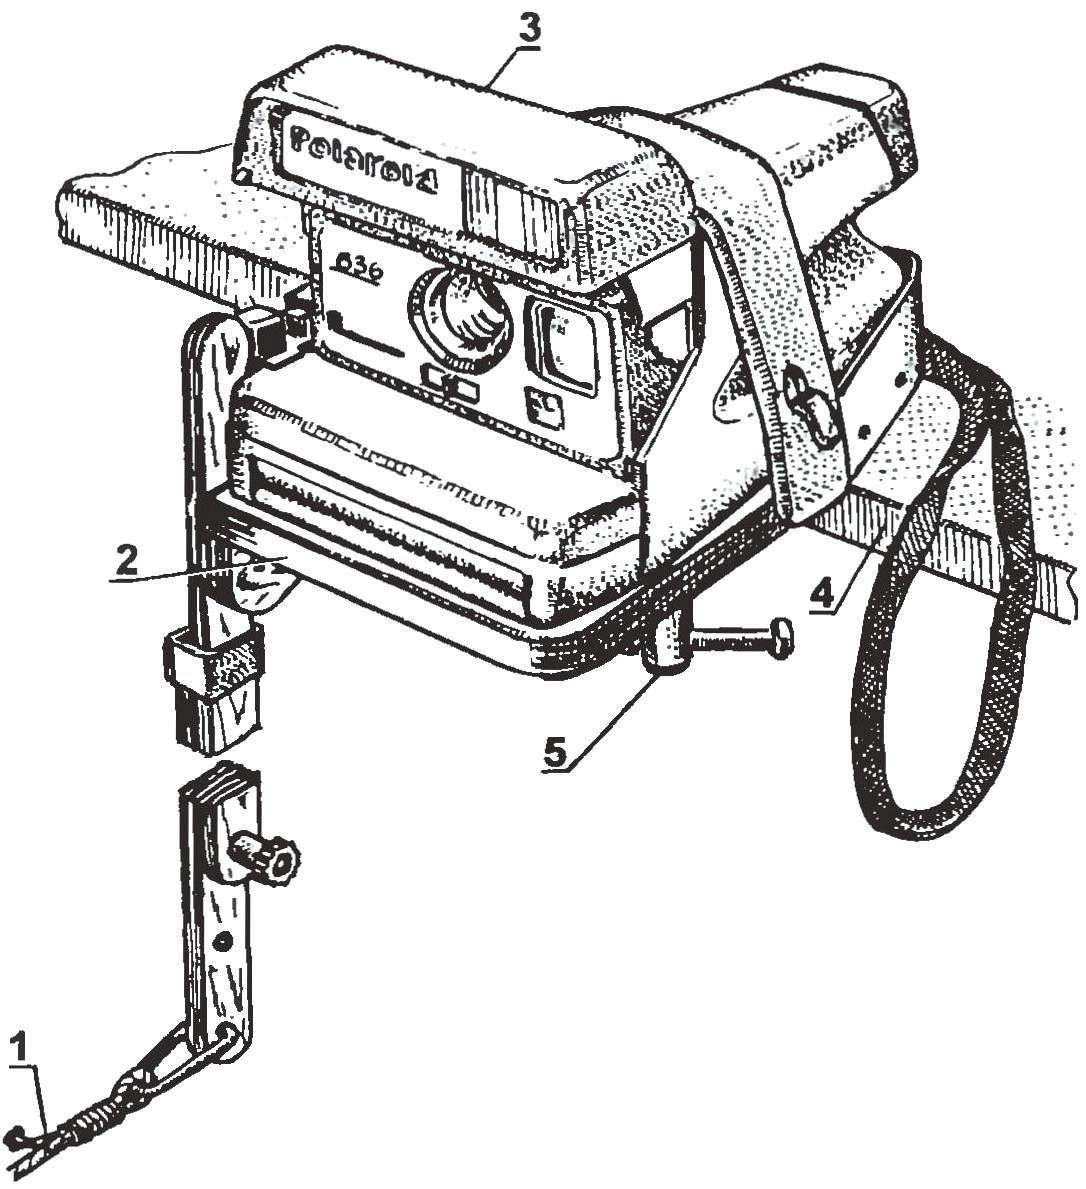
One of the ways samomoderirovanie:
1 — power; 2 — clamp; 3 — fixture; 4 — camera
The rear part of the platform is framed by a restrictive clamp, made of aluminum sheet of 1.5 mm thickness and attached to the edges of the pad with small nails. At the ends of the staples are made hooks they cling rubber tourniquet, the chamber is pressed against the pad. Not to accidentally scratch the camera body on the bracket (as indeed in the rest of the details fit, even wood), all faces and corners are rounded and internal side glued pad of strips of thin foam.
At the front of the site, bottom, right side (in the direction of the camera lens) attached to the dowel and glue a small bracket EDP. To the bracket on the axle (screw), with the possibility of rotation on it, is attached to the lever of the trigger device.
The compound lever, both parts of it — master and slave — is made of 5 mm plywood strips of width 20 mm. the Connection parts is made using a clamp from a steel strip section 10×1,5 mm, riveted on the upper end of the leading part (in which is inserted the lower end of the driven part) and the bolt M3 with the special (zamorachivayas by hand) nut the length of the leading arm of the lever you can change the speed, thereby adjusting the amount of force on the lever for tripping the shutter release button. Such a connection of parts of the lever allows you to stack them for storage, thereby reducing space occupied by fixture location.
The upper end of the driven part of the arm is made with rounded inside of the strap, so as not to confuse the ends during Assembly.
All plywood fixture parts prior to Assembly are covered by a colourless transparent varnish.
Now I will describe the process of “samomoderirovanie”.
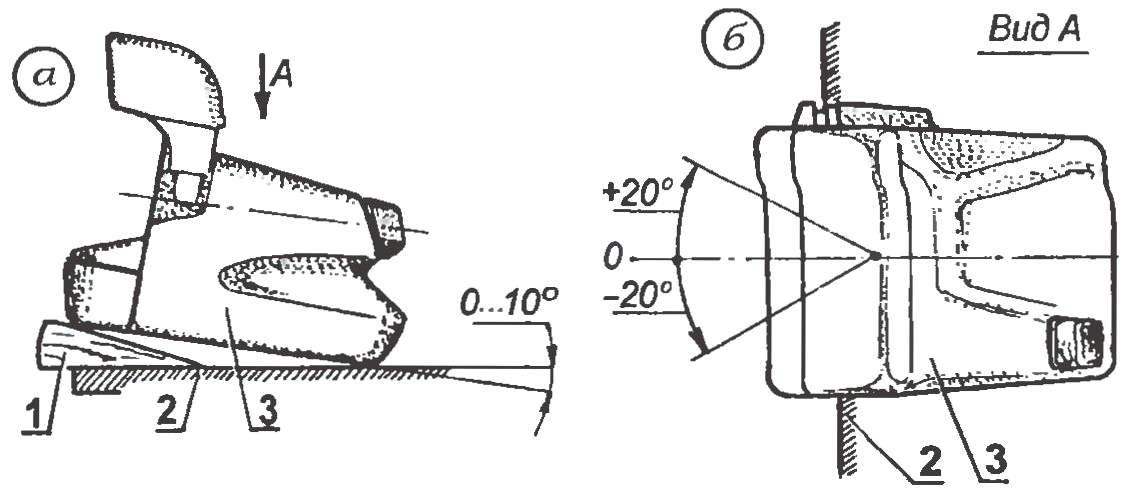
Adjustment of the angle of photography (a — vertical, b — horizontal):
1 — lining (wooden wedge PLI strips of cardboard); 2 — abutment surface; 3 — the camera
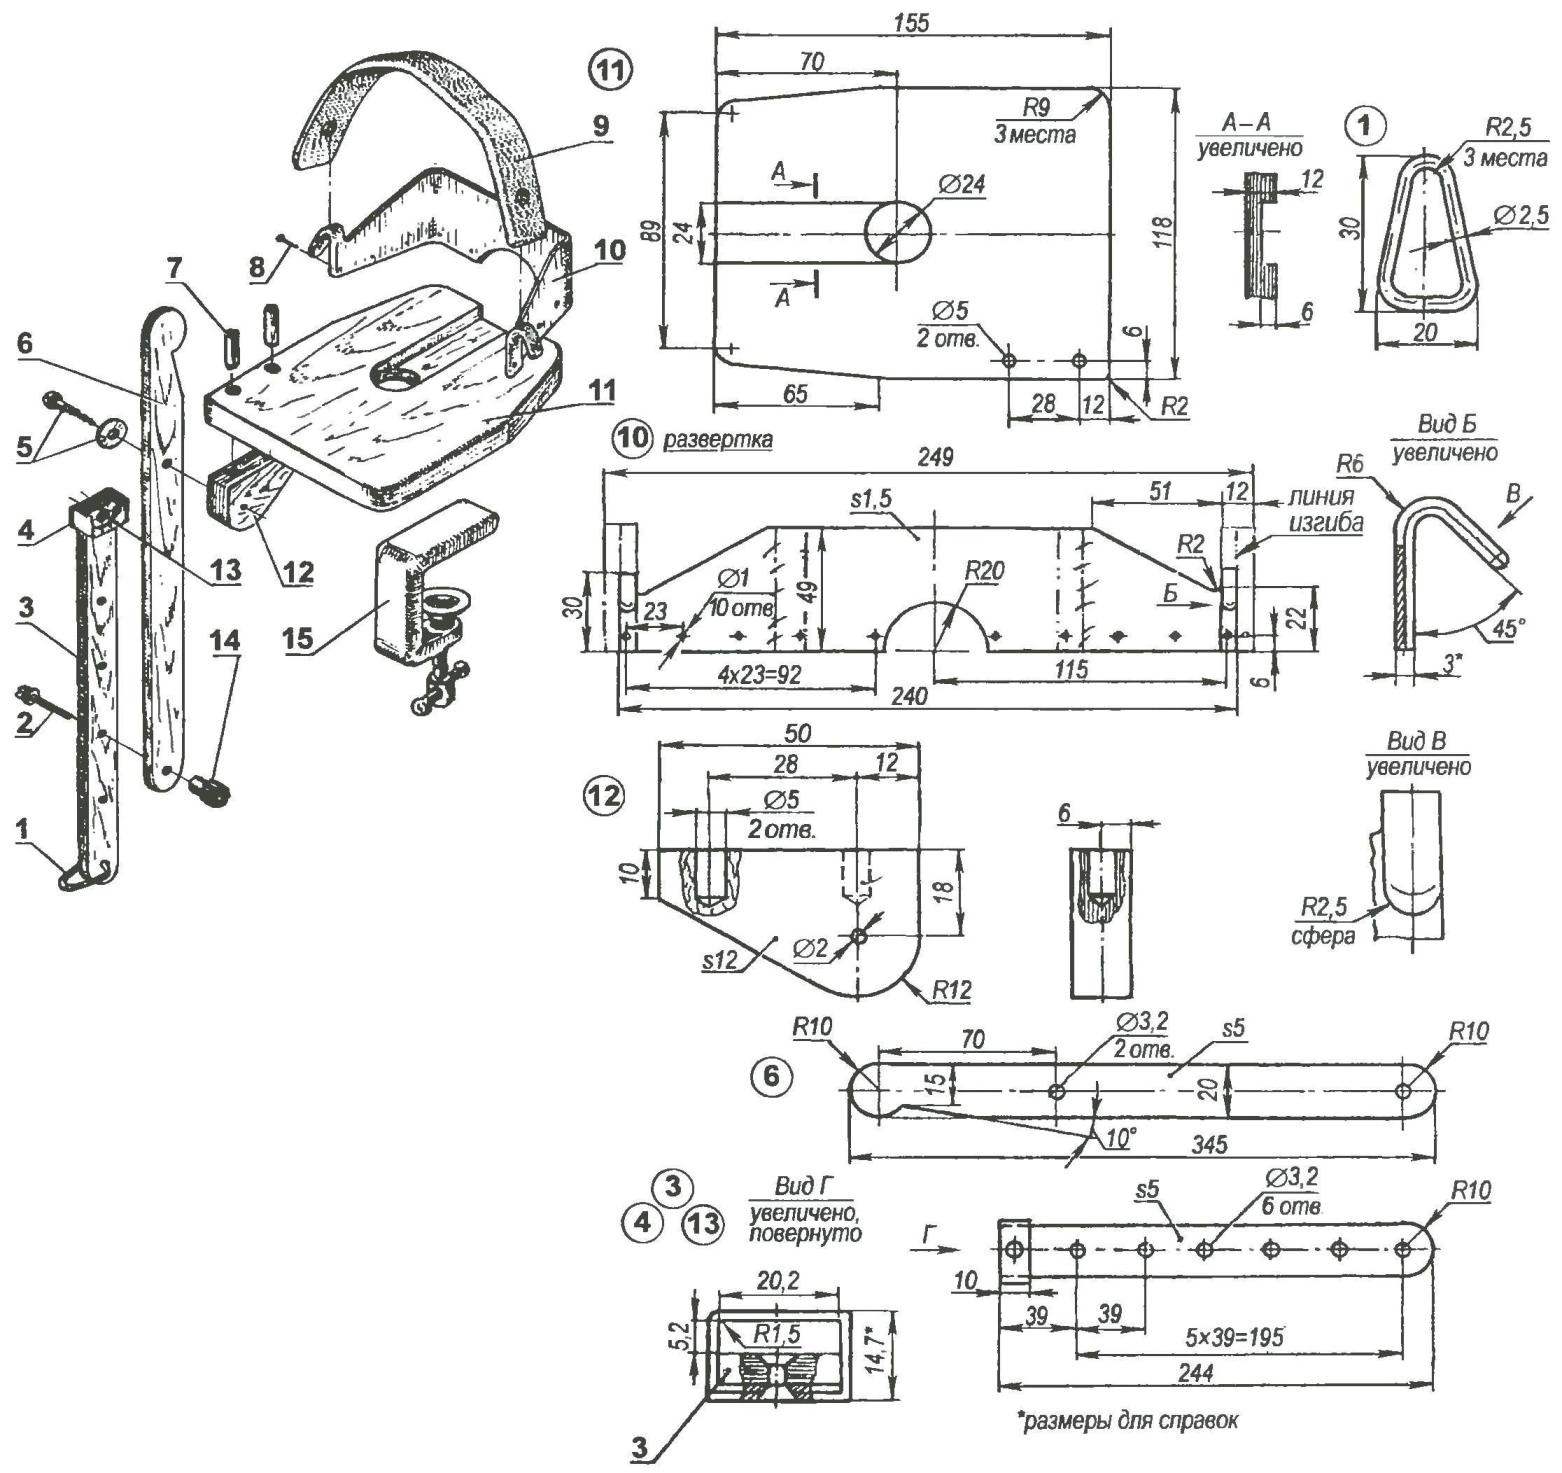
Fixture length samopomoshchi camera “Polaroid-636” (clemency drawing):
1 — earring (wire OVS Ø2. 5); 2 — M3 bolt with washer; 3 — a leading plank of the lever (plywood BS, s5); 4— clip (steel, sheet s1,5); 5 — lever axle (screw with washer); 6 — strap led arm (plywood BS, s5); 7 — thick Ø5 (wood, L20, 2); 8 — nail Ø1 (L7, 10 PCs.); 9 — clamp (rubber band 250x25x4); 10 — retaining bracket (aluminium, sheet s1,5); 11 — area-base (plywood BS, s12); 12 — bracket (plywood BS, s12); 13 — rivet Ø3 (aluminum); 14 — special nut M3; 15 — clamp
The fixture installs on the edge of the table focuses on the place where it will be the subject of the shooting and secured with clamps. The camera is mounted on a platform device and is fixed on it a rubber plait. Strap camera, not to interfere, is inserted into the hole of the bounding bracket and is moved back or to the side. If necessary, the camera angle vertically adjustable installation of the linings of the material at hand under the bottom of the housing. The horizontal angle of your camera lens is adjustable within ±20° rotation of the apparatus with platform and clamp. Next to the earring bottom of the arm attaches cut cord length (at least) to the point where it will be at the time of samoshenko photographer. At the end of the knotted cord loop, such that it freely entered with the foot in the Shoe.
Now the photographer leads the camera to a working condition and is scheduled to place in front of the lens, gently wears a noose on the foot approximately at the level of the ankle, and assumes the pose and gently pull the cord until the moment of operation of the starting mechanism of the camera photography made.
When shooting outdoor fixture with a camera can be mounted, for example, on the branches of trees and other suitable objects.
V. PETROV, S. fish, Krasnoyarsk Krai
Recommend to read
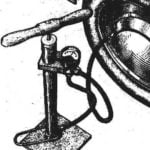 THE PUMP UNDER CONTROL
Motorists have appreciated a commercially available foot-pump to inflate tyres equipped with pressure gauge: it is easy to use and allows you to constantly monitor the pressure in the...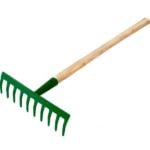 UPGRADED RAKE
A lever mounted on the rake (figure 1), will greatly facilitate the work of the gardeners when released from the teeth of grass or foliage. Make it from steel wire diameter 6 ... 8 mm....
