Frame with elements of the inner liner:
1, 8 — slat bottom frame, 2 — front, 3 — cross front, 4 — upper (push-in) cross brace 5 — rail for krysheval trim, 6 — side cross member 7 is a support cross member for bedside tables, 9 — the bottom of the Cabinet, 10 — side cladding, 11 — rear valance, 12 — roof sheathing.
With all the variety of homemade built-in cabinets, a range of sizes however can be recommended as standard. In our version (closet) height from the base of the crossbar for hangers of about 1900 mm. it is also Desirable that above the crossbar, up to the mezzanine remained stock — 60-70 mm. For normal placement of clothing on hangers required depth of approximately 600 mm.
The frame of the Cabinet can be mounted in two ways. If the walls of the niche converge exactly at right angles, it is collected outside the opening and then tightly put in place. If there is a curvature, the frame should not reach the walls of about 20-30 mm, so that in the future to fully enter the niche; the crack close up then slip the rail. But still better to mount the frame on the parts directly in the recess in the wall.
For the wardrobe, you will need timber with a section of 40X70 mm — for racks, straps 30-60 mm — horizontal elements, sheets of plywood or hardboard for the interior lining, MDF — doors, the bottom of the upper shelf and inner Cabinet. The hanging rail can be wood (say, the handle of a shovel) or from the pipe 1 /2 “. For hanging doors fit the piano hinge. All major connections are made on the screws with glue.
Begin Assembly with the lower frame. If there is no suitable Board, and the only plank, she is made double. First in a niche is injected the lower part of the set and bursting at the top of the mezzanine bar of the rear rack, then stack the second frame part (glue). Put on the left front side cross member that connect the spikes cover the tables. Once you can install and the rest of the crossmember that the rack and left rear. Now turn right a pillar. Entering it, immediately bursting front upper mezzanine crossbar for connecting it with the rear right stand screw side of the crossbars. After that, it is better to do the roof sheet mezzanine: fasten it with small screws or nails to the rails mounted on the top spacer to the strut.
Not yet installed cross bar and front cross member, it is convenient to perform the lining of the walls of the Cabinet (the back is inserted in advance, but may remain neophitou, if the wall is papered). The turn came of the crossbar: it can permeate the lateral cross member or sign in harvested them blind holes. Finally put the other side and the front crossmember, spreading the bottom the bottom of the plywood and attic chipboard — internal work with the frame finished.
The last operation — with doors. The first major large to attach, and then has to adjust and set in place the mezzanine. For decorative purposes (as an option) between the top and main doors can be left indented, appearing in the middle of the front crossmember. Bottom main door should not close the bottom frame entirely, but only slightly, by approximately 10 mm, to go to her. The piano loop is better to mount small screws with glue.
If the doors are harvested from is not covered with a protective or decorative layer particleboard, remember that according to the sanitary requirements of the material require gluing or painting. Here the house master is available scope for choice. One thoroughly cleaned the surface of the door skin, treated with stain (or not) and cover it in several layers of a furniture varnish. Second — just painted with an enamel paint suitable for the interior of the shade. The third use washable Wallpaper, film under the tree (again, optionally, covering the top with varnish).
If the closet is supposed to hold not only clothes, but small things — gloves, hats, scarves, other accessories inside the Cabinet you should install a small bedside table with drawers.
Table:
1 — Reiki-guides for drawers, 2 — top panel 3 — side panel.
The nightstand drawer.
Her body can form only two panels: top and side. The second side wall and the rear will be the plane of the Cabinet. The cross, laid in the left side wall of the Cabinet, may serve as a support bar for the top panel of the tables. However, the role of the support is completed, and rail — similar to those that will be filled on the sides of the wardrobe and bedside tables as guides for drawers. The same rail will be fastened to the side panel of the cabinets to the underside of the Cabinet. Between panels it is easy to connect plug-in round thorns, as shown in the figure.
The sizes of the tables are dictated by the necessary number of boxes. Better if its depth will be somewhat less than that of the Cabinet. Collect boxes from thick plywood or small boards, with a bottom of fiberboard or plastic, slightly embedded in the walls of the box: this is a shallow cut.
Since the dimensions of the drawers are very small and the load from the intended content, the walls between an optional punch in the dovetail — sufficient and more simple connection for plug-in round thorns and glue.
Panel tables and the front walls of the drawers a bright color enamel paint — yellow, orange, red.
G. BARANSKI, Bulgaria
Hidden reserves for built-in wardrobe might have in your home and in addition to niches for example, at the kitchen door.
The fact that the layout of some apartments doors opening to turn inside the kitchen, thereby depriving modest “yardage”, and the radius of its rotation, nothing can be put. However, the jamb which carries the hinges of the door, somewhat away from the wall, about 20 centimeters (in different houses). This little pier and it was decided to use a different Cabinet: with one door it was to be the very kitchen door in the open position (and it is almost lo the ground state).
The location of the Cabinet in the kitchen:
1 — door, 2 — zadworny wardrobe.
In fact, the whole design of two main parts: Board-front Board and cover. All internal shelves and the base of the septum — continuous “variation of”, which depends on the imagination of the artist or items. Because in the process of operation can appear stuff of other dimensions were chosen such fastening internal elements that would allow, if necessary, freely change the internal layout.
Zadworny wardrobe kitchen door:
1 — bottom support rail, 2 — bottom complete, 3 — Board-front, 4 — Board cover, 5 — bearing-walls, 6 — shelf, 7 — the area of the mounting rack to the wall, 8 corner mount shelves, 9 — metal spike.
Here’s the train of thought and calculations (the latter mostly performed in-place, directly on the wall). So, the width of the Board-stands must equal width of the pier, and its height is the height of the door: then the door can tightly cover the inside of the Cabinet. Krysheval width of the Board is greater than the width of the pier on the thickness of the door: the resulting visor will block the upper slot and protects against the penetration of dust from the top; and from an aesthetic point of view better. The length of the cap equal to the distance from the pier to the edge of the door leaf; the lid thus rests on the rack, which is attached with screws, and the wall — to the metal corner.
She strut attached to the wall on two small corners (the inner side). For shelves on it and screwed on the wall corners, horizontal shelf which has a single hole with metal (nail) thorn shelves: this makes it easy to remove and install. Partitions — also, the PA metal spikes.
The internal solution, as already mentioned, is selected in accordance with the size of the planned storage in this closet items — mostly under small and large glass jars from jams and pickles (bottom and the first shelf) and a box of cereals and medicinal plants (middle and top). The lower right corner is reserved for bunk Ironing Board; on the shelf above it is a mixer, grinder and thermos — their sizes and determined the distance between the shelves.
Bottom shelf — the “tulossa” and below under load it does not bend, provides a longitudinal, resting it on the baseboard of the wall and the timber front.
For more dense prileganija to the cupboard door magnetic catch set with its counterpart on the front.
L. KRUGLIKOVA, architect
Recommend to read “ROWING” DRIVE VELOMOBILE Olympic games were held in Greece. I like venoconstrictor, pleased with the success of our riders on the track. And was impressed winning four rowers on academic Powerful boats, rowing... HEAT-RESISTANT PUTTY Remember, we have the oven built of red brick, there was a crack. When you are kindling from it stretched a thin trickle of bluish smoke. My grandfather made a special putty and filled... 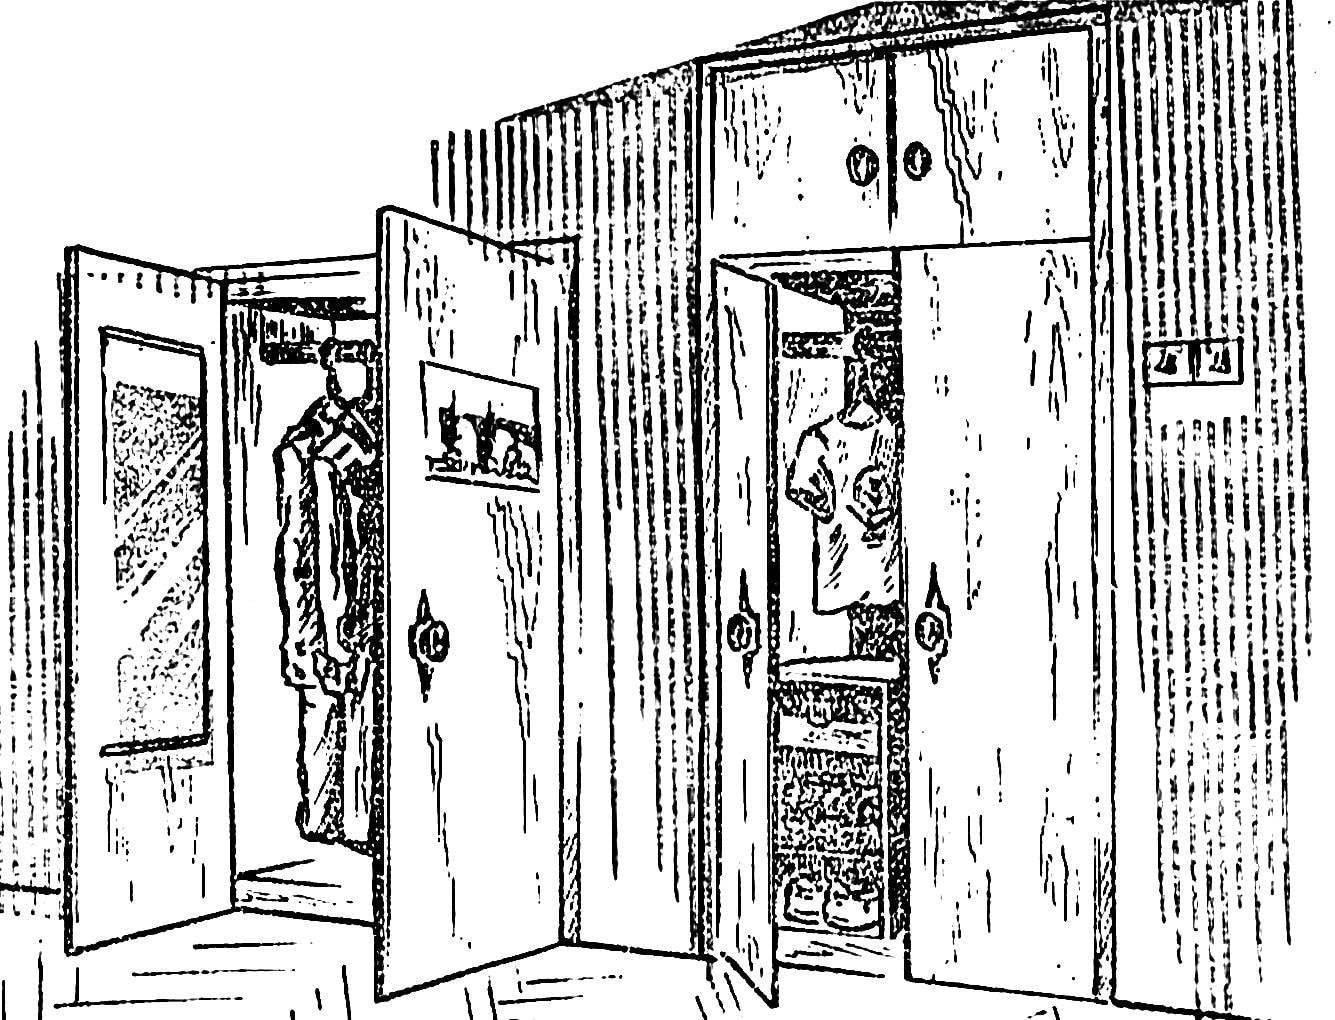
 An indispensable complement to modern homes steel built — in cabinets in the kitchen, hallway, bedroom. Unlike other types of furniture they do not take up useful floor space, simple and cheap to manufacture, and most importantly, being hidden in the wall, do not violate the rational solutions of the interior.