CELLAR ON THE BALCONY

CELLAR, ON THE BALCONY

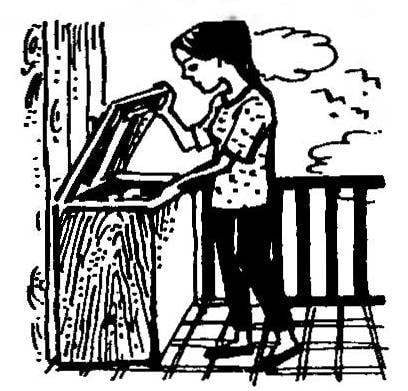
For storing vegetables in winter increasingly cold boxes that are well established not only in urban environments but also in rural areas. Especially where high groundwater level is difficult (and sometimes impossible) construction and development of full buried and underground storage facilities. The popularity of container mini-cellars is also due to their relatively simple design, is available for repeating many homebrew.Cellar-“thermostat” is, in fact, insulated box, which is equipped with a heater and a control unit.

The control unit measures the temperature, compares it with the preset value and, accordingly, enables or disables Parking with the provision of ventilation by convection currents of air.
 
I designed and properly functioning for several seasons mini-cellar is no exception. Especially due to its dimensions (balcony, where is a set, alas, is not dimensionless), the cost of parts and materials, ease of Assembly and operation of the repository.
Take, for example, the foam panels 60 mm thickness. Firmly United by glue-not only do they serve as a heat insulator, but also are the basis for the design. For additional protection from moisture, improve heat resistance and mechanical strength of the casing of these panels primed with diluted PVA or “Bustilat” followed by pasting (inside and out) oilcloth textile lining.
 
A set of foam
A set of foam:
 
1 — maximum load of vegetables; 2 — heater; 3 — cover; 4 — a sealing frame; 5 — wood banding edge of the body; 6 — wall; 7 — wooden lattice; 8 — base; 9 — wooden pallet; 10 — electro – insulating sleeve; 11 — cable tray; 12 — network cable; 13 — control unit; oilcloth facing of the case conventionally not shown

 
Cover dimensions correspond to the cross section of the mini-greenhouses. For a reliable seal of the junction of the body and give more rigidity to its inner surface glued to the foam frame. The same is durable and the tray. Covered with several layers of moisture-proof enamel, it evenly distributes the base weight of the stored vegetables.
 
But the housing can be assembled from three-layer (tree-slag wool-wood or wood-foam-wood) panels, the manufacturer even in the modest home Studio is relatively simple. You only need to keep in mind: to reduce heat transfer between the inner and outer walls must be a minimum of connecting parts. And wooden bundles, without which it is impossible to do, it should be installed so that the heat flow was directed across the grain, because the wood in this case, the conductivity is minimal.
 
Now about the heater. In my cold box is a self — made construction using three heat bulbs. Its advantages are availability, cheapness, simplicity of installation more than compensate for the main drawback — the relatively small service life at low power density.
 
Lamps — most common located in a vertical casing (mine). Used convection, which is free upgrade lamps heated air under the cover of vaccine with subsequent penetration through the layer located on the grid of agricultural products (e.g. potatoes) and return (already cooled) to the bottom of the mine. The change in the number of included bulbs are easy to obtain the required power of the heater.
The pit walls are layered between sheets of plywood sandwiched woolen cloth or flannel. The choice of these materials due to their low thermal conductivity. Also provides additional protection from overheating in the shape of a cylinder of tinplate. The pit walls are bonded at the bottom aluminum area of 15×15 mm and above metal banding with rivets.
 
Lampholders for incandescent lamps are arranged on three staples of the metal strip which is firmly connected (riveting or welding) a bracket. The insulated temperature sensor wire from the suspension, where it is placed 50 — 60 mm from the base of the container.
 
Electric heater (option)
Electric heater (option):
 
1 — interior lining of mine (plywood s3); 2 — fabric insulation; 3 — external cladding mine (plywood s3); 4 — metal casing; 5 — rivet (52 pieces); 6 — M6 bolt (2 PCs); 7 — nut-lamb (2); 8 — bracket; 9 — filament lamp; 10 — electroputere; 11 — bracket (3 pieces); 12 and frame retainer (aluminium angle 15×15 mm); 13 — grid vaccine; 14 — point welding of the bracket and the bracket; 15 — suspension of the wire of the temperature sensor; 16 — temperature sensor (thermistor, 2); 17 — based vaccine (“sandwich” plywood-foam-plywood); 18 — core electric cable; 19 — sleeve (white tin)

 
Control unit, often called a thermal stabilizer that maintains the desired temperature in the container, including or switching off the electric heater. Such devices published a lot, including in the pages of “Modeller-designer”. Recommend your, proven, option with two thermistors, thyristor, transistor, and microchip.
 
I am sure that the present samuelidisa, even if he had to make only agricultural machines and aggregates, the list of what is needed to build the thermal stabilizer does not scare me. First, the number of radio parts here minimized, none of them are expensive and scarce. Second, a circuit diagram, and moreover, the circuit Board is not that difficult.
 
To understand heat stabilizer, start with the power supply. Here the voltage is rectified (diode Assembly КЦ402Г), stable (Zener Д814Б). Ripple is smoothed by capacitor CP.
 
The tone of the whole application set the thermistor R7 and R8 are, standing on the inputs 1, 2 and 5, 6 of the chip DD1. And the latter operates so that their resistance is temperature-dependent, the conditions for closing or opening of the transistor VT1, the control thyristor VS1, which includes-switches off the load RH (electric heater).
 
As temperature decreases, resistance of thermistor increases. And on reaching one of them, the lower temperature limit during commissioning, electronics work in such a way that opens the thyristor VS1, and through the load R flows pulsating current from the diode bridge VD1-VD4.
 
The load remains enabled regardless of which of the thermistors gave the signal to switch (or both) is at pin 11 of the chip will remain low voltage. When the temperature in the vaccine is increased to a predetermined value, the resistances of the thermistors decreases. And after reaching the upper temperature limit of the thermistor R10 supplies a signal to the switch. The current through the resistor R3 is stopped. And in the “zero” point (a pulsating voltage), the thyristor VS1 is closed, shutting off the load Rh. In this condition the scheme is until the temperature again decreases and the resistance of one thermistor will increase so that the voltage at the input of the chip increases to switching value (“high”), and the transistor VT1 is closed and thyristor VS1 will open.
With the switch SA2, the heating element can be turned on forcibly, regardless of the signal of the control unit. It may be necessary to monitor the safety of incandescent lamps or forced ventilation of the vaccine.
 
Adjustment of the heat stabilizer is reduced to finding the upper temperature (to) and lower (tH) thresholds, which are connected to the thermistors features according to the algorithm in some limited volume and there is measured the temperature with a mercury or alcohol thermometer. And the recommended sequence is that initially this volume placed the first sensor. Next, set the temperature in accordance with the selected value of tH switch. The thermistor R7 is kept in such an environment at this temperature for about 10 minutes, after which, by changing the position of the movable contact of the variable resistor R5, to achieve operation of the device and turning on the heater RH.
 
Principalia the electrical circuit and PCB assembling a thermos of tablesfor
 
then heat the environment to a limited extent by some value (e.g. 2 °C) and placing next to the first the second sensor is a thermistor, adjust already on R10. This produces a time delay and changing the position of movable contact of the variable resistor R8, to achieve off of the heater R
 
The adjustment must be repeated several times, not forgetting the safety rules, because all the elements of the circuit are under voltage of 220 V.
 
The control unit is placed in a locked box separate from the heater lamps and sensors-thermistors.
 
Now to replace the parts. There are a lot of choices. In particular, diode Assembly КЦ402Г allowed to replace a similar КЦ402В, КЦ405Г and КЦ405В, wherein the location of the contact pins. A high voltage (with the indices “A” and “b” in the name) is also quite acceptable, but not from the series КЦ403 and КЦ404 — they contain two independent rectifier bridge. In extreme cases, we can recommend and a home-made Assembly, such as power diodes КД226В brands, КД411Г, Д231 or 2Д215А.
 
Cobalt-manganese thermistors KMT-4 valid to replace the copper-manganese MMT-4. However, the latter have a smaller value of temperature coefficient of resistance and therefore lower sensitivity.
 
Chip К176ЛА7 with four logical elements “2I-NOT” designed for 9-volt supply voltage, while still functioning at 5-10 V and consumes a very small current. She has good analogues, for example, K561LA7, К511ЛА1 and К511ЛА5.
 
Variable trimmer SPb can be replaced by SDRs, however, the latter is worse than the humidity and constant value of the set resistance.
 
Well, instead of Д814Б (Uci = 9, 1С1 — 36 mA) is quite acceptable other Zener diodes. For example, D810, Д811, Д814А. The same can be said about the replacement of the transistor KT315 and КТ315Б on ГТ341 (with any letters) or a semiconductor triode КТ3102А.
 
In conclusion, a few remarks about the features and operation of mini greenhouses. Because with all func-
functional similarity the vaccine is fundamentally different from traditional cellars, and the basis of this difference in ventilation. The first of these it is, essentially, missing. As air exchange occurs, it would seem, only when the cover is opened.
 
In fact, the air exchange with the external environment when the heat stabilizer is constantly happening: when I turn on the heating element temperature in minibaseboard a few increases and a portion of the air exits from the enclosed space to the outside, and the cooling of the internal volume, on the contrary, heading back inside.
 
And the greater the temperature difference, the more is the switching of the heater, the more intense is the “breath” of the vaccine. The reflection of this fact is extremely important since it allows to avoid increasing the humidity within the storage and rotting in it products.
 
But the possibility of maintaining temperature and humidity at the required level for use, however, is not unlimited. It turns out that putting vegetables in storage is desirable when the outside temperature is below + 10 °C. And it is necessary to keep the wet veggies in the thermocontainer did not fall.
 
For getting rid of moisture allowed to use a forced operation of the heating element when the lid is opened. This will allow the layer to dry vegetables in cold box due to suction of outside air and exhaust moist, passed through the layer to the outside. Such an operation is possible even without the cost of electricity: nastavi housing of the heating element pipe, obtain the natural extract.
 
At low temperature the ambient air humidity inside the cold box is always higher than the humidity of the outside air, so that when the “breath” of the vaccine is freezing of the joint cover. This is a natural process, and to deal with it is not necessary. And the cover is not frozen to its nest, it is enough to insert into the gap between her and the corps of strips of plastic film.
 
Finally, the last tip. The best results — the maximum uniformity of temperature throughout the storage space, and small deviations from steady state is achieved when the vaccine when continuing the heater gives exactly as much heat as required.
M. VEVIOROVSKY

Recommend to read

  • CORONADO – HUNDRED YEARS OF EXCELLENT SERVICE IN THE NAVYCORONADO – HUNDRED YEARS OF EXCELLENT SERVICE IN THE NAVY
    In 1774 all of sea power by the thunder of artillery fire had spread sensational news - in England there is a new weapon of incredible destructive power. Of course, there immediately...
  • TO HELP THE CABINETMAKERTO HELP THE CABINETMAKER
    What tools not in the Arsenal home master furniture maker. Offer another one. It can help you to choose the decorative grooves on the exterior panels. For the manufacture of this device,...