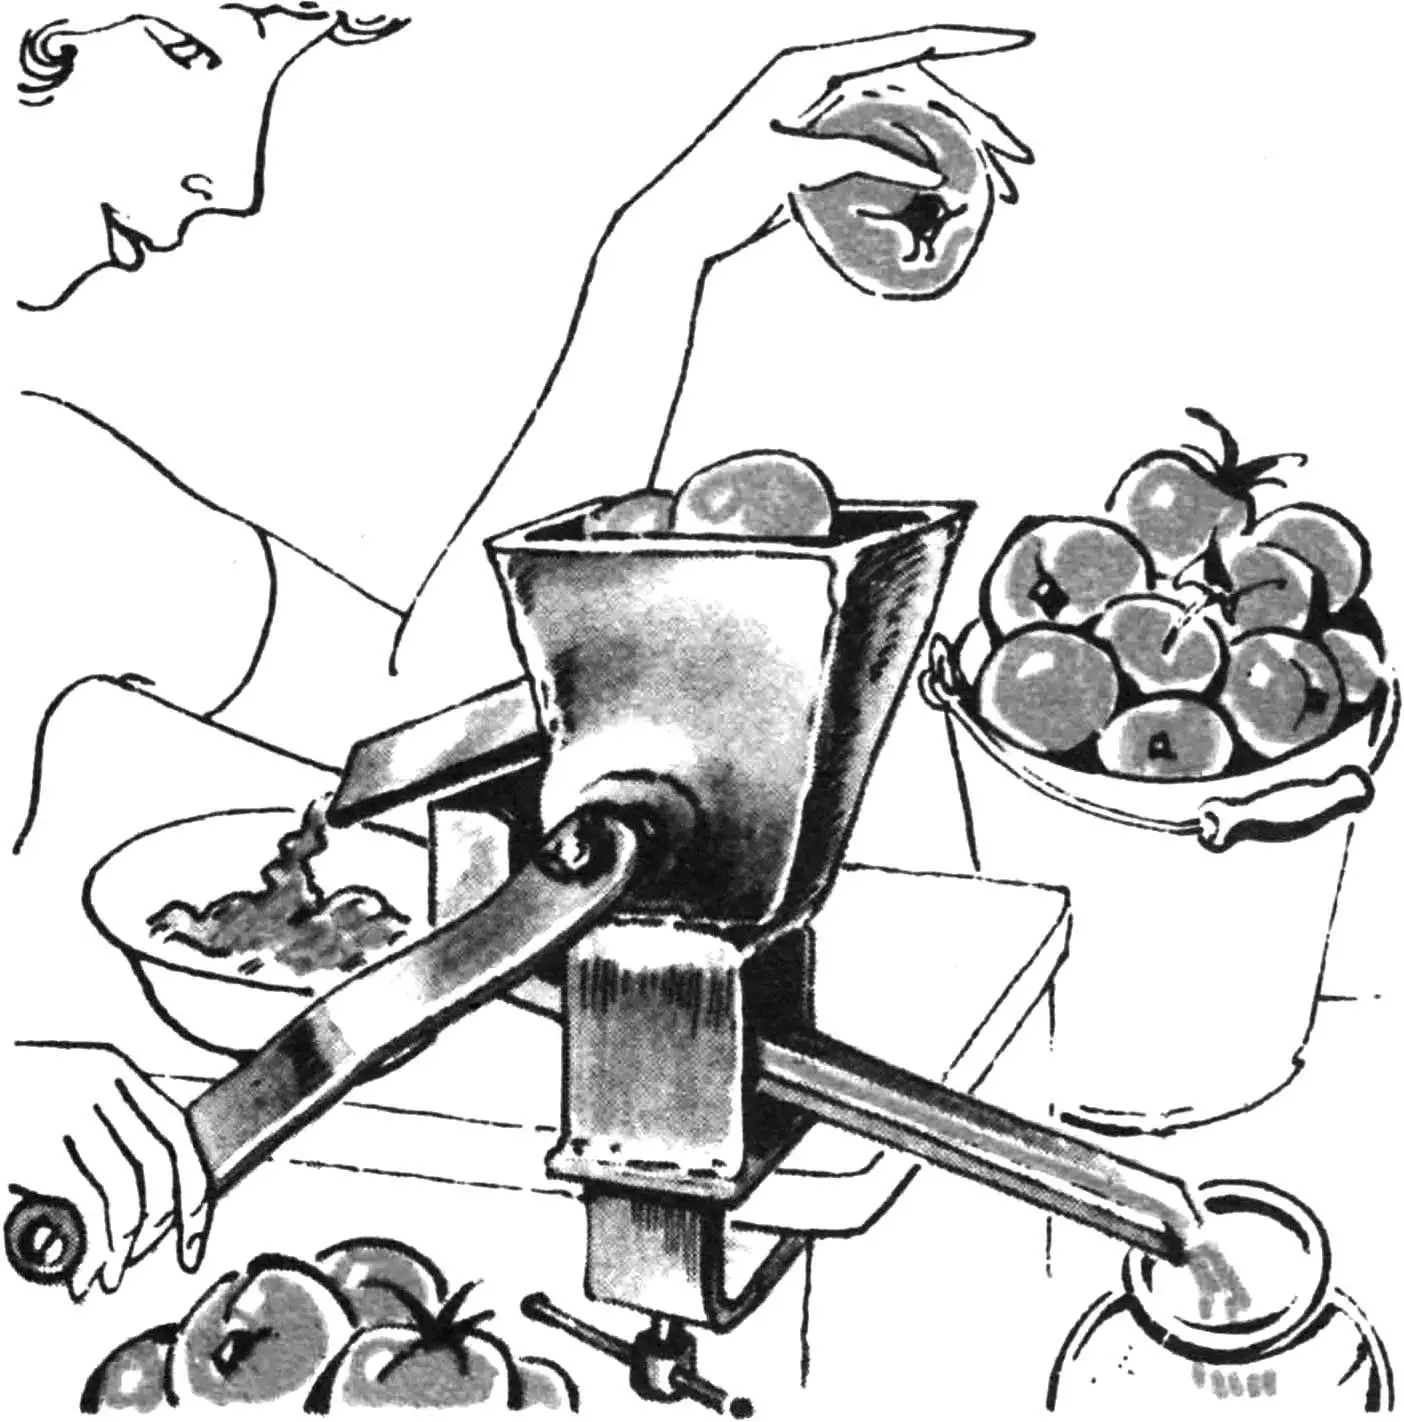
Every time the season for preserving vegetables and making juices approaches, I catch myself thinking that I’ll have to go to my neighbor again to borrow his juicer. It looks unassuming and simple in design, but once I’ve worked with it, I can no longer bring myself to use my industrial electric-powered juicer with numerous attachments: after using it, I’ll have to wash the entire kitchen again and clean all those attachments.
The neighbor’s homemade one is a completely different story: you only need to wash three parts afterward, and seeds and pulp don’t get stuck, while the productivity is such that even though it’s manual, I get a bucket of tomato juice in 30—40 minutes.
It’s a great pity that such devices are not available in stores. Therefore, I decided to describe the design of this juicer in the pages of your magazine: maybe someone will make one for themselves, or perhaps industry will become interested.
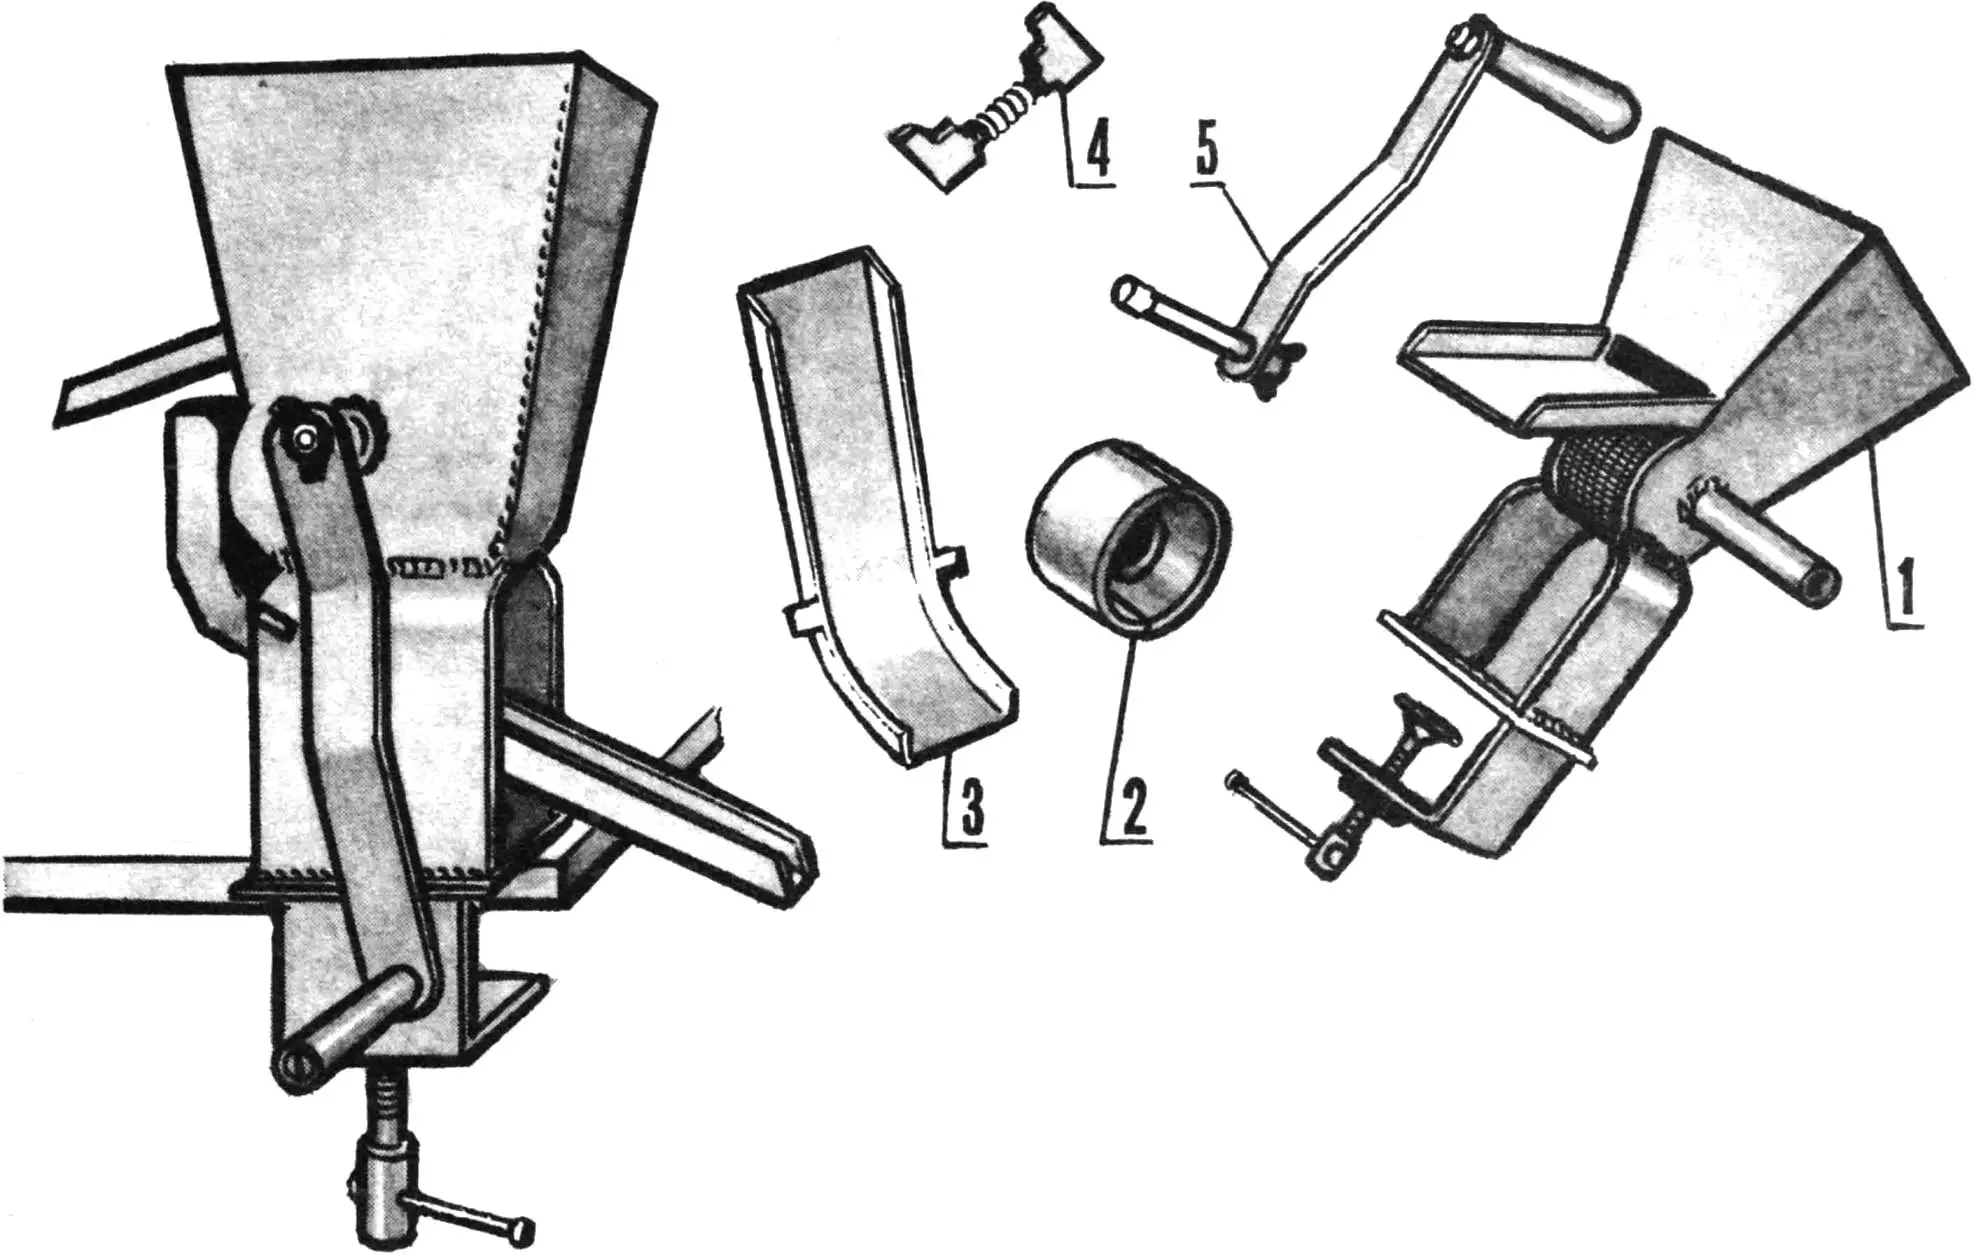
1 — assembled body, 2 — drum, 3 — juice tray, 4 — scraper knives, 5 — handle with shaft.
Externally, the juicer resembles a meat grinder: it’s also clamped to the table with a clamp, the same loading window funnel, the same handle. However, the similarity ends there, as the operating principle is completely different: there’s no auger and familiar knives inside, although there is its own screen at the output. Instead of an auger, there’s a small drum with scraper knives. With their blades, they grab the tomato (or slices if it’s large) and pull it along when turning the handle, pushing it into the narrowing gap between the body and the drum.
The mechanism design is extremely simple. The visible external parts are the clamp, two plate brackets above it, a hopper with a handle and a mesh window for juice and a pulp exit window, with two trays underneath. Inside, there’s only one unit — the drum, and in it — plates of retractable scraper knives with a spacer spring. The drum is screwed onto the shaft shank with its thickened bottom with a threaded hole, which is connected to the drive handle. The shaft bearing and simultaneously the seal is a fluoroplastic bushing, whose body is a steel bushing welded to the hopper side.
A mesh (perforated plate with Ø 1.5 mm holes) is welded to the lower window of the hopper — through it, the juice flows onto a long tray, secured with bent lugs in specially cut slots of the bracket posts. The pulp tray is welded to the hopper below its upper window.
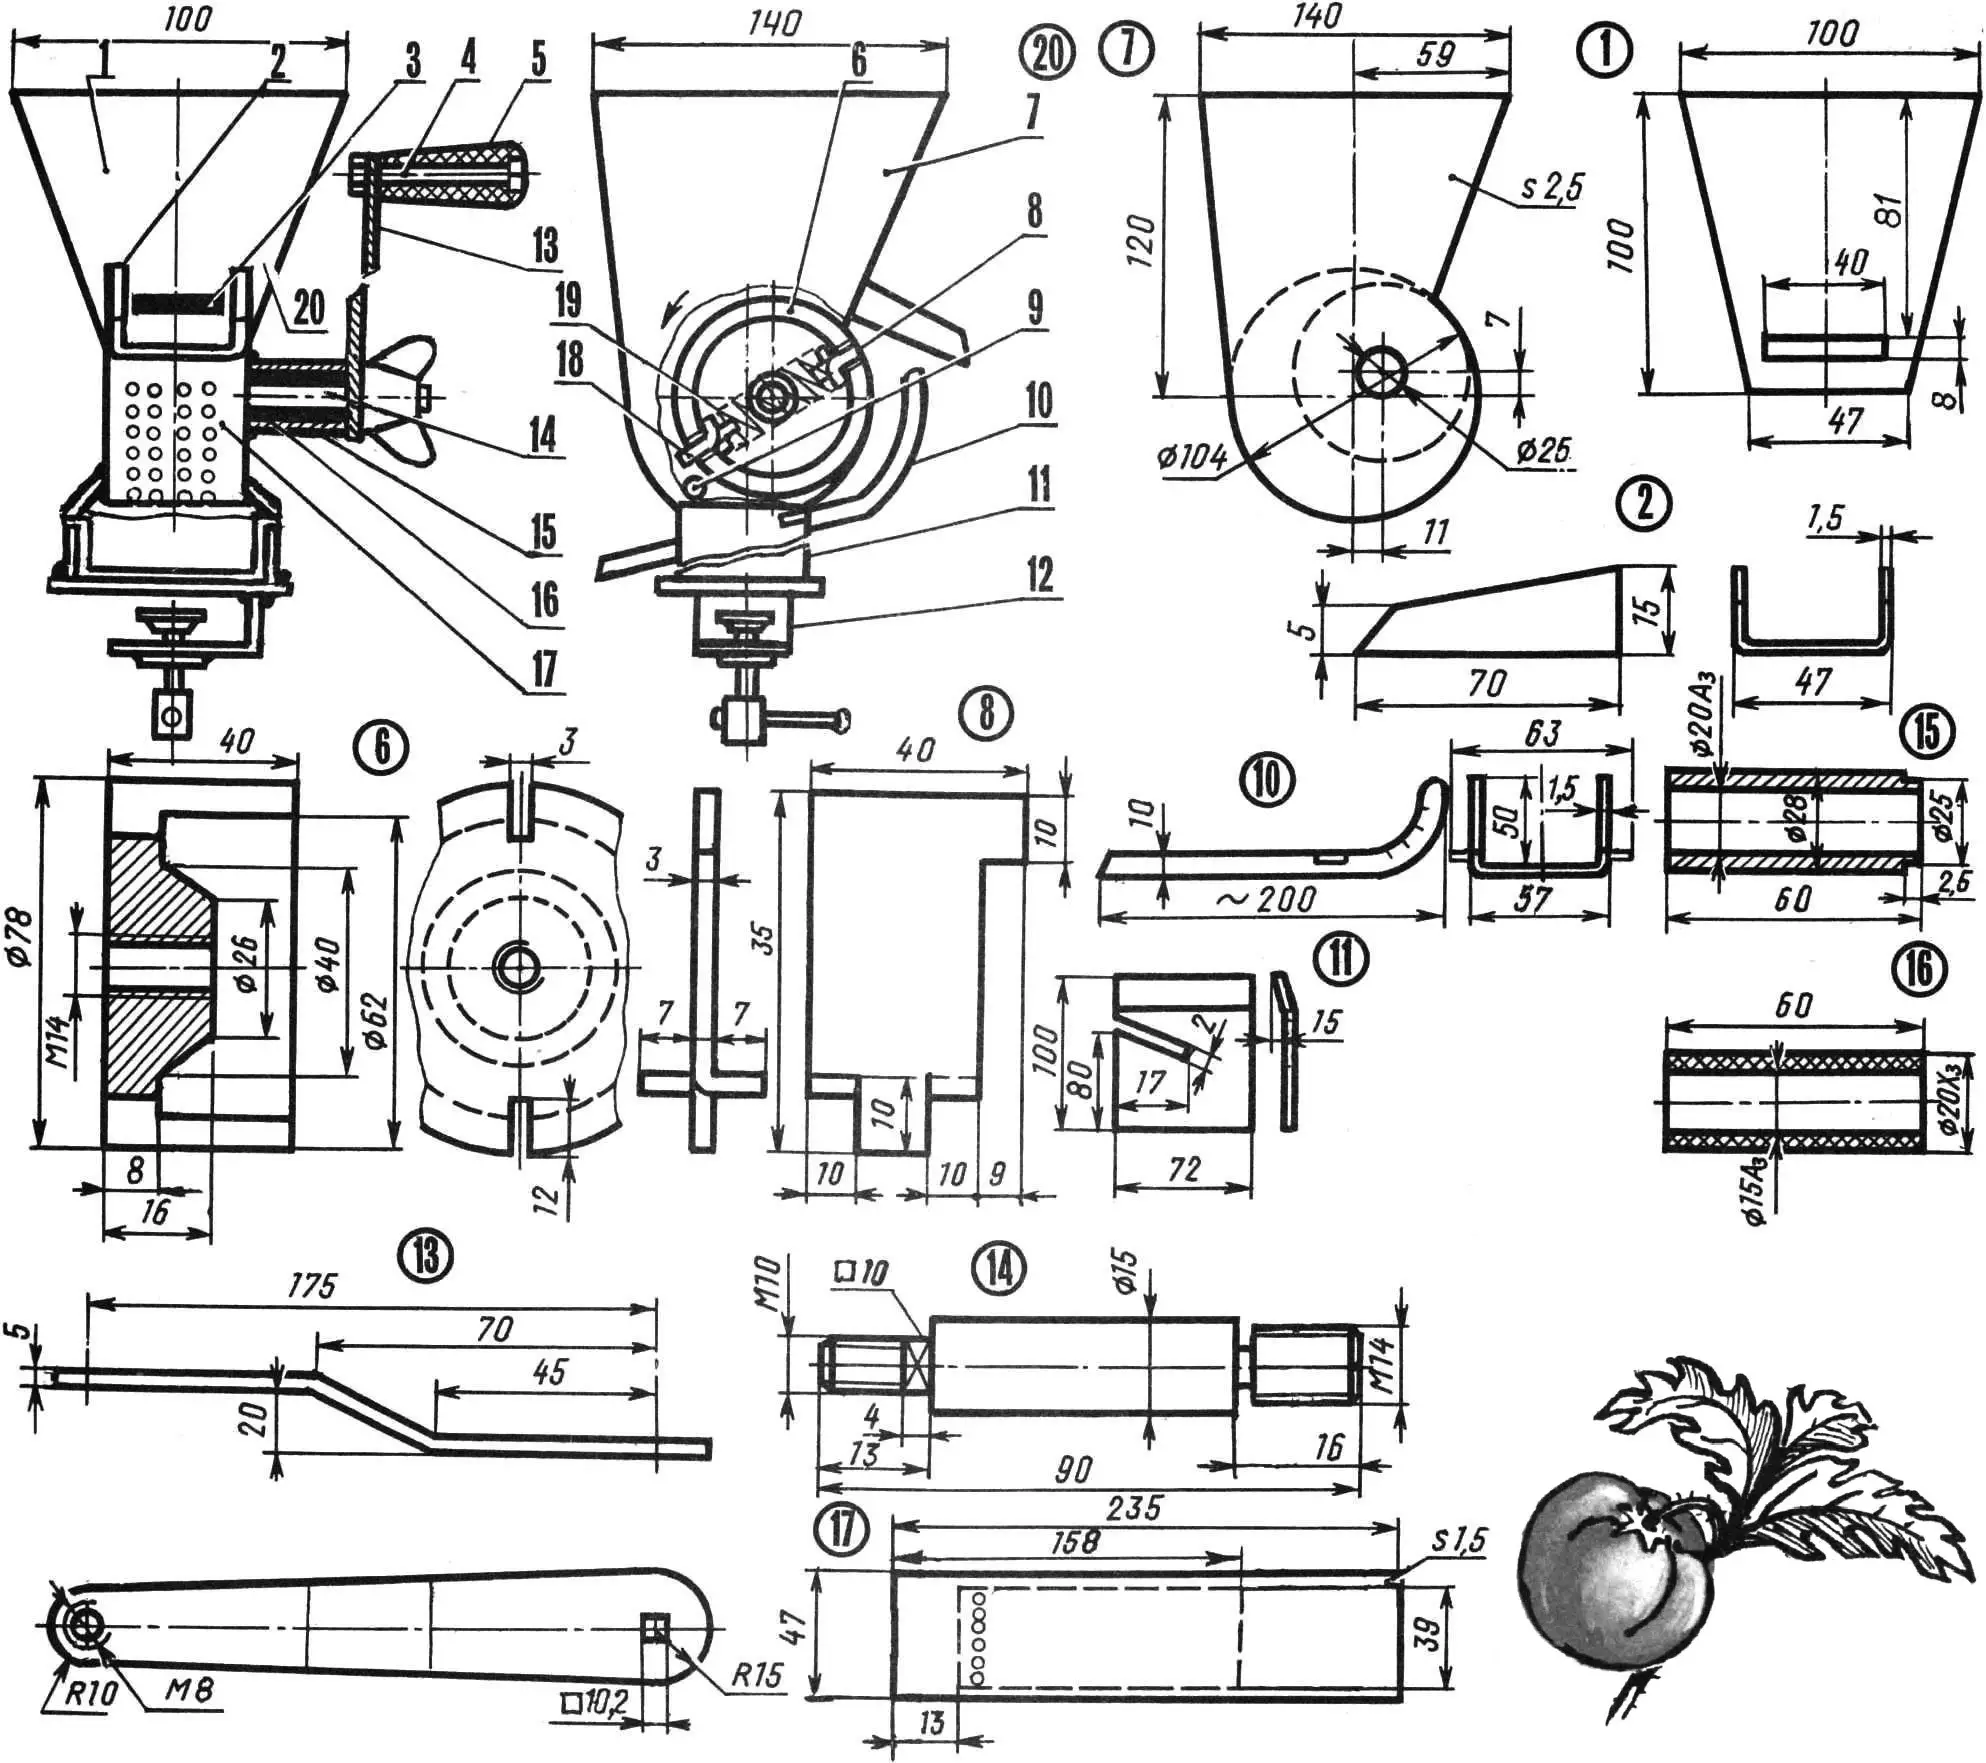
1 — front wall of hopper, 2 — pulp tray, 3 — pulp exit window, 4 — shaft, 5 — handle, 6 — drum, 7, 20 — side walls of hopper (wall 20 — with hole), 8 — knife (retracted), 9 — tomato, 10 — juice tray, 11 — post, 12 — clamp, 13 — handle connecting rod, 14 — axis, 15 — bearing housing, 16 — bearing (fluoroplastic bushing), 17 — mesh (or perforated strip with Ø 1.5 mm holes), 18 — knife (in extended state), 19 — knife spring.
The scraper knives are connected by a spacer spring. For this, their plates are cut into three “petals” at the bottom: the two outer ones are bent in opposite directions (stop), the middle one is inserted into the spring. At the top of the plate, there’s a lateral protrusion that limits its pressing into the drum slot.
The handle with the shaft is assembled as a single unit. The second assembly unit will be the drum with knives on the spring. It’s inserted from the top of the hopper; then the shaft is carefully introduced into the fluoroplastic bushing and screwed together with the drum. It remains to install the juice tray — and the juicer is ready to work.
Thanks to the eccentric arrangement of the drum relative to the body walls, the scraper knives sliding along them, the closer to the mesh, the more they sink into the drum slots, and the tomatoes pulled by them are increasingly compressed and crushed. On the mesh, they are practically rubbed through its holes, completely giving up juice under the pressure of the drum. And the almost dry pulp is then pushed out through the window onto the discharge tray by the knives that are released when leaving the mesh.
The mechanism disassembles just as easily as it was assembled: the juice tray is removed, the shaft is unscrewed from the drum (by reverse rotation of the handle) and the freed drum with knives is removed from the hopper — that’s it, ready to wash.
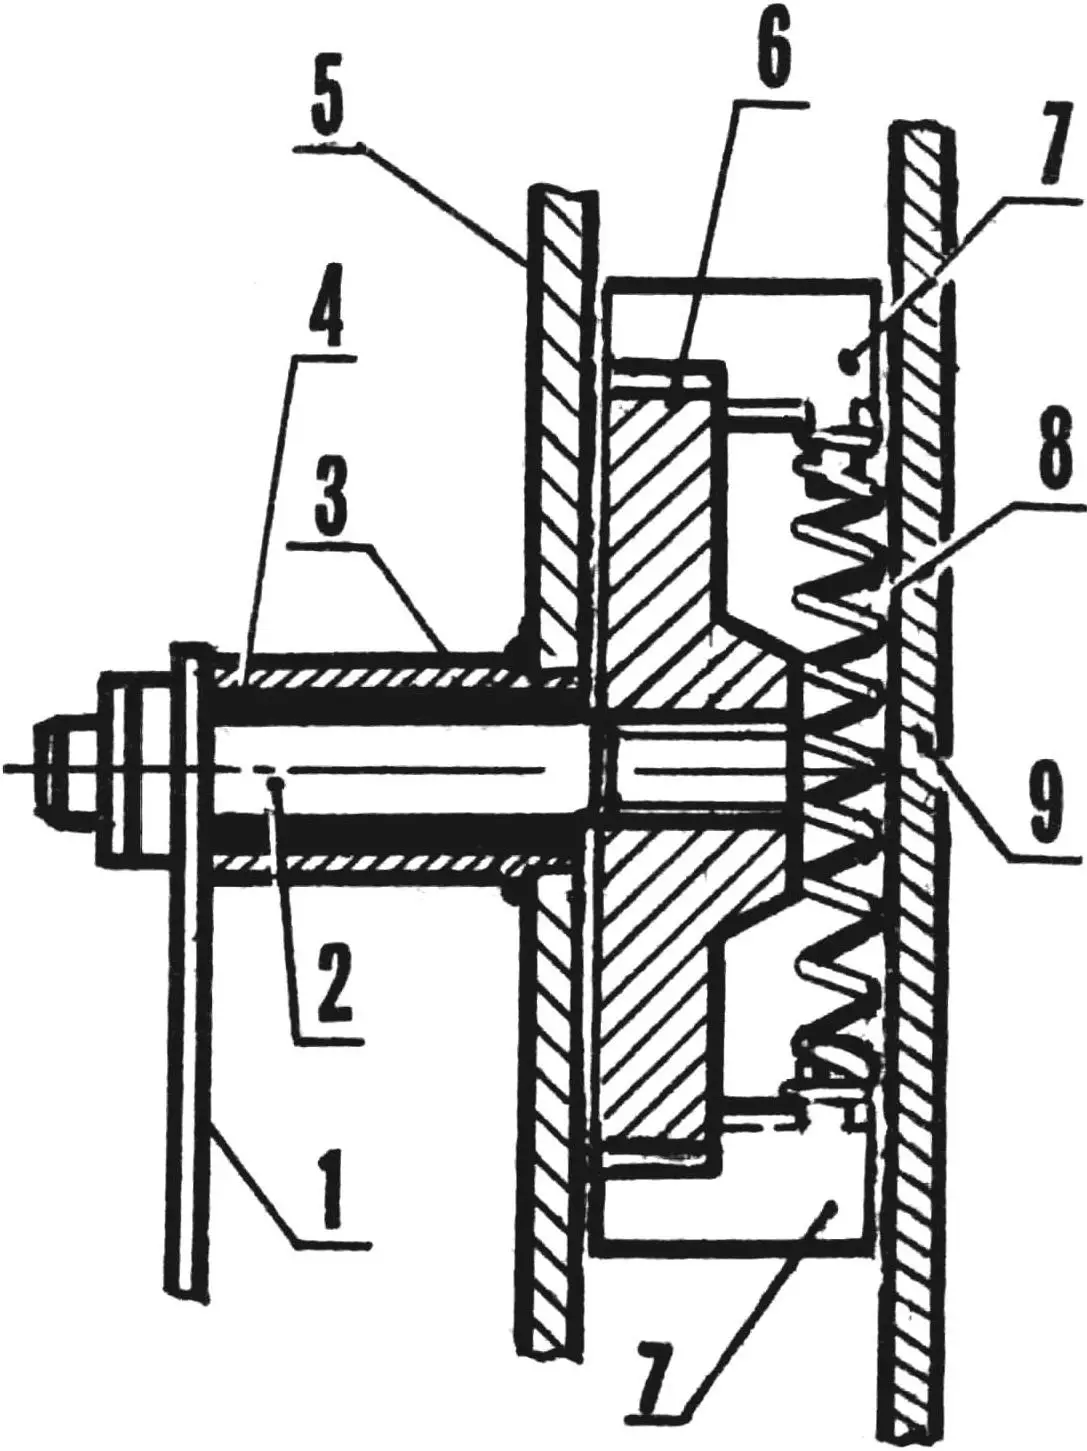
1 — handle, 2 — shaft, 3 — bearing housing, 4 — bearing (fluoroplastic bushing), 5, 9 — hopper walls, 6 — drum, 7 — knives, 8 — spring.
I think this simple machine would be a great help for amateur gardeners and vegetable growers — after all, you can process any soft fruits, berries, and vegetables through it. The only exception will be those that have not seeds, but pits: they need to be removed first, and the rest can be passed through the juicer.
The proposed design variant was intended for tomatoes and designed for a maximum fruit diameter of 50—60 mm. When using the machine for other types of vegetables, berries, and fruits, appropriate changes can be made to the dimensions of the hopper, drum, and other units and parts.
I’m confident: everyone who makes such a device will be satisfied.
«M-K» 7’89, G. ASTAKHOV, engineer
Recommend to read
 Following the leader without leaving your place
Nowadays, many people use a bicycle as an indoor trainer in winter. The designs for the base vary widely. What they probably have in common is one thing: it gets rather boring to pedal in...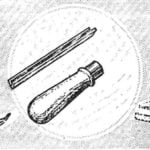 GREAT CUTTER
Many are in closets or in the attic old, as a rule, with black-topped, umbrella — worn, or simply out of fashion. Their spokes are made of good steel and had the shape of the groove or...
