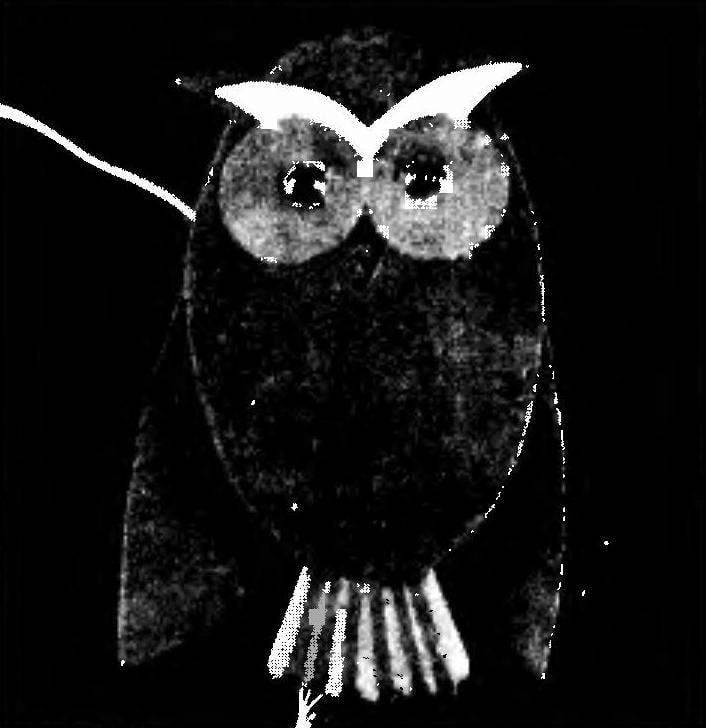
 The making of this very fun toy is easy even to schoolchildren. Decorated under stylized electronic owl, she will fit well in any interior. Location — wall mounted, connection to the electrical power outlet and “functioning”… Should only pull the signal cord as the owl anxiously wave her wings and looks around the space “hypnotic” gaze (bright orange flash of the eyes — neon lamps).
Based on the fact that in the manufacture of a toy-“podargus” an active part will be taken and the youngest readers of the magazine, almost all the technology is given in illustrative form. Yes, and many of the operations that have to be carried out, generousrelative or paper and cardboard, is available to everyone.
Take, for example, the body of the e-rectangle. The workpiece to cut it out of plywood or cardboard (presspan) 3 mm thick (both materials are widely used for the lining of mail-order boxes). Next — drilled holes under the lamp-eye with a diameter of 9.5 mm, and a screw М3х30 with the countersink to a diameter of 5 mm on the front side and under the nails 1,5×24 mm, which will serve as the axes of rotation of the wings.
To the body the back is glued the tail made also from plywood or pressshpana. Sector, grind a file to a depth of 1 — 2 mm. is here the seat. Before gluing a tail painted gray-blue nitroenamels. Details of the trunk and tail is permissible to combine by making them from one piece of plywood or 3 mm of cardboard.
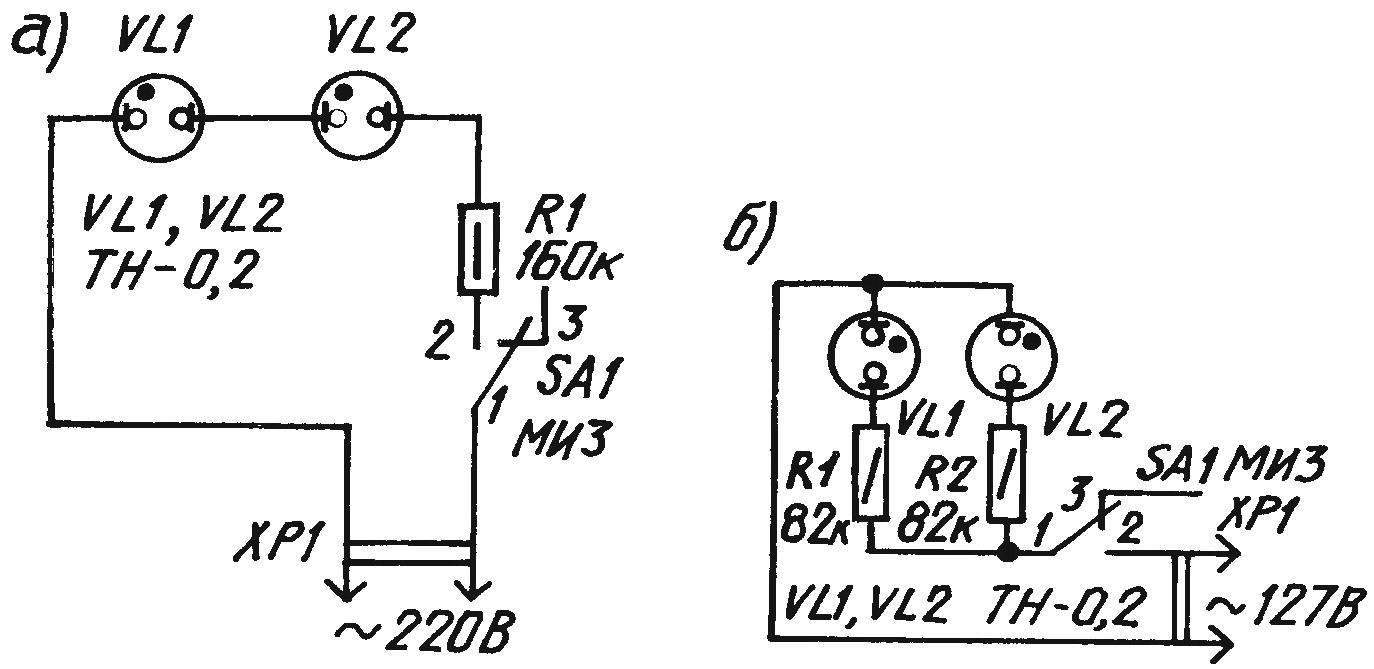
A circuit diagram of the electronic owl is powered from the mains voltage of 220 V (a) and its 127-voltea modification (b)
From the back side of the torso (complete) paste over with a film of polyester or similar material to reduce friction of the wings during their movement. You can use tape, the front side of which has antifriction properties.
The wings are cut from the same sheet of plywood (presspan) or cardboard. On the front side hang their “velvet” paper gray-blue color, and the rear — friction film.
Each wing drilled holes with a diameter of 1.5 mm under steering axle and 2 holes for nylon fishing line and return the rubber bands (elastic used pharmacy cord).
The electrical circuit consists of two neon lamps VL1, VL2, limiting resistor R1 and the key switch SA1. As “neo-knock” recommended TN-0,2, and the role of push-button switch SA1 type МИ3 (2A, 220V), the lever is additionally bent to better secure the line-“podargus”. Allowed and the use of the microswitch type MP or less common buttons KM1-1, but we need to make small changes in the lever-push-button design.
For a network with voltage 220 V resistance of R1 mentioned above (and it’s a half-watt of MLT, VS or other analog) is selected in the range of 150 — 180 ohms. At 127 volt power supply it is recommended that a slightly different schematic with two resistors 82 kω and rated power dissipation of each is 0.5 watts.
Base and panel mounting bracket are cut out of plywood or cut out pressshpana thickness of 3 mm. In the partition are holes for nails, screws and installation “nenok”, with slots for the wires, apply solder to the sidewall of the cap. In the rear wall of the drilled holes under the relevant elements of the fastener, and also are deepening under the Central (axial) the findings of the lamps.
Before assembling the divider and base are painted by nitroenamel. As brackets power cord used insulation plate from the old plug.
After the “electronic” part of the rectangle will be already mounted to the lever of the switch SA1 tie nylon fishing line. Well, the above mentioned bracket and plate-suspension, cut out of sheet aluminium 1 mm thick, gently tightening the screws with M3 nuts.
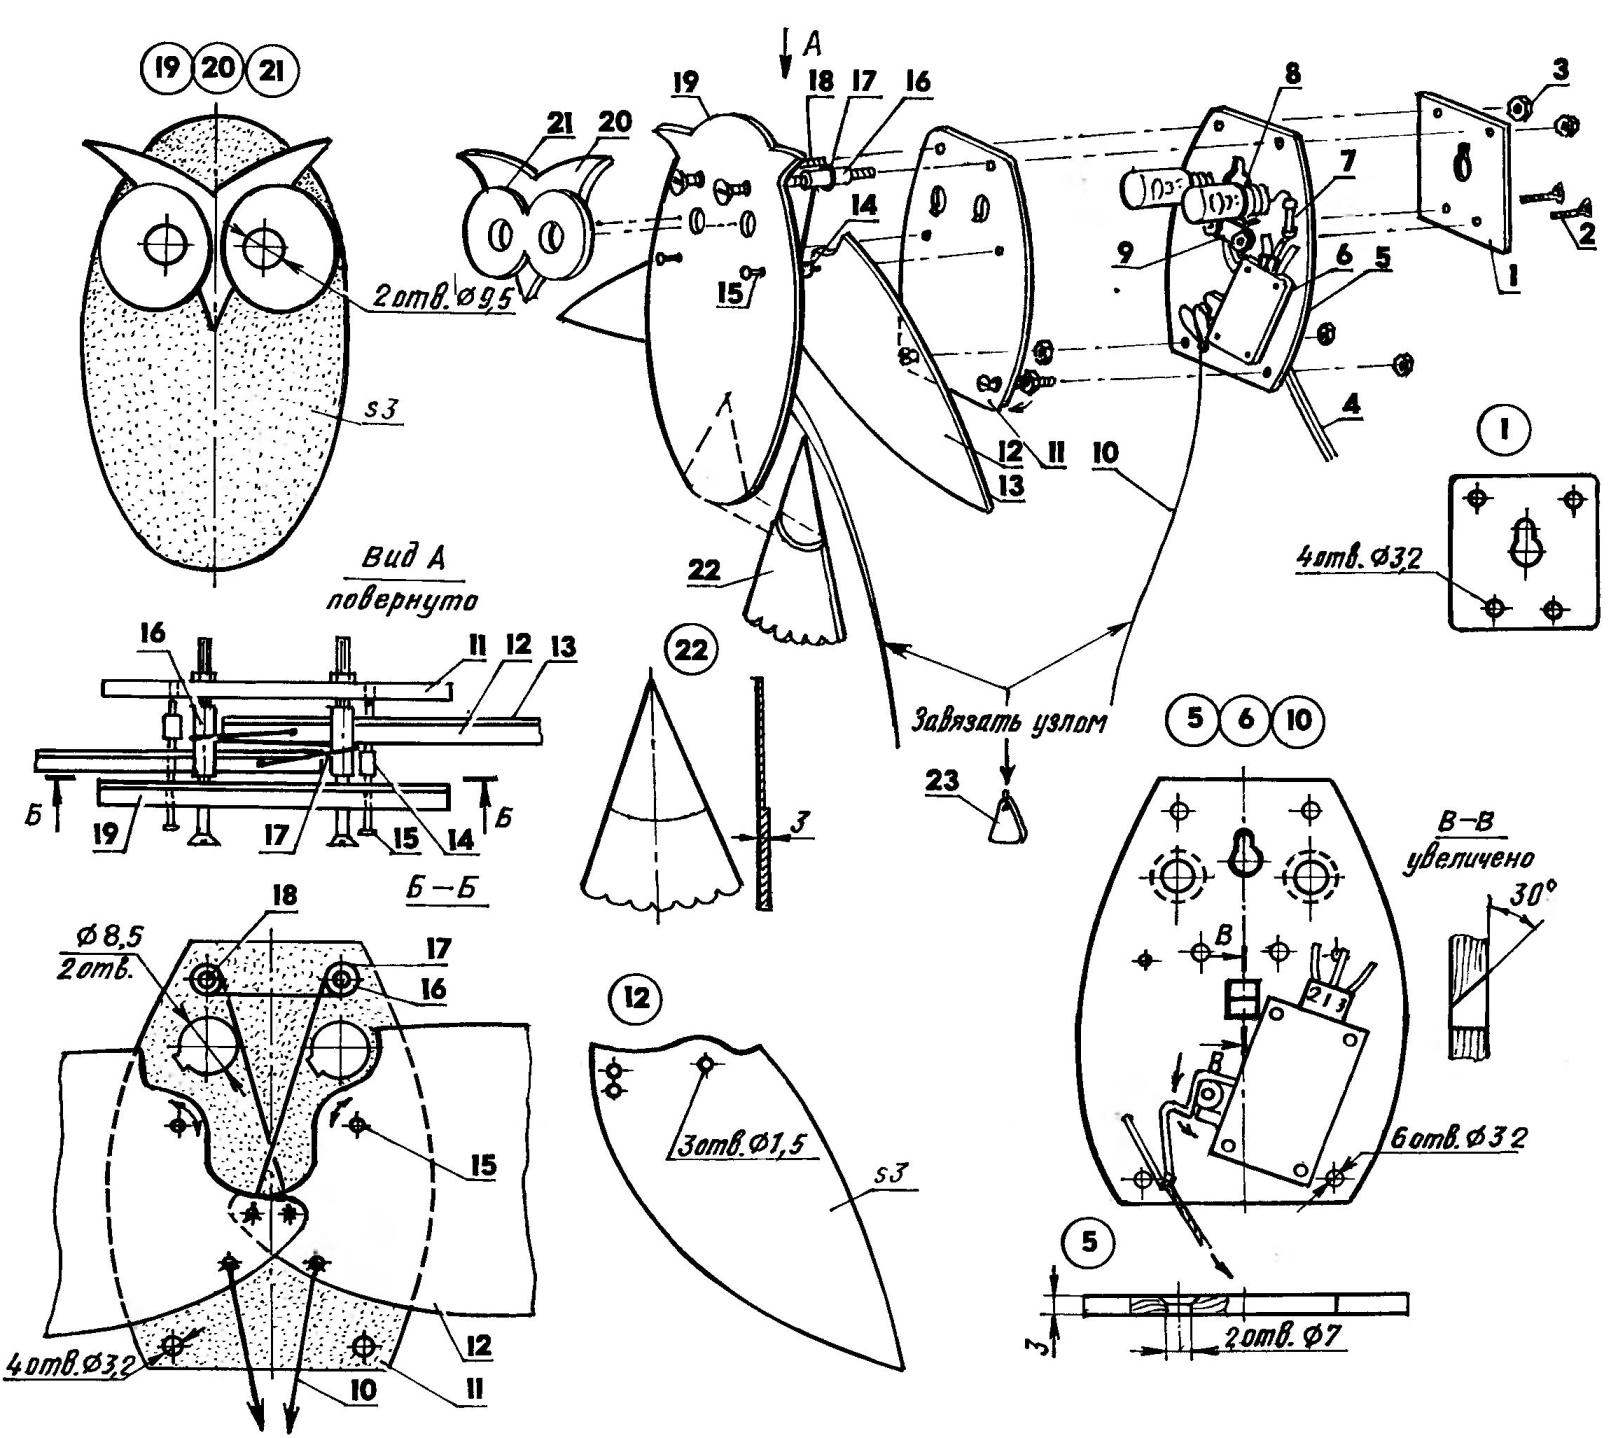
Electronic toy-owl:
1 — plate-suspension (aluminum sheet, s1); 2 – М3х15 screw with countersunk head (2); 3 — nut M3 (8 pieces); 4 — cable; 5 — base; 6 — limit switch МИ3 (modified); 7 — resistor, MLT-0,5 (160 ohms, 2 PCs); 8 — neonka TN-0,2 (2); 9-clip (insulation plate from the plug); 10 — nylon line (L300 — 350, 3). 11 — baffle-bracket; 12 — wing (2); 13 — friction sticker (3 PCs); 14 and 16 — short and long sleeve (segments of PVC pipe, 2); 15 — nail 1,5×24 (2); 17 — a rubber cord; 18 — М3х30 screw with countersunk head (2); 19 — body; 20 eyebrow with a beak; 21 — eye circles; 22 — tail; 23 — pen-“powerhouse”;
material children. POS. 5, 11, 12, 19, 22 — plywood or presspahn (s3) POS. 20 and 21 cardboard covered with foil or velvet paper (eyebrows with a beak of a Golden color); electrical protection (silver film from the flower bouquets or gray tape around the perimeter of the partition-base), and imitation feathers, velvet paper (greyish blue color on the body and wings, and purple stripes at the tail) conventionally not shown
Then move to the Assembly mechanism smahivanija wings. They moved more freely and when folded do not interfere with each other, the rotary axis of each, and the screws М3х30 wear a “space-defining” sleeve — cuts of PVC pipes (e.g. wire insulation). Return gum consistently are twisted around the aforementioned screws with bushings and threading the ends through the previously made holes, tie on the wings.
Then proceed to mount the 300-mm segment of nylon fishing line-“podargus”. Two of them are tied to the wings, that is, separately and for all using this hole. Together these segments linked below, at about the end of the tail when folded the wings. And in the not yet tightened to the end node pass through another line coming down from the lever switch. Adjusting the mutual position of the trio so that when swinging the wings flashed “Naoki” in the eyes of the owl, the common bottom part of the twist as a braid, and in the end tied to the handle-“powerhouse” plexiglass.
Torso e-full hang outside a gray-blue velvet paper. Expressive details of the head cut out of cardboard, “faced with” bright paper”Losenko” or foil. Preferably, eyebrows and beak had a Golden hue. Tail hang strips of purple paper.
The product has taken steps to electrical safety — inner and back walls is pasted a strip of insulating material with a width of about 15 mm (silver foil from the flower bouquets or Scotch grey) that covers the electrical part. Only left the place for the thread switch. The metal sides of the bases of the lamps, speakers near the inner walls wrapped with tape.
A. BRANITSKY, Minsk
Recommend to read
 THE WATER IS HEATED THE SMOKE
Having a stove ( coal or wood), it is possible to provide hot water sink in the kitchen and even the shower using the heater device, allowing the use of the heat of the hot gases that... ECONOMICAL NIGHT LIGHT
In recent years, developers of electronic equipment for ham radio became available to the newest element base of leading foreign and domestic manufacturers, allowing you to create new...
