Over the years of being passionate about water tourism, we have tried several variants of carts for transporting kayaks and equipment. And on hikes, we have seen many different portable transport devices. But all of them had design flaws that did not allow them to be used equally well both in short weekend hikes and on roads and trails of complex routes.
The proposed cart, in our opinion, meets these requirements. It was tested both in the conditions of the Moscow region and on hikes in Karelia, where there are many portages.
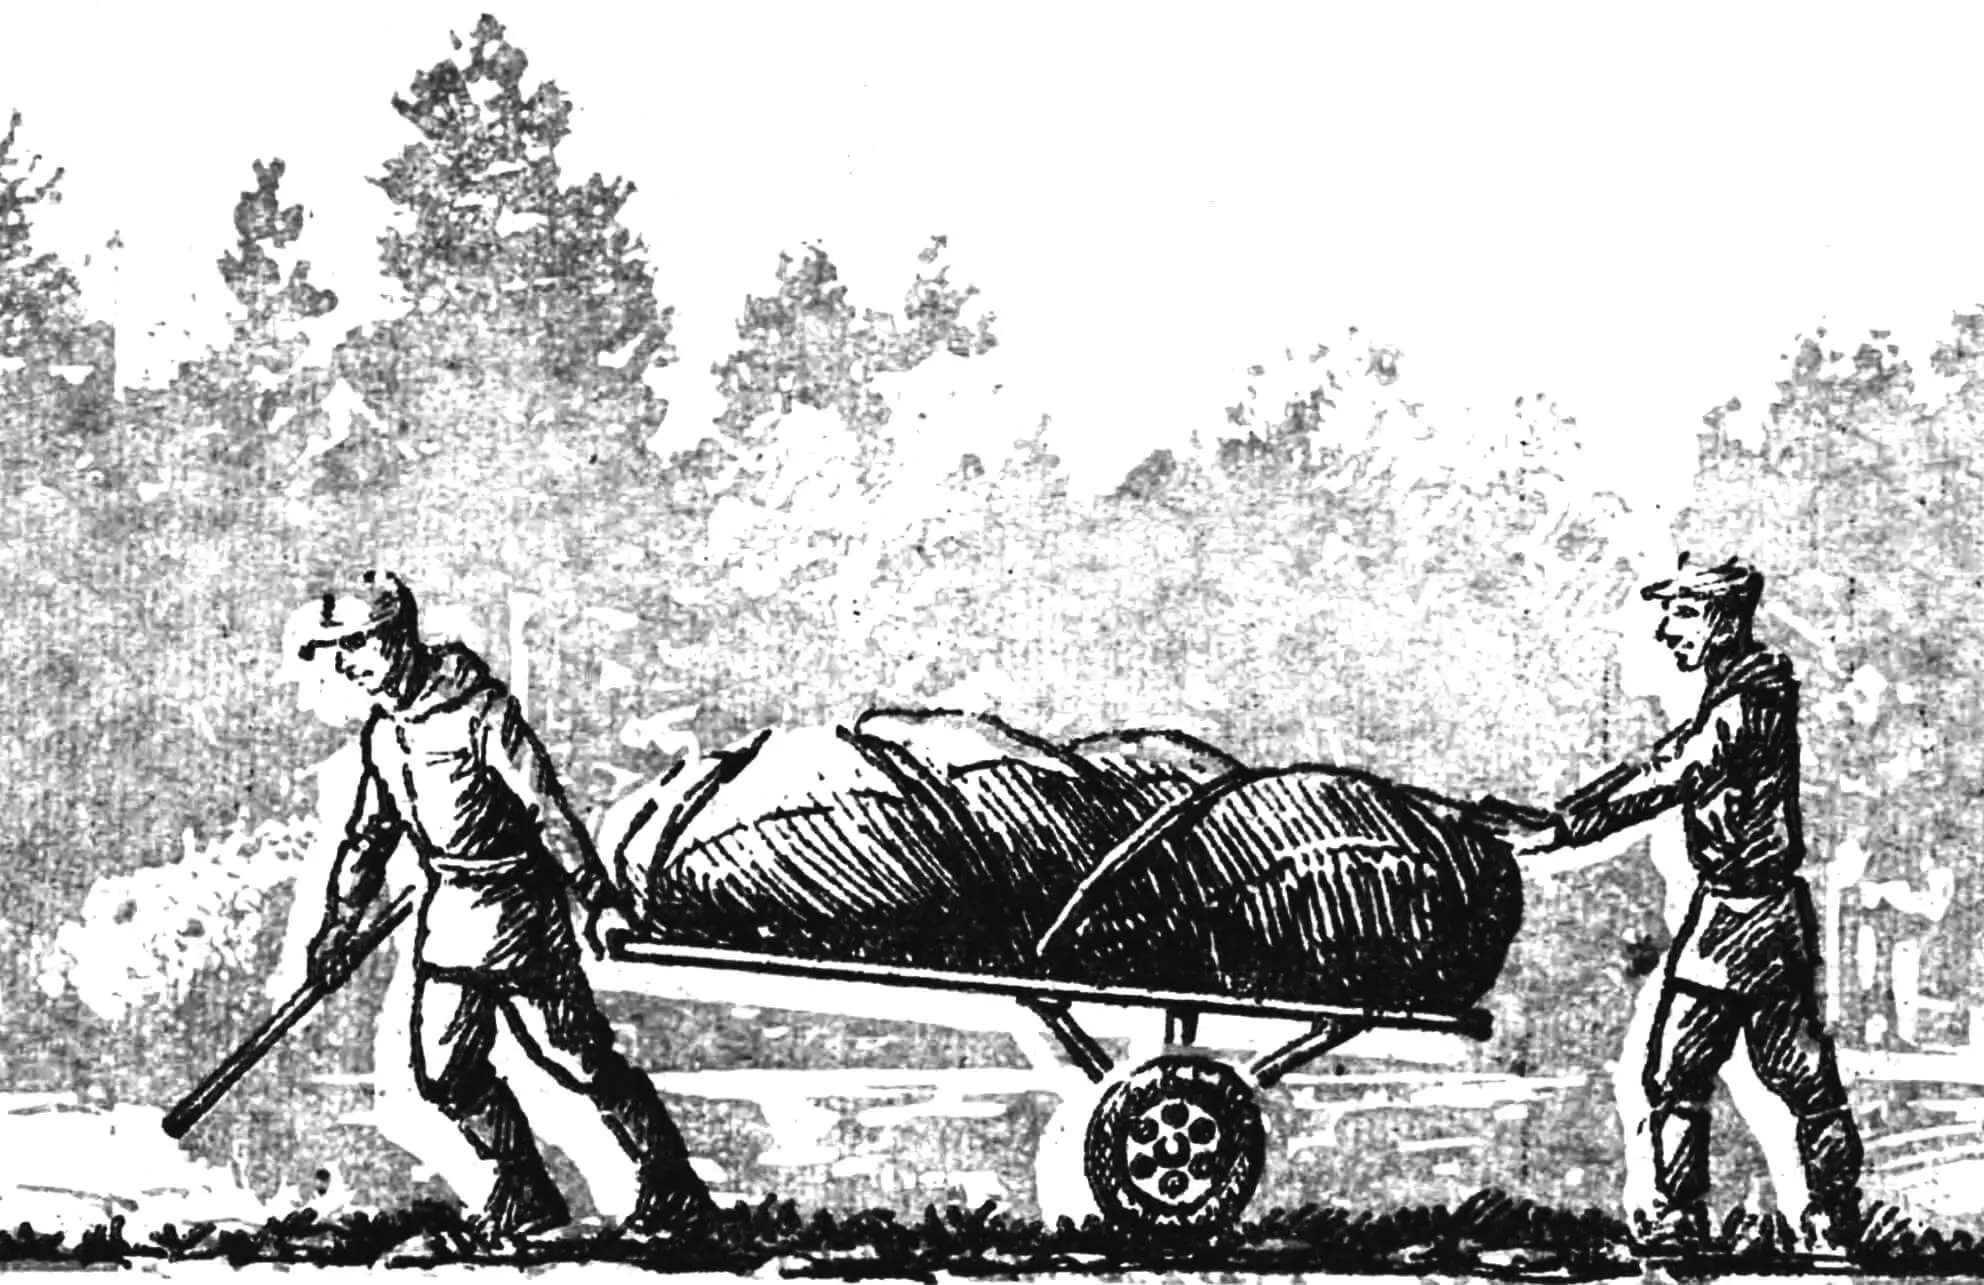
On such a cart, you can load (fig. 1) two “Salut M-52” kayaks, each packed in its own bag, and near the handles, under the straps, also two tents. With this load, we easily entered the train and in the car, without removing the kayaks, put the cart in a vertical position. In the same form, but with wheels turned inward (fig. 5 B), three tourists easily carry the cart with two kayaks to the rear platform of a bus or trolleybus.
In Karelia, two kayaks, equipment and food for a group of 4 people were loaded onto the “Donkey” — the total weight was approximately 200 kg. The loading of the “luggage” is shown in figure 2. The cart passed well with this load on gravel and sand roads, pushed by one person,— and the distance from the station to the kayak assembly site was about 3 km!
On the Karelian route, the cart had to transport an unassembled kayak (fig. 3). This is how we bypassed a dangerous rapid: along a forest trail, for a distance of 1.5 km. At the same time, part of the cargo of another kayak that passed through the rapid was placed in the cockpit.
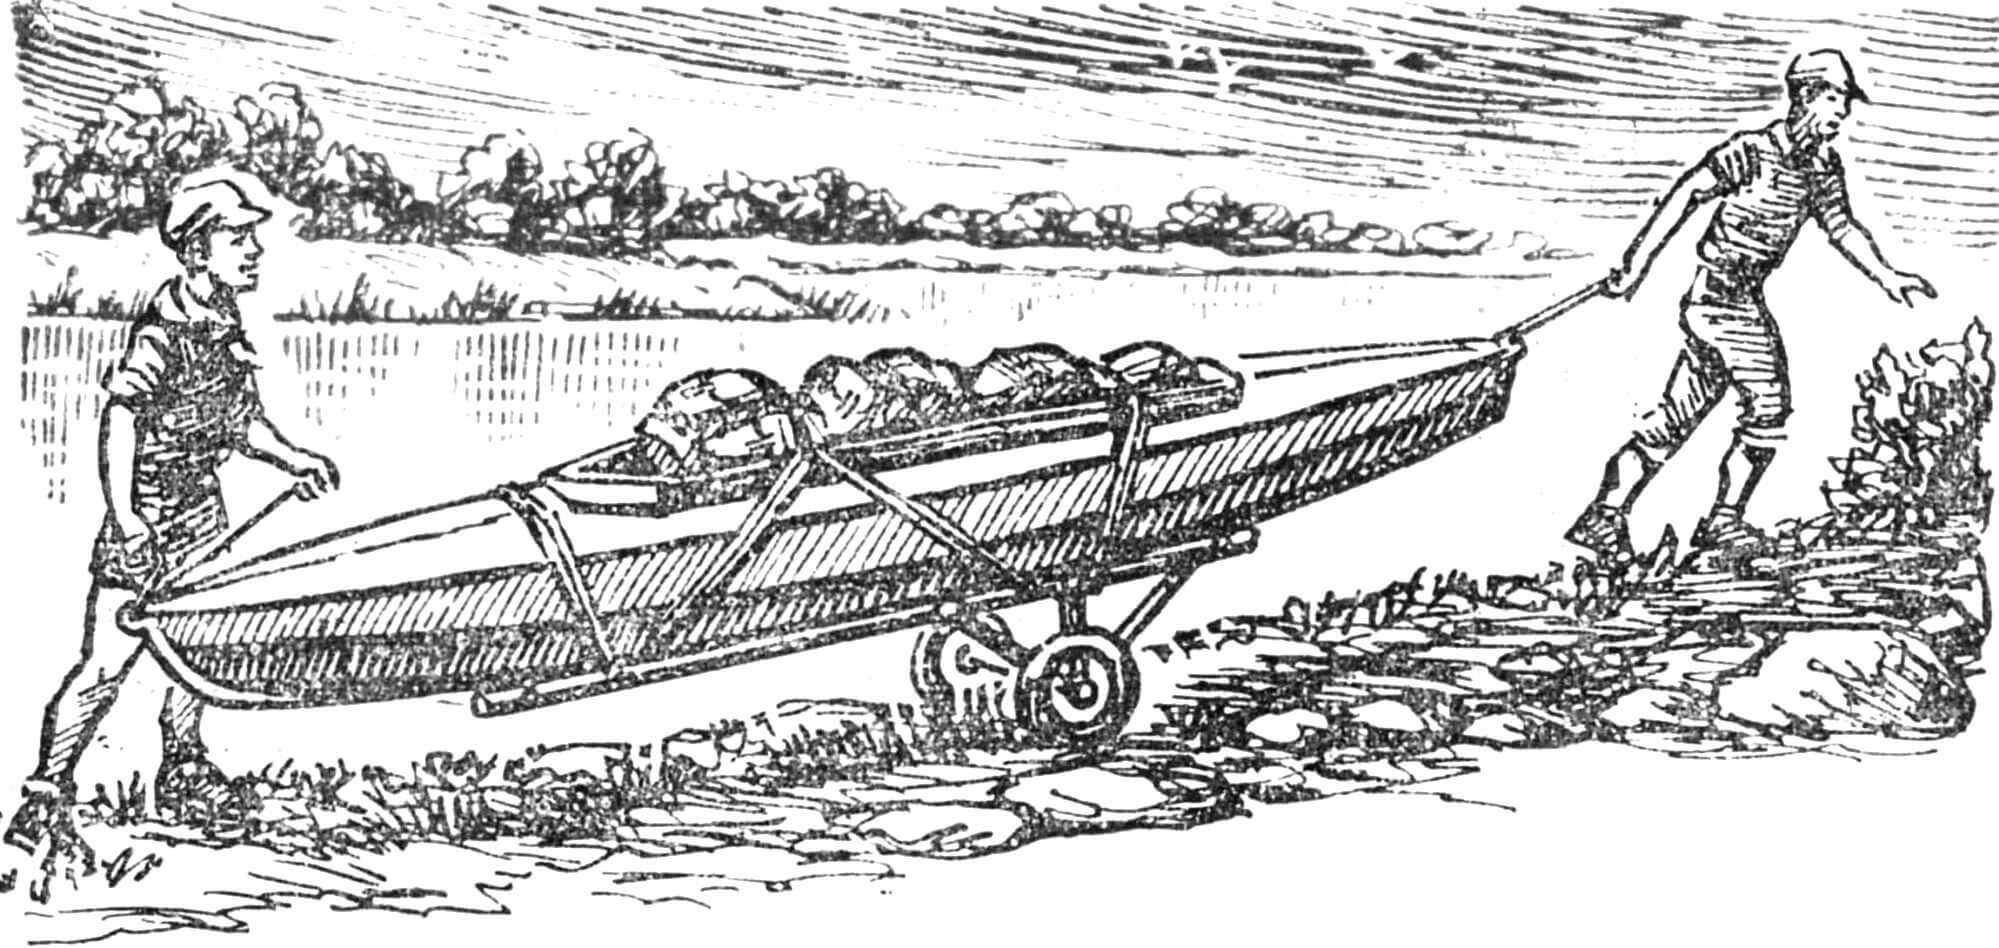
The kayak was transported in this form practically by one person — by the stern stem block; the second tourist only slightly supported it by the bowstring of the bow. Canvas straps were used for all types of cargo loading: they do not stretch.
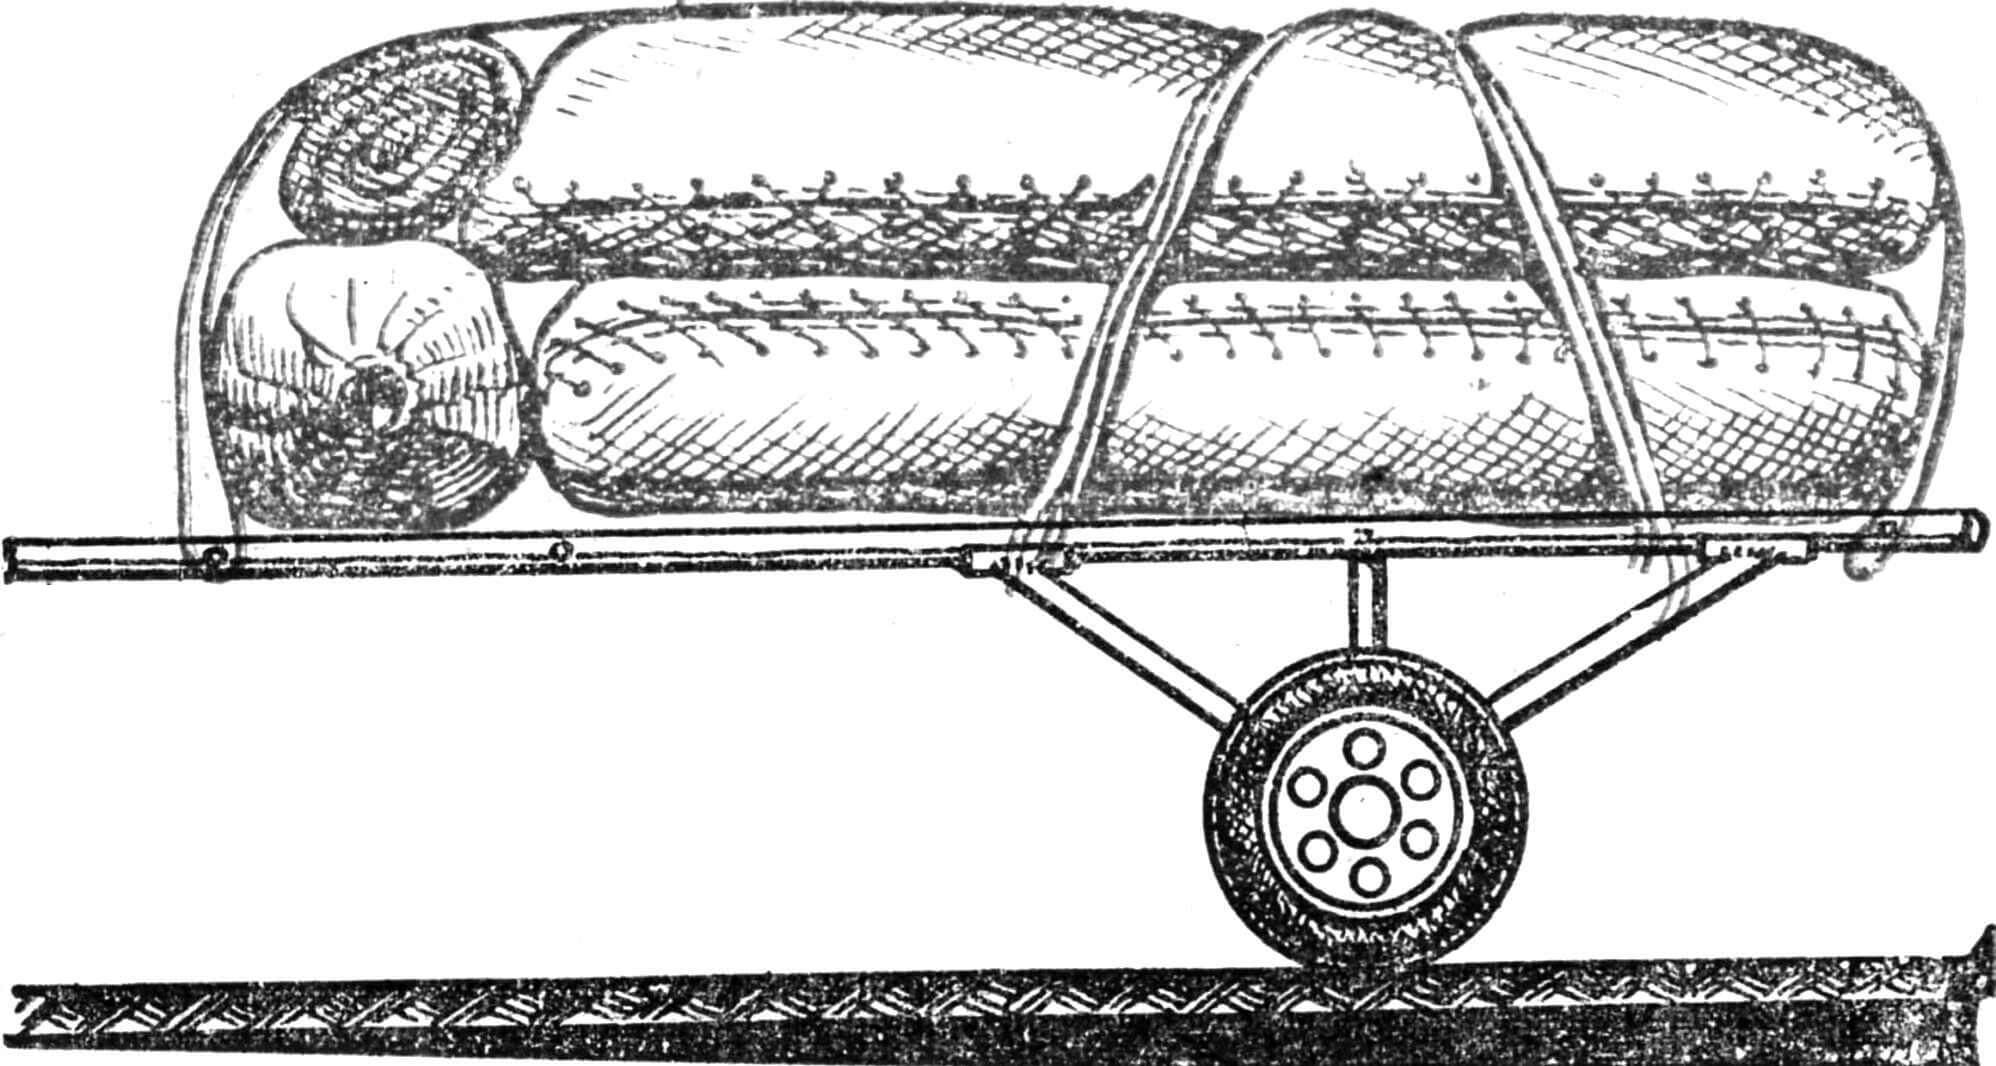
The collapsible cart consists of a platform (fig. 4), a support frame, two wheels with half-axles, two brackets and tie-down canvas straps. In disassembled form, the wheels, support and brackets are placed in the bow or stern compartment of the kayak. The platform, as a rule, is not disassembled, but is placed entirely on the keelson. The transverse connections are placed on the frames and tied diagonally to them with ropes. The platform does not interfere with the crew’s location in the kayak, does not come into contact with the shell.
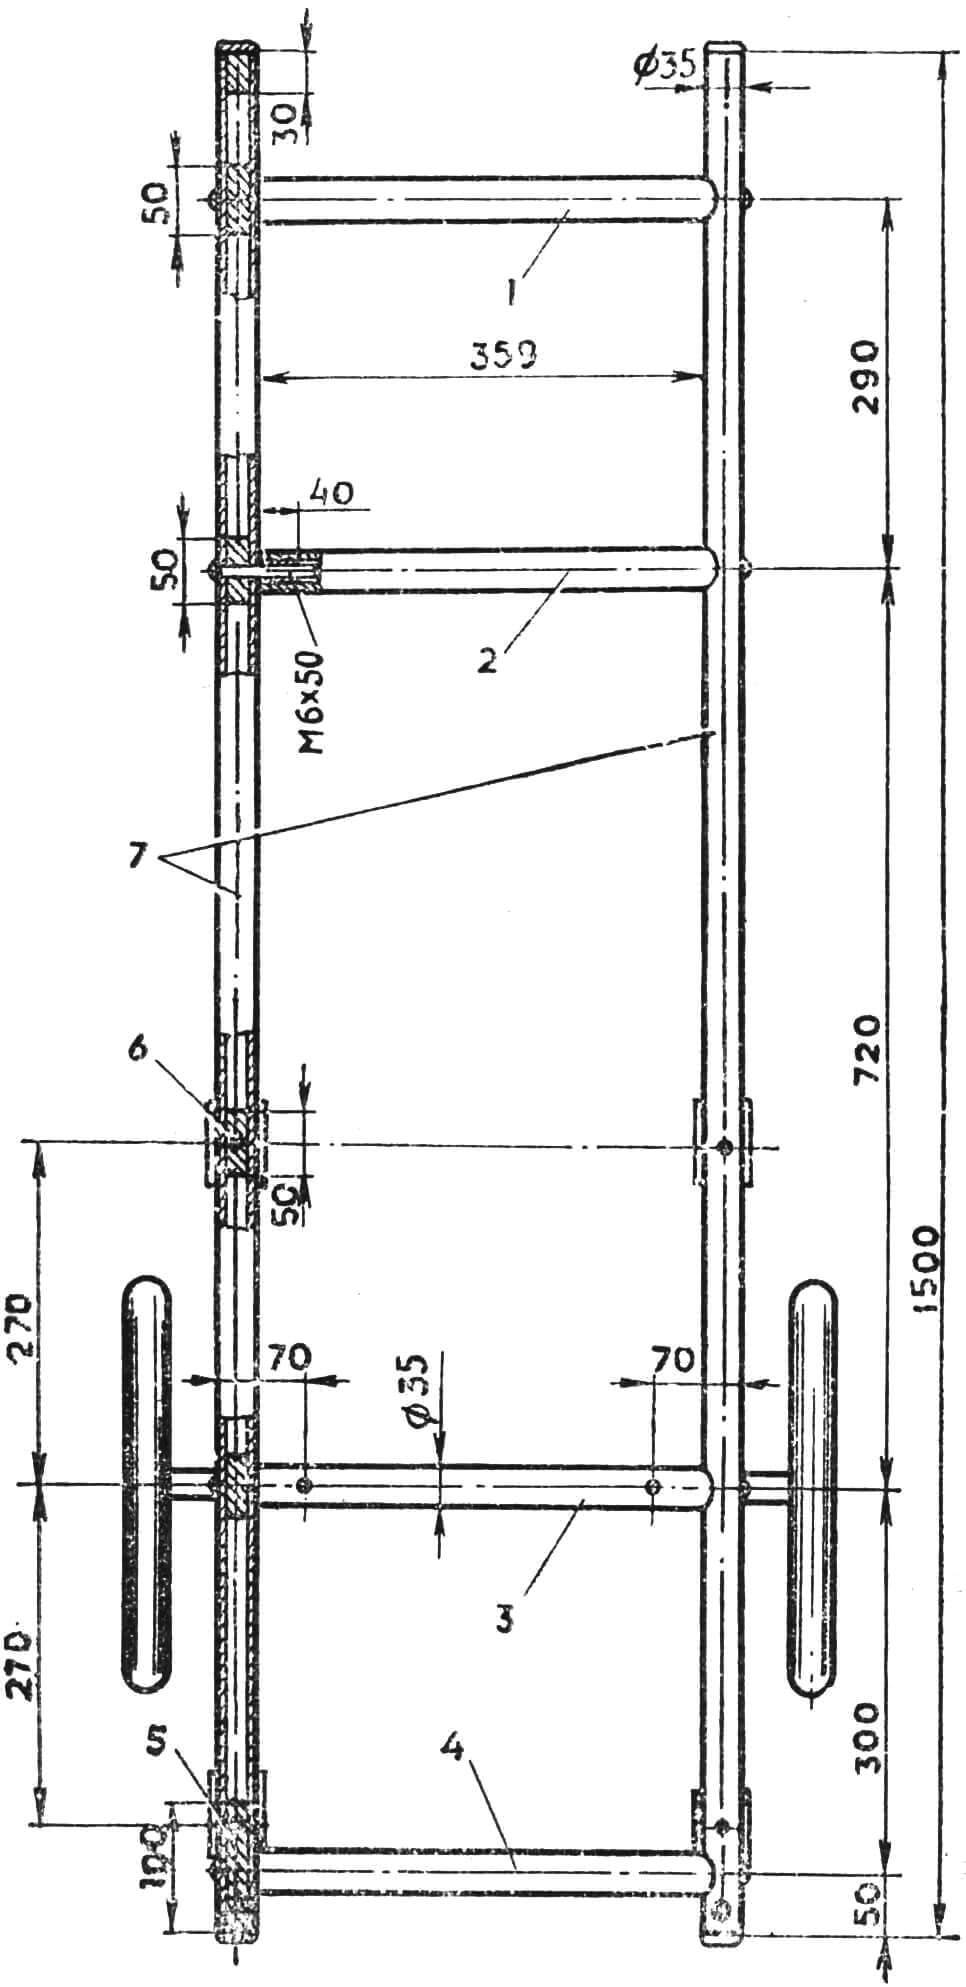
1—4 — transverse connections, 5 — plugs, 6 — stoppers, 7 — platform longitudinal pipes.
During long hikes in sparsely populated areas, due to the large amount of cargo, three-seater kayaks are often used as two-seater ones. Then the heaviest and bulkiest cargo (canned food, campfire equipment, fishing gear, spare paddles, etc.) is placed on the cart platform to protect the shell and frame of the kayak. It happens that at a campsite it is difficult to find spacers for a two-person tent. The cart helps here too. Unscrew the screws, remove the transverse connections — and two pipes 1.5 m long are at your service.
For the platform, two duralumin pipes Ø 35 mm and 1500 mm long and four pieces of the same pipe 394 mm long each are used. Duralumin stoppers of the appropriate diameter 50 mm long are pressed into the places where the pipes connect with the transverse connections and the support frame brackets (fig. 4). Duralumin plugs are placed at the ends of the pipes (on the side of connection 4— to a depth of 100 mm, and on the side of connection 1 —to a depth of 30 mm). Duralumin stoppers 40 mm long with through thread M6 are pressed into the ends of the transverse connections. Then, grooves with a radius of 17.5 mm are cut or milled at the ends of the transverse connections for a tight connection with the main pipes. Holes Ø 6.5—7 mm are drilled in the latter in accordance with the center-to-center distances. After that, the platform is assembled and fixed with 8 M6X50 screws with washers.
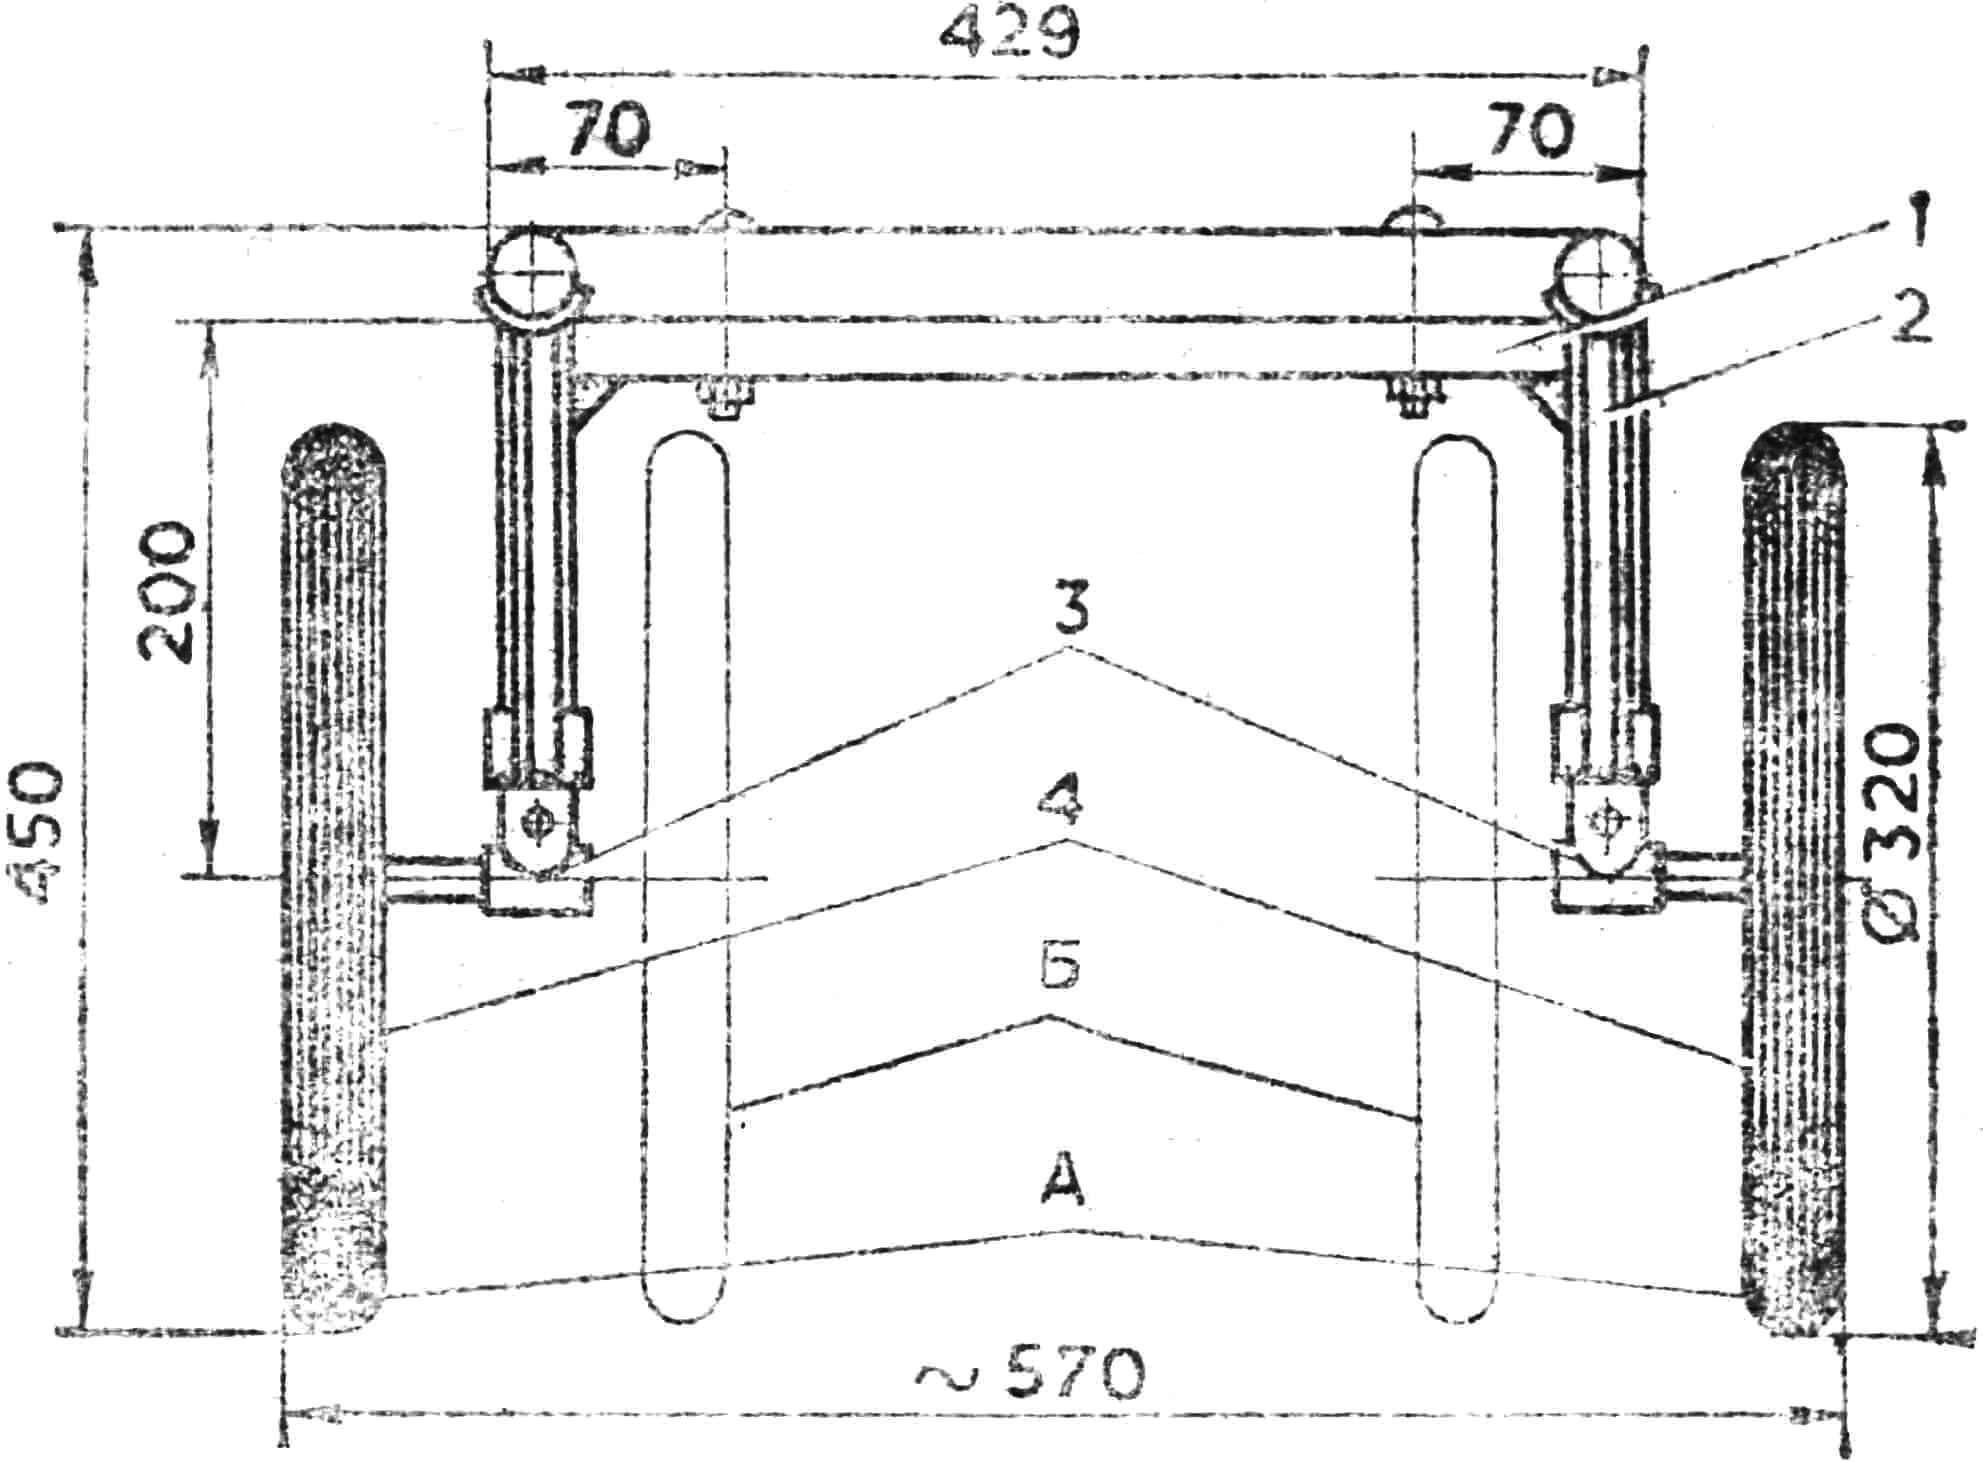
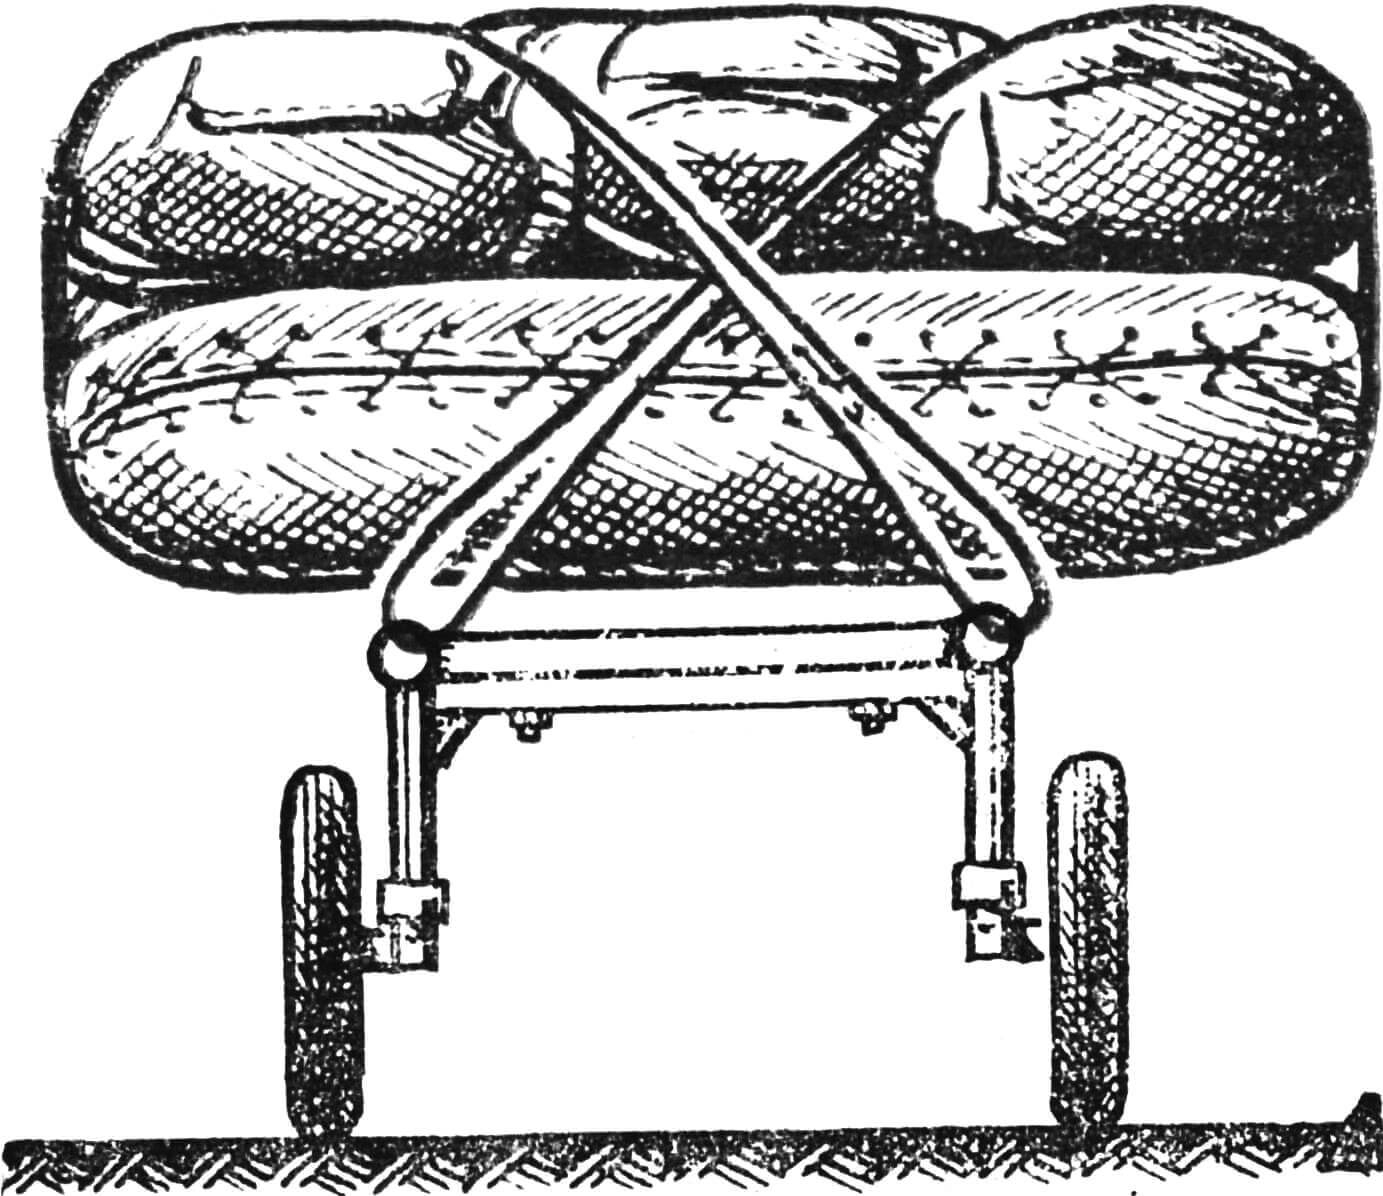
1 — support frame, 2 — post, 3 — kingpins with half-axles, 4 — wheels. A — running position of wheels, B — transport position.
The cart’s support frame (fig. 5) has the shape of the letter П with dimensions of 429X200 mm. For it, scraps of steel water or gas pipes are used — (outer Ø 26.8, inner Ø 20). One pipe 429 mm long and two pipes 200 mm each are cut. Bushings with inner Ø 16 A3 and 40 mm long are pressed into the latter from the wheel axle side. The opposite ends of the pipes are cut at an angle of 45°, connected at an angle of 90° and welded with an autogenous torch. To increase rigidity, it is advisable to weld triangular gussets 5 mm thick with a length of welded sides of 30 mm at the pipe connection points.
After manufacturing the support frame, holes for M8X80 bolts are marked — for connecting it to the platform. On the side of the support 429 mm long, distances of 70 mm are set aside from the edges and two holes Ø 8.2 — 8.5 mm are drilled (fig. 5). The same holes are made on the transverse connection of the platform (see fig. 4).
1 — support plates, 2 — angle braces, 3 — bushing, 4 — support post.
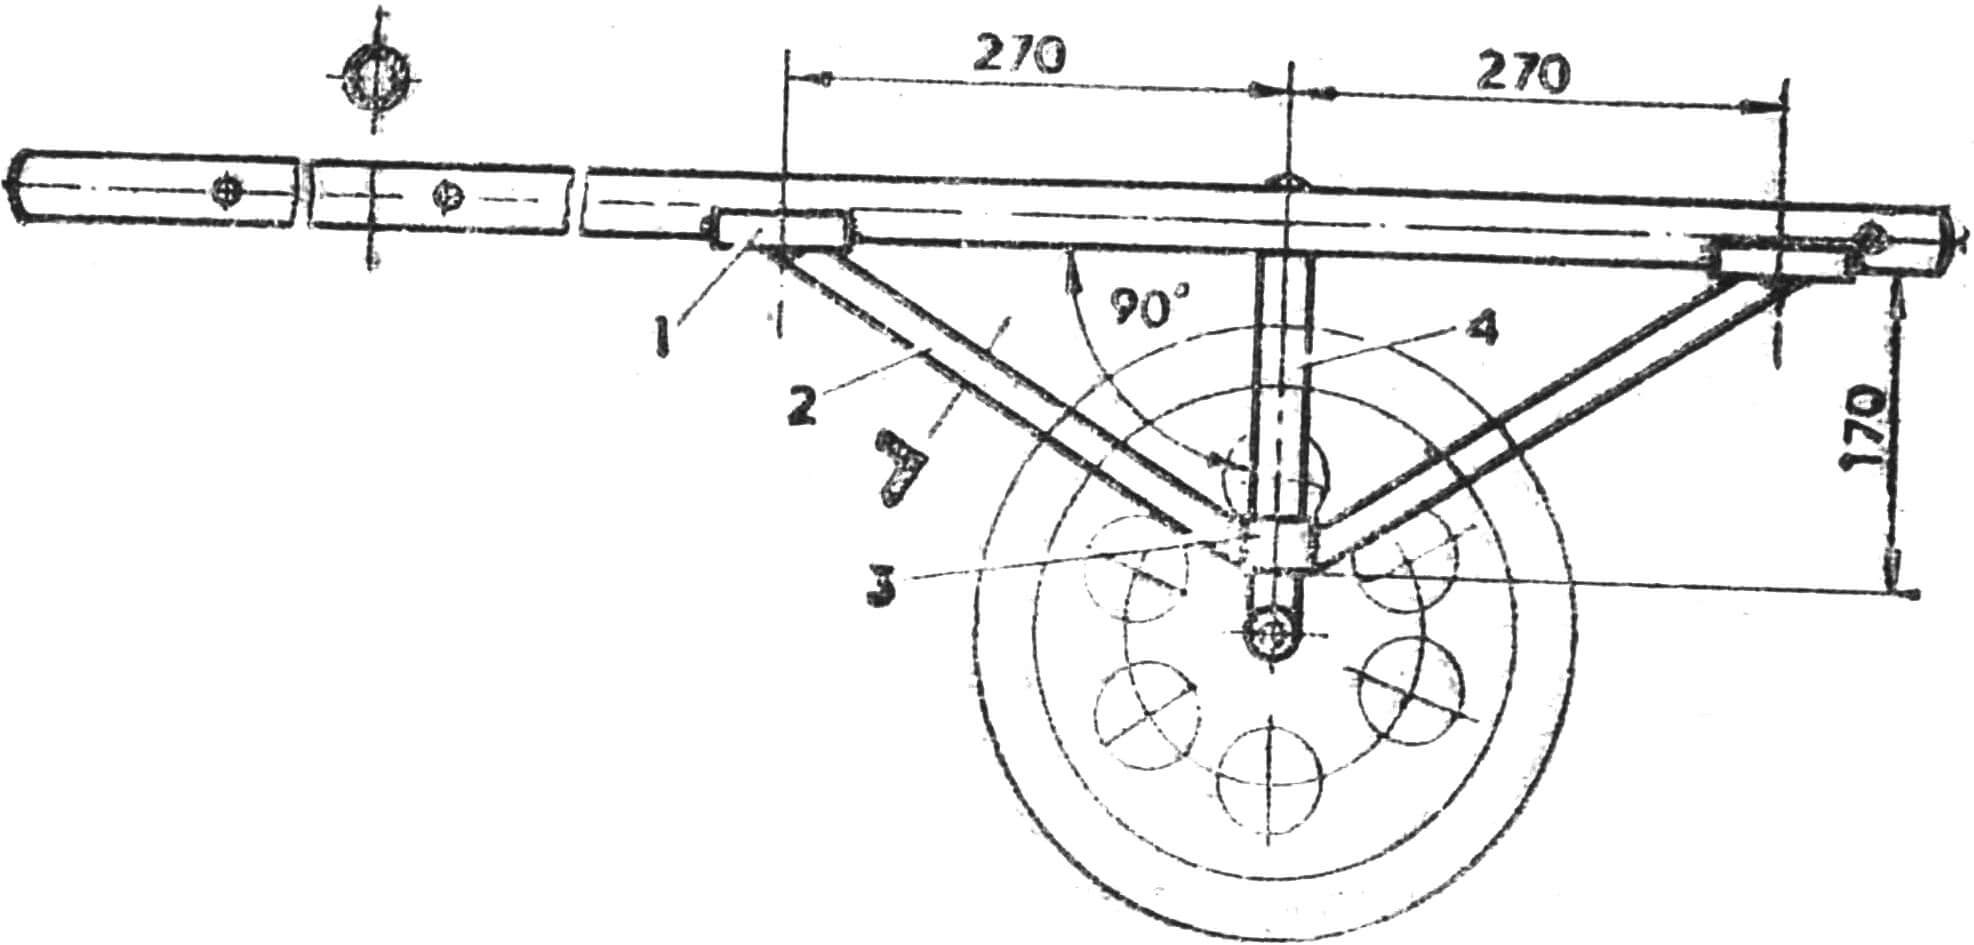
The bracket (fig. 6) consists of two steel support plates 2 mm thick with a rounding radius of 17.5 mm, two steel angles 20X20 mm and a steel bushing 30 mm wide with outer Ø 34 mm and inner — 27 mm. When the parts for two brackets are ready, holes are drilled on the long pipes of the platform on both sides from the center of the transverse connection at a distance of 270 mm and M6 thread is cut, then the support plates are fastened with screws. On the vertical pipes of the support at a distance of 170 mm (fig. 6), bushings are installed and temporarily secured. Angles are cut and tacked by electric welding to the support plates and bushings. Attention should be paid to the fact that an angle of 90° should be maintained between the support post and the platform pipes.
1 — pin, 2 — half-axle.
The running gear consists of two wheels and two half-axles welded to the kingpins (fig. 7); the pins are mated to each other at an angle of 90°, then the connection point of the pins is welded with an autogenous torch. After cleaning the weld and scale, the kingpins are inserted into the holes of the support posts and at a distance of 12 mm from the edge, they are drilled together for an M8 bolt. Marking and drilling must be done exactly in the center so that when the wheel is moved from position A to position B (fig. 5), the holes of the support posts and pins coincide.
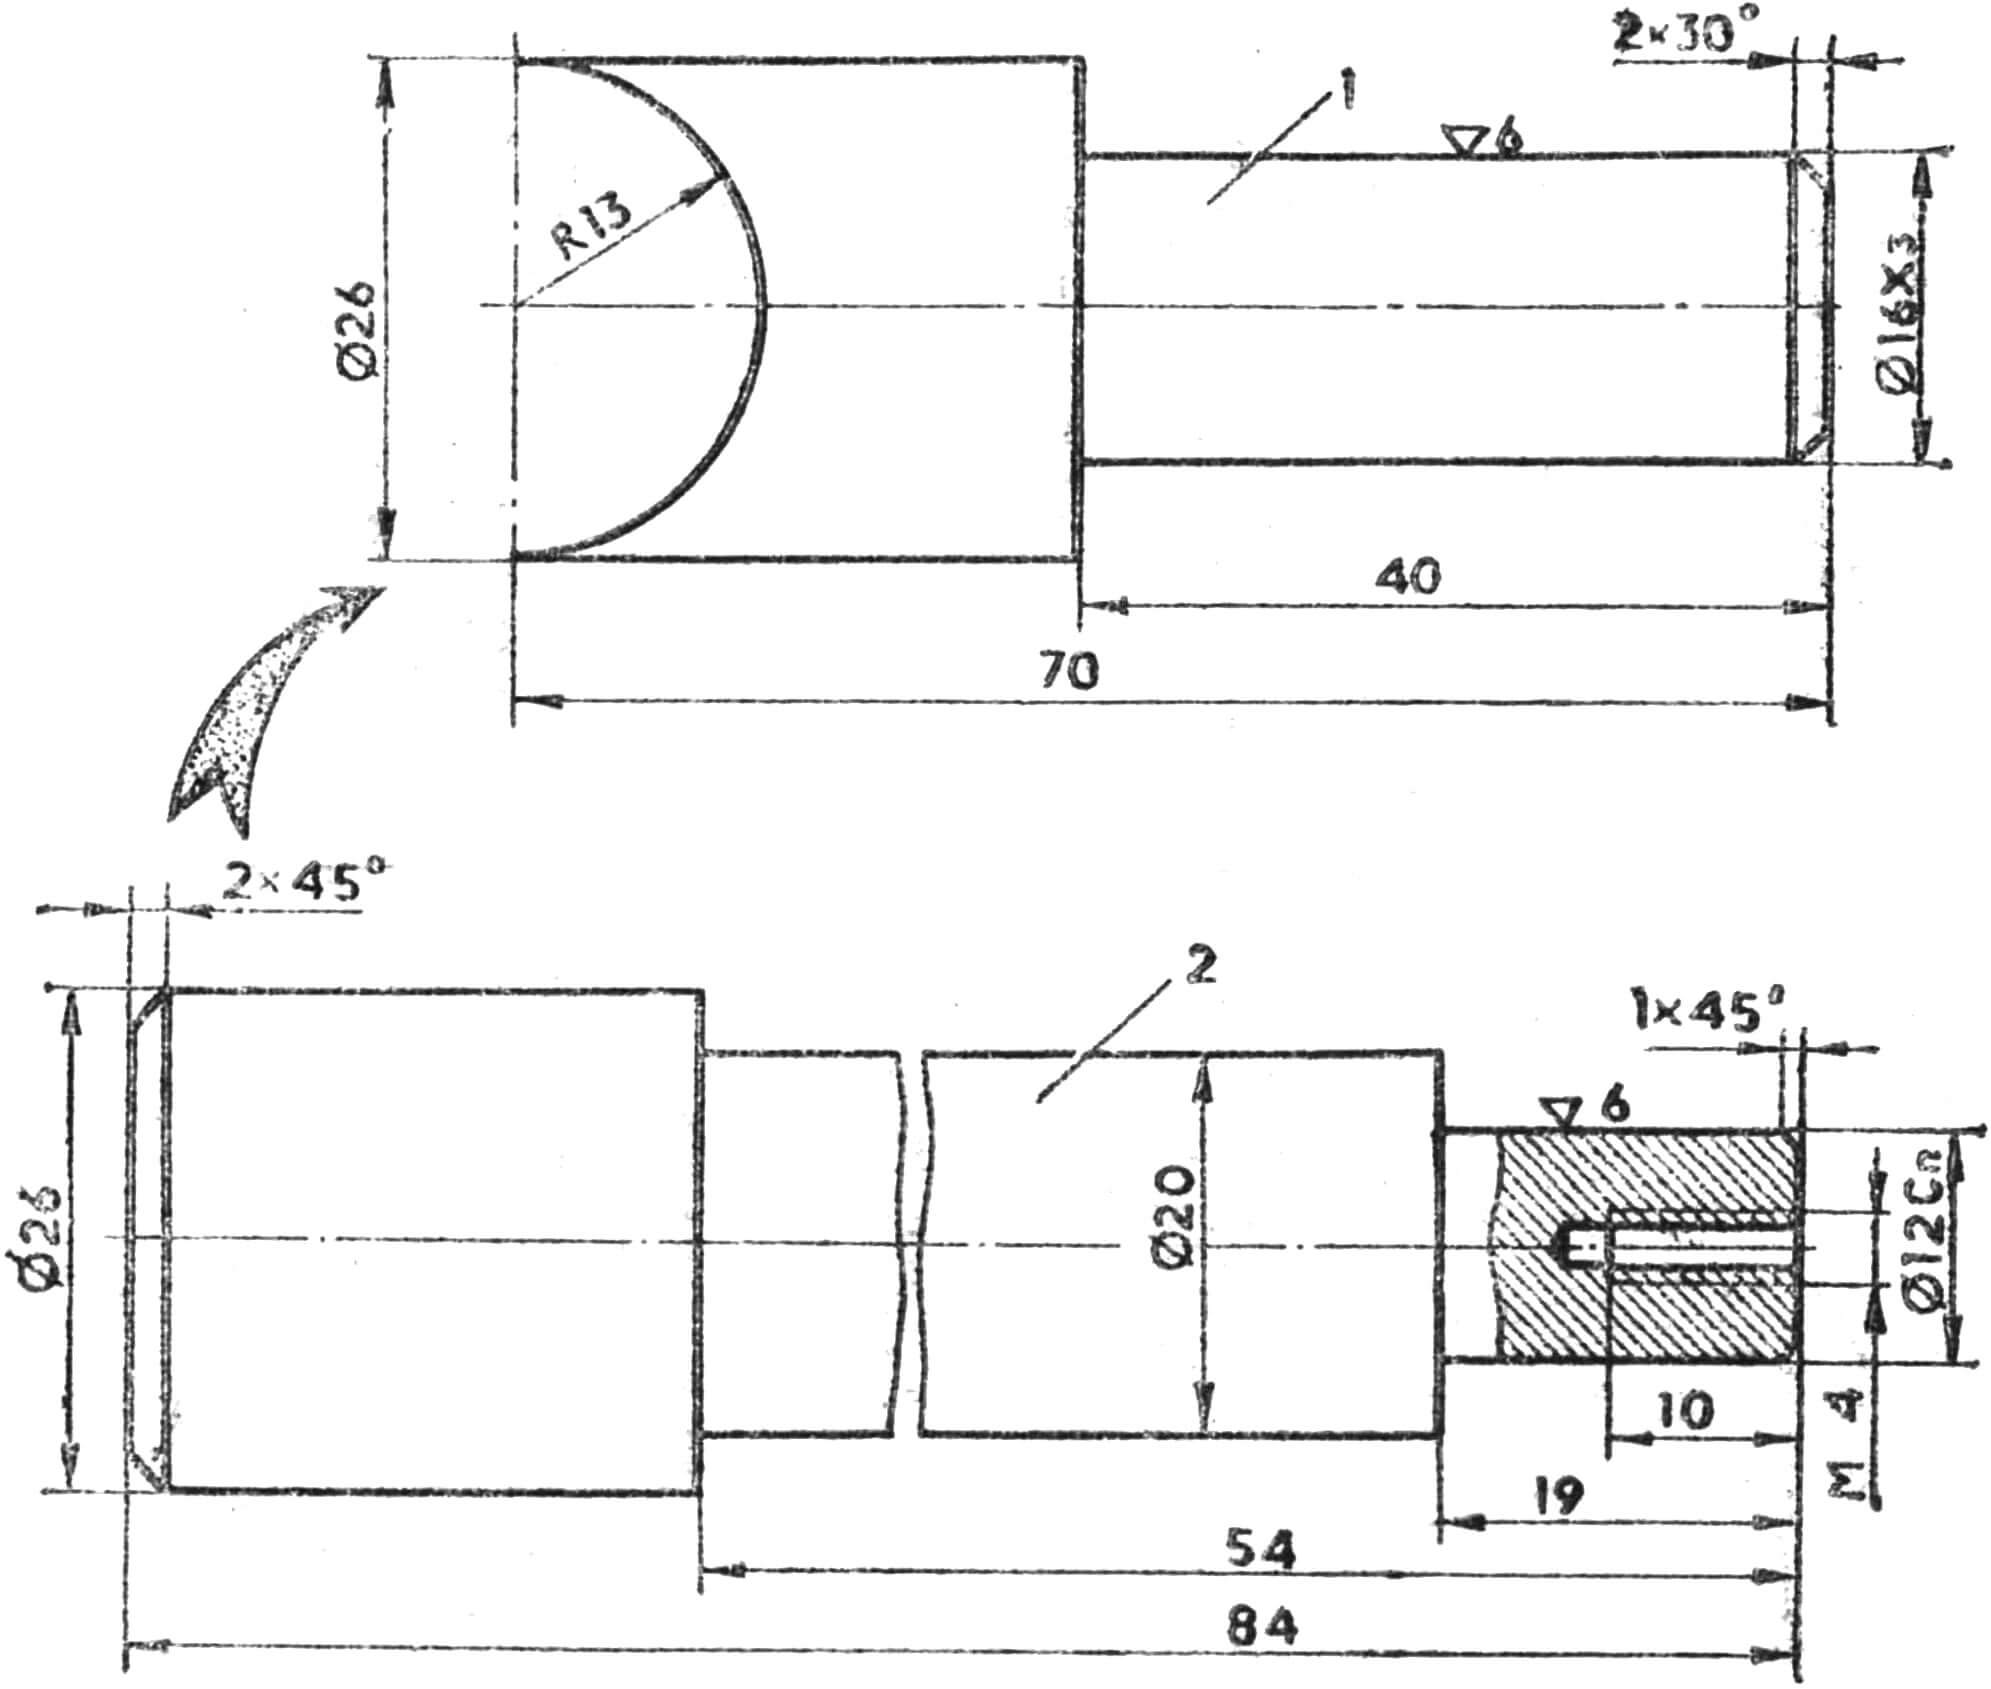
To ensure high load capacity of the cart and ease of movement, wheels Ø 120 mm are made of duralumin (D16) on bearings No. 80201 (4 pcs.) with a rim for a tube and tire model L-155 (12 1/2X2 1/4) from a children’s bicycle (fig. 8).
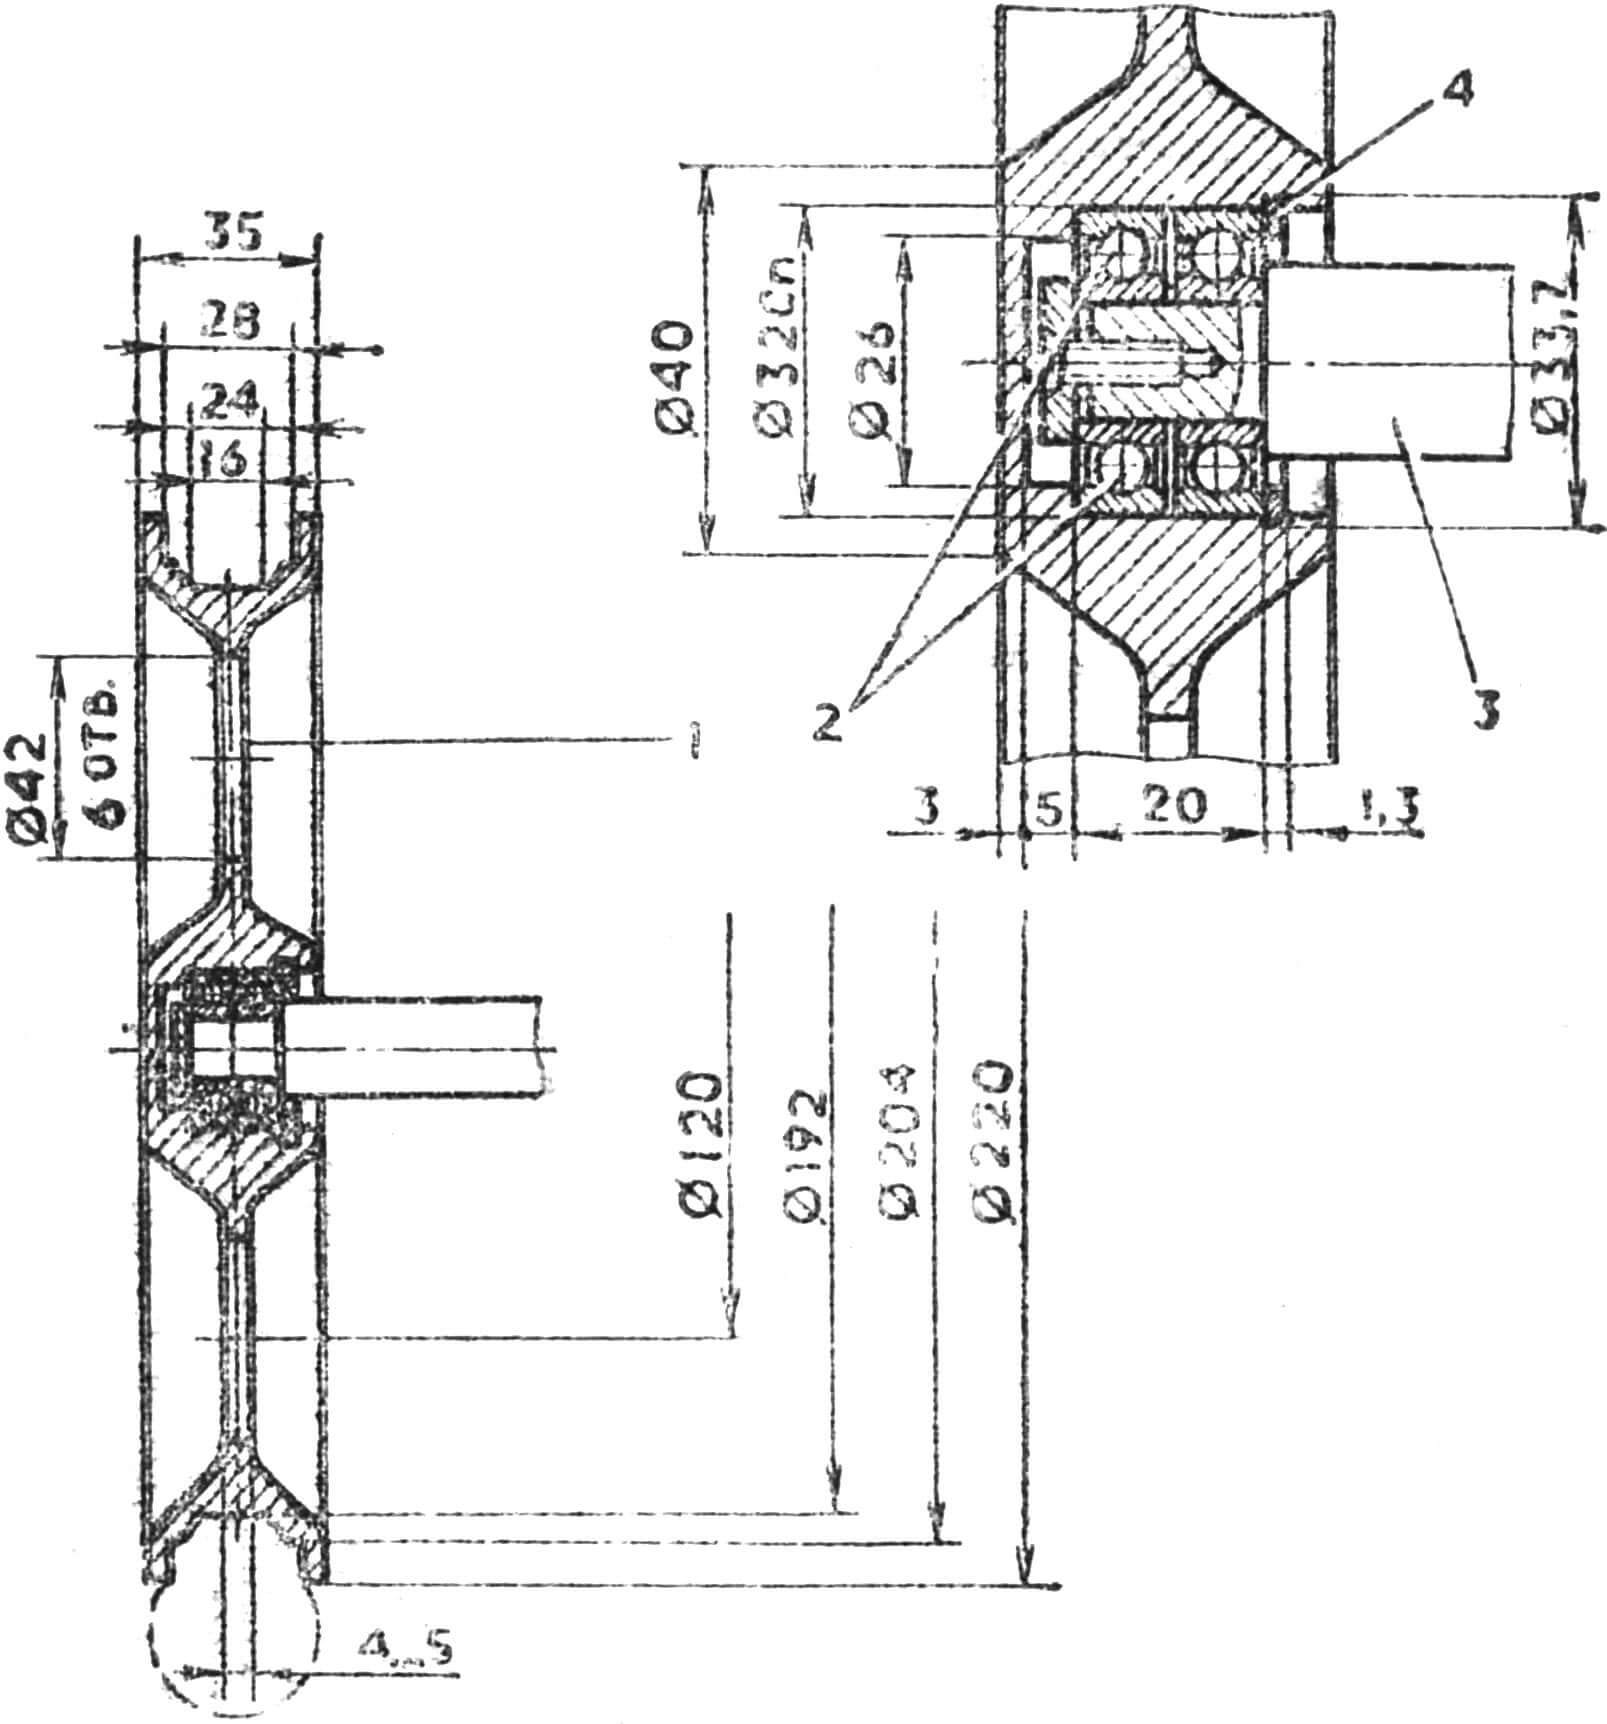
1 — disk, 2 — ball bearing No. 80201, 3 — half-axle, 4 — ring VE-32.
After manufacturing the axles and wheels, they are assembled. A spring ring is put on each of the half-axle journals (fig. 7 and 8), two ball bearings No. 80201 are mounted, washers Ø 18 mm and 3 mm thick are installed and fastened to the axles with M4X10 screws with countersunk heads. The wheels are put on the bearings and secured with VE-32 spring rings. If they are not available, split rings of the same diameter made of spring wire Ø 2 mm can be used. For this, the grooves for the ring 1.2 mm wide (fig. 8) are bored to a width of 2.1 mm.
After mounting the support (see fig. 5) with wheel axles and brackets are coated with yellow nitro paint. The cart handles and transverse connection (see fig. 4) are wrapped with red insulating tape. The platform is not painted.
Cart assembly is simple, it takes 5—7 minutes. The support frame is attached to the platform with two bolts (see fig. 5). Two brackets are freely put on the support posts (see fig. 6) and fastened with four M8X30 screws. The wheel kingpins are inserted into the posts and secured with two screws. For assembly, you need a screwdriver and a 12X14 wrench.
The platform pipes can be used on the “Salut M-52” kayak (with the appropriate structural addition) and as a mast (see B. Barkana’s book “300 Tips on Boats, Boats and Motors”. L., “Shipbuilding”, 1975).
If you want to have a lighter cart for only one kayak, then take duralumin pipes Ø 26—30 mm for the platform.
V. BEKHTIN, mechanical engineer
Recommend to read
 MOTORCYCLE + CAR = MOTORCYCLE
Their paths diverged at the dawn of the automobile industry, and since then the lines of development have continued without intersecting until now... We are talking about a motorcycle and... FLYING “SAUCERS”
Victor E. Marina from Rostov-on-don from a young age engaged in the construction of models of free flight. In recent time, leading a circle of aircraft modeling on obsut, he became...
