
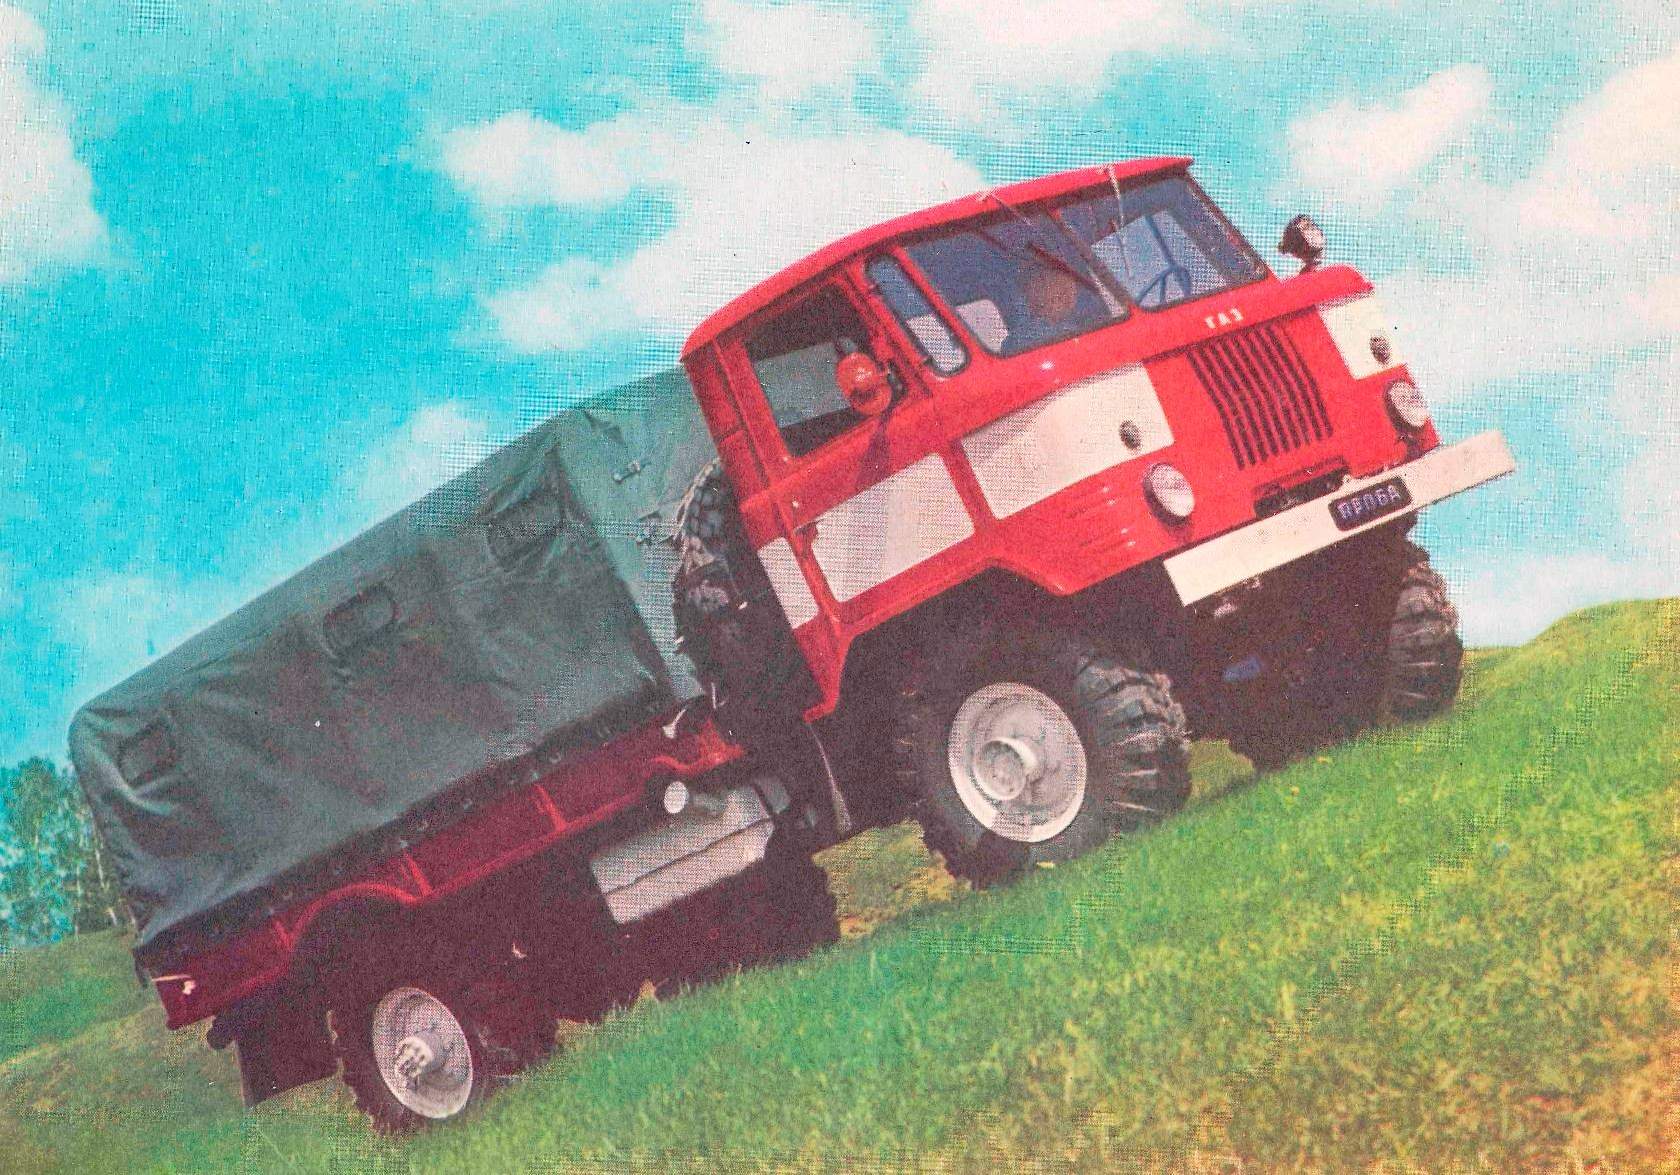
 This universal car 2 ton capacity designed for the transport of goods and people, as well as for towing trailers with a total weight of 2 tons in all road conditions. New advanced designs of components and assemblies provided GAZ-66 good reliability, durability and ease of maintenance.
The basic quality car high permeability. The GAZ-66 it is perfected and is a record for all known in the world of similar high-speed machines. Its permeability is almost the same as tracked vehicles.
Thanks to both leading axles, low pressure tires (which reguliruetsya on the go from the cab) and a powerful enough engine, he is not afraid of steep climbs, loose desert Sands, almost a meter of virgin snow.
This car is produced by Gorky automobile plant since 1964. At international exhibitions in Moscow (1966) and in Leipzig (1967) GAZ-66 awarded gold medals. In 1968 he became the first Soviet car has a Sign of quality.
Described below a model of the GAZ-66 is made by Igor Felinum in the circle of experimental automodelisme of the Novosibirsk club of young technicians of the plant named after V. P. Chkalov.

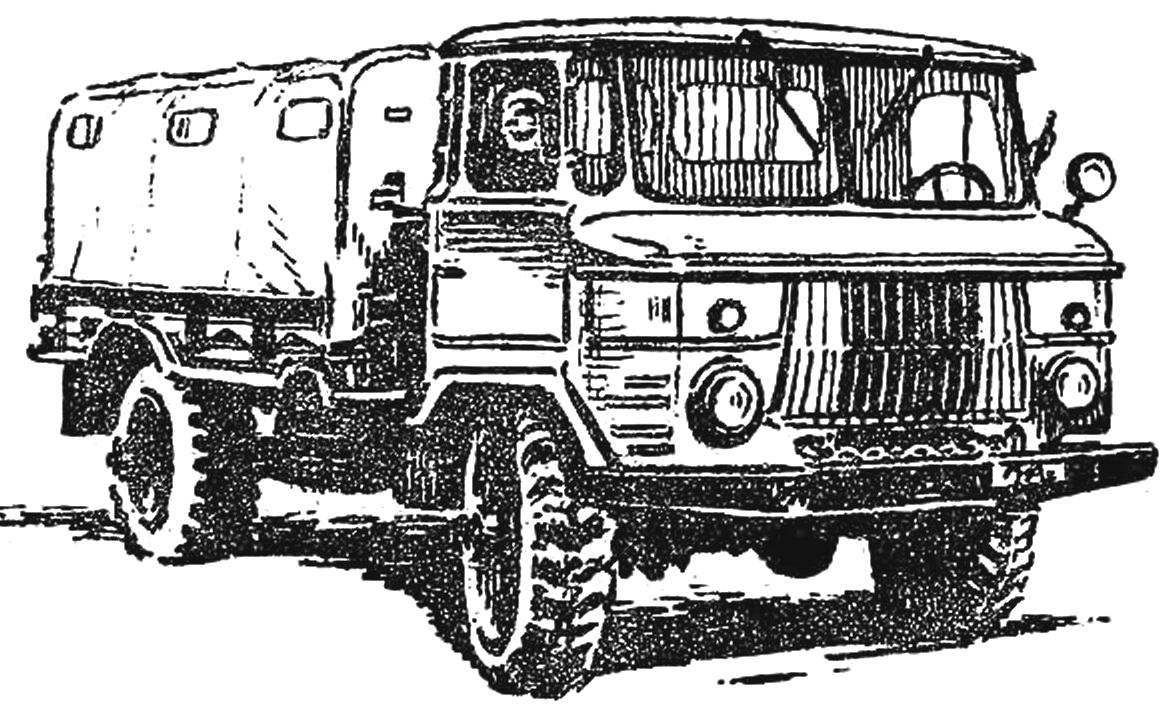
Fig. 1. The model of the car GAZ-66:
1 — cabin, 2 — tilt, 3 — spare wheel, 4 — hub, 5 wheel, 6 — tank, 7 — frame, 8 — reclining bench, a 9 — body 10 — front bumper, 11 — front axle, 12 — tool box, 13 — rear bumper, 14 — rear axle.
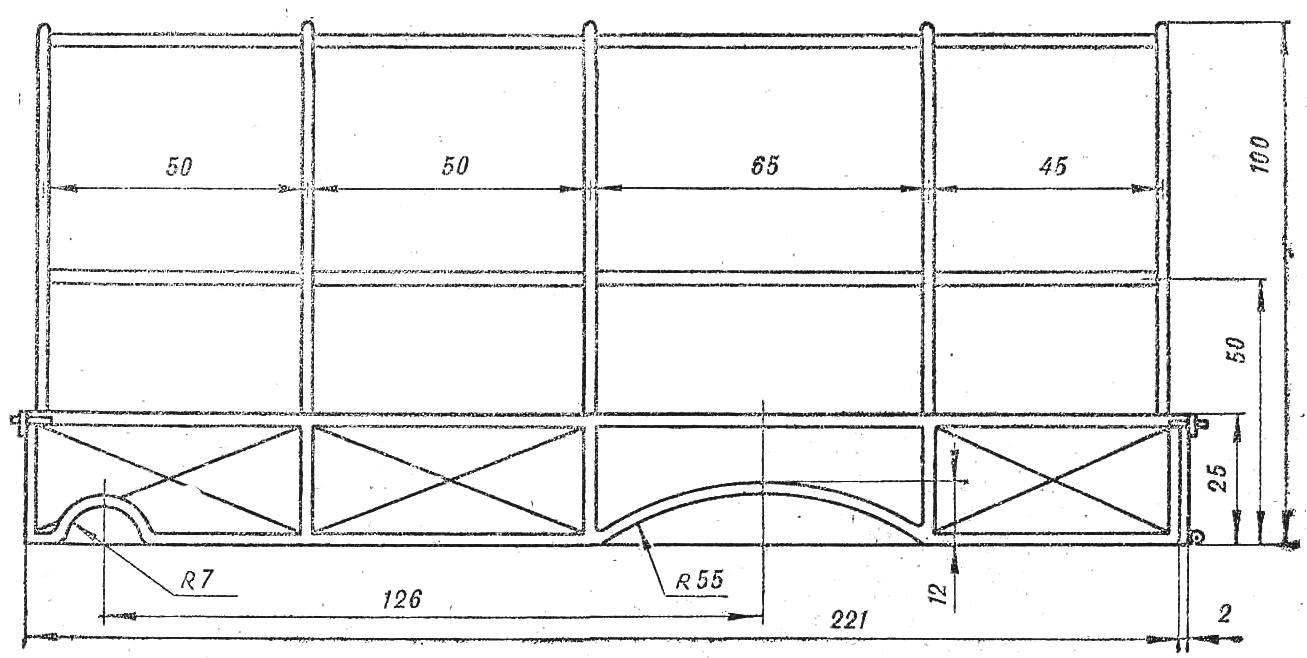
Fig. 2. Body
Car model GAZ-66 (Fig. 1) consists of three main components: chassis, body and cabin.
SUSPENSION (Fig. 4) includes a motor 2, a frame 7, the front 12 and rear 16 axles, wheels, springs, 3, 8 and driveline 6.
The motor MU-50. Attached to the frame using brass or steel bracket 5 with a thickness of 1 mm.
The frame is made of sheet metal. First make a template of the main beams of the frame 7. For this template to cut two pieces. Then, cut four strips 5 mm wide, solder them top and bottom to the previously cut blanks. Should get the two parts of the main beam of channel cross-section. Now cut the sheet metal workpiece 9 front and rear buffers 17 and the cross beams of the frame 13 and spam them, install on the frame. Thoroughly clean the soldering points with a file and sandpaper. The main and transverse beams of the frame and the front buffer can be made by another method — to bend them from a single piece of sheet metal.
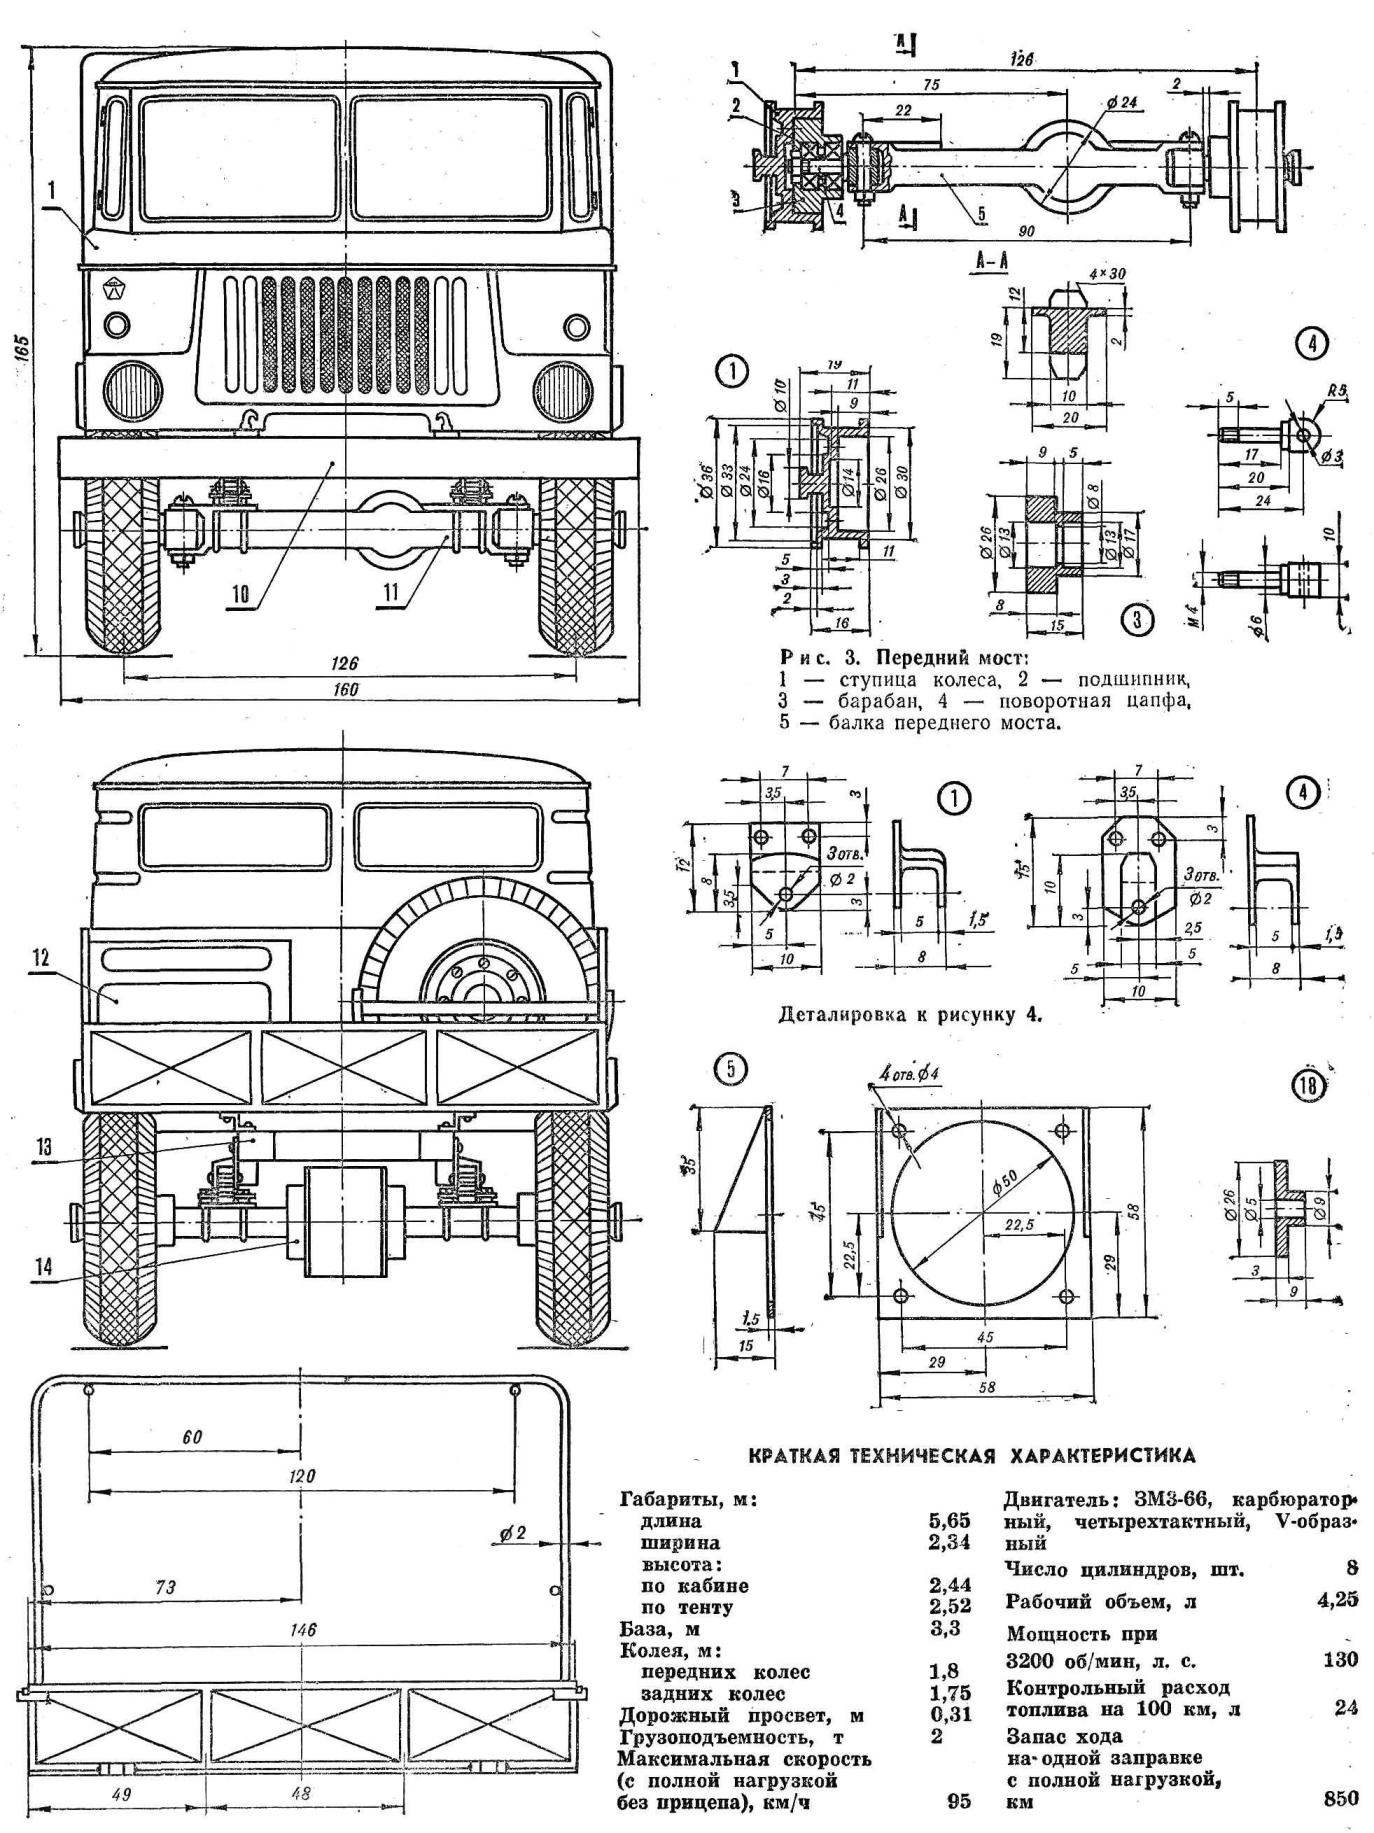
The GAZ-66 has both the leading of the bridge. The model has only the leading rear axle, but the front is made so that looks too similar to a leading. It is milled from alloy D-16T. It can be made of steel, but it will be much harder.
Rear axle Assembly bevel gear. Their gear ratio 1 : 1,45. Basic details — front sleeve 20, the side of the sleeve 19 and the gear 16. All of them, except for the side bushings, made of D-16T. Side bushings of steel 45 with a thickness of 1 mm. the dimensions of the bridge are determined by the size of gears. In the side sleeve press two bearing 13X5. The same bearings install in the front bushing. If not, then make a bushing out of bronze. After Assembly, break in the gear of the axle on a drill press for 20-30 minutes with no grease, then disassemble it, wash in kerosene, grease lubricating oil, grease, and better — tsiatim-201, re-assemble and break in. Then properly assembled bridge should work easily and freely.
The attachment points of the springs 1 and 4 are fabricated from alloy D-16T or steel. They are attached to the frame with M2 screws.
Springs made of spring of the clock or spring steel with a width of 5 mm. the Front spring 3 has a set of five strips and the rear 8 of the eight. By the end of the spring, solder a tube (steel or brass) with internal Ø 2 mm. to This end, insert the spring in the front node 1 and lock it with the screw M2, the Rear end of the spring needs to rely on the screw M2, mounted in the part 4.
To the side of the sleeves 19 of the rear axle according to figure 4 in places where it must be mounted on a spring, solder patesserie plate 15 with a size of 18X18 mm with a thickness of 1-1,2 mm stainless steel or bronze. In these plates, drill four holes Ø2 mm. Install the axle so that the leaf springs lay on the plate between the holes. On top of the leaf springs press the clamping plates 14 and screws with M2 nuts. Similarly mounted and the front axle. There is another option mounting bridge with bent staples from a wire. He is shown in the General arrangement drawing of the model (see Fig. 1).
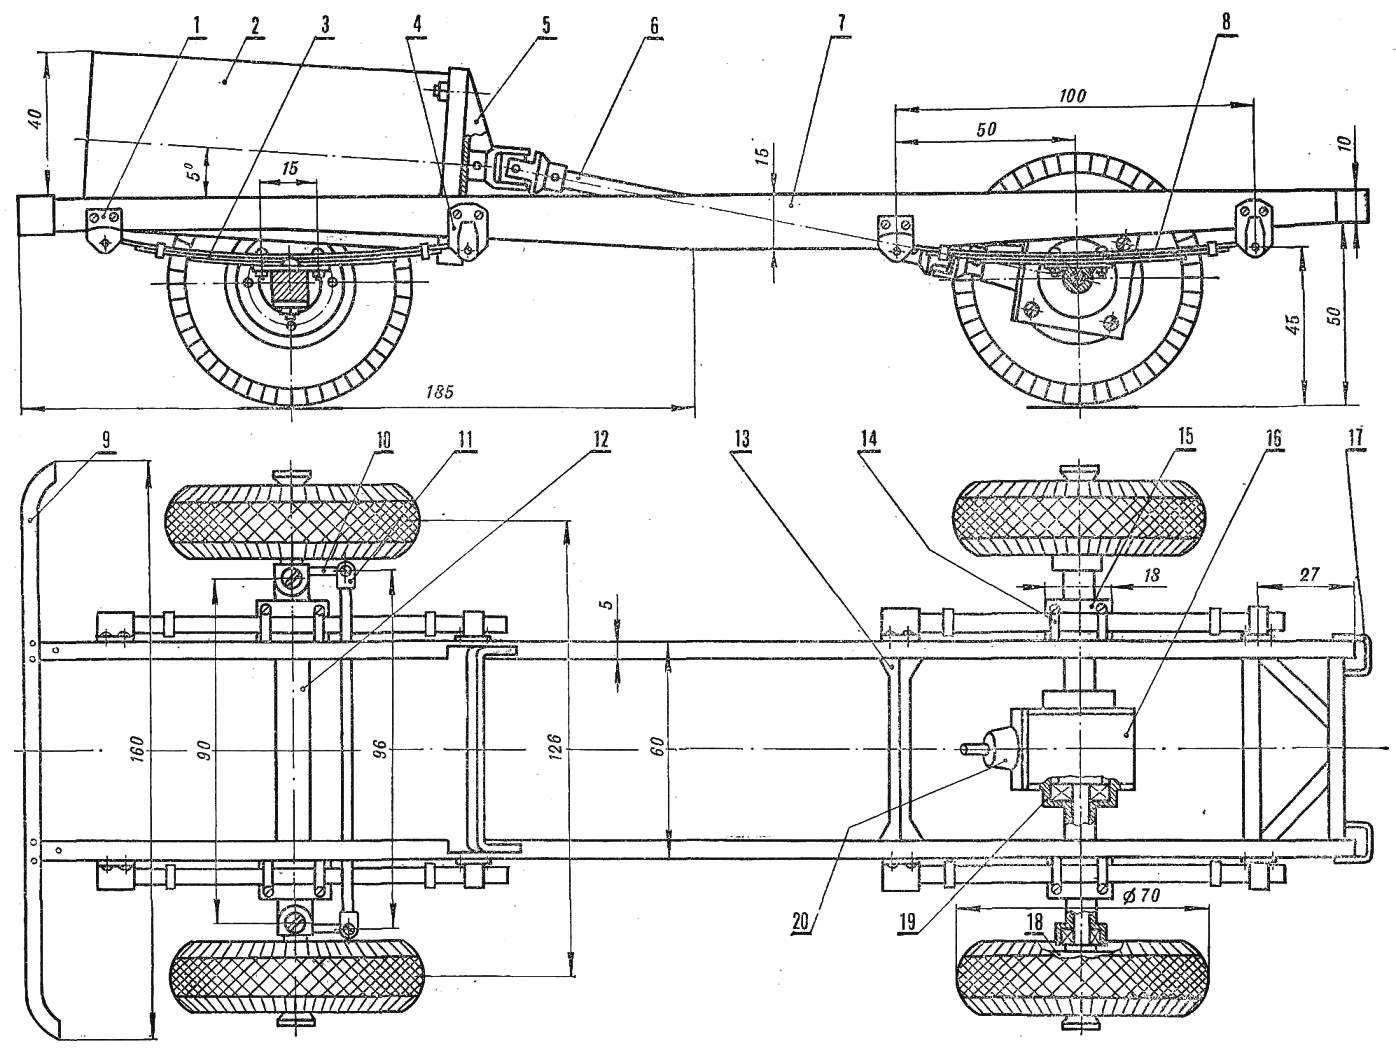
Fig. 4. Suspension:
1 — front mount-spring, 2 — engine, 3 — front springs, 4 — rear clamping springs, 5 — mounting bracket engine, 6 — propeller shaft 7 — main beam of the frame, 8 — rear spring, 9 — front bumper, 10 — lever 11 — transverse thrust, 12 — front axle, 13 — transverse beam of the frame, 14 — tie plate, 15 — adresserna plate, 16 — rear axle (gears), 17 — rear bumper, 18 — bushing for the rear wheels 19 — side sleeve, 20 front bushing.
To the front wheels that you can manage, secure on the rotary axle 4 (Fig. 3) the levers 10 (see Fig. 4) and connect them to the transverse rod 11. Fabricate a propeller shaft 6. How to make it seen from the drawing. Now install it between the engine and the rear axle. On the axis of the bridges put on the hub wheel 1 (see Fig.3). Together locations of ball bearings or bronze bushings apply grease (grease, grease or technical vaseline). On hubs rubber tyres Ø 70 mm.
MANUFACTURER of CABIN 1 (see Fig. 1) start with blanks, which are made of wood (pine, Linden) according the General arrangement drawings. Then from a sheet cut out billet and attach them with small nails to the disc, and solder to each other. Seams carefully smooth out. On the roof napauta pieces of brass wire, imitating the ribs. Make a loop and attach the door to the cabin. Inside install instrument panel, steering wheel and seat. With a hinge cabin are connected with the frame, back, additionally, additionally attached to it a small latch.
The BODY (Fig. 2) also made of tin. For the frame of the awning, take a brass or steel wire Ø 1,5— 2 mm. Tent stitch from the material of the protective colors.
Zashpaklyuyte the cab and the body, and after processing an emery paper paint nitroemalyu.
The power source is put on the body. They can be block from battery 373, “Mars”, or alkaline silver-zinc battery.
V. KUZNETSOV, head of road pilot automodelisme, Novosibirsk, Russia
Recommend to read
 RACING MODEL — THE CHAMPION OF EUROPE
In the early 70-ies before the Soviet athletes-automodellista was a challenge: dvuhsotmetrovy to exceed the threshold speed in the class of models 2.5 cm3. These days, the speed has... CHINESE SYNTHESIZER
In selling there are a number of relatively inexpensive electronic musical instruments (EMI) of Chinese origin that fall within the price category of a toy. However, inherent in their...
