 Anyone interested in the history of armored vehicles is well known that highly characteristic feature of the external appearance of the German tanks since 1943 was an anti-magnetic coating of armor — so-called “zimmerit”. Originally this coating was intended only for the Eastern front, but soon became an integral part of all tanks of the Wehrmacht. “Zimmerit” with a rather complex chemical composition, in simplified form, is represented as a mixture of latex with cement. The idea of such a coating is rather controversial, since the magnetic mines were used only by guerrillas, and after application the tank was still “clean” place (rollers, tracks, etc.). In the end mine was “to stick” and to railway platform, and downhill equally flew echelon with tanks, as with the “Cimmeria”, and without it. But nevertheless, the Germans did it quite costly.

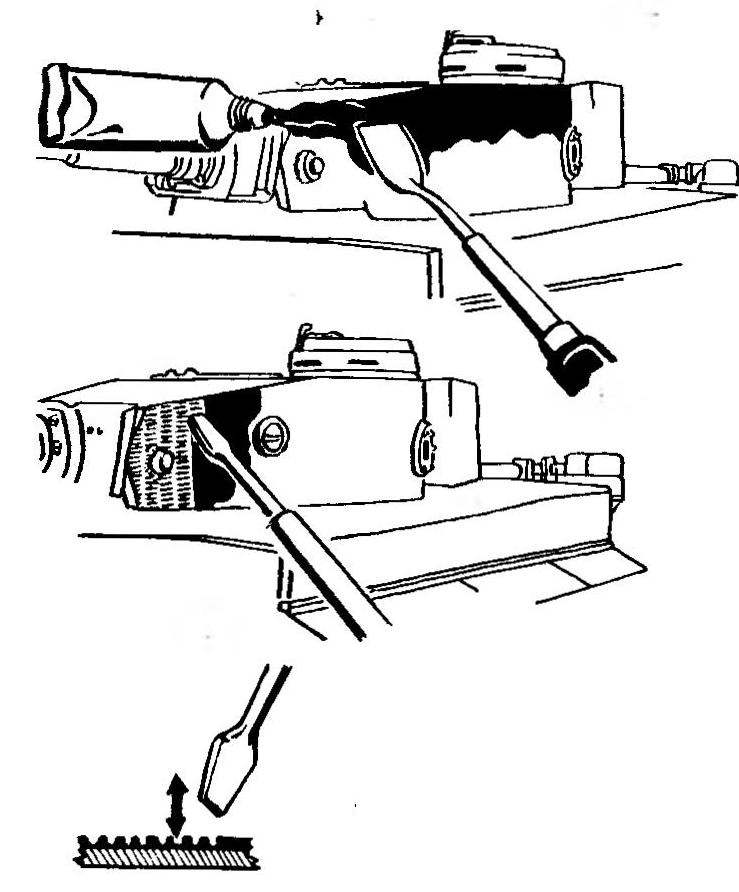
HOW TO MAKE “ZIMMERIT”
“Zimmerit” applied mostly in terms of workshops and frontline military units. The thickness of the layer was 1.5 mm. depending on the applied tool coating can have different shapes: squares, diamonds, horizontal and vertical stripes with a smooth or “waffle” surface. On top of the “zimmerit” applied camouflage pattern. In General, a fighting machine with such a coating has gained quite a picturesque appearance. The last circumstance may not be of interest to modelers wanting to do and they even made the model more attractive.
