Barely touching the redan to the water surface, sometimes on one rowing screw, is worn on aquadrome models class FSR. Speed, maneuverability, dynamics and seaworthiness of the glider — all this is possible and feasible if the model is thought out literally all the features of its design.
Today we want to introduce athletes modelers with radio controlled model of the type FSR-3,5, recommended by the Polish magazine “Modelarz”, with the power plant, which offers drawings of the German magazine “Modellbauwelt”.
Body shell wikiepedia of two halves — top and bottom. The work should begin with the production of the master model, doing her best from softwood, e.g., basswood. For this selected block of appropriate dimensions; if you find such not succeed, the workpiece is glued from several boards, positioning them as masons in laying bricks offset by half the width.
Further on the theoretical drawing cut templates — their contours should correspond to the depicted in our drawings. Material templates can serve two to three – millimeter plywood, and even better — made of anodized aluminum the same thickness.
The next stage — the markup phony workpiece. It is necessary to produce a surface gauge marking on the plate. When applied this line of planes, which are located in frames, the diametrical plane of the housing and the plane of the connector. In conclusion, on the upper plane of the workpiece is applied to the contour of the body in terms. Then it is cut along this line with an allowance of 2-3 mm on the side.
Using a semicircular chisel, rasp and round gracioso file templates “planted” on the workpiece. This is done by successive approximations; the final operation of fitting templates are “paint”. The working surface of the pattern is rubbed with colored pencil and pressed tightly to the surface of the blanks: painted places cut down, and then the template once again pressed tightly to the piece, and again cut off the painted areas.
“Planted” all of the templates, carefully remove the wood between the sections. Makes sense also pre-colored pencil to outline the location of the cross sections, and the processing of ingots to ensure that the color lines were not touched by the cutting tool. A smooth transition from section to section of check or a smooth line where the plots are fairly straightforward, or elastic wood, plastic or metal rake. After final processing, the disc cemented in several passes with intermediate Vykurovanie and painted in two or three layers with subsequent polishing.
The next phase — making matrix. It will require two strong wooden box, which dimensions should exceed the dimensions of the upper and respectively the lower parts of the body. The matrix material can serve as the epoxy compound consisting of resin and filler, for example, clean river sand. To begin with, the master model is covered with a separating layer (parquet putty, a solution of wax in benzine or turpentine, etc.) and raspolirovyvayut to a mirror Shine. Next, the master model coat a layer of epoxy binder, and immediately begins to prepare the compound for the casting of the matrix. A mixture of epoxy resins with sand should be uniform and plastic. Keep in mind that the shaping of the matrix must begin, when applied to the master model epoxy starts to set and becomes viscous.
The future will depend on the thoroughness of the introduction of the master model into the compound. Must first be leveled and compacted compound; if possible, process a batch of simple homemade vibrator motor fixed on its axis by the eccentric weight. By the way, it is useful also to compound carefully filled all the hollows, angles, transitions owing to the presence of the master model, and also to remove the “epoxy” bubbles of air.
In the molding of the insert matrix into the compound also three or four metal, lubricated pins, which will later serve to guide the molding of housings.
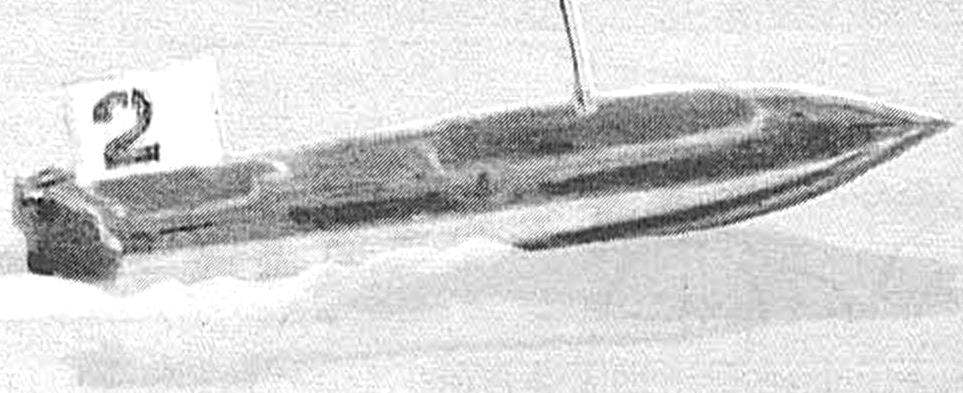
The model of the class FSR-3.5 mm.
The theoretical drawing of the underwater hull.
The design of the template.
Make sure that the master model was immersed in a compound line connector and the surface of the potting compound in the box was horizontal and smooth. After curing the resin, you can start shaping the upper part of the matrix. Note that to make a master model of the lower polimetrica should not be. It is only necessary to strip the plane of the connector and cover it with a separating layer. The process of introduction of the master model in the compound does not differ from those already described for the lower polimetrica.
Dissecting after the curing of the resin volumetric and pulling them from the master model, thoroughly wash polimetrica gasoline or acetone, gently pospolite and Polish. The matrix is ready.
Powerplant size:
1 — frames for the installation of the reducer, 2 — gearbox, 3 — gear (m=1, Z=28), 4 — washer 5 — nut (M5), 6 — starting pulley, 7 — nut M6 8 — gear (m=1, Z=15), 9 — cone, 10 — bearing 5X15X5 mm, 11 — motor, 12 — bolt engine, 13 — stern shaft, 14 — stern tube, 15 — the clip on the engine 16 — the screw of fastening of a reducer 17 — “the base” plate of power plant, 18 — the cone of gears, 19 — body shell size.
Shell wikiepedia of several (depending on their thickness) layers of fiberglass. Pre-fiberglass or laundered gasoline or annealed on the hotplate — it will save the fabric from the wax, which she is impregnated during manufacture. Valaku it is desirable to produce small pieces, each carefully pretera to the matrix, expelling air bubbles and excess epoxy. If possible, the curing of veclachi is better done simultaneously with vacuum suction. This matrix is placed in a plastic sealed bag, and his neck is connected to the inlet hose of the pump. Vacuum Vileika preferably the whole period of curing epoxy resin.
Similarly wikiepedia and a second body half. Connecting the “top” and “bottom” is made only after the cut window in the casing and additionally the customized frames and ribs for fitting the engine, gearbox and remote control equipment.
The frames are glued in the housing with a fitting at the place; their number is determined by the stiffness of the shell and dimensions of the equipment and gear. The frames are a sandwich of foam core, covered on two sides with plywood plates 1 mm thick or two layers of fiberglass. The same design and longitudinal ribs.
Reducer, through which is transmitted torque from the engine to the propeller, pinion, spur; his ratio — 0,536. Thus the motor pinion gear has 15 teeth and gear wheel — 28.
The gearbox housing is milled from D16T or AK4-1T. The holes for the stern tube shaft and bore holes for bearings chiseled on a lathe certainly with the same setup.
Motor pinion gear — steel 30KHGSA, gear wheel — bronze stamps Brag or Broth. Both module — 1, the center distance of 21.5 mm. Stern tube shaft — from “silverfish” 50KHFA, stern tube with outer Ø of 8 mm and a wall thickness of 1 mm.
The gear is planted on a cone bushing. To observe the alignment of the hub and stern tube shaft, it makes sense to adhere to the following production technology. For starters, the workpiece shaft stern tube is cut on one side of the thread M5 on the workpiece taper sleeve is cut a threaded hole. Next, the billet sleeve is screwed onto the workpiece shaft, tight drags, and then on the lathe completely protectives conical seat. In this case, the shaft and bushing will be strictly coaxial.
In the reducer there are two bearing 5X15 mm width 5 mm.
According to the materials of the journals “Modelarz” (Poland) and “Modellbaumesse” (GDR)
Recommend to read VELOMOTO TANDEM The two-seater velomoto car "Tandem" — my latest homemade design with a combined drive: from the pedals of the driver and passenger (in this case, he becomes the second crew member), and a... CONVERTER PUSH-PULL Summer — time for vacation and travel. During this period, there is a special need for a universal power supply for various mobile (and not only) household appliances. Such a... Scroll back to top
 Barely touching the redan to the water surface, sometimes on one rowing screw, is worn on aquadrome models class FSR. Speed, maneuverability, dynamics and seaworthiness of the glider — all this is possible and feasible if the model is thought out literally all the features of its design.