RESONATORY CLIMBS

RESONATORY CLIMBS
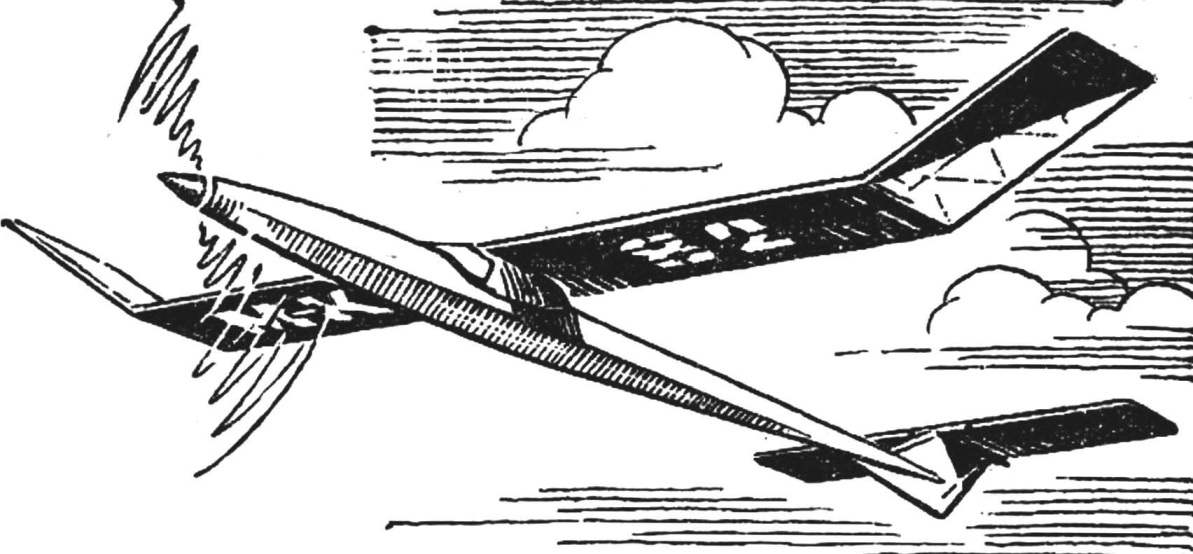
Today I want to introduce You to the model class B1, having almost the same set of wings. This force diagram consoles with a transverse set of pine slats is fully justified, since for such models, the requirements of stiffness, processability and low weight is no less important than for a glider.

The model design is relatively simple.

 
The wing is single-spar, has a smooth middle part without cross angle “V”, raised only by his “ears”. It is made permanent, as the size is not very large. And the lack of junction nodes allows to save considerable for the model class B1 weight.
 
Start with the spar gathered in its simplest area is the slipway both the shelf and the wall in one piece. It is better to make the part from a length of 1000 mm and continue with the spar just the right size. “Ears” you cut from the center section after Assembly of the frame. Thus it is possible to achieve full similarity profile and the size of the chord across the wing span.
 
Once the glue is dry, remove the bulkhead from the slipway. Spread out on a flat Board made a life-size drawing, start to assemble the front of the wing. Securing pins the spar and planed the front edge inspect consists of tightly pre-sliced strips, forming the front part of the “ribs”. If everything is in order, glue them with epoxy in place and wait a day — the time required for complete curing.
 
Fig. 1. Model with rubber motor class B1
 
Fig. 1. Model with rubber motor class B1:
 
1 — spinner, 2 — pole, 3 — back pin, 4 — body, 5 — keel 6 — wick, 7 the rudder, 8 — regulator, 9 — wing.
 
Fig. 2. Templates for the manufacture of screws.
 
Fig. 2. Templates for the manufacture of the screw.

 
It is now up to the rear part of the profile. She is going to the same Board, just under the spar to put a flat wooden plate with a thickness of b mm, which is attached with pins and the rear edge. You can use two rails 5×10 mm placed under the frame members. Checking the mutual position of the parts of the wing, glue the tail part of the “ribs”.
 
Install ending (fake, of a thickness of 3 mm) and stringers. Wkleic an additional wall longitudinal length of 200 mm in the middle of the center section, do some processing of the frame. Then carefully cut with a jig saw console-ears, adjust the joints of the longitudinal elements of the set to the tip is above the center section 100 mm. Drank out of plywood with a thickness of 1 mm the gain of the spar and kleiv them in places of fracture of the wing, finally assemble the frame. Scarves and lining of the Central part of the wing is made of plywood with a thickness of 1 mm.
 
The wing is covered with long-fibre paper — macalintal. From the top you need to cover it with four layers of dilute Amalita. After drying of the varnish, hold the frame under load, or formed under the influence of uneven drying of Amalita random curvature will be very hard to eliminate. But the required twist of the wing is necessary to provide necessarily, warming of the skin over the stove. You must ensure that the front edge of both endings was 2.5 mm below the rear edge (relative to the untwisted wing).
 
Empennage is made mainly of packing foam. Using a heated electric current of the wire cut it into plates with a thickness of 2.5 mm for stabilizer and 3.5 mm for the keel. Cutting along the contour of the workpiece horizontal tail and giving it a concave profile, glue the pine spars, edges, a Central rib and ending. The last two items can be done by sawing along a curved lime plate having a section 20×2,5 mm.
 
Fig. 3. The nose of the fuselage with a pylon and a front boss.
 
Fig. 3. The nose of the fuselage with a pylon and a front boss.
 
The keel is exactly the same, only the rails to the border — 2X3,5 mm. They also need to paste and crack under the rudder, which is cut out from balsa. When assembling the tail it is better to use casein glue. Epoxy is too heavy, and when you-scrivanie resin seam, joint with the softest foam, greatly interfere with this work.
 
The external finish of the tail is to wrap it tissue paper or a transformer on the glue (he is better than casein that is less permeable to solvent) and subsequent varnishing. Enamel, which is applied three times in thin layers, dilute with thinner. After each coat thoroughly dry the item, otherwise included in enamel thinner can eat away at the foam and feathers will have to do it again.
 
After finishing the exterior trim can be pasted in the Central rib of the stabilizer bamboo pins for fixing the rubber rings and wick. At the upper end of the keel stick box stabilizer with the same pins. Here will be more suitable epoxy.
 
The fuselage is of rectangular cross section, rolling into a triangular in the rear. Structurally, it is a truss I-beam — this type of fuselage has a minimal weight with exceptional stiffness.
 
He does so. Prepared Reiki the spars and braces of the workpiece, the drawing of the fuselage with diluted resin is collected by two opposing farm in the sidewall. Cut from the remnants of several square foam frames. They come in handy when building, after its completion, these frames are removed. Cementing the sidewall thread, check to see if the resulting fuselage curvatures and twists. You can now glue the remaining struts.
 
Fig. 4. Installation of the stabilizer on the tail.
 
Fig. 4. Installation of the stabilizer on the tail.
 
Fig. 5. The design of the Central part of the wing.
 
Fig. 5. The design of the Central part of the wing.
 
Through the day enjoy a final draft of the farm. You need to sew fake plates nasal sections, install the front frame and sew up the fuselage, through which will pass back pin fastening rubber motor.
 
Glued the fuselage as well as wing — macalintal paper. Just varnishing it is necessary five times. Pylon made of plates of PVC foam stamps, set him on the bed of the wing (plywood with a thickness of 1 mm) and transparent black (color celluloid film). Fit the pylon to the fuselage and checking the mounting angle of the wing, fit an his paper and set aside. Glue the item to the place it will be possible only after complete Assembly of the model — selection its provisions achieve the desired alignment.
 
Rotor group. Rubber band that serves as a motor, consists of 20 threads cross-section of 1×3 mm. Weight — 25 g grade rubber Pirelli.
 
In an extreme case, you can use the Hungarian round. Then the wiring should consist of 45 strands.
 
The screw is made from a lightweight, well-dried lime. Its diameter is 480 mm, 580 mm. the boss and the machine the folding of the blades is of the usual type. The axis of the propeller is bent from wire OVS Ø 2 mm. Particular attention to the correct shape hook, PA which is put on the rubber motor. If the suspension point of the harness will not be on the axis of rotation, during operation of the motor will be strong vibration, so they will interfere with the rubber to give all the stored in it energy.
 
In the butt of the blades glued copper bushings in them freely, but without large gaps, are bent from the ends of the wire soldered to the screw axis. Folding occurs under the action of the stretched rubber rings mounted on the axis and on small hooks embedded in the blades.
 
Profile convexo-concave, thin, reminiscent of the widely known G-417в. External finish blades — full lining with long-fibre paper and a partial (in the butt), thin fiberglass. After painting it is desirable the surface of the blades polished.
 
BALANCING BASIC DATA
 
Wing setting angle is +3°, the stabilizer is 0°; the angles of inclination of the axis of the screw — down 3° right / 3° (just selected when adjusting the models); the position of the center of gravity 50 to 60% of the chord of the wing (depending on weather conditions). The model flies in a motorized honor to the right, on the planning side.

 
MAIN TECHNICAL DATA MODEL
 
Weight, g:
fuselage – 29
wing pylon – 36
stabilizer – 8
want with the boss 29
The weight of the lubricated rubber motor into condition, g – 25
The mass flight, g – 127
In particular the area of DM2 – 13,76
 
A. DMITRIEV, athlete 1-th digit

Recommend to read

  • WHAT IS THE DATE TODAY?WHAT IS THE DATE TODAY?
    In wall weekly that's for sure indicate that this sliding arrow with a window cut out, for example, of cardboard, glued back zasypkoj of the same material.
  • KOREAN CROSSOVER WITH AN AMERICAN EMBLEMKOREAN CROSSOVER WITH AN AMERICAN EMBLEM
    Not all know that Louis-Joseph Chevrolet, whose name is famous American car company, and millions released it the car does was neither the owner of the company, nor a car designer. ...