 This schematic model airplane designed by M. S. Stepchenko, one of the veterans of the Soviet aircraft modeling. Its main advantage — ease of fabrication. Required for construction material: pine rack, a little steel wire Ø 0.6 mm, tissue and drawing paper, rubber thread Ø 1 mm with a length of about 2 m. the Model flies well indoors and outdoors.
Work suggest to start with the manufacture of the wing. Vystrugat Reiki cross-section of 1X3 mm: two length of 360 mm and four 70 mm. After this sheet, cut four strips the size 3X20 mm and bend them as shown in the figure. Ends of long and short strips and spread with glue and firmly attach them to the strips.
The cross section of the rails to the rib — 0. 5X2 mm. nine of Them: on the center — seven a length of 100 mm and two end length of 80 mm. Bend the ribs on the soldering iron or the lamp, the ends sharpened in the form of the blade.
In places the angle V edge of the wing glue and press the two corner ribs. 15-20 min install the rest. To the front edge at the junction with the Central rib tie brace out of sheet metal and attach the bar of the hog. And it also glue the Back edge of the wing.
The stabilizer fin and glue the strips over 1X3 mm (the size of the vats in the figure). Attach the stabilizer and fin to the fuselage tail boom. Its length is 190 mm, the cross section is variable from 3X3 to 1,5X2 mm.

The fuselage with the pine rail with a length of 320 mm, a cross section of 3X4 mm in front and 3X3 mm in the rear Bearing — bar of lime 3X7X10 mm — glue to the fuselage and tie the thread. The axis of the hole under the screw shaft will move down and to the right.
The propeller hub made of rails with a length of 55 mm and a cross section of 3X4 mm. the Cuts for the blades, made of two layers of construction paper, run the jigsaw at an angle 35е. Screw shaft made of steel wire Ø 0.6 mm hook in the sleeve, and then thread into the hole of the bearing and bend a hook for the rubber motor.
The entire model glue tissue paper. Wing tie rubber band to the fuselage. The rubber motor is six strands rubber round section Ø 1 mm. the Weight of the model is about 15 g.
Adjustment and start-up. Having assembled the model, check that there are no distortions. The movement of the wings along the fuselage, locate the center of gravity of the model with rubber motor. It needs to be at a distance of 1/3 the width of the wing from the leading edge.
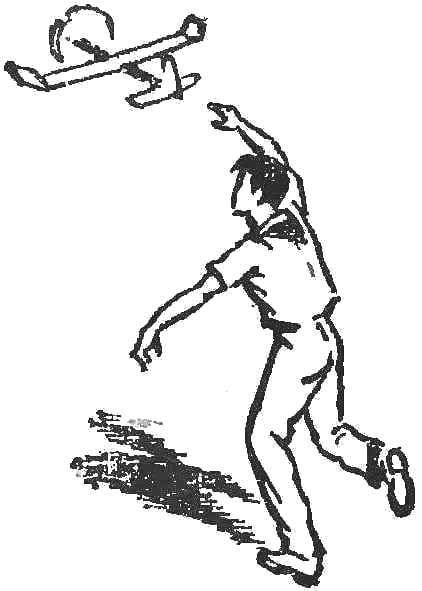
Having achieved the desired alignment, adjust the model to plan, that is, without the screw. Keeping one hand on the fuselage and slightly tilting the nose down, smooth motion push the “Baby”. If the model “lifts” the nose, the wing will move to the stabilizer. When flying down a steep — dive — wing move forward. A well-adjusted model should fly 8-10 m.
More complex phase — adjusting motor flight. Tighten the rubber motor at 50-60 rpm, take the model over the fuselage, right-hand and left hold the screw. Nudge let the model horizontally. Then gradually increase the number of turns of the rubber motor. You must remember that you shouldn’t move the wing after the model is adjusted on the scheduling.
If the model turns, first of all, try to displace the shaft end of the screw to the right or to deflect in the same direction of the keel (or rudder). However, the swirl can be caused by other reasons: weight asymmetry, different curvature of the profile of the ribs at the right and left wing поло4 wines.
Sometimes with a small twist of the rubber motor model flies well, and at large — not gaining height. The reason is that the tightly wound rubber Flex rack and the fuselage. In this case, stretch or replace the rack more durable.

1 — propeller hub, 2 — blade propeller, 8 — bearing, 4 — propeller shaft, 5 — a rubber motor, 6 — body, 7 — strut wing, 8 — the front edge of the wing, 9 — strip, 10 — rib, 11 — rear edge of the wing, 12 — hook for the rubber motor, 13 — tail boom of the fuselage, 14 stabilizer, 15 Kil.
It happens that in the engine flight model moving too much, and the more twist the rubber motor, the stronger. So, due to the imbalance of the propeller blades or the wrong bend of the hook of the screw shaft.
If after running the model into a steep climb tends to make the loop, slip the end of the shaft down. Cut the thread, take off the bearings and erode the upper part of the shaft. When the model was not gaining altitude, the end of the screw shaft must move up.
To regulate motor flight follows the angular displacement of the screw shaft, and a planning — movement of the wings along the fuselage (changing alignment), the change in the angle of attack of the wing and rotation of the keel.
To improve flying qualities, “Baby” can be offered to members who have experience doing modeling, make folding propeller.
V. ROZHKOV, master of sports of the USSR


