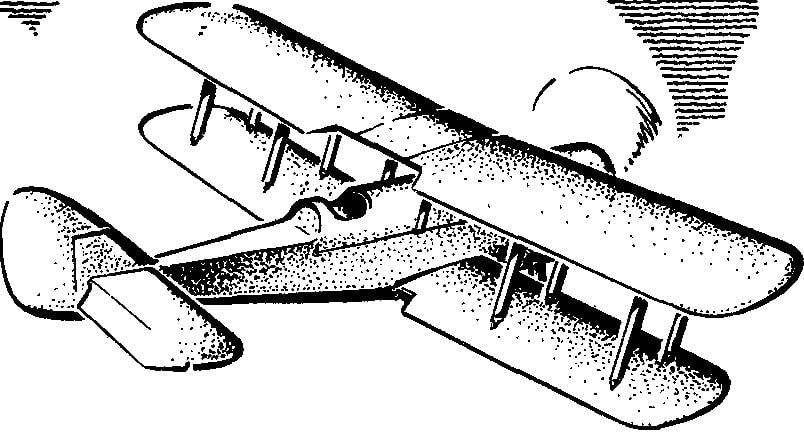
The basic material for the work on the copy of the selected foam (light, fine-pored, packaging). All processing operations are conducted using the jigsaw, which was repeatedly considered on pages of the “M-K”. It is better to prepare two kinds of tools: one stationary cutting plates of various thicknesses and portable, to perform work at the place.
The build starts with the fuselage. Most time consuming part is fairing. Primarily made templates (four of them) to trim the foam block on the internal and external contours. The workpiece (its size 30X45X248 mm) at the ends of the templates are attached with pins, and draws them in advance so that at the same time can be used for video frames.
The frames themselves are made of sheet metal with a thickness of 3 mm. Only the first force has a thickness of 5 mm, and further carries two lugs of lime Ø 8 mm front is reinforced with an overlay of mm plywood. The boss screwed the screws on the engine.
The Assembly procedure of the fuselage in the fairing according to the drawing assemble the frames, then glue the sides, tail boss, and finally put all the elements of the lower and upper trim panel. The lower section from the nose to the third frame a bit kruglitsa.
Fig. 2. The design of the fuselage:
1 — the fairing 2 — the power frame, 3 — plywood panel, 4 — lime tube, 5 — lower valance, 6 frames, 7 — casing, 8 — the rear part of the bottom plating, the 9 tail boss, 10 Kil, 11 — side panel, 12 — rack wings, 13 — th, 14 — wheel 15 — crutch.
Billet wings are cut similarly, with the use of templates, jigsaw. With additional templates profiled parts are the endings and then on the glue going in the finished plane. The tail has the profile of a flat plate, thickness: 3 mm After cutting to the shape of the part is helpful to turn over thin balsa or lime strips. Struts biplane box, and landing gear, — balsa 1 mm thick (you can also substitute a lime).
Fig. 3. The profile of the wing.
Wheels machined from dense Styrofoam and is supplemented by cones, glued together from paper. These “caps” have an external size of about 30 mm.
Before final Assembly of the entire model of the finished part upholstered tinted tissue paper. This will give copy a more authentic look and increase the strength of the foam. The cording is made on georazvedka the PVA glue. Color options, as drawings of aircraft P-1 given in the “M-K” № 1, 1986 (the size of the published projections in the design of the copy is enlarged three times).
Waiting for the full drying of the skin, starting the final Assembly. It is conducted on PVA. In fastening places racks on the surface of the wings glue the “snout” of a dense paper. Through them miss brace, made of thin copper wire. However, for this purpose it is better to use soft tinned wire, which looks more realistic. Similarly, the simulated and control cables.
The engine is mounted so that the axis of the propeller was denied the right by 2° and down by 1.5°. Fully assembled model weighs not more than 80 g.
Adjustment start with debug mode planning. Achieving stable, level flight, moving to motor launches. The engine operating time on one tank standard tank is approximately 40 s. During this time, the model R-1, ascending a wide spiral, gaining up to 50 m height. The total flight time is on average 100-110 C.
A. ESIPOV, head of laboratory, Ufa
Recommend to read AND IN SLUSH AND ICE For six years, regularly serves me scooter "Tourist". For movement on muddy or snow-covered road made to replace the rear wheel other — terrain. In old tires drilled on either side of... VASE IN THREE FLOORS In fact, the "floors" can be very different, as well as the selection of plates and saucers, depending on the purpose: fruit, berries, candies. It is important that all suitable options...  Models with a miniature carbon-dioxide engines attract the attention of a growing number of adherents of the small aircraft. This is understandable: like the plant is extremely easy to use, simple, does not require special fuel composition for the operation, allow to make very interesting flying technique available to most modellers, down to the youngest.

