“SCHOOL” ON THE LUNGE

Said to be good the model airplane itself teaches us to govern ourselves. Especially valuable is her property for beginners korovikov. However, apart from flight, training models required: maximum ease of fabrication and strength. We offer our readers two successful design for the initial “school” for learning the basics of flight complex. These models-coaches can help young athletes become faster first-class masters.

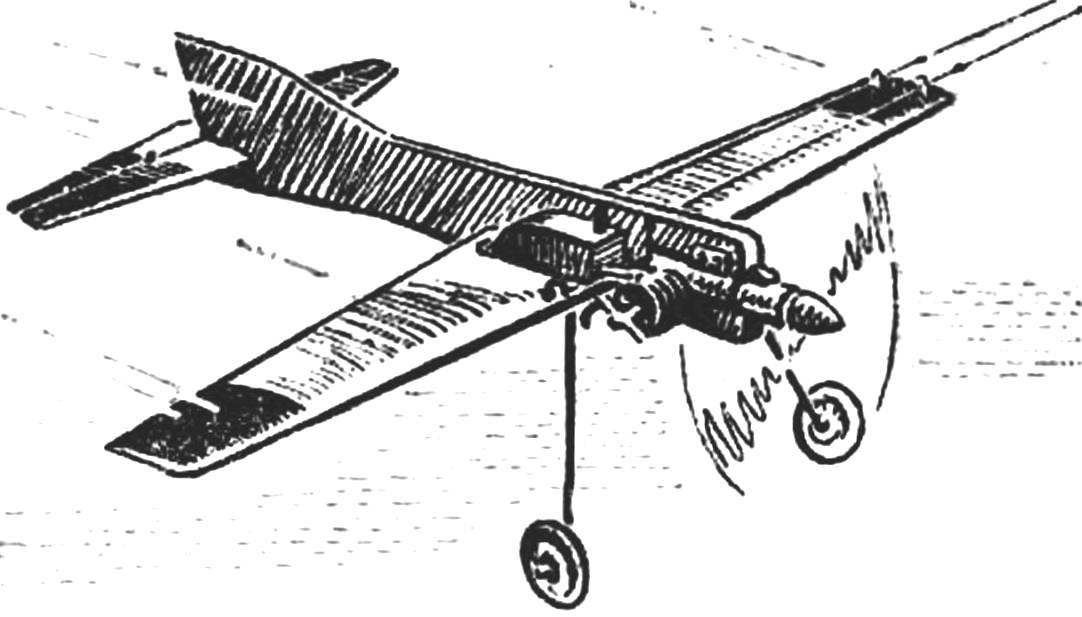
Although superficially this model is similar to the data collected from the sets of parcels, it flies much better. “The secret” in a much lighter wing. It is made of wood having almost twice lower specific gravity than plywood wing of the parcels, and, in addition, it carved out large Windows of relief, practically does not reduce strength. Therefore, the model is held steadily in the air, perfectly obeying the helm, even at medium engine speeds. Moreover, the vitality of the device above any praises. The prototype, built by guys dozens of times head over heels rolled down the dirt track stadium after unsuccessful encounters with the earth and each time was ready to rise again into the air.
 
An important advantage of the proposed model and that it is made of boards… from an ordinary packing box. For the wing it is necessary to select a plate thickness of 5-7 mm, the size of 100X500 mm (and more narrow) for the fuselage the same, only a width of 70 mm. and not to Tinker with the plane, try to find wood for the stabilizer plate having a thickness of about 3 mm., Its size is 50X250 mm.
So, let’s start with the wing. m If you failed to find a suitable width of the plank, glue the billet of the two. Before doing this it is necessary to fit them to each other and to embed four inserts that will give the joint the necessary strength. Glue take, nitrocellulose hicles or make your own by dissolving one weight part of celluloid (comb, soap dish or line) in two parts of acetone. First apply on the abutting surface a thin layer of glue and let it dry, then thoroughly fluff the joints, connect the parts and hold them tight until dry.


The workpiece that has been cut along the contour as shown in the drawing, prostrogat planed to thickness of the wing has decreased in the leading edge from the middle to the edges from 5 to 4 mm, and the rear from 2.5 to 2 mm. Window of relief are cut with a jigsaw, and all the wing is sanded with abrasive paper.
 
Cut along the contour of the blank of the fuselage is also covered with plane. Under engine part of the sheathing preferably thin plywood — it will not crack under any attacks. After 10-12 hours it is possible to cut the seat under the engine (the model is designed for YC-17) and drill four holes for the screws of its fastening. The fuselage also sand the paper.
Stabilizer with Elevator is cut n vystragivaetsja integral; the steering wheel is cut after processing of the horizontal tail. Hinges suspension thread. “Sew” I “eight”, preferably nylon thread. Tape them before gluing the root of control horn of the Elevator.
 
Rocking control aluminum. To make it even straightened out aluminum spoon. The part thickness is not less than 1 mm. With a horn it connects the traction of the bike or knitting needles Ø 2 mm. At the ends napauta tin washers, and on the long shoulders of the rocking clip the leads of thin wire. Do not forget that the length of the thrust is selected after the model is non-rejected when rocking the Elevator must be in neutral position.
 
 
Assembly of the model start with propilivanija the slots in the fuselage under the wing and stabilizer. These details needs to sit tightly without tilting. If everything is in order, glue the plane, and then after drying it over the glue joints again. Exterior finish consists in covering the entire model painted macalintal paper on liquid nitroblue. The fuselage and horizontal tail is permissible not to fit, and paint nitroemalyu. You can use gouache with the subsequent fixing it in the same liquid nitrocream.
 
Now attach the wing using the screws and nuts with thread M3 rocker, insert the guide control cord, solder cut from a sheet reservoir and install it on the fuselage.
 
Landing gear are bent from a steel wire of Ø 3 mm, passed through pre-drilled in the fuselage under the wing holes. Fixing gear on the wing with a copper wire Ø 0,8—1 mm. from the Top of the wing for the mounting wire fit the trim strips. Workpiece length for the landing gear — 500 mm. Wheels can be cut from thick plywood or to take ready-made from children’s toys. They are fixed soldered tin washers. It was necessary to put the model of the motor, connect the cords to fill the fuel — and… happy flying!
 
V. LUMP Krivoy Rog

Recommend to read

  • LATEST JET FIGHTERS OF THE LUFTWAFFELATEST JET FIGHTERS OF THE LUFTWAFFE
    Recall. During the Second world war working on jet engines were in Germany on a broad front. They are ahead in this area all of the country and was able to convey in the production of...
  • MOTOBLOCK WITH A TWISTMOTOBLOCK WITH A TWIST
    I am a reader of "Modeller-designer" for nearly three decades and twenty-five years engaged in technical creativity. Over the years, made a lot of homemade designs, including presented...