The most important element of such a cord for the wing. From the precision of its contours, from the strength of the power unit depend largely on flight characteristics and reliability speed overall. In the simplest case, for example, the wing is cut from the plate of plywood with a thickness of 4-5 mm (best to use alder a four-layer 5 mm thick — it is easy and it is not prone to warping, but to find it it is possible far not in each shop). But try to ask a PLANO-convex wing profile, such as after the first coating will be visible distortion, and they will increase with each new cover and just in time. Therefore, for the simplest plywood wings can be recommended exclusively symmetrical profiling.
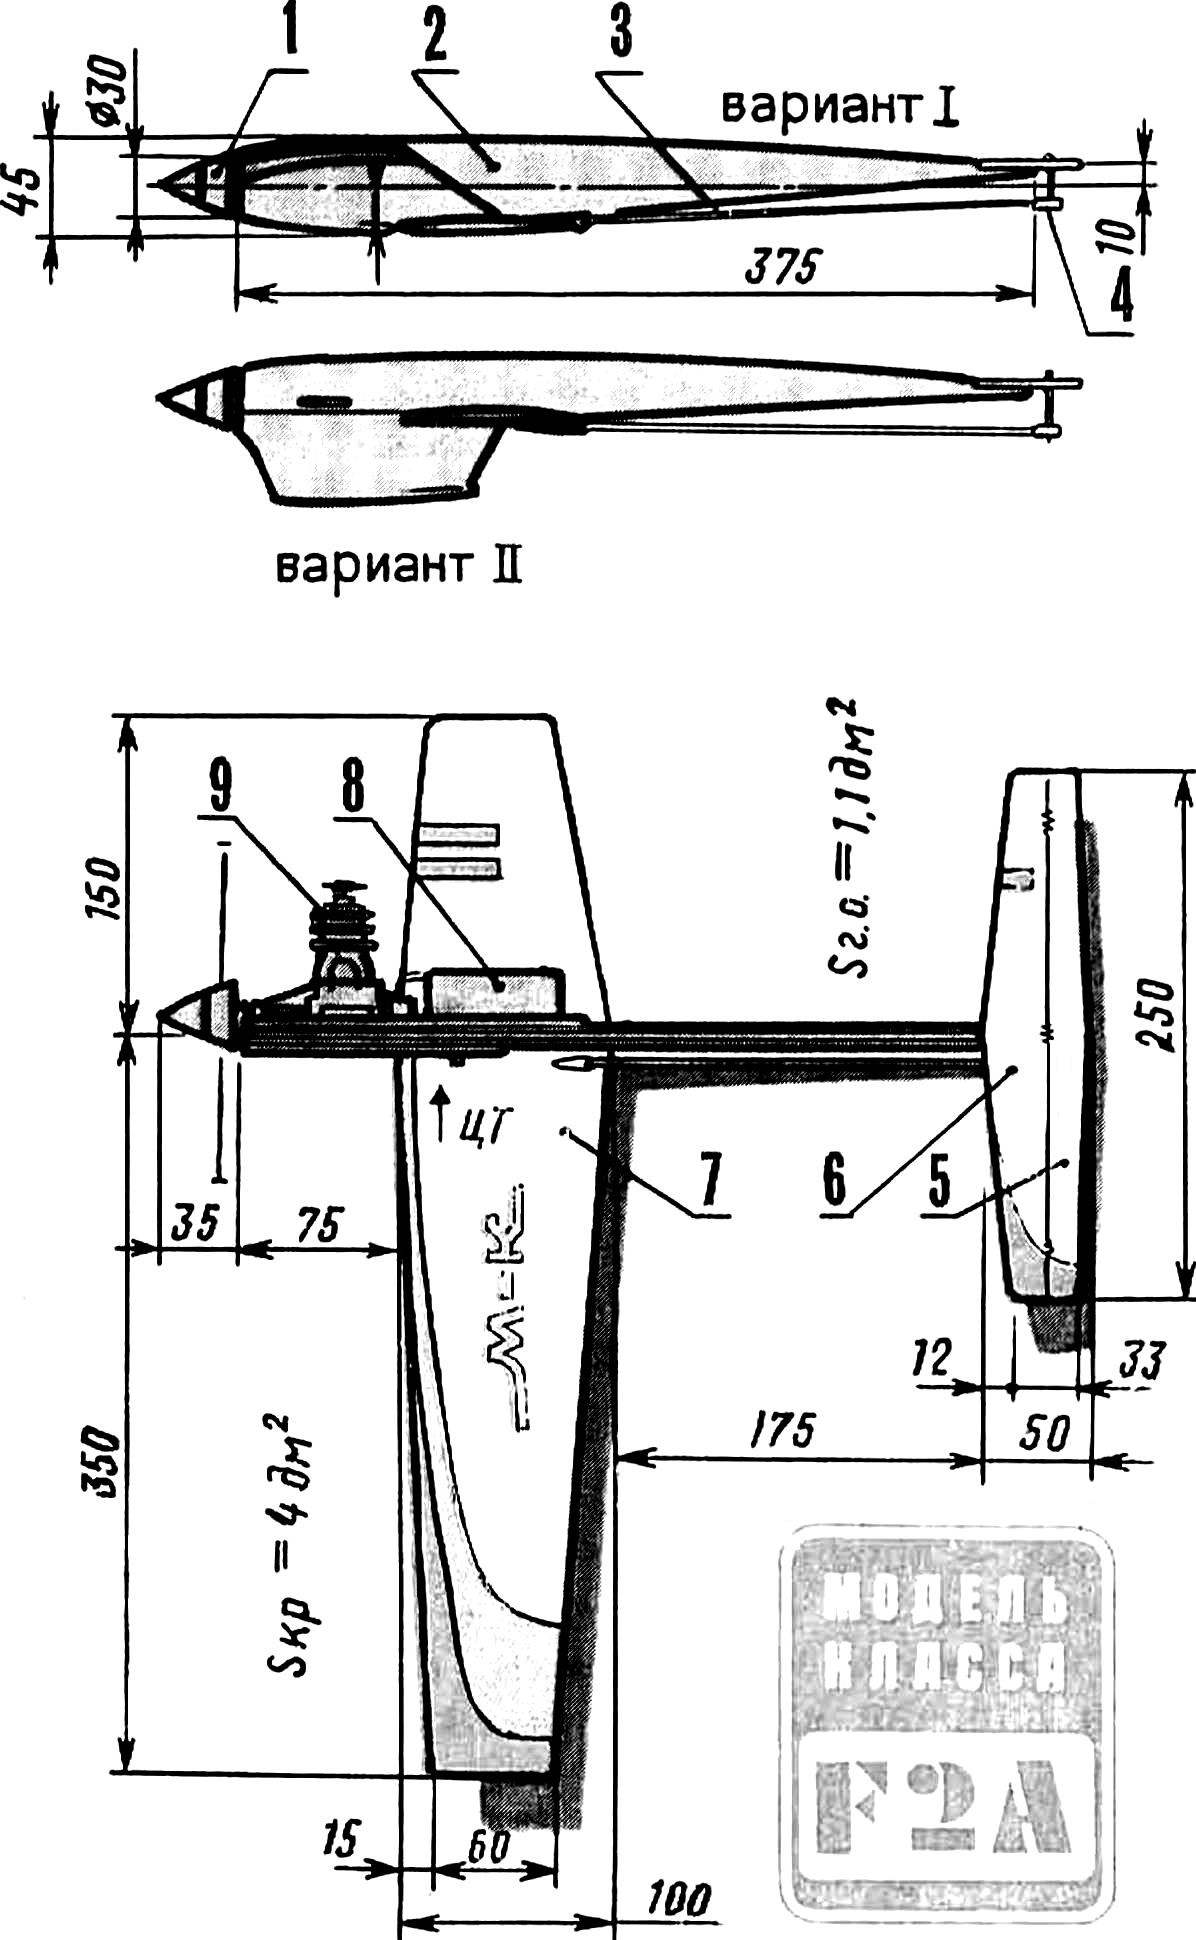
Wing model (veneer volume):
1 — wire output pull rocking, 2 — ending (lime, 8 mm thick), 3 — the leading edge-spar (pine or birch section 6Х18 mm), 4 — rigid wing skin (plywood 1 mm), 5 — a longitudinal wall (Linden thickness of 2 mm), 6 — rib (lip thickness of 4 mm), 7 — Central power rib (birch thickness 10-12 mm), 8 — holder axis of a rocking chair, 9 — rocker control (duralumin with a thickness of 2 mm). The trailing edge is formed by the adhesive joint between the sheets of plywood sheathing; to run on a straight rail of the slipway.
In the basic version of the normal wing has a symmetrical profile with a thickness of about 9 mm. Process the wing Assembly is very simple: in a fixed flexed on the slipway of the lower sheet of plywood sheathing on epoxy glue assembled kit details (and there are only five!), then the frame is cleaned, put the controls and then glue the top plywood sheathing. Thanks to the power part, formed by the two closed panels, it turns out the wing is very high rigidity and strength. In order to fully realize the benefits of such a scheme, it is important to customize the items to each other and to use only certified plasticized epoxy resin.
The profiles, wing and tail (wing in its simplest version — telefonerna).
In another embodiment, the wing is, in principle, repeats the previous one. Here, however, the plywood replaced with pressshpana (“insulation”) with a thickness of about 0.5—0.7 mm. it Should be noted that initially we were given such an option obviously of secondary importance, considering it a “substitute”solution. But when a cardboard wing was completed, it became clear — this detail is superior in mechanical characteristics of any other! Build a cardboard wing is similarly stacked plywood, using the same epoxy resin, but the longitudinal bulkhead-the bulkhead is not placed, and across the plane cavity is introduced in advance profiled insert of foam stamps SS-4-40. When replacing latest on PVC, you can go on the following versions: with only the wing tight thick drawing paper on the epoxy binder. Record easy a product is best suited for experienced models speed specialist, which is often more important is not the strength characteristics and the ability to even slightly reduce the specific load on the supporting surface.
The speed stabilizer is specially designed unusually narrow. Here the optimal solution is meaningless, because the task is a bit: stiffness and strength without restrictions of weight for that little detail. Narrow stabilizer provides not only efficiency, but also gave the opportunity to use as blanks for quality source material — the birch of the line length of 600 mm (they have a width of 30 mm and a wall thickness of 2.5 mm). From these blanks cut out the outline of the stabilizer and rudder and then just scroogled edge. Then comes the covering of parts with the nitro lacquer and painting. When mounting on the fuselage, it is useful to envisage the possibility of removal and replacement of feathers.
The fuselage speed is based on the basic requirements — strength, practically no relief. For conservation of mass of this part within acceptable margins had compressed all dimensions. The base of the fuselage is fake or aspen plate is constant over the entire length of the thickness. On both sides, she glued a millimeter or polutorametrovoy plywood, and then processed the contour, until the groove under the engine. Then put the right trim motor out of plywood with a thickness of 2.5—3 mm, process it on the engine and glued the screws on the motor flush with the left plane of the workpiece. The final step will be gluing the left facing the motor from the plywood with a thickness of 1.5 mm On a finished fuselage wing (and stabilizer) is hinged by means of two M4 screws (stabilizer — M3) and glued in the fuselage steel threaded fungi. Rocking of the control horn connects to the rudder pull rod steel spokes Ø 2-2,5 mm. the Whole control system needs to provide the easy movement without backlash. The most successful scheme of the hog believe the threaded rod M3, stuck in the Elevator and carrier a nylon or Teflon biscuit-joint that allows to adjust the maximum deflection angles of control surfaces.
The fuselage of the model:
1 — left sub panel (plywood 1.5—2 mm) 2 — M3 screws, 3 — side trim of the lime-plate (plywood 1-1,5 mm on both sides), 4 — fungi fixing the wing 5 — lime plate of the fuselage (with a thickness of 10-11 mm) 6 — M4 screws fixing the wing, 7 right panel (plywood 2.5 mm).
The fully finished and decorated model mounted motor with a propeller and fuel tank. If necessary, adjust the position of the center of gravity by gluing a small lead cargo, pre-wrapped with a thin cotton thread. In the case of a too light tail, better to load it at the expense of putting a more powerful crutch that protects the fuselage and tail during landing.
The chassis at first is fixed, and after the acquisition of piloting skills, this kind of technology go to reset, it represents a common high-speed three-wheeled “trolley”. When attached to the chassis easily installed with one rack of duralumin plates on the screws attaching the lower legs of Carter, with one wheel, the axis of which should be placed 10 mm in front of the center of gravity of the model. And on the inside of the wingtip light screw wire Kostelic.
It should be noted that with careful Assembly, the wings of the proposed model, tend to be very resource. Therefore we recommend to use them in the construction of more professional equipment — high-speed with a boxy fuselage and zakuporivaniya engine. Side view of this model is shown in figure a General view. The result corresponding to the first discharge can be obtained by installing the micro KMD-2,5, converted according to the recommendations of the “M-K” (see No. 6, 1988).
V. KIBENKO, head of the society of experimental modeling
Recommend to read THE CATAMARAN OUT OF FOAM… On the waters of the Urals in recent years began to appear a catamaran out of foam. They are unsinkable, easy to operate, durable and simple to manufacture. The figure shows the design... FLYING AROUND THE ROOM Room models of small size. Simple in design and in manufacture. Material for their construction can serve as dry stubble and any weed, its structure is similar to a stalk of wheat. As... 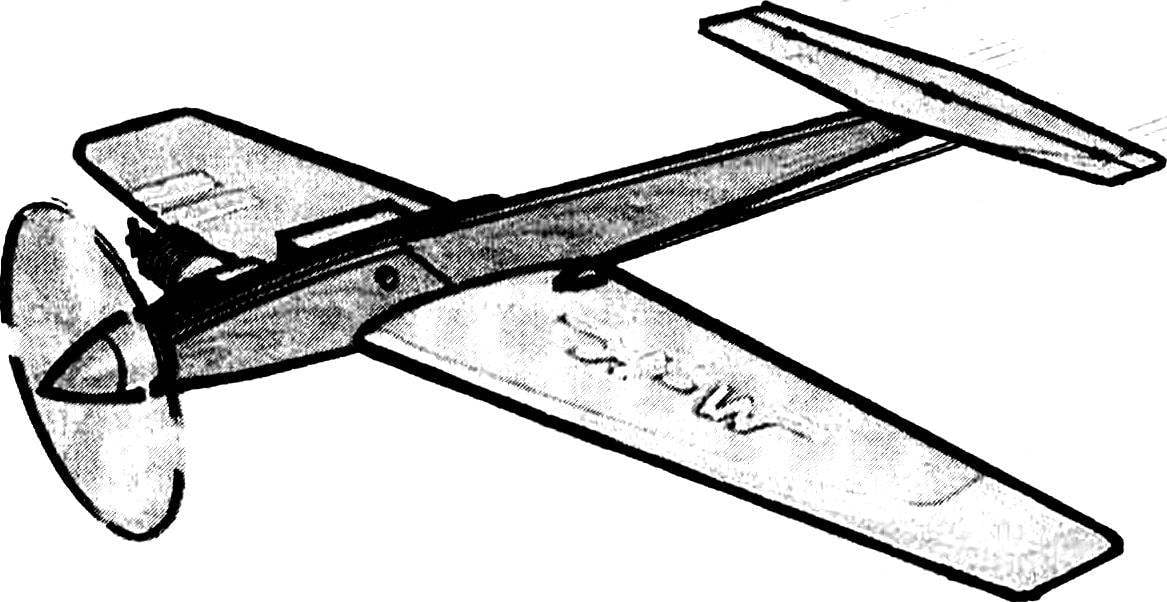
 We offer young modelers-koretnikov apparatus of the class F2A designed to meet the standards of the 1st and 2nd digits. Power circuit model is simplified, as the technology of manufacturing of all parts and components that enables to build such high-speed cord member in the club of the second year. Aerodynamic design progressive, Odnokolenko type. However, to facilitate the piloting system of the engine scheme is supplemented by a small external polacrilin, helping to ensure a smooth transition modes. Developed the stabilizer also serves to simplify flying on takeoff and landing.